SUBSCRIBE TO BAKECLUB!
  •  
0 CART/CHECKOUT

Learn, connect & share through a love of baking

  • Home
  • Classes
    • Live & Guided Online Classes
    • Self-paced Online Classes
    • How to choose an online class
    • Special Events
  • BakeClub & Co.
    • Join BakeClub & Co.
    • Log in to BakeClub & Co.
    • Gift BakeClub & Co.
  • Make Me a Baker Program
    • Make Me a Baker Online
    • Testimonials
    • Graduation gallery
  • Shop
    • Anneka's Books
    • BakeClub Aprons
    • Baking Gifts
    • Gift Certificates
  • Recipes
    • Browse All
    • Bakes that Travel Well
    • Bakes to Share with a Cuppa
    • Baking with Kids
    • Café Favourites
    • Flour-free Recipes
    • International Recipes
    • Recipes to Nurture, Comfort & Calm
    • Savoury Tummy Fillers
    • Winter Warmers
  • Resources
    • BakeClub Blog
    • BakeClub Tips
    • BakeClub Q&A
    • BakeClub Videos
    • BakeNews Archives
    • Subscribe to BakeClub
  • About
    • Who is Anneka Manning?
    • About BakeClub
    • What Our Students Say
    • BakeClub Partners
    • Media
    • Contact Us
  • home
  • Products
Prep 20min (+ cooling time)Bake 50-55minMakes 10 serves

Simple yet sublime. This pound cake is infused with a tangy lemon syrup and is perfect to serve on its own with a cuppa or used as a base for a more elaborate celebration cake. This recipe was originally published in BakeClass.

Ingredients

  • Melted butter, to grease
    250g unsalted butter at room temperature, cubed
    220g (1 cup) caster sugar
    Finely grated lemon zest of 1 lemon
    4 eggs, at room temperature
    250g (1â…” cups) plain flour
    2½ teaspoons baking powder
    2 tablespoons strained freshly squeezed lemon juice

Lemon Syrup

55g (¼ cup) caster sugar
2 tablespoons strained freshly squeezed lemon juice

    Method

    1. Preheat oven to 180°C (160°C fan-forced). Grease a 20cm (base measurement) round cake tin or springform pan with melted butter and line the base with baking paper.
    2. Using an electric mixer beat the butter, sugar and lemon zest in a large bowl until pale and creamy.
    3. Add the eggs one at a time, beating well after each addition.
    4. Sift together the flour and baking powder. Use a spatula to fold half of the flour mixture through the batter mixture. Fold in the lemon juice and then the remaining flour mixture until just combined.
    5. Spoon the batter into the prepared tin and smooth the surface with the back of a spoon. Bake in preheated oven for 50-55 minutes or until a skewer inserted in the centre comes out clean.
    6. Meanwhile, to make the Lemon Syrup, combine the caster sugar and lemon juice in a small saucepan and stir over medium heat until the sugar dissolves. Remove from the heat and set aside until the cake is cooked.
    7. Immediately after removing the cake from the oven, brush the top with a little of the syrup. Leave the cake to stand in the tin for 5 minutes before turning out onto a wire rack. Brush the top of the cake with the remaining syrup and set aside to cool.

    Baker's Tips

    • This cake will keep in an airtight container at room temperature for up to 2 days.
    Lemon Drizzle Pound Cake
    Prep 40min (+pastry making,  30min cooling and 2hr chilling time)
    Bake 45-55min
    Makes 8-10 serves

    Sometimes known as lemon chester pudding, lemon meringue pie is a wonderful combination of short, buttery pastry, a tart custard filling and a sweet, fluffy meringue topping. This recipe won’t disappoint!

    Ingredients

    1 quantity sweet shortcrust pastry, shaped into a disc before wrapping and chilling

    Lemon Filling
    40g (â…“ cup) cornflour, sifted
    200ml strained freshly squeezed lemon juice
    80ml (â…“ cup) water
    220g (1 cup) caster sugar
    6 egg yolks
    100g salted butter, diced

    Italian Meringue Topping
    4 egg whites
    220g (1 cup) caster sugar
    80ml (1/3 cup) water
    Pinch of salt

      Method

      1. Preheat oven to 200°C (180°C fan-forced).
      2. Use a lightly floured rolling pin to roll out the pastry on a lightly floured bench top to a round about 3mm thick. Line an ungreased 22cm diameter (base measurement), 3cm deep pie plate or tart tin with the pastry. Use a small sharp knife to trim any excess pastry.
      3. Place the pastry case on an oven tray and use a fork to prick the base about 12 times. Line the pastry case with crumpled baking paper or foil and fill with pastry weights or raw rice, making sure they fill the case. Bake in preheated oven for 20 minutes.
      4. Remove the pastry case from the oven and use the paper or the foil to lift the weights out of the case. Return the case to the oven and bake for a further 20-25 minutes or until the pastry is cooked through and is golden. Set aside to cool.
      5. To make the Lemon Filling, place the cornflour in a medium saucepan. Use a balloon whisk to gradually stir in the combined lemon juice and water until smooth and well combined. Stir in the sugar, egg yolks and butter. Stir over medium heat for 3-5 minutes or until the butter melts. Continue to stir over medium-low heat for 5-10 minutes or until the mixture thickens and comes to a simmer. Pour immediately into the pastry shell and use the back of a metal spoon to smooth the surface. Set aside for 30 minutes to cool. Cover and chill for at least 2 hours or until the filling is set.
      6. When ready to serve, preheat oven to 240°C (220°C fan-forced).
      7. To make the Italian Meringue Topping, put the egg whites in the bowl of a stand mixer fitted with a whisk attachment. Combine the sugar and water in a small saucepan and stir with a wooden spoon or spatula over low heat until the sugar dissolves. Increase the heat to medium and bring to the boil. Boil for about 10 minutes, occasionally brushing down the side of the pan with a pastry brush dipped in water to dissolve any sugar crystals, until the syrup reaches soft ball stage (115°C on a sugar thermometer). Meanwhile, just before the syrup is ready, whisk the egg whites on high speed until firm peaks form. Remove the syrup from the heat and stand for about 1 minute or until the bubble subside. With the motor running on high speed, gradually add the sugar syrup in a thin steady stream until all the syrup has been incorporated. Add the salt and then continue to whisk on medium speed for another 10 minutes or until the meringue has cooled to room temperature.
      8. Spread the meringue mixture over the top of the lemon filling, swirling as desired. Bake in preheated oven for 5-10 minutes or until browned on the edges (see Baker’s Tips). Stand for 5 minutes before scooping with a large metal spoon or cutting into wedges with a sharp knife that has been dipped in hot water (see Baker’s Tips).

      Baker's Tips

      • This pie is best eaten the day it is made.
      • If using a tart tin, you can transfer the pastry case to a ovenproof serving plate before adding the filling.
      • You can also use a blowtorch to caramelise the meringue topping instead of returning it to the oven in step 7.
      • Dipping the spoon or knife in hot water and drying before scooping or cutting will make it easier to portion.

      This recipe is from Anneka's SBS Food online column, Bakeproof: Citrus.

      CLICK HERE for more Bakeproof recipes.

      Photography by Alan Benson.

      Lemon Meringue Pie
      Prep 40min (+ pastry making time)Bake 35minMakes 10

      Italian meringue makes an elegant topping for these classic tarts. You can caramelize the meringue lightly with a blow torch to add a delicate, slightly burnt caramel flavour to complement the sweetness of the meringue and sourness of the lemon filling if you wish.

      Ingredients

      1 quantity Sweet Shortcrust Pastry, rolled into a log about 15cm long before wrapping and chilling as directed
      Icing sugar (optional), to sprinkle
      Cream or ice cream, to serve

      Filling

      2 eggs
      110g (½ cup) caster sugar
      125ml (½ cup) pouring (thin) cream
      100ml strained fresh lemon juice

      Italian Meringue

      4 egg whites, at room temperature
      220g (1 cup) caster sugar
      60ml (¼ cup) water

        Method

        1. Preheat the oven to 200°C (180°C fan-forced).

        2. Remove the pastry from the fridge and cut into 10 even slices. Gently pat a pastry portion on a lightly floured benchtop with the palm of your hand to fatten slightly. Use a lightly floured rolling pin to roll out to a disc about 3mm thick. Line a 6.5cm (base measurement), 2cm deep, tart tin with removable base, with the pastry, pressing it into the side and corners with your thumb and/or fingertips. Roll the rolling pin over the top of the tart tin to trim any excess pastry. Repeat with the remaining pastry portions to make 10 tart cases in total.

        3. Place the tart cases on an oven tray. Use a fork to prick the pastry base of each about 4 times. Line the pastry cases with squares of greaseproof paper or foil and fill with pastry weights, dried beans or raw rice, making sure they press into the corners and fill the cases. Bake in preheated oven for 10 minutes.

        4. Remove the tart cases from the oven and use the paper or the foil to remove the weights from the cases. Return the cases to the oven and bake for a further 5-10 minutes or until the pastry is just cooked through and looks dry.

        5. Meanwhile, to make the filling, use a fork to whisk the eggs, sugar, cream and lemon juice together until well combined. Strain the mixture into a jug. Pour the filling into the hot pastry cases while still in the oven (see Baker's Tips), dividing evenly. Reduce the oven temperature to 160°C (140°C fan-forced) and bake for a further 10 minutes or until the filling has just set in the centre but still wobbles slightly when shaken. Cool the tarts in the tins.

        6. To make the Italian Meringue, put the egg whites in the bowl of a stand mixer fitted with a whisk attachment. Combine the sugar and water in a small saucepan and stir with a wooden spoon over low heat until the sugar dissolves. Increase the heat to medium and bring to the boil. Boil for about 10 minutes, occasionally brushing down the side of the pan with a pastry brush dipped in water to dissolve any sugar crystals, until the syrup reaches hard ball stage (120°C on a sugar thermometer).

        7. Meanwhile, just before the syrup is ready, whisk the egg whites on high speed until firm peaks form. Remove the syrup from the heat and stand for a bout 1 minute or until the bubble subside. With the motor running on high speed, gradually add the sugar syrup in a thin steady stream until all the syrup has been incorporated. Continue to whisk on medium speed for another 10 minutes or until the meringue has cooled to room temperature.

        8. Spoon the meringue mixture into a large piping bag fitted with a #13 (1.3cm) plain or #11 (1.1cm) star nozzle. Pipe small rounds of meringue over the surface of the tarts to cover. Use a blow torch to lightly caramelize the meringue if desired.

        9. Dust with icing sugar, if desired and serve with cream or ice cream.

        Baker's Tips

        • Adding the filling to the pastry cases while still sitting in the oven will mean you can fill the tarts completely and minimise the chance of it spilling when transferring it to the oven.
        • These tarts will keep in an airtight container in the fridge for up to 2 days (although the pastry will soften slightly on keeping). Bring to room temperature to serve.
        Lemon Meringue Tarts
        Prep 1hr45min (+ preparation time for Lemon Drizzle Pound Cakes, Swiss Meringue Buttercream and Striped Meringue Kisses)Bake 20minMakes about 20 serves

        Created by Make Me a Baker student Janet Jackson for her graduation, this gorgeous cake brings together a selection of the techniques that she learnt during the 6-month program.

        Janet said, "I love to bake cakes and have always admired decorated cakes but have never had the confidence to try one for myself.  For my graduation bake, I wanted to bake and decorate a cake using produce from my garden at home and techniques I had learnt through the MMAB program.  I trialled many different versions of lemon cake, some with poppy seeds and others with sour cream and Greek yoghurt, before settling on this delicious lemon drizzle cake which is lusciously moist and filled with the zing of freshly picked lemons."  


        Ingredients

        Edible flowers, to decorate (optional)
        3 Lemon Drizzle Pound Cakes
        2 quantities Swiss Meringue Buttercream
        5-15 yellow Striped Meringue Kisses

        Lemon Curd
        2 eggs, at room temperature
        2 egg yolks, at room temperature
        165g (¾ cup) caster sugar
        80g unsalted butter, diced
        2 tablespoons strained freshly squeezed lemon juice
        Finely grated zest of 2 lemons

        Lemon Crumb
        60g unsalted butter, chilled, diced
        80g plain flour
        50g caster sugar
        1 tablespoon strained fresh lemon juice
        1 teaspoon finely grated lemon zest

        Candied Lemon Curls
        220g (1 cup) caster sugar
        250ml (1 cup) water
        ½ lemon

          Method

          1. To make the Lemon Curd, use a balloon whisk to whisk the whole egg, egg yolk and sugar in a medium saucepan until smooth. Add the butter, juice and zest and stir continuously with a wooden spoon until the mixture thickens enough to coat the back of a spoon (if you run your finger across the back of the spoon through the curd a line should remain when ready and the mixture should be 70°C on a sugar thermometer). Do not boil. Stain through a sieve into a bowl (see Baker’s Tips). Cover the surface of the curd with plastic wrap and place in the fridge for at least 2 hours before using.
          2. To make the Lemon Crumb, preheat oven to 180°C (160°C fan-forced) and line a baking tray with baking paper. Place all ingredients into the bowl of a food processor and process until the mixture just comes together in a dough. Use your fingers to press the dough onto the lined baking tray until about 3mm thick and bake in preheated oven for 10-12 minutes or until pale golden. Remove from oven and set aside to cool completely on the tray. Once cooled, break up the biscuit and process in the food processor again using the pulse button until a coarse crumb forms. Transfer the crumbs back to the lined tray and bake for a further 8 minutes or until golden. Set aside to cool on the tray (see Baker’s Tips).
          3. To make the Candied Lemon Curls, line a baking tray with baking paper. Use a vegetable peeler to remove the rind from the lemon in long strips. Use a small sharp knife to remove any white pitch from the rind and then cut the rind into long, thin strips. Combine the sugar and water in a small saucepan and stir over medium-low heat until the sugar dissolves completely. Add the lemon rind, bring to a simmer and simmer over medium-low heat for 20 minutes or until the rind is translucent. Remove the saucepan from the heat and use a skewer to remove the lemon strips, one at a time, from the syrup and twist around the round handle of a wooden spoon to make the curls. Allow to stand for about 5 seconds and then remove carefully from the wooden spoon by sliding off the end of the handle, using the skewer to help carefully release them if necessary. Set aside on the lined tray. Repeat with the remaining lemon rind strips.
          4. To assemble the cake, use a large sharp serrated knife to level the tops of the Lemon Drizzle Pound Cakes if necessary. Place one of the cakes on a serving plate or cake stand. Spoon about a quarter of the Swiss Meringue Buttercream into a piping bag fitted with a #11 (1.1cm) round piping nozzle and pipe a border of buttercream around the top outside edge of the cake. Spoon about ⅓ cup of the chilled lemon curd into the centre of the cake and spread evenly to the buttercream. Spoon about ⅓ cup of the remaining buttercream in small dollops over the lemon curd and use a small palette knife or the back of a metal spoon to spread gently to cover the curd. Continue to layer the cake, curd and buttercream finishing with a cake layer.
          5. Spread the top and sides of the cake with the remaining buttercream creating a semi-naked look. Decorate with the Striped Meringue Kisses, Lemon Crumb and Candied Lemon Curls and embellish with fresh flowers if desired.

          Baker's Tips

          • This recipe will make about 1½ cups of Lemon Curd, but you will only need about 1 cup of the lemon curd for this cake. The leftover curd will keep in a sealed sterilized jar in the fridge for up to 2 weeks.
          • The Lemon Crumb will keep in an airtight container or jar at room temperature for up to 2 weeks.
          • The Lemon Curls will keep in an airtight container at room temperature for up to 1 week.
          • Janet baked the cakes the day before and let them stand overnight allowing the lemon drizzle to soak in. The Lemon Curd was made a couple of days ahead of time and stored in the fridge to thicken and develop flavour. She also made the Candied Lemon Curls and Lemon Crumb well ahead of time so she could concentrate on the assembly and decoration of the cake on the day of Graduation.

          Lemon-on-Lemon Celebration Cake
          Prep 10minBake 15-18minMakes about 9

          Scones are what I whip up if time is short – they are simple, fast and everyone loves them. The secret to the lightness of these scones is the surprising combination of lemonade and cream (instead of milk) – it may seem a little odd but, believe me, it works!

          Ingredients

          450g (3 cups) self-raising flour, plus extra, to dust
          Pinch of Salt
          80g butter, cubed, softened slightly
          125ml (½ cup) lemonade, at room temperature
          185ml (¾ cup) pouring cream, plus extra to glaze
          Berry jam and whipped cream, to serve

            Method

            1. Preheat the oven to 200°C. Lightly grease a baking tray with butter and then lightly dust with flour, shaking off any excess.
            2. Put the flour and salt in a medium bowl. Use your fingertips to rub in the butter until the mixture resembles fine breadcrumbs and the butter is evenly incorporated. Make a well in the centre.
            3. Combine the cream and lemonade, add to the flour mixture and use a flat-bladed knife to mix with a cutting action until the dough comes together in clumps.
            4. Use lightly floured hands to bring the dough together – it will be soft, but not sticky. Place on a lightly floured surface and knead lightly and briefly (only about 6 times) to bring it together in a smooth ball.
            5. Use the palm of your hand to flatten the dough out to about 2cm thick. Using a floured 6 cm round cutter, cut the dough into 9 rounds. Gathering the offcuts and, without over handling, pressing out as before, when necessary. Place on the prepared tray, 1-2cm apart. Use a pastry brush to lightly brush the top of each scone with a little extra cream, then dust with a little extra flour.
            6. Bake in the middle of the preheated oven for 15-18 minutes, until the scones are lightly golden and cooked through; they are ready if they sound hollow when you tap them on the base. Serve warm or at room temperature, split and topped with jam and cream.

            Baker's Tips

            • These scones are best eaten on the day they are made.
            Lemonade Scones
            Prep 25min (+1hr cooling time)Bake 40minMakes 16 serves

            More a slice than a cake, I can’t believe I have only just discovered this gem from the land of the long white cloud. I can completely understand why it features fondly in the childhood memories for anyone who grew up in rural New Zealand!

            Ingredients

            Melted butter, to grease

            Biscuit Base
            100g (3½oz) salted butter, at room temperature
            110g (½ cup/4oz) caster sugar
            1 teaspoon natural vanilla essence or extract
            3 egg yolks
            225g (1½ cups/8oz) plain flour
            1 teaspoon baking powder
            320g (1 cup/11¼oz) good-quality raspberry jam

            Coconut Meringue Topping
            4 egg whites, at room temperature
            220g (1 cup/7¾oz) caster sugar
            1 teaspoon natural vanilla extract or essence
            135g (1½ cups/4¾oz) desiccated coconut
            1 tablespoon good-quality raspberry jam (see Baker's Tips)

            Method

            1. Preheat oven to 180°C/350°F (160°C/215°F fan-forced). Grease a 20cm x 30cm (8inx12in) slice tin with melted butter to grease and line the base and sides with one piece of non-stick baking paper, cutting into the corners to fit and allowing the paper to overhang the sides.
            2. To make the Biscuit Base, use an electric mixer fitted with a paddle beater to beat the butter, sugar and vanilla until pale and creamy. Beat in the egg yolks until well combined. Sift together the flour and baking powder, add to the butter mixture and beat on low speed until just combined.
            3. Press the biscuit base mixture into the prepared tin to cover evenly. Bake for 10 minutes or until starting to colour (the base won’t be cooked through at this stage). Remove from the oven and spread evenly with the raspberry jam. Set aside to cool slightly.
            4. Meanwhile, use an electric mixer with a whisk attachment to whisk the egg whites in a large clean, dry mixing bowl on medium-high speed until soft peaks form. Add the sugar, a spoonful at a time, whisking well on medium-high speed after each addition. Continue to whisk until the mixture is thick and glossy, the sugar has dissolved and a trailing peak forms when the whisk is lifted. Whisk in the vanilla and then use a spatula or large metal spoon to fold in the coconut until evenly combined. Spread the meringue mixture over the raspberry jam to cover. Dot the 1 tablespoon of jam over the top of the meringue and then use a tooth pick or skewer to swirl it through the meringue mixture.
            5. Return the slice to the oven and bake for 30 minutes or until golden and crisp to touch on top. Place on a wire rack and allow the slice to cool in the tin (about 1 hour).
            6. Use the paper to transfer the slice from the tin to a cutting board. Cut into portions to serve.

            Baker's Tips

            • Although raspberry jam is traditionally used in this slice, any berry jam can be used - mixed berry, strawberry and blackberry all work well.
            • This slice will keep in an airtight container at room temperature in a cool spot for up to 4 days.


            This recipe is from Anneka's SBS Food online column Bakeproof: Meringue. Click here for more Bakeproof columns and recipes.


            Photography by Alan Benson.

            Louise Cake
            Prep 20min (+4hr freezing and 20min cooling time)Bake 12-15minMakes 8 serves

            A blissful combination of truly Aussie flavours — Anzac biscuits, macadamias and honeycomb — these ice-cream sandwiches are the ultimate summer indulgence.

            Ingredients

            Anzac Biscuits
            75g (½ cup/2¾oz) plain flour
            70g (¾ cup/2¾oz) rolled oats
            45g (½ cup/1½oz) desiccated coconut
            75g (⅓ cup/2¾oz) caster sugar
            60g (â…“ cup/2oz) unsalted macadamia nuts, toasted and chopped
            75g (2¾oz) salted butter, cubed
            2 tablespoons golden syrup
            2 teaspoons water
            ½ teaspoon bicarbonate of soda

              Honeycomb Ice Cream
              2 litres (3½pt) good-quality vanilla ice cream
              2 x 50g (1¾oz) Violet Crumble bars or chocolate-coated honeycomb, coarsely chopped

              Method

              1. To make the Honeycomb ice cream, line a freezer-proof tray with non-stick baking paper. Scoop the ice cream into a large bowl and set aside for 5 minutes or until softened slightly. Working quickly, sprinkle with the crushed Violet Crumble over the ice cream and use a large metal spoon or spatula to fold together until just combined, being careful not to overwork as the ice cream may start to melt. Spread the ice-cream evenly over the lined freezer proof tray until about 2cm/¾in thick. Cover with another piece of baking paper and quickly smooth the surface. Place in the freezer for at least 4 hours or until set.
              2. To make the Anzac biscuits, preheat the oven to 180°C/350°F (160°C/315°F fan-forced). Line 2 large oven trays with non-stick baking paper.
              3. Put the flour, rolled oats, coconut, sugar and macadamia in a medium mixing bowl and stir to combine.
              4. Put the butter, golden syrup and water in a small saucepan and heat over medium heat, stirring occasionally with a wooden spoon, until the butter melts and the mixture is hot. Remove from the heat, add the bicarbonate of soda and stir to combine; the mixture will foam up. Add to the dry ingredients and stir with the wooden spoon until evenly combined.
              5. Roll tablespoonfuls of the mixture into balls and place about 7cm/2¾in apart on the lined trays. Use your fingers to flatten the balls until they are about 1cm/½in thick and about 6.5cm/2½in in diameter.
              6. Bake in preheated oven for 12-15 minutes, swapping the trays after 6 minutes, or until golden and cooked through. Remove the biscuits from the oven and cool on the trays (this will take about 20 minutes).
              7. To assemble the sandwiches, line a metal tray with baking paper and place in the freezer. Use a 6-7cm/2¼in-2¾in round cutter to cut out rounds from the firm ice-cream. Sandwich the ice-cream between two biscuits, pressing firmly together. Place on the tray in the freezer. Repeat with the remaining ice-cream and biscuits to make 8 sandwiches in total. Serve straight away or leave in the freezer until ready to serve.

              Baker's Tips

              • The unfilled biscuits will keep in an airtight container at room temperature for up to 2 weeks.
              • The assembled ice-cream sandwiches will keep in an airtight container in the freezer for up to 1 week.


              This recipe is from Anneka's SBS Food online column, Bakeproof: Aussie Day Favourites. CLICK HERE for more Bakeproof recipes.

              Photography by Alan Benson.

              Macadamia & Honeycomb Ice Cream Sandwiches

              $100.00/pp

              more info
              Macarons
              - Products -

              Macarons will take place on Sunday 23rd August 2026 from 10am-1pm.

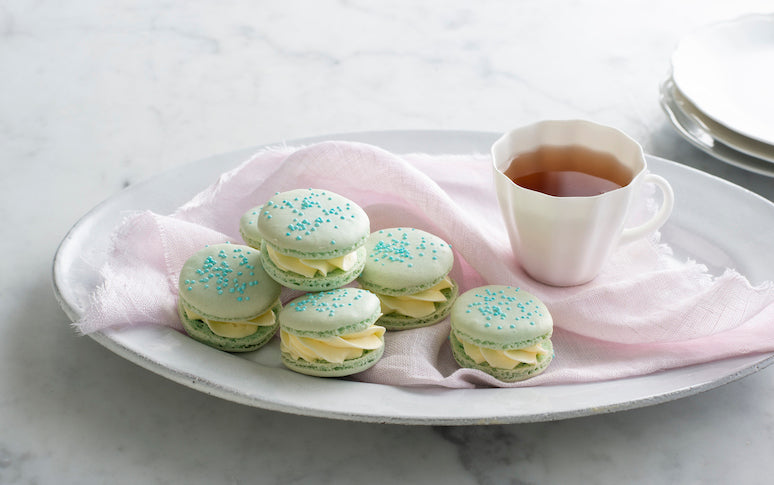
              Learn to bake your own French-style macarons – the darlings of the confectionery world – in this fun and informative live online baking class.

              CLICK HERE TO ENROL NOW!


              Completely inspired by the class with Anneka and it has really put me on Cloud 9 for the week! This sort of content – totally accessible and realistic, achievable and personal – is exactly what I was looking for to improve my baking skills. Can't praise you highly enough.

              Stephanie Robinson, Sydney


              Learn to bake gorgeous macarons – right in your very own kitchen!

              Macarons is a fun and informative 3-hour live virtual baking session where you will learn to make your own French-style macarons – the darlings of the confectionery world – all from your very own kitchen! The class will take place on Sunday 23rd August 2026 from 10am-1pm (AEST).

              Anneka Manning will take you through the process step by step, sharing all of her practical tips and tricks along the way. During the virtual Live Session, you will have the opportunity to bake classic Vanilla Macarons along with Anneka, asking questions, troubleshooting and gaining invaluable tips and tricks as you go. The Live Session will be supported by printable recipes and resources which will become your go-to kit every time you wish to bake these divine treats.

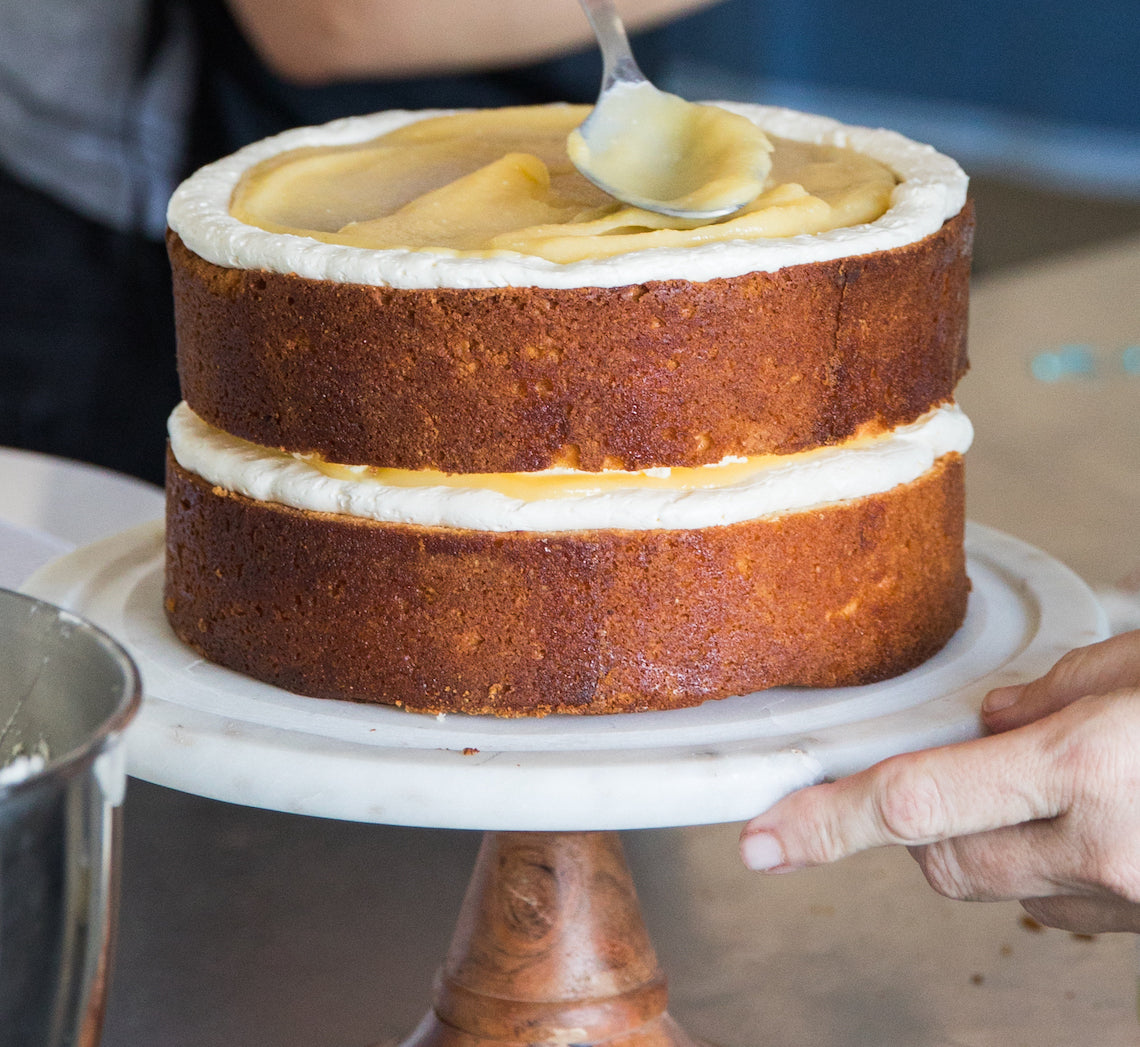
              Not only will you learn the secrets to the perfect Macaron batter and piping techniques, but you will also gain insight into a number of different buttercreams and fillings that can be used, as well as an endless array of flavours, colours and decorations limited only by your imagination.

              From how to achieve great 'feet', why temperature is key in the macaron-making process, and how to 'mature' your macarons to develop not only the best flavour but also the best texture, this class will have you whipping up a batch of stunning macarons whenever the mood takes you!

              Dates

              Sunday 23rd August 2026 at 10.00am-1.00pm Australian Eastern Standard Time (UTC+10) via Zoom.

              CLICK HERE TO ENROL NOW!


              The session will be recorded and will be available for you to watch afterwards if you are unable to attend the Live Session or rewatch it at a later date.

              If you are interested in joining a future course, please fill out your details at the bottom of this page and you'll be one of the first to know when dates are released.

              Cost

              $100 (50% off for all BakeClub & Co. Members).

              If you want to learn how to make macarons, then take Anneka's class. Anneka takes the fear away from attempting macarons and shows you step by step how to achieve great results.

              Angela Parisi, Melbourne

              Student numbers

              We will only be accepting a limited number of bakers for this class so that Anneka can answer your baking questions during the Live Session and provide personal feedback.

              Who is this class suitable for?

              This class is, quite simply, suitable for everyone – from absolute beginners to more experienced bakers who want to brush up on their macaron-making skills. As this class is completed online, it is suitable for students from all over the world.

              What will I learn?
              • The elements that make a good Macaron
              • How to make the almond base and Macaron batter
              • How to make Italian meringue
              • The different between French and Italian macarons
              • How to achieve great 'feet'
              • The best piping technique for well-shaped macarons
              • How to check if macaron batter is ready for baking
              • How to check when macarons are baked
              • Making American buttercream and different buttercream options (Chocolate Fudge, Swiss Meringue and French)
              • Piping buttercream and the different effects achieved when using different piping tips
              • How to add a 'surprise' centre
              • Different flavour combinations and decorating ideas
              • Maturing, storing and freezing your macarons

              Fantastic way to learn a new skill in your own kitchen! It was great – the Zoom presentation worked really well and I loved it.

              Nicky Littlewood, Boggabilla

              What will I receive?
              • A 3-hour virtual live baking demonstration on Zoom (recorded for you to rewatch at your convenience) where Anneka Manning will guide you step-by-step through the process of making French-style macarons – including the opportunity to bake Vanilla Macarons alongside her.
              • Access to Anneka’s 35+ years of baking experience and expertise, with the ability to ask any questions that arise during the class.
              • The chance to connect (virtually) with like-minded bakers and share your creations within The Kitchen Table online group.
              • A thorough understanding of how to make macarons, plus the knowledge to troubleshoot and apply these skills in the future for consistent baking success.
              • Invaluable printable information sheets and recipes to support your learning and reference in your own kitchen.
              • Lifetime access to the live video and all course materials, so you can revisit the class whenever you like.
              • Membership to BakeClub’s exclusive The Kitchen Table online group, providing a space to ask questions and share your baking journey.
              • Lasting baking confidence, knowledge and skills you can use regularly at home.
              How will I get the most out of this online class?

              To get the most from this class, we recommend setting aside time to attend the Live Session with Anneka and review the supporting materials beforehand. If you’re unable to join live, the session will be recorded so you can watch it at a time that suits you.

              For the best experience and results, we encourage you to bake along during the class – it’s the perfect way to put the techniques into practice and gain the full benefit of Anneka’s guidance.

              What if the dates don't suit me? Can I still enrol in the class?

              If the date of this class doesn't work for you, you can still enrol and take part in your own time. While you may miss out on the Live Session, it will be recorded and will be available to watch when it suits you. You will have lifetime access to the video, as well as all the course material (including all of the resources and recipes). 

              CLICK HERE TO ENROL NOW!


              CLICK HERE TO BROWSE OUR OTHER ONLINE CLASSES!


              Such a valuable online, live learning experience with all supporting materials for future reference. Definitely would recommend.

              Melinda Happer, Sydney

              If you are interested in a future LIVE class, please fill out your details below and you'll be one of the first to know when new dates are released.


              $3,150.00/pp

              more info
              Make Me a Baker Online Program
              - Products -

              Make Me a Baker 2026 is now SOLD OUT.

              If you are interested in a future program, please fill out your details at the bottom of this page.


              The practical, approachable, inspiring and fun way to learn to bake

              This unique 10-month online baking program is designed to make you a confident, inspired and skilled baker - no matter your current ability – all from your very own kitchen! 

              Now available to bakers all over the world, Make Me a Baker Online is hosted by Anneka Manning and includes regular online live classes spread over the program's 10-month duration together with with online support and set ‘homework’ to embed the learning. The live sessions will be recorded so you can watch (or rewatch) at a time that suits you. There will also be supplementary Q&A sessions held mid-week which will also be recorded to rewatch if you are unable to attend live.

              Throughout this comprehensive program, you will learn not only the 'how' but also the 'why' of baking, exploring the science behind it and giving you the know-how and confidence to be a brilliant baker. Make Me a Baker not only covers the basics of baking but all of the more challenging techniques as well.

              You will have lifetime access to the online material so you can work through the content in your own time and come back to it whenever it suits you.

              Don't take our word for it! Hear what some of our graduates had to say about their Make Me a Baker experience.

              Do it. It will change the way you bake, make you more confident and improve your how-to knowledge ... Please do not stop offering this course, it was the best online course I have done.

              Corinna Murray


              What do I get?

              • Access to Anneka Manning's extensive 35+ years of baking experience, knowledge and her fail-safe, tried-and-tested recipes, plus the ability to get her advice, feedback and answers to any baking questions for the duration of the program
              • 12 live video sessions which will take place on Zoom and will be recorded so that you can watch (or re-watch) them in your own time if you are unable to attend
              • 10 monthly live Q&A video sessions with Anneka where you can ask her any baking questions whether they’re related to the course or just general baking curiosities
              • Lifetime access to all of the resources including the information sheets, recipes and video recordings of the Live Sessions
              • The flexibility of baking at home at your own pace using your own equipment and ingredients
              • A community of passionate, like-minded bakers to (virtually) share the experience with
              • Exclusive membership to the Make Me a Baker online forum, which is only open to students of the program, to receive support from Anneka and the BakeClub Team whenever you need it throughout the program
              • 'Baking for Business' online session for those interested in setting up their own home baking business.
              • Downloadable recipe and information kits for every live session
              • One-year free membership to BakeClub & Co.
              • A 15% discount off both KitchenAid appliances* and the entire Cakers Warehouse range.

              * Discount code valid off the listed price for Australian orders only when purchased on kitchenaid.com.au.

              If you decide to do the MMAB program, you will learn so much of what really matters in your bakes, and will have so much confidence in making the decisions you need to make to ensure success with your baking ... A huge benefit of the online platform is that there is a recording which you can go back and review.

              Gina Hughes

              Prep 25min (+30min chilling and 30min cooling time)Bake 25minMakes about 40

              Sipping on malted milk milkshakes and playing dominos is a vivid childhood memory. These biscuits combine the two and kids will love not only creating them, but also playing with them as they snack — all you need is a glass of milk!

              Ingredients

              250g butter, softened slightly
              110g (½ cup) caster sugar
              1 egg yolk
              375g (2½ cups) plain flour
              60g (½ cup) malted milk powder
              Dark or milk Choc Bits (chocolate chips), to decorate

              Method

              1. Preheat the oven to 160°C (140°C fan-forced). Line two large oven trays with non-stick baking paper.
              2. Use an electric mixer to beat the butter and sugar until smooth and just combined. Add the egg and beat until well combined.
              3. Add the flour and malted milk powder to the butter mixture and beat on low speed until just combined evenly and a dough forms.
              4. Turn the dough onto a lightly floured surface and knead lightly and briefly until it just comes together. Divide the dough into two portion. Use a lightly floured rolling pin to roll out one portion to 5mm thick. Use a large sharp knife and a ruler to cut the dough into 4cm x 8cm rectangles; re-rolling any off cuts as necessary. Use the knife to make a shallow indent across the middle of each biscuit. Place on the lined oven trays, leaving about 2cm between each. Press the Choc Bits into the biscuits to resemble dominos. Repeat with the remaining dough portion and Choc Bits. Place in the fridge to chill for 30 minutes.
              5. Bake in preheated oven for 25 minutes, swapping the trays around after 10 minutes, or until pale golden and cooked through. Cool on the trays.

              Baker's Tips

              • These biscuits will keep in an airtight container at room temperature for up to 1 week.

              This recipe is from Anneka's SBS Food online column, Bakeproof: Kids in the Kitchen.
              CLICK HERE for more Bakeproof recipes.

              Photography by Alan Benson.
              Malted Milk Domino Biscuits
              Prep 15min (+30min cooling time)Bake 40minMakes 7 cups

              There really is nothing like a homemade cereal. One word of advice though – don’t leave the cardamom out as it gives this granola an elusive and fascinating flavour.

              Ingredients

              285g (3 cups) rolled oats
              150g natural almonds, coarsely chopped
              55g (¾ cup) shredded coconut
              40g (¼ cup) sunflower seeds
              40g (¼ cup) pepitas (pumpkin seeds)
              2 teaspoons ground cinnamon
              ½ teaspoon ground cardamom
              185ml (¾ cup) maple syrup
              2 tablespoons sunflower oil
              2 teaspoons vanilla essence
              170g (1 cup) seedless raisins
              80g (½ cup) dried apricots, shredded

                Method

                1. Preheat oven to 160°C (140°C fan-forced).
                2. Line a large baking tray with non-stick baking paper.
                3. Combine the oats, almonds, coconut, sunflower seeds, pepitas, cinnamon and cardamom in a large heatproof bowl.
                4. Combine the maple syrup, sunflower oil and vanilla. Add to the oat mixture and use a wooden spoon to mix until evenly combined. Spread over the lined tray and bake in preheated oven for 30 minutes, stirring twice during baking. Stir through the raisins and apricots and bake for a further 10 minutes or until the oats are deep golden and well toasted.
                5. Cool on the tray (this will take about 30 minutes). Serve with milk, yoghurt and/or fruit.

                Baker's Tips

                • Store this granola in an airtight container in a cool dark spot for up to 1 month.

                This recipe is from Anneka's SBS Food online column, Bakeproof: Gifts from the Kitchen. CLICK HERE for more Bakeproof recipes.

                Photography by Alan Benson.

                Maple, Cardamom & Almond Granola
                Prep 20min (+1hr 30min cooling time)Bake 60-65minMakes about 20

                This is the way the best classic chocolate brownies should be - fudgy but not too dense, rich but not too sweet. These ones are also studded with maple-encrusted roasted pecans to for an added welcome surprise!

                Ingredients

                Melted butter, to grease
                250g (9oz)good-quality dark chocolate (45-54 per cent cocoa), chopped
                185g (6½oz) salted butter, cubed
                3 eggs, at room temperature
                220g (1 cup, firmly packed/7¾oz) brown sugar
                1 teaspoon natural vanilla extract or essence
                110g (¾ cup/4oz) plain flour
                30g (¼ cup/1oz) Dutch cocoa powder
                ½ teaspoon baking powder
                Cocoa powder or icing sugar, to dust (optional)

                Maple-Roasted Pecans
                180g (6½oz) pecans
                60ml (¼ cup/2fl oz) maple syrup
                ½ teaspoon sea salt flakes

                Method

                1. To make the Maple-Roasted Pecans, preheat the oven to 180°C/350°F (160°C/315°C fan-forced). Line an oven tray with sides with non-stick baking paper. Place the pecans, maple syrup and salt in a medium bowl and toss to combine. Spread the pecans in one layer on the oven tray and pour over any maple syrup left in the bowl. Cook in preheated oven for 12-15 minutes, stirring often, until toasted and the maple syrup has thickened to a sticky consistency. Remove from the oven and set aside to cool completely on the tray. Once cool, coarsely chop the pecans.
                2. Reduce the oven temperature to 160°C/315°C (140°C/285°F fan-forced). Grease a 16cm x 26cm (6¼in x 10½in) shallow slice tin and line the base and long sides with one piece of baking paper.
                3. Place the dark chocolate and butter in a medium heatproof bowl over a saucepan of simmering water (don’t let the base of the bowl touch the water). Stir occasionally until chocolate and butter melt and the mixture is smooth. Remove the bowl from saucepan and set aside to cool to room temperature.
                4. Use an electric mixture with a whisk attachment to whisk the eggs, sugar and vanilla until thick and pale. Add the cooled chocolate and whisk until just combined.
                5. Sift together the flour, cocoa powder and baking powder. Add to chocolate mixture and whisk on low speed until just combined. Add the chopped pecans to the chocolate mixture, breaking them up if they have started to stick together, and use a spatula to fold until evenly combined.
                6. Pour the mixture into the prepared tin and spread evenly. Bake in preheated oven for 45-55 minutes or until moist crumbs cling to a skewer inserted in the centre. Remove from the oven and cool in tin on a wire rack (this will take about 1½ hours).
                7. Remove brownie from the tin using the baking paper to lift it out. Cut into portions and dust with cocoa powder or icing sugar, if desired, to serve.

                Baker's Tip

                • These brownies will keep in an airtight container at room temperature (in a cool spot), for up to 5 days. Serve at room temperature.
                Maple-Roasted Pecan Brownies
                • 1
                • …
                • 8
                • 9
                • 10
                • 11
                • 12
                • …
                • 18

                Follow @bakeclub_australia on Instagram

                Our partners

                SUBSCRIBE!
                contact us
                • info@bakeclub.com.au

                • FOLLOW US
                CUSTOMER INFORMATION
                • FAQ
                • Terms of Use
                • Privacy Policy
                • Terms of Service
                • Refund policy

                © 2025 BakeClub. All Rights Reserved.

                Site by Fruitful Creative.