SUBSCRIBE TO BAKECLUB!
  •  
0 CART/CHECKOUT

Learn, connect & share through a love of baking

  • Home
  • Classes
    • Live & Guided Online Classes
    • Self-paced Online Classes
    • How to choose an online class
    • Special Events
  • BakeClub & Co.
    • Join BakeClub & Co.
    • Log in to BakeClub & Co.
    • Gift BakeClub & Co.
  • Make Me a Baker Program
    • Make Me a Baker Online
    • Testimonials
    • Graduation gallery
  • Shop
    • Anneka's Books
    • BakeClub Aprons
    • Baking Gifts
    • Gift Certificates
  • Recipes
    • Browse All
    • Bakes that Travel Well
    • Bakes to Share with a Cuppa
    • Baking with Kids
    • Café Favourites
    • Flour-free Recipes
    • International Recipes
    • Recipes to Nurture, Comfort & Calm
    • Savoury Tummy Fillers
    • Winter Warmers
  • Resources
    • BakeClub Blog
    • BakeClub Tips
    • BakeClub Q&A
    • BakeClub Videos
    • BakeNews Archives
    • Subscribe to BakeClub
  • About
    • Who is Anneka Manning?
    • About BakeClub
    • What Our Students Say
    • BakeClub Partners
    • Media
    • Contact Us
  • home
  • Products
Prep 1hr (+2hr 20min cooking, 2hr cooling, 5min standing time and pastry making time)Bake 45-50minMakes 6 serves

These pies take a much-loved Aussie classic and give it a subtle, aromatic twist. Chuck steak is slow-cooked until tender, then paired with shiitake mushrooms, ginger and a touch of oyster sauce for savoury depth and gentle warmth. A hint of allspice in the shortcrust pastry adds an extra layer of flavour, tying everything together in a way that feels familiar yet just a little unexpected. Baked until golden and crisp, they’re a comforting reinvention of the traditional meat pie.

Ingredients

3 quantities Shortcrust Pastry (each with the addition of 1 teaspoon ground allspice added with the flour), each made separately and shaped into a disc before wrapping and chilling as directed (see Baker's Tips)
1 egg, lightly whisked
Sesame seeds, to sprinkle

Filling
1kg (2lb 3oz) trimmed chuck steak, cut into 2cm (¾in) chunks
35g (¼ cup/1¼oz) plain flour
60ml (¼ cup/2fl oz) peanut oil
2 small brown onions, chopped
200g (7oz) shiitake mushrooms, sliced
2 garlic cloves, finely chopped
3 teaspoons finely grated fresh ginger
250ml (1 cup/9fl oz) good-quality beef stock
500ml (2 cups/17fl oz) water
2 tablespoons oyster sauce, or to taste

Method

  1. Place the chuck steak in a large bowl, sprinkle with the flour and toss to coat.
  2. Heat 1 tablespoon of the oil in a large heavy-based saucepan over a high heat and cook half the steak chunks, stirring occasionally, for about 5 minutes or until sealed. Remove from the pan, scraping any cooked-on bits from the base, and set aside. Repeat with another tablespoon oil and the remaining steak.
  3. Clean the pan if necessary. Add the remaining 1 tablespoon oil, onion and shiitake mushrooms and cook over a medium-high heat, stirring occasionally, for 5 minutes or until the onion and mushrooms start to soften. Reduce the heat to medium, add the garlic and ginger and cook for a further 1 minute, stirring occasionally, or until aromatic. Return the steak to the pan with the stock, water and 1 tablespoon of the oyster sauce and bring to a simmer.
  4. Reduce heat to low and simmer, covered, for 30 minutes, stirring occasionally. Uncover and then simmer for a further 30 minutes to 1 hour, stirring frequently or until the meat is tender and the liquid has reduced and thickened to a thick sauce consistency. Stir in the remaining oyster sauce, taste and adjust seasoning by adding a little more oyster sauce if necessary. Transfer the mixture to a heatproof bowl, cover and place in the fridge, stirring occasionally, until cooled to room temperature (this will take about 2 hours).
  5. When ready to assemble the pies, preheat oven to 220°C/425°F (200°C/400°F fan-forced). Brush six 10.5cm/4in (base measurement) x 14cm/5½in (top measurement) metal or foil pie dishes. Unwrap the pastry discs and divide each into quarters. Shape a quarter into a disc and use a lightly floured rolling pin to roll the pastry on a lightly floured bench top into a round until about 3mm (⅛in) thick and about 15cm (6in) in diameter. Repeat with the remaining discs. (Refrigerate the pastry discs on a lined tray as they are rolled if the weather is warm.)Use an upturned pie dish to cut out pie lids from 6 of the rolled pastry rounds. Use the end of a 1.1cm (11mm/½in) piping nozzle or a small sharp knife to cut a small steam hole in the centre of each pie lid.
  6. Gently ease the uncut pastry discs into the pie dishes and use your fingertips to press the pastry gently into the corners without stretching it — it will overhang the dishes slightly. Divide the cooled steak mixture between the pastry cases to fill. Place a lid over the mixture to cover each pie, brush the edge of each lid with the whisked egg and then fold the excess pastry from the bases over the top of the lids, crimping with your fingertips or pressing with a fork together to seal. Brush the top of each pie lightly with some of the remaining egg wash and sprinkle with sesame seeds.
  7. Reduce the oven to 200°C/400°F (180°C/350°F fan-forced) and bake the pies in preheated oven for 45-50 minutes or until the pastry is cooked through and a deep golden. Stand the pies in the dishes for 5 minutes before turning out and serving immediately.

Baker's Tips

  • Don't be tempted to make the 3 quantities of pastry all at once. Making them separately makes the pastry easier to handle and will give you a better final result.
  • The cooked pies will keep in an airtight container in the fridge for up to 2 days. Reheat in an oven preheated to 160°C/315°F (140°C/285°F fan-forced) for 15-20 minutes or until heated through.
  • To freeze, wrap uncooked or cooled cooked pies individually in plastic wrap and then seal in an airtight container or freezer bag and freeze for up to 3 months. Thaw in the fridge before baking (as per recipe) or reheating (see above tip).


    This recipe is from Anneka's SBS Food online column, Bakeproof: Aussie Day Favourites. CLICK HERE for more Bakeproof recipes.


Photography by Alan Benson.Save

Ginger-Scented Beef & Shiitake Pies
Prep 30min (+2hr chilling and decorating time)Bake 20-25minMakes about 25 cookies

Use this recipe as the base for cookies decorated with either royal icing (like these gorgeous Iced Heart Cookies) or fondant. The sweetness of the icing complements the spicy gingerbread base perfectly and lays down a canvas for you to create something extra special for customers, friends and family.

Ingredients

125g salted butter, softened
90g (½ cup, lightly packed) brown sugar
235g (160ml/â…” cup) golden syrup
1 teaspoon natural vanilla extract or essence
375g (2½ cups) plain flour
2 teaspoons ground ginger
1 teaspoon ground cinnamon
1 teaspoon bicarbonate of soda


Method

  1. Use an electric mixer with a paddle beater attachment to beat the butter and sugar on medium speed for 2-3 minutes, or until pale and creamy. Add the golden syrup and vanilla and beat to combine evenly. Sift together the flour, ginger, cinnamon and bicarbonate of soda. Add to the butter mixture and beat on low speed until just combined evenly and a soft dough forms. Turn the dough onto a lightly floured surface and divide into 2 equal portions. Shape each portion into a disc about 2cm thick, wrap in plastic wrap and place in the fridge for 2 hours or until firm enough to roll easily.
  2. Preheat the oven to 160°C (140°C fan-forced). Line two large oven trays with baking paper.
  3. Use a lightly floured rolling pin to roll out one portion of the dough (leave the remaining portion in the fridge) on a lightly floured benchtop to 6mm thick. Use cutter/s of your choice, approximately 7.5cm across at the widest part, to cut out shapes and then use a palette knife to carefully transfer the shapes to the prepared oven trays, leaving a little room between each for
    spreading. Reroll any dough scraps to make more shapes. Discard any offcuts from the second rolling. Repeat with the remaining gingerbread dough portion.
  4. Bake in preheated oven for 20-25 minutes, swapping the trays halfway through baking, or until the cookies are just starting to colour and are cooked through. Stand the cookies on the trays for a few minutes before transferring to a wire rack to cool completely. Decorate as desired.

Baker's Tips

  • Undecorated biscuits will keep in an airtight container at room temperature for up to 5 days.
Gingerbread Cookies
Prep 25min (+ 2hr chilling, cooling and standing time)Bake 12-15minMakes about 35

Based on a deliciously spiced gingerbread, these fun biscuits are given their personalities through simple decorations... Make them into cheeky gingerbread men or turn them upside down and decorate them as cute, Christmas-themed reindeer.

Ingredients

125g (4½oz) unsalted butter, softened
90g (½ cup, lightly packed/3oz) brown sugar
235g (⅔ cup/8¼oz) golden syrup
1 teaspoon natural vanilla extract or essence
375g (2½ cups/13¼oz) plain flour
2 teaspoons ground ginger
1 teaspoon ground cinnamon
1 teaspoon bicarbonate of soda

Icing

185g (1½ cups/6½oz) pure icing sugar
35ml (7 teaspoons) boiling water
Red food colouring  

Method

  1. Use an electric mixer with a paddle attachment to beat the butter and sugar on medium speed for 2-3 minutes, or until pale and creamy. Add the golden syrup and vanilla and beat to combine. Sift together the flour, ginger, cinnamon and bicarbonate of soda. Add to the butter mixture and beat on low speed until just combined and a dough forms. Divide the dough into 2 portions. Shape each into a disc about 2cm/¾in thick, wrap in plastic wrap and place in the fridge for 2 hours to chill.
  2. Preheat the oven to 160ºC/315°F(140°C/285°F fan-forced). Line two large oven trays with baking paper.
  3. Use a lightly floured rolling pin to roll out one portion of dough (leave the remaining portion in the fridge) on a lightly floured bench top to 4mm/⅛in thick. Use an 8cm/3¼in tall gingerbread man cutter to cut out shapes and then carefully transfer the shapes to the prepared oven trays using a palette knife, leaving a little room between each for spreading. Reroll any scraps to make more shapes. Discard any off cuts from the second rolling. 
  4. Bake in preheated oven for 12-15 minutes or until the biscuits are just starting to colour and are cooked through. Stand on the trays for a few minutes before transferring to a wire rack to cool. Repeat with the remaining gingerbread dough portion.
  5. To make the Icing, sift the icing sugar into a medium bowl. Gradually add 30ml (6 teaspoons) of the boiling water and mix until smooth. The icing should be a piping consistency (see Baker’s Tips). If it is too thick stir in the remaining 1 teaspoon of boiling water and then test the consistency again. Spoon ¾ of the icing into a piping bag fitted with a 3mm/⅛in nozzle (see Baker’s Tips) and set aside. Stir a couple of drops of red food colouring into the remaining icing to reach the desired colour. Spoon into a separate piping bag fitted with a 3mm/⅛in nozzle.
  6. Use the icing to decorate the cooled biscuits to make men and/or reindeer as desired (using the photograph as a guide). Set aside for about 20 minutes or until the icing sets completely. 

Baker's Tips

  • To test if the icing is the correct consistency for piping, drizzle a little off the end of a teaspoon onto a plate and set aside for a few minutes. If it keeps its shape it is ready to use.
  • If you don’t have piping bags and nozzles you can spoon the icing into a snap-lock bag, seal and then cut a small hole in one of the corners to pipe through.
  • Store in an airtight container at room temperature for up to 1 week.


Photography by Georgie Esdaile.

Gingerbread Men and Reindeers

$100.00/pp

more info
Gluten-free Baking Essentials
- Products -

Gluten-free Baking Essentials is a self-paced online course that will introduce you to the tricky world of gluten-free baking.

CLICK HERE TO START NOW!


Discover this no-fuss 'real' guide to the world of gluten-free baking – in your own time!

Gluten-free Baking Essentials is a self-paced online course that will introduce you to the tricky world of gluten-free baking and will give you an understanding of gluten-free ingredients and how to use them successfully – all from your own home kitchen!

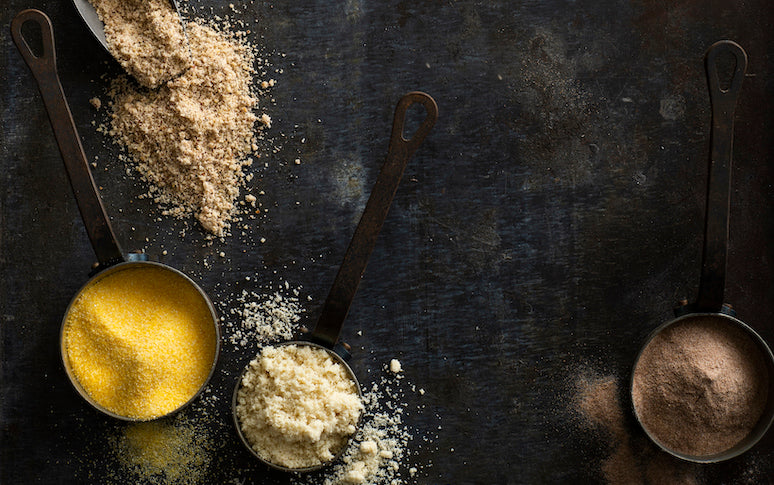
Completed in your own time, at your own pace, this course will give you a thorough understanding of what can be substituted for gluten-based ingredients in your baking and introduce you to the best gluten-free flour options. You will learn how to make your own gluten-free flour blends and for which type of recipe each blend is best suited, as well as how to adapt recipes to gluten-free (and how to get the best results!). You will also receive an invaluable collection of gluten-free recipes that you can build upon and use on a daily basis including gluten-free bread, pastry, pizza base, muffins, biscuits and a special celebration cake.

Guided by Anneka Manning, she will share her more than 30 years of baking experience, knowledge and research, as well as all of her practical and handy tips and tricks.

By the end of this course, you will walk away with all the knowledge, skill and confidence you need to get the best out of recipes without gluten and enjoy successful – and delicious – gluten-free baking!

Gluten-free Baking Essentials is accredited by Coeliac Australia.

How to enrol

Gluten-free Baking Essentials is a self-paced course and is now open for enrolment. 

CLICK HERE TO START NOW!

Cost

$100

Who is this course suitable for?

This course is, quite simply, suitable for bakers of all skill levels who want to expand their gluten-free knowledge and understand how gluten-free ingredients work and how to use them successfully in their baking. This course is not only for those who need to avoid gluten in their own diets, but also those who want to bake for family and friends who are gluten-intolerant.

As this course is completed online, it is suitable for students from all over the world.

What will I get?
  • An understanding of gluten-free baking, substitutions and gluten-free flour options
  • Downloadable and printable information resources including The Principles of Gluten-free Baking, A Guide to Gluten-free Flours, Starches and Other Ingredients, Making Your Own Gluten-free Flour Blends and Tips for Gluten-free Baking
  • An invaluable collection of delicious gluten-free recipes (many of which are also dairy-free) that you can build upon and use on a daily basis (see full list below)
  • Membership to BakeClub's exclusive The Kitchen Table online group which will provide ongoing support and inspiration
  • Gluten-free baking confidence, knowledge and skill to use regularly at home
Which recipes are included?
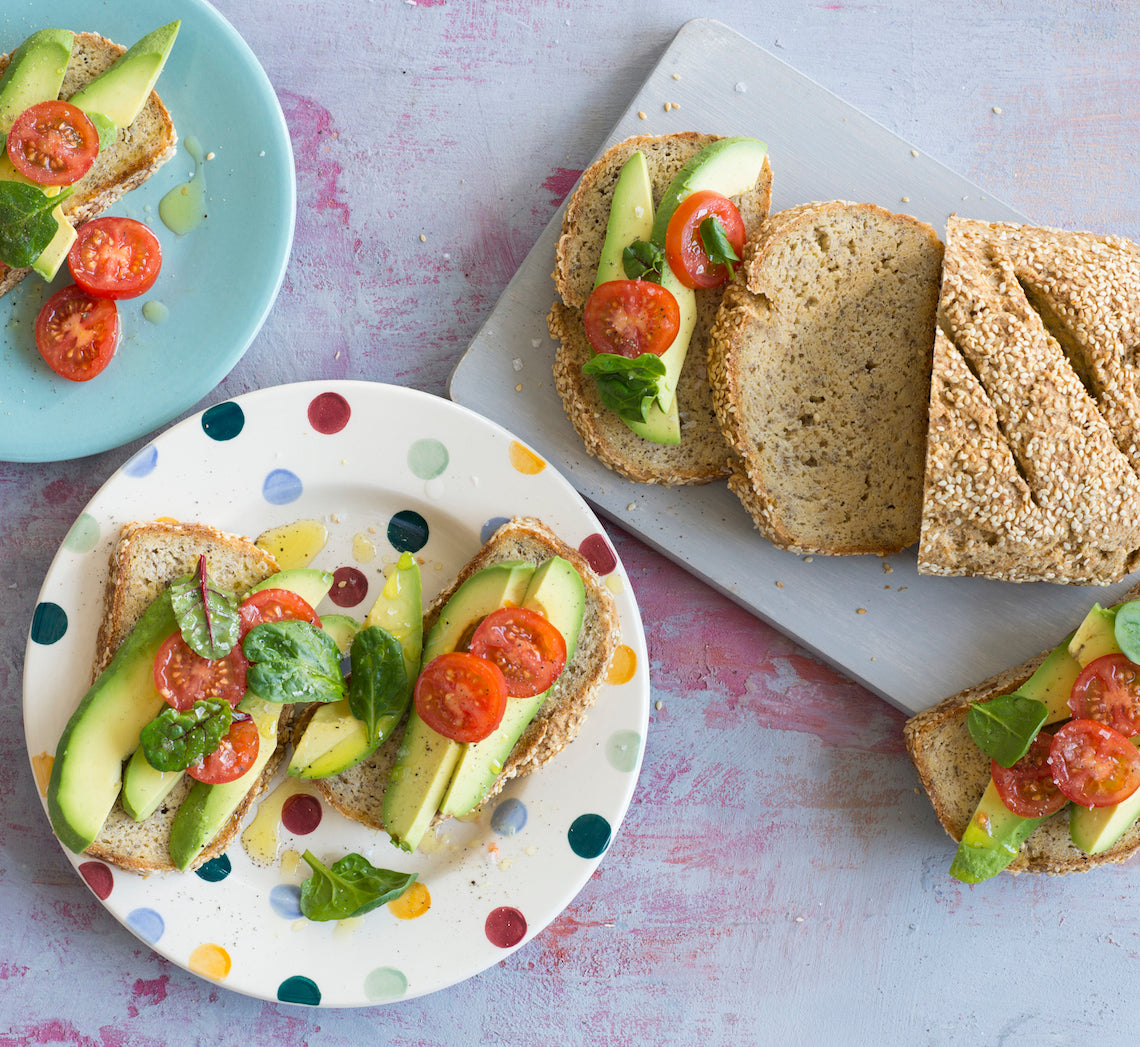
  • Artisan-style Gluten-free Bread
  • Gluten & Dairy-free Banana & Coconut Berry Muffins
  • Gluten-free Banana Bread
  • Gluten-free Chocolate Chunk Cookies
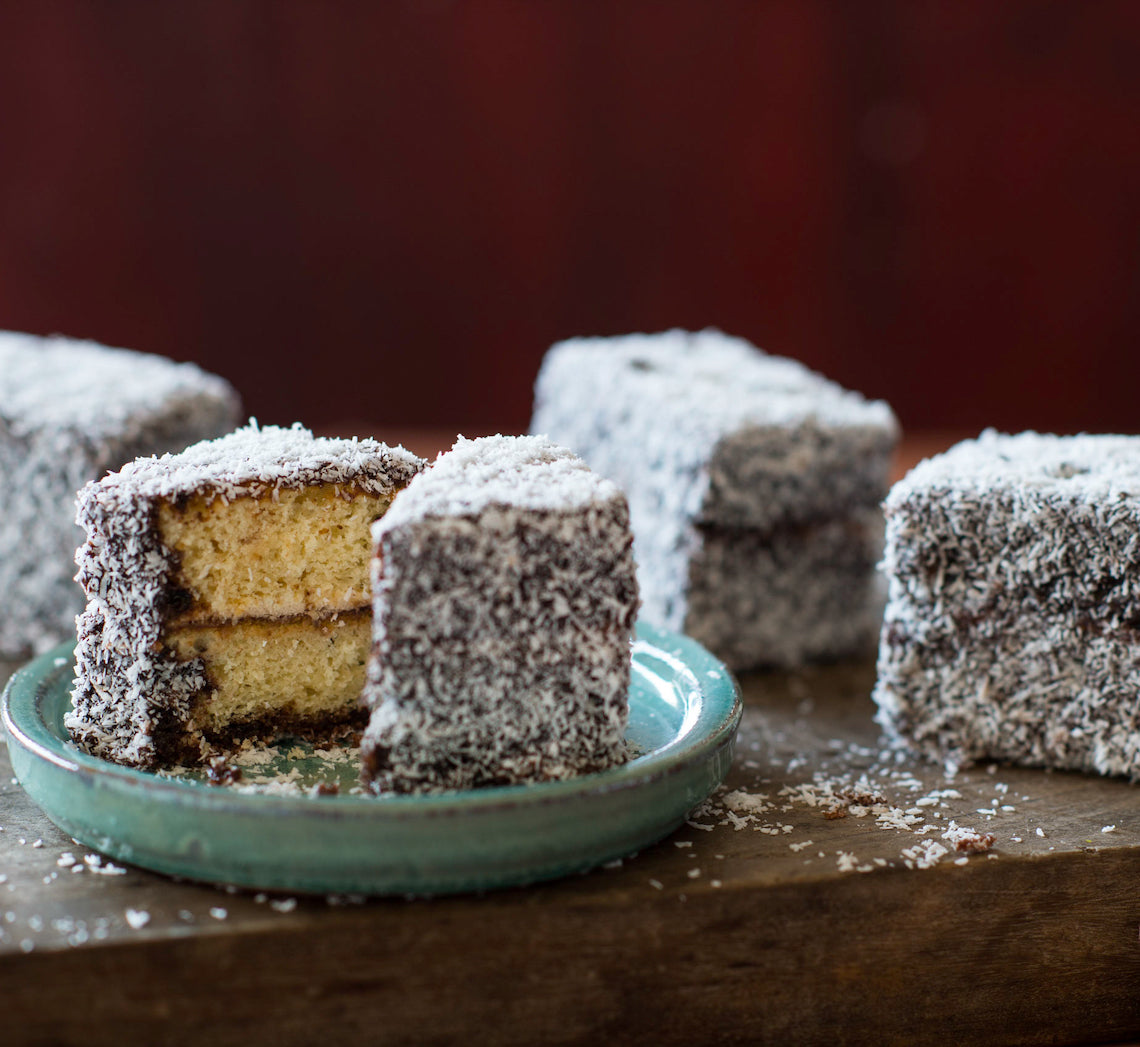
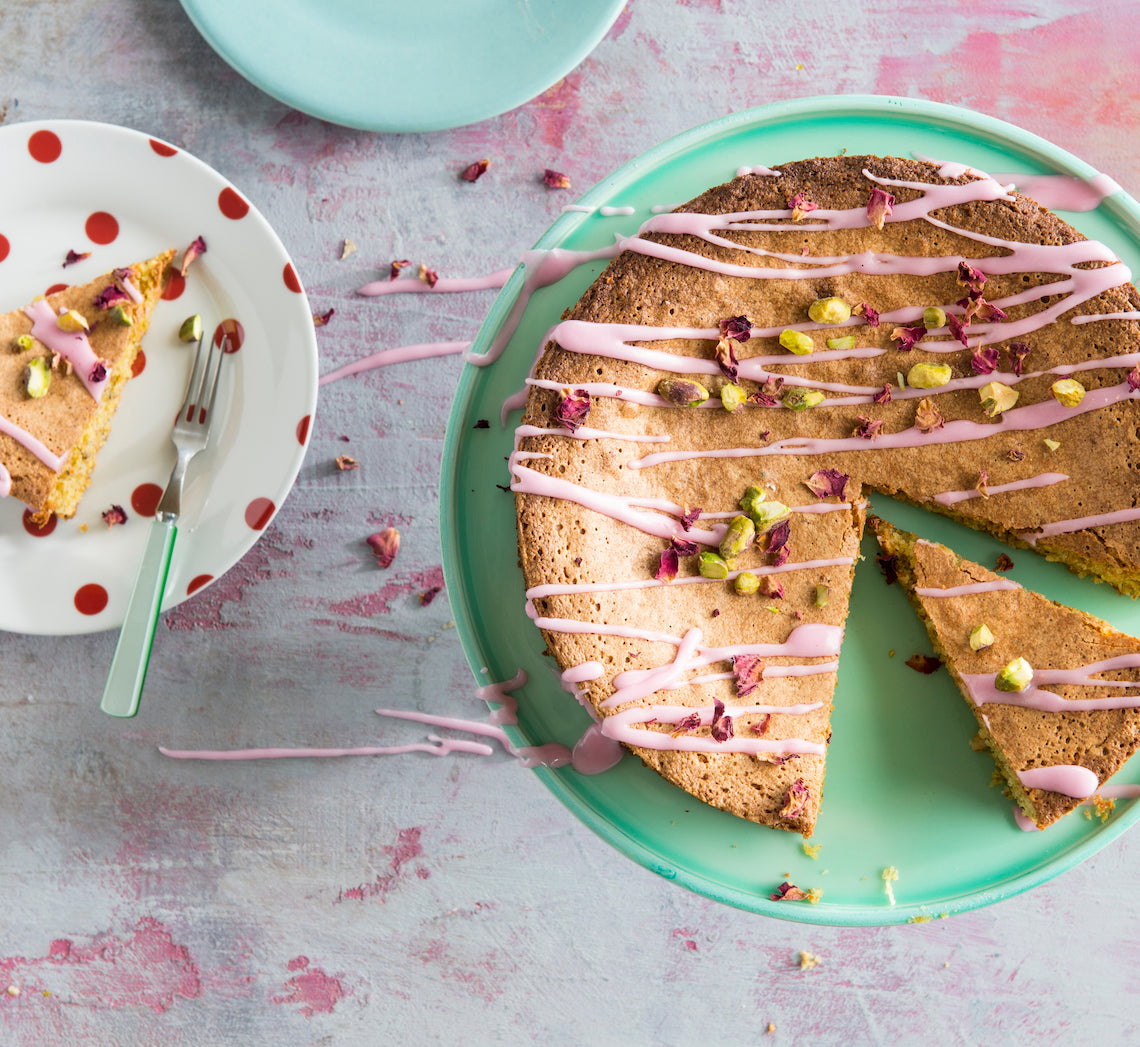
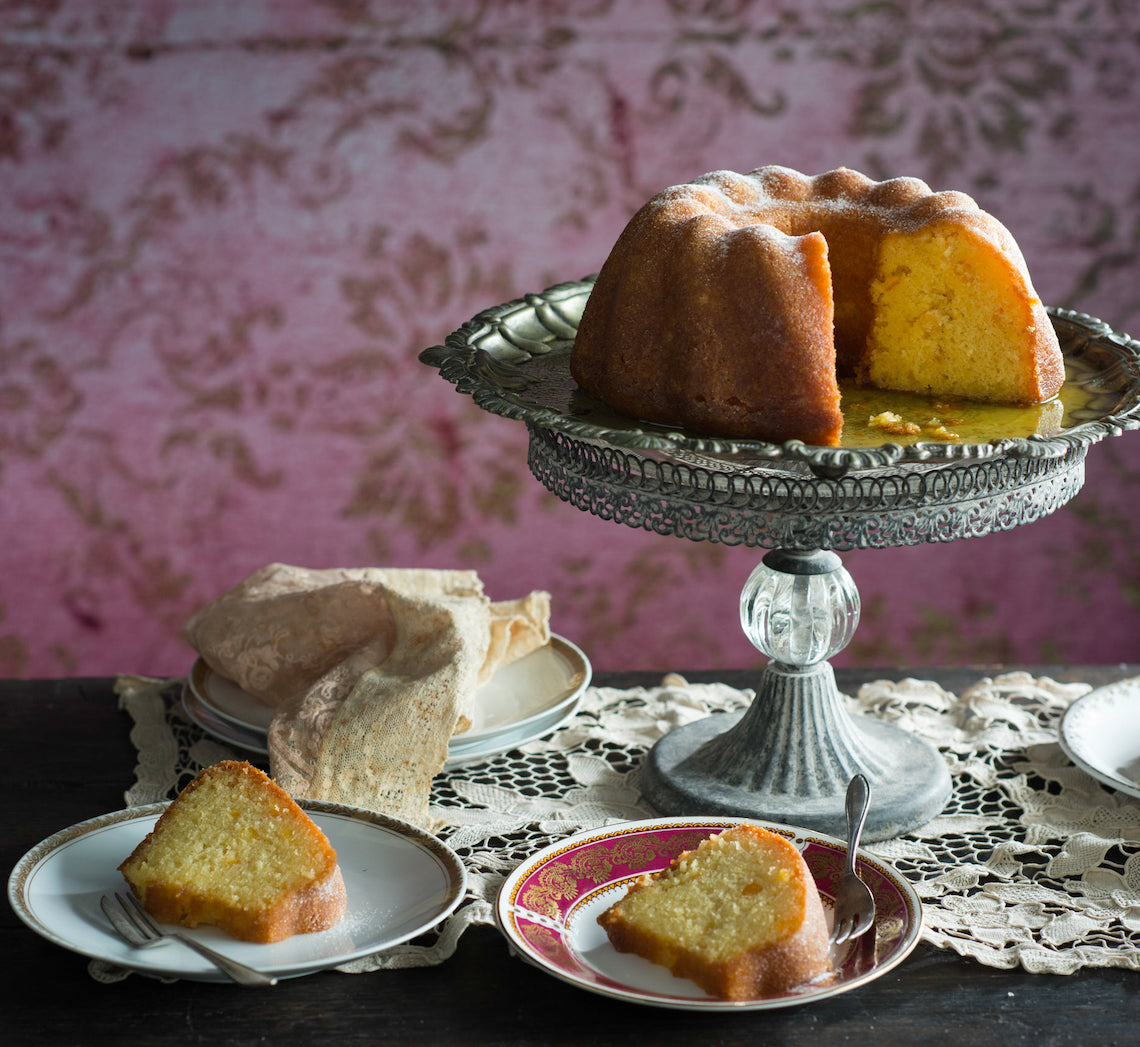
  • Gluten-free Orange Toffee & Chocolate Celebration Cake
  • Gluten-free Ricotta, Basil & Tomato Pizza
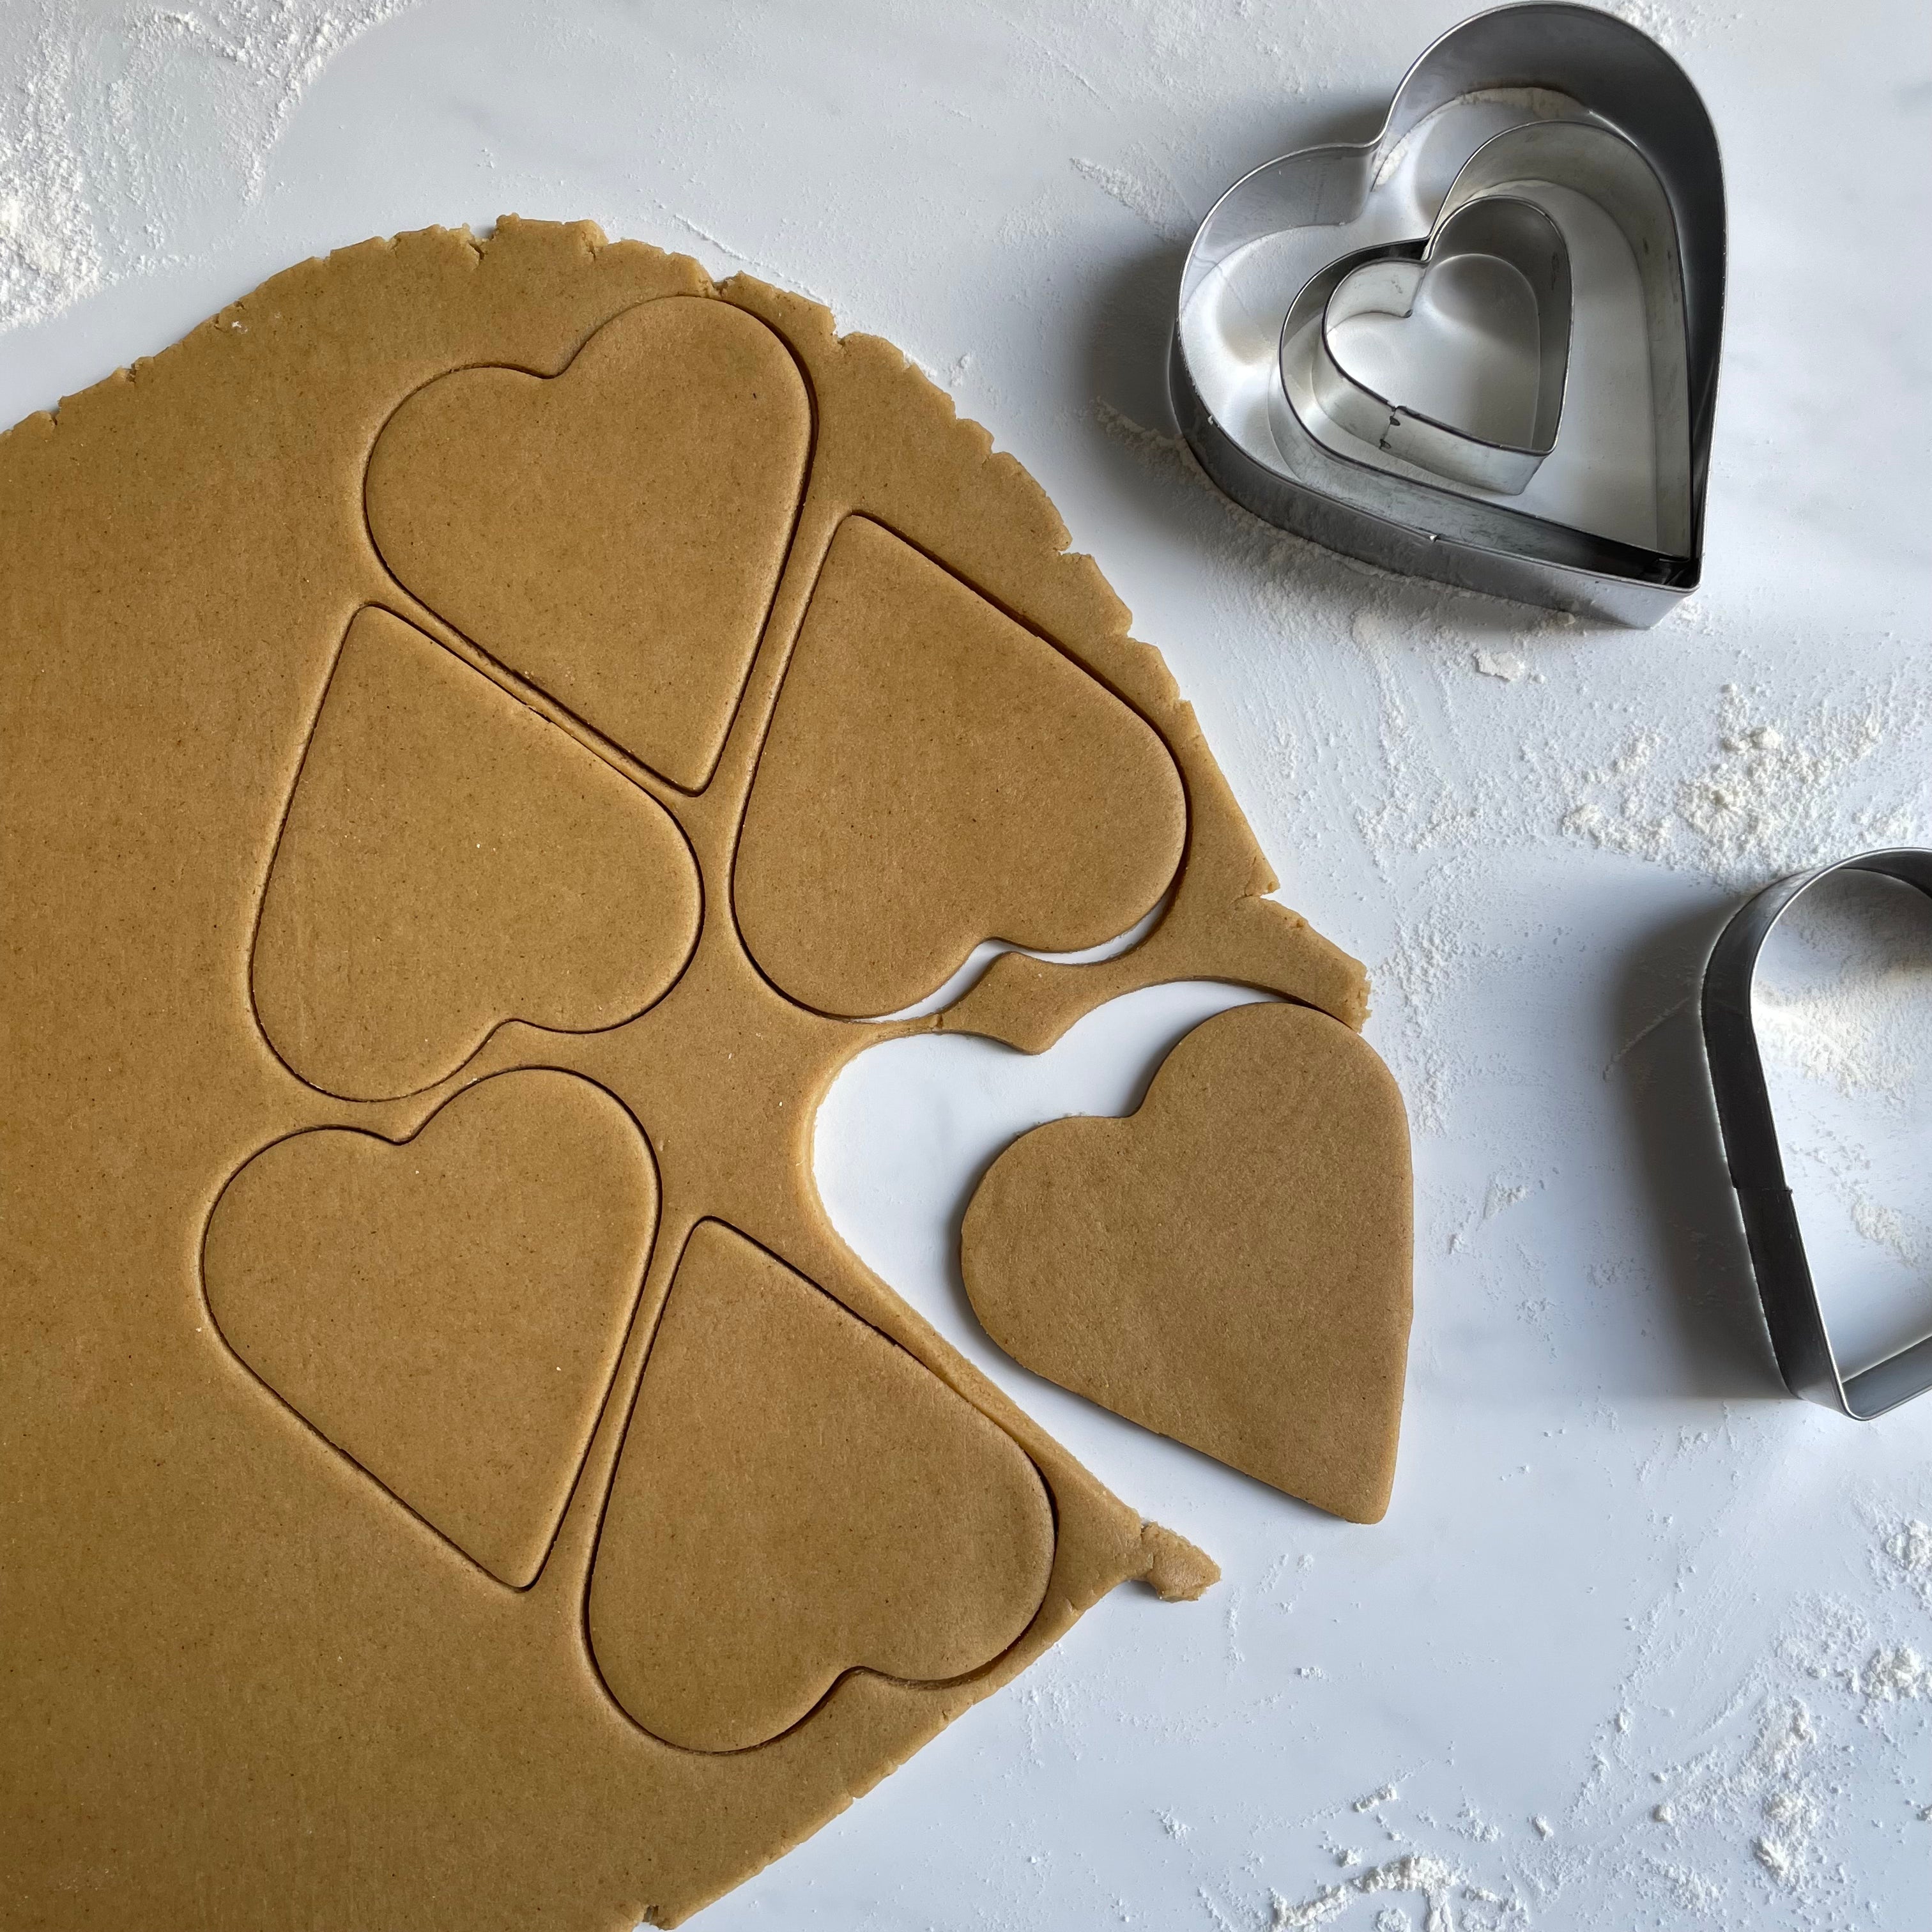
  • Gluten-free Shortcrust Pastry
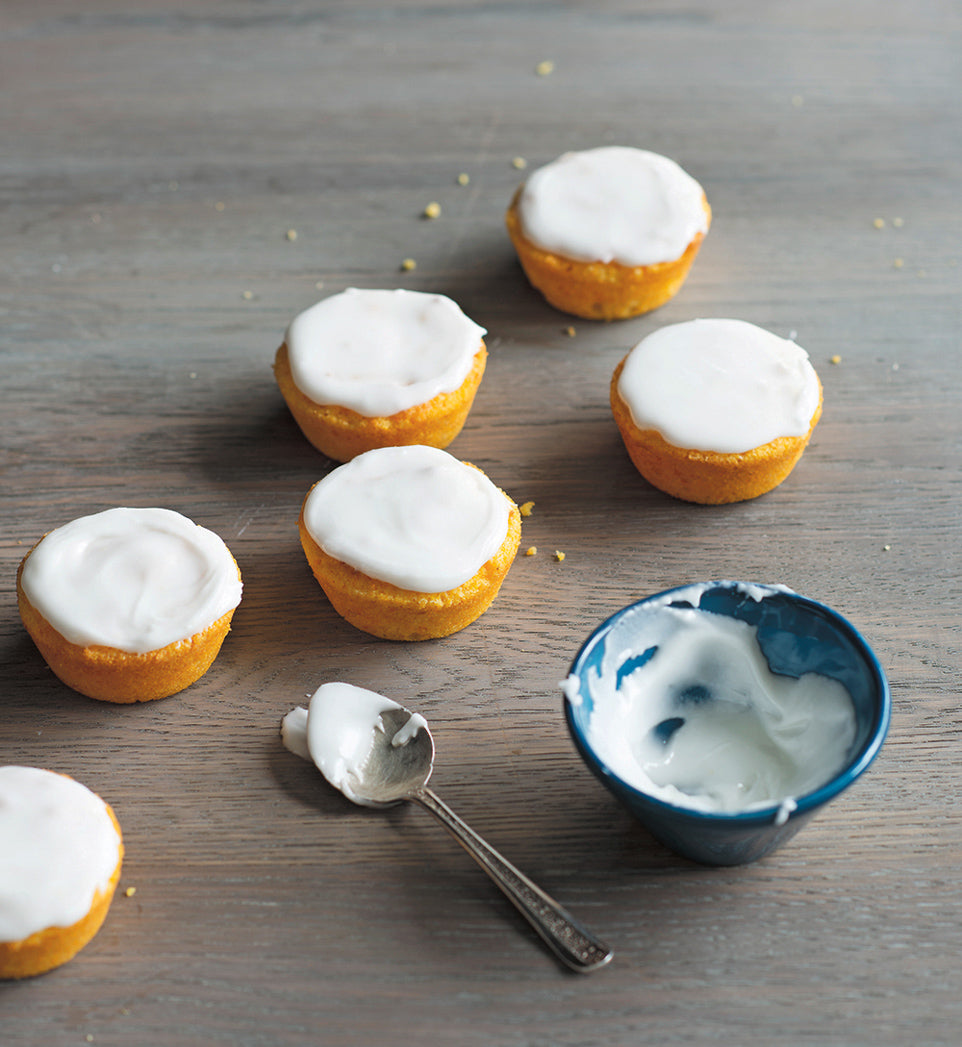
  • Gluten-free Vanilla Cupcakes with Chocolate Frosting
  • Gluten-free Zucchini, Feta & Pesto Galette
  • Seeded Gluten-free Crackers
How does a self-paced course work?

This online course is completely self-guided. Upon enrolment, you will gain access to the course content which you can work through at your own pace. You can log on whenever it is convenient for you and complete the modules one day at a time.

You can take as long as you need to complete the course – it's up to you how quickly you want to work through the content. You will have lifetime access to all the recipes and printable information sheets so you can dip in and out of it whenever it suits you.

There is the option to connect with other bakers via Facebook through BakeClub's exclusive The Kitchen Table membership group and via Instagram using #bakeschoolglutenfree. This way you can share your experience and support each other as your confidence and skills grow.


So, is Gluten-Free Baking Essentials for me?
  • Do you need to avoid gluten in your diet but still want to bake delicious things you can eat?
  • Do you want to bake successfully for family and friends who are gluten-intolerant?
  • Would you like to gain a thorough understanding of what can be substituted for gluten-based ingredients in your baking and gain the confidence to do so?
  • Would you like to be guided and inspired by Anneka's 30+ years of baking experience in your own kitchen?
  • Do you have more time on your hands at the moment and keen to learn a new skill?

If any of these sound like you, then this course is the one for you!

CLICK HERE TO START NOW!


CLICK HERE TO BROWSE OUR OTHER ONLINE COURSES!


Prep 15minBake 35minMakes about 15

Wickedly rich, this gluten-free brownie can match it with the best of them. Fudgy, rich and studded with tart raspberries, you won't be able to stop at just one piece!

Ingredients

Coconut oil, to grease
150g (5¼oz) gluten-free, good-quality dark chocolate, chopped
100g (½ cup/3½oz) coconut oil
135g (¾ cup/4¾oz) coconut sugar
2 eggs, at room temperature, light whisked
60ml (¼ cup/2fl oz) coconut milk
1 teaspoon natural vanilla essence or extract
30g (¼ cup/1oz) cocoa powder
2 tablespoons coconut flour
¾ teaspoon gluten-free baking powder
50g (½ cup/1¾oz) almond meal
150g (5¼oz) frozen raspberries
Pure icing sugar, to dust (optional)

    Method

    1. Preheat oven to 160°C/315°F (140°C/285°F fan-forced). Grease a 16cm x 26cm  (6¼in x 10½in) shallow slice tin with coconut oil and line the base and long sides with one piece of baking paper.
    2. Place the dark chocolate and coconut oil in a medium heatproof bowl over a saucepan of simmering water (don't let the base of the bowl touch the water). Stir occasionally until chocolate and coconut oil melt and the mixture is smooth. Remove bowl from the saucepan.
    3. Add the sugar, eggs, coconut milk and vanilla to chocolate mixture and use a balloon whisk to stir until well combined. Sift together the cocoa powder, coconut flour and baking powder into a bowl, add the almond meal and stir to combine. Add to chocolate mixture and stir with a spatula until just combined. Add the frozen raspberries and fold gently until just combined.
    4. Pour mixture into prepared tin and use the back of a metal spoon to spread evenly. Bake in preheated oven for 35 minutes or until moist crumbs cling to a skewer inserted in the centre. Cool in tin and then chill for at least 1 hour (see Baker's Tips).
    5. Remove brownie from the tin using the baking paper to carefully lift it out. Cut into portions and serve dusted with icing sugar, if desired.

    Baker's Tips

    • These brownies are a little more fragile than normal fudge brownies and will be easier to cut if you chill them for at least an hour before removing from the tin to cut.
    • These brownies will keep in an airtight container in the fridge for up to 5 days. Serve straight from the fridge or stand at room temperature for 30 minutes before serving.

    This recipe was originally published in Anneka's SBS Food online column, Bakeproof: Coconut.

    Click here for more Bakeproof recipes.

    Photography by Alan Benson. 

    Gluten-free Coconut & Raspberry Brownies
    Prep 40min (+ 40min cooling and 20min chilling time)
    Bake 20min
    Makes 9

    Gluten-free cakes are sometimes hard to come by. Moist and flavoursome, these lamingtons won’t disappoint. Those with gluten or wheat intolerances and sensitivities won’t ever have to compromise if wanting to enjoy this Australian classic.

    Ingredients

    80ml (â…“ cup) thickened cream, whisked to firm peaks
    180g (2 cups) desiccated coconut, to coat

      Gluten-free buttercake

      175g (1¼ cups) purchased gluten-free plain flour mix
      2½ teaspoons gluten-free baking powder
      165g (¾ cup) caster sugar
      125g unsalted butter, cubed, softened
      2 eggs, at room temperature
      80ml (â…“ cup) milk
      2 teaspoons natural vanilla extract or essence

        Chocolate icing

        465g (3¾ cups) pure icing sugar
        55g (½ cup) cocoa powder
        150ml boiling water
        1½ teaspoons vanilla essence

          Method

          1. To make the gluten-free buttercake, preheat the oven to 180°C. Grease a 20 x 30cm (base measurement) shallow cake tin and line the base and two longs sides with one piece of baking paper.
          2. Put the flour, baking powder, sugar, butter, eggs, milk and vanilla in a large mixing bowl. Use an electric mixer to beat on low speed until combined. Increase the speed to medium and beat for 3 minutes or until the mixture is well combined and very pale in colour. Spoon the mixture into the lined tin and spread evenly using the back of a spoon. Lightly tap the tin on the bench 3 times to get rid of any excess air bubbles.
          3. Bake for 20 minutes or until cooked when tested with a skewer. Cool for 5 minutes in the tin, then turn onto a wire rack to cool completely (this will take about 40 minutes).
          4. To make the Chocolate Icing, sift the icing sugar and cocoa powder into a medium bowl. Add the boiling water and vanilla and stir until smooth (it should be the consistency of pouring cream).
          5. Trim the edges of the cooled cake and then cut in half to form two layers about 20 x 15cm. Spread one half of the cake with a little of the Chocolate Icing and then spread whipped cream. Top with the remaining cake half. Chill for 20 minutes or until the cream is firm enough to cut the cake.
          6. Use a sharp serrated knife to cut the layered cake into 9 portions (about 6.5 x 4.5cm each). Run a palette knife around the cut surface of each lamington to remove any excess cream.
          7. Spread the coconut on a tray or plate. Rest a cake portion on a fork, dip into the chocolate icing and then and spoon the icing over the top and sides to completely coat. Allow any extra icing to drip off. Roll the cake in the coconut to coat evenly. Place on a wire rack. Repeat with the remaining cake portions, icing and coconut.

          Baker's Tips

          • If the icing becomes too thick while you are coating the cake pieces, stir in enough extra boiling water, adding it a teaspoon at a time, to thin to the right consistency.
          • These lamingtons will keep in an airtight container in the fridge for up to 2 days. Stand at room temperature for at least 30 minutes before serving.

          This recipe is from Anneka's SBS Food online column Bakeproof: Lamingtons. CLICK HERE for more Bakeproof recipes.

          Photography by Alan Benson.

          Gluten-free Lamingtons
          Prep 30min (+1hr cooling time)Bake 30minMakes 8-10 serves

          This gluten-free and dairy-free recipe, with its subtle lemon flavour teamed with an aromatic rosewater icing and light nutty texture, is the perfect afternoon-tea cake. It will dip slightly in the centre due to its delicate nature but this is just a sign of how lovely and light it is.

          Ingredients

          Light olive oil, to grease
          100g (1 cup) almond meal
          100g (¾ cup) raw unsalted pistachios, toasted and finely ground
          90g (½ cup) instant polenta or wholegrain corn flour
          2 teaspoons gluten-free baking powder
          3 eggs, at room temperature
          165g (¾ cup) caster sugar
          125ml (½ cup) light olive oil
          1 lemon, rind finely shredded, juiced
          extra raw unsalted pistachios, toasted and coarsely chopped, to decorate
          dried rose petals (optional), to decorate

          Lemon and rosewater icing
          125g (1 cup) pure icing sugar
          1 tablespoon (about) strained fresh lemon juice
          1 teaspoon rosewater
          gluten-free pink or rose food colouring, to tint

          Method
          1. Preheat oven to 180°C (160°C fan-forced). Brush a 20cm springform cake tin with olive oil and line the base with non-stick baking paper.
          2. Place the almond meal, ground pistachios, polenta and baking powder in a medium bowl and use a whisk to stir to combine and remove any lumps. Set aside.
          3. Use an electric mixer with a whisk attachment to whisk the eggs and sugar on medium-high speed until thick and pale and a ribbon trail forms when the whisk is lifted. Whisk in the olive oil, 2 tablespoons of the lemon juice and the lemon rind.
          4. Add the dry ingredients to the egg mixture and use a spatula or large metal spoon to fold until evenly combined. Pour into the prepared cake tin and bake for 30 minutes or until a skewer inserted in the centre comes out clean. Stand the cake in the tin on a wire rack for 10 minutes before removing the sides of the tin. Set aside to cool completely.
          5. To make the lemon and rosewater icing, sift the icing sugar into a medium bowl. Gradually stir in the 1 tablespoon lemon juice and the rosewater until the mixture is smooth and has a thick coating consistency, adding a little more juice if needed. Cover with plastic wrap and set aside at room temperature until ready to use.
          6. Drizzle the cooled cake with the icing and then sprinkle with extra pistachio nuts and dried rose petals, if using. Set aside for 30 minutes or until the icing has set before serving in wedges.

          Baker's Tips
          • This cake will keep in an airtight container at room temperature for up to 4 days.


            This recipe is from Anneka's SBS Food online column Bakeproof: Gluten-free baking. Click here for more Bakeproof columns and recipes.


            Photography by Alan Benson.

            Gluten-free lemon & pistachio cake with rosewater icing
            Prep 20min (+ 30-60min simmering, cooling and 20min standing time)Bake 15-18minMakes 12

            These cakes are a play on the original (and wonderful) Middle Eastern Orange Cake from the one and only Elizabeth David. Making use of seasonal mandarins and with the addition of coconut and polenta, this version is also flourless and gluten-free.

            Ingredients

            2 large mandarins (about 110g)

            Melted butter, to grease

            100g (1 cup) almond meal

            95g (½ cup) instant polenta

            45g (½ cup) desiccated coconut

            ½ teaspoon gluten-free baking powder

            3 eggs, at room temperature

            165g (¾ cup) caster (superfine) sugar

            1½ teaspoons natural vanilla extract or essence

            Mandarin icing

            250g (2 cups) pure icing (confectioners') sugar

            1½–2 tablespoons mandarin juice

            Method
            1. Put the whole mandarins in a small saucepan, cover with water and set over high heat. Bring to the boil, reduce the heat and simmer for 30–60 minutes, or until very soft when tested with a skewer. (You may need to place a small saucer over the mandarins to keep them submerged.) Remove the mandarins from the water and set aside to cool slightly.
            2. Meanwhile, preheat the oven to 180°C (160°C fan-forced). Brush a 12-hole 80ml (⅓ cup) capacity silicone or metal muffin tin with melted butter to grease. Quarter the mandarins and remove and discard the centre core and any seeds. Purée the skin and flesh in a small food processor or blender until smooth.
            3. Put the almond meal, polenta, coconut and baking powder in a medium bowl and mix well to combine.
            4. Put the eggs, sugar and vanilla in a medium bowl and use an electric mixer with a whisk attachment to whisk on high speed until very thick and pale and a ribbon trail forms when the whisk is lifted (about 3–4 minutes).
            5. Add the mandarin purée to the egg mixture and use a spatula or large metal spoon to fold in until just combined. Add the polenta mixture and fold together until combined. Divide the mixture evenly among the muffin holes (you can pour it from a jug or use a ladle).
            6. Bake in the preheated oven for 15–18 minutes, or until a skewer inserted in the cakes comes out clean. Cool the cakes in the tin for 5 minutes. Use a palette knife to ease the cakes out and transfer to a wire rack to cool.
            7. To make the Mandarin icing, sift the icing sugar into a medium bowl. Gradually stir in the juice until the mixture is smooth and has a thick coating consistency, adding a little more juice if too thick. Cover with plastic wrap and set aside at room temperature until ready to use.
            8. Spread the tops of the cooled cakes with the icing. Set aside for 20 minutes or until set.
            Baker's Tips
            • These cakes will keep in an airtight container in a cool place (but not in the fridge) for up to 2 days.
            Recipe and image from BakeClass by Anneka Manning (Murdoch Books).
              Gluten-free Mandarin, Polenta & Coconut Cakes
              Prep 30min (+1hr30min cooling time)Bake 1hr 10minMakes 1 loaf

              This bread is almost the complete opposite of most commercially made gluten-free breads - wonderfully substantial (it won’t ‘dissolve’ in your mouth), moist and flavoursome without containing any gums. The key is the inclusion of psyllium husks and chia seeds to give the dough flexibility and structure in the absence of gluten. It’s great fresh, but toasting really brings out the nuttiness of the flours used.

              Ingredients

              150g (1 cup) sorghum flour
              75g (½ cup) millet flour
              70g (½ cup) brown rice flour
              65g (½ cup) sweet (glutinous) rice flour
              90g (½ cup) fine polenta
              1½ teaspoons fine sea salt
              625ml (2½ cups) lukewarm water
              7g (1 sachet) instant dried yeast
              2 tablespoons honey
              2 tablespoons light olive oil, plus extra to grease
              25g (â…“ cup) psyllium husks
              50g (¼ cup) chia seeds
              2 tablespoons sesame seeds, to coat and sprinkle 

              Method
              1. Combine the sorghum, millet, brown rice and sweet rice flours, polenta and salt in a large bowl.
              2. Combine 60ml (¼ cup) of the lukewarm water, yeast and 1 teaspoon of the honey in a small dish and whisk to combine with a fork. Set aside in a warm, draught-free place for 5 minutes or until frothy.
              3. Meanwhile, use a balloon whisk to whisk together the remaining 560ml (2¼ cups) lukewarm water, remaining honey, olive oil, psyllium husks and chia seeds until evenly combined. Set aside for 3 minutes or until the mixture thickens slightly.
              4. Whisk the yeast mixture into the psyllium husk mixture. Add to the dry ingredients and use a wooden spoon to mix to a soft, slightly sticky dough.
              5. Cover the bowl with plastic wrap and set aside in a warm, draught-free place for 1½ hours or until risen slightly and is spongy in texture.
              6. Grease a 11.5cm x 21cm (base measurement) loaf tin with a little extra oil and sprinkle with 1½ tablespoons of the sesame seeds to coat lightly. Turn the dough onto a benchtop, shape into a 20cm log and place in the greased tin. Brush the top with a little water and sprinkle with the remaining sesame seeds. Cover with plastic wrap and set aside and place in a warm, draught-free place for 1 hour or until well risen.
              7. Preheat the oven to 200°C (180°C fan-forced).
              8. Use a sharp knife to cut 4 diagonal slits across the top of the loaf. Bake 1 hour and 10 minutes or until golden, cooked through and sounds hollow when tapped on the top.
              9. Turn the loaf out onto a wire rack and set aside to cool completely - this will take about 1½ hours) before slicing.
              Baker's Tips
              • This bread is best kept in a cloth or paper bag at room temperature in a cool spot where it will keep for up to 5 days.
              • To freeze, place whole or sliced in a sealed freezer bag or airtight container and freeze for up to 3 months. Thaw at room temperature or toast slices straight from the freezer.


                This recipe is from Anneka's SBS Food online column Bakeproof: Gluten-free baking. Click here for more Bakeproof columns and recipes.


                Photography by Alan Benson.

                Gluten-free Wholegrain & Chia Bread
                Prep 30minBake 50minMakes 12 serves

                Originally a cake of the poor, Gugelhupf is a firm staple in Austria and is of the most popular afternoon tea offerings especially in the local kafes (coffee houses). But, as Emperor Franz Josef preferred, it is often eaten for breakfast. There seem to be as many variations of this yeast or sponge-based cake as there are days in the year – this one has a luscious orange syrup to keep it lovely and moist.

                Ingredients

                20g (¾oz) butter, melted, combined with 1½ teaspoons plain flour, to grease
                250g (9oz) unsalted butter, at room temperature
                125g (1 cup/4½oz) icing sugar, sifted
                2 teaspoons natural vanilla essence or extract
                4 eggs, at room temperature, separated
                250g (1â…” cups/9oz) plain flour, plus extra to dust
                1½ teaspoons baking powder
                Good pinch of salt
                75g (2¾oz) candied orange rind
                110g (½ cup/4oz) caster sugar, plus 1 tablespoon extra to sprinkle

                Orange Syrup
                250ml (1 cup/9fl oz) strained fresh orange juice
                145g (â…” cup/5oz) caster sugar
                50ml (2½ tablespoons/1¾fl oz) orange liqueur

                  Method

                  1. Preheat oven to 180°C/350°F (160°C/315°F fan-forced). Brush a 2.5 litre/5.25pt (24cm/ 9½in diameter) bundt tin with the melted butter and flour mixture to grease.
                  2. Use an electric mixer to beat the butter and icing sugar and vanilla until pale and creamy. Add the egg yolks and beat until well combined and creamy.
                  3. Sift together the flour, baking powder and salt and then stir through the candied rind. Use an electric mixer with a whisk attachment to whisk the egg whites with the salt until soft peaks form. Add the caster sugar and whisk until thick and glossy. Use a large metal spoon or spatula to fold the egg whites into the butter mixture until evenly combined. Then gently fold in the flour mixture until just combined.
                  4. Spoon the mixture into the prepared tin and smooth the surface with the back of a spoon. Bake in preheated oven for 45-50 minutes or until a skewer inserted comes out clean. Stand in the tin for 5 minutes before turning onto a plate with a lip.
                  5. Meanwhile, to make the Orange Syrup, combine the orange juice and sugar in a small saucepan and stir over medium heat until the sugar dissolves. Bring to a simmer and then remove from the heat. Stir in the orange liqueur.
                  6. Slowly pour the hot syrup over the hot cake, allowing it to soak in as much as possible. Sprinkle with the extra caster sugar and cool to room temperature (this will take about 1 hour). Serve in slices for morning or afternoon tea or dessert on its own or with cream.

                  Baker's Tips

                  •  This cake will keep in an airtight container at room temperature for up to 3 days.

                  This recipe is from Anneka's SBS Food online column, Bakeproof: Austrian Baking.

                  CLICK HERE for more Bakeproof recipes.

                  Photography by Alan Benson.

                  Gugelhupf with Orange Syrup
                  Prep 2 hours (+ 4 hours chilling time)Bake 30-40 minMakes 18 serves

                  These divine desserts petite gateaux were created by Rachel Hunt, one of our Make Me a Baker students for her graduation. A crisp, nutty, meringue base is topped with a mirror-glazed, ever-so-light honey-infused mousse surrounding a floral lavender jelly. Using a number of techniques, this recipe showcases all the fantastic new skills and confidence Rachel gained over the course of our 6-month program and, lucky for you, she’s sharing it so you can make them at home! Rachel uses 18 x 30mm and 60mm (top measurement) half sphere silicon moulds however other shapes/sizes can be used.

                  Ingredients

                  Lavender Jelly
                  • 6 fresh unsprayed lavender heads or 2 teaspoons
                    dried culinary lavender, plus extra to decorate
                  • 250ml (1 cup) water 
                  • 110g (1/2 cup) sugar
                  • 1½ teaspoons powdered gelatin
                  • 2½ tablespoons cold water
                  • Purple food colour (optional)
                  Honey Mousse
                  • 5 eggs, separated
                  • 40g butter, diced
                  • 135g good-quality white chocolate chips (like Callebaut)
                  • 60ml (¼ cup) good-quality honey 
                  • 2 teaspoons powdered gelatin
                  • 2 tablespoons cold water
                  • 300ml thickened cream

                  Hazelnut Meringue

                  • Vegetable oil, to grease
                  • 150g hazelnut meal or peeled toasted hazelnuts
                  • 7 large egg whites
                  • ½ teaspoon white wine vinegar
                  • 385g (1¾ cups) caster sugar

                  Mirror Glaze

                  • 2 tablespoon powdered gelatin
                  • 250ml (1 cup) cold water
                  • 330g (1½ cups) caster sugar
                  • 160ml (2/3 cup) sweetened condensed milk
                  • 2 cups good-quality white chocolate chips (like Callebaut)

                    Method

                      1. To make the lavender jelly, combine the sugar and 250ml water in a small saucepan and stir over a low heat until sugar dissolves. Bring to the boil. Remove from the heat and add the lavender. Set aside to cool to room temperature.
                      2. When the syrup is almost cool, place the cold water in a small heatproof bowl or dish and sprinkle the gelatin over. Set aside for 5 minutes or until the gelatin is fully rehydrated. Sit the bowl or dish into another bowl of hot water and stir until dissolved and the mixture is clear.
                      3. Strain the jelly syrup through a sieve to remove the lavender. Transfer the gelatin mixture to a medium bowl and stir in the syrup until well combined.
                      4. Tint the jelly syrup with purple food colouring if desired. Place 18 x 30mm (top measurement) half-sphere silicon moulds on a tray and pour in the jelly syrup (there will be some syrup left over and you can set it in other moulds or glasses if you wish). Place in the fridge to chill for at least 4 hours, or until well set.
                      5. To make the honey mousse, lightly whisk the egg yolks and combine in a medium saucepan with the butter, chocolate and honey. Stir over low heat until the chocolate is just melted (be careful not to overheat). Transfer mixture to a large bowl.
                      6. Place the cold water in a small heatproof bowl or dish and sprinkle the gelatin over. Set aside for 5 minutes or until the gelatin is fully rehydrated. Sit the bowl or dish into another bowl of hot water and stir until dissolved and the mixture is clear. Stir gelatin mixture into the chocolate mixture until combined. Cover and cool to room temperature, stirring occasionally.
                      7. Use an electric mixer with a whisk attachment or a hand-held balloon whisk to whisk the cream in a medium bowl until soft peaks form. Fold the cream into the cooled chocolate mixture until just combined. Whisk the egg whites with a clean whisk in a large bowl until soft peaks form. Add half the egg whites into the chocolate mixture and gently fold through. Add the remaining egg whites and gently fold through until just combined.
                      8. Place 18 x 60mm (top measurement) half sphere moulds on a tray and pour in the mousse mixture to fill each until almost full. Remove the lavender jelly domes from the smaller moulds and press into the centre of each individual mousse, ensuring the mousse completely covers the jelly. If the jelly isn't completely covered, add a little more mousse. If necessary, scrape a palette knife across the top of the moulds so that the base of the mousse domes will be level. Chill for at least 4 hours, or until set.
                      9. To make the hazelnut meringue, preheat the oven to 180°C (160°C fan forced). Lightly grease 2 oven trays and line with non-stick baking paper.
                      10. If using whole toasted hazelnuts grind the nuts with 1 tablespoon of the caster sugar in a food processor until fine but still with some texture.
                      11. Use an electric mixer with a whisk attachment to whisk the egg whites and vinegar until soft peaks form. Add the caster sugar 1 tablespoon at a time, whisking well after each addition. Once half the sugar has been added start adding the rest in larger quantities, whisking well after each addition, until stiff, glossy peaks form. Use a metal spoon or spatula to fold the hazelnuts through the meringue. Spoon the meringue onto the prepared trays and spread evenly in a rectangle until about 1-1½cm thick. Bake in preheated oven for 30-40 minutes until a crisp crust forms. Remove from the oven and cool for 20 minutes on the trays and then transfer them to wire racks, still on the baking paper, to cool completely. Carefully remove the baking paper and transfer to a cutting board. Use a 6cm round cutter to cut discs from the meringue sheets. Set aside in an airtight container.
                      12. To make the mirror glaze, place 80ml (1/3 cup) of the cold water into a small bowl or dish and sprinkle the gelatin over. Set aside for 5 minutes or until the gelatin is fully rehydrated.
                      13. Combine the remaining water, sugar and condensed milk in a small saucepan over a medium heat. Stir occasionally until the mixture begins to bubble. Remove from the heat, add the gelatin mixture and stir until fully dissolved. Add the white chocolate chips and stir slowly until melted. Pour the mixture through a sieve into a large jug and set aside to cool to room temperature.
                      14. Remove the petit gateaux domes from the fridge and place on a wire rack over a larger oven tray to catch the drips. Carefully and slowly pour the glaze over ensuring the domes are completely covered. Sprinkle dried lavender on top to decorate if desired.
                      15. Set aside at room temperature for at least 20 minutes or until the glaze is set.
                      16. Use a palette knife to transfer the mousse domes to the hazelnut meringue discs and serve.

                    Baker's Tips

                    • The mousse domes will keep in an airtight container in the fridge for up to 2 days.
                    • The Hazelnut meringue will keep in an airtight container at room temperature for up to 1 week.


                    Rachel took inspiration for her creation from:
                    https://www.deliciousmagazine.co.uk/
                    https://www.womensweeklyfood.com.au/
                    https://chelsweets.com
                    https://ballymaloe.ie/content/ballymaloe-recipes

                    Photography by Alan Benson.

                    Honey, Lavender and Hazelnut Meringue Petite Gateaux
                    Prep 15min (+ cooling time)Bake 45-55minMakes about 24

                    Knowing what is going into your muesli bars is the key to good ones – it makes them so much healthier and tastier.

                    Ingredients

                    260g (180ml / ¾ cup) good-quality honey
                    125ml (½ cup) sunflower oil or light olive oil
                    250g (2½ cups) rolled oats
                    30g (1½ cups) puffed millet
                    45g (½ cup) desiccated coconut
                    1½ teaspoon ground cinnamon
                    55g (â…“ cup) sweetened dried cranberries
                    75g (½ cup) currants
                    80g (½ cup) raw almonds, coarsely chopped (see Baker’s Tips)

                          Method

                          1. Preheat the oven to 140ºC (120°C fan-forced). Lightly grease a shallow 20 x 30cm (base measurement) slice tin and line the base and sides with non-stick baking paper.
                          2. Put the honey and oil in a small saucepan over medium heat and stir until well combined and heated through. Set aside.
                          3. Put the rolled oats, millet, coconut, cinnamon, cranberries, currants and almonds in a large bowl and mix to combine evenly. Add the honey mixture and stir to combine well. Using damp hands, press the mixture firmly into the lined tin. Press the mixture with the back of a spoon to make the surface smooth and even.
                          4. Bake for 45–55 minutes or until the surface is dark golden brown all over. Cool completely in the tin before cutting into 24 bars with a sharp knife.

                              Baker's Tips

                              • For a nut-free version, substitute the almonds with â…“ cup sunflower seeds or pepitas (pumpkin seeds).
                              • These muesli bars will keep in an airtight container at room temperature for up to 1 week. Alternatively they also freeze well for up to 3 months – wrap individual bars in plastic wrap and then seal in an airtight container or freezer bag. Thaw at room temperature.
                              • For extra-crisp muesli bars, store in an airtight container in the fridge.


                                Honied Muesli Bars
                                • 1
                                • …
                                • 6
                                • 7
                                • 8
                                • 9
                                • 10
                                • …
                                • 18

                                Follow @bakeclub_australia on Instagram

                                Our partners

                                SUBSCRIBE!
                                contact us
                                • info@bakeclub.com.au

                                • FOLLOW US
                                CUSTOMER INFORMATION
                                • FAQ
                                • Terms of Use
                                • Privacy Policy
                                • Terms of Service
                                • Refund policy

                                © 2025 BakeClub. All Rights Reserved.

                                Site by Fruitful Creative.