SUBSCRIBE TO BAKECLUB!
  •  
0 CART/CHECKOUT

Learn, connect & share through a love of baking

  • Home
  • Classes
    • Live & Guided Online Classes
    • Self-paced Online Classes
    • How to choose an online class
    • Special Events
  • BakeClub & Co.
    • Join BakeClub & Co.
    • Log in to BakeClub & Co.
    • Gift BakeClub & Co.
  • Make Me a Baker Program
    • Make Me a Baker Online
    • Testimonials
    • Graduation gallery
  • Shop
    • Anneka's Books
    • BakeClub Aprons
    • Baking Gifts
    • Gift Certificates
  • Recipes
    • Browse All
    • Bakes that Travel Well
    • Bakes to Share with a Cuppa
    • Baking with Kids
    • Café Favourites
    • Flour-free Recipes
    • International Recipes
    • Recipes to Nurture, Comfort & Calm
    • Savoury Tummy Fillers
    • Winter Warmers
  • Resources
    • BakeClub Blog
    • BakeClub Tips
    • BakeClub Q&A
    • BakeClub Videos
    • BakeNews Archives
    • Subscribe to BakeClub
  • About
    • Who is Anneka Manning?
    • About BakeClub
    • What Our Students Say
    • BakeClub Partners
    • Media
    • Contact Us
  • home
  • Products
Prep 25minBake 45minMakes about 8-10 serves

Dating back to the early British settlers of North America, cobblers are based on seasonal fruits and topped with a wet, scone-like mixture. The result is a simple pie of sorts with the topping resembling cobblestones – thought to be the reason for this homely dessert's name.

Ingredients

  • Melted butter, to grease
  • 800g (about 5 small) firm ripe pears (such as Williams or Packhams), peeled, cored and cut into eighths
  • 1 bunch rhubarb, trimmed and cut into 5cm lengths (you should have about 500g trimmed rhubarb)
  • 135g (⅔ cup, firmly packed) brown sugar
  • 2 teaspoon natural vanilla extract or essence
  • 1½ teaspoon ground cinnamon
  • Vanilla ice cream or cream, to serve

Cobbler Topping

  • 225g (1½ cups) self-raising flour
  • Pinch of salt
  • 125g chilled butter, cubed
  • 75g (⅓ cup) raw sugar sugar, plus 1 tbsp extra for sprinkling
  • 125ml (½ cup) buttermilk, plus extra to glaze

Method

  1. Preheat the oven to 190°C. Lightly grease a 1.5 litre (6 cup) ovenproof dish with the melted butter.
  2. Peel, quarter and core the pears. Cut each quarter in half lengthwise and place in a large bowl. Add the rhubarb, sugar, vanilla and cinnamon and toss gently to combine evenly. Transfer to a.
  3. To make the Cobbler Topping, sift the flour and salt together into a medium bowl. Use your fingertips to rub in the butter until the mixture resembles fine breadcrumbs and the butter is evenly incorporated. Stir in the sugar and make a well in the centre.
  4. Add the buttermilk to the flour mixture and use a flat-bladed knife to mix with a cutting action until the dough comes together in clumps. Use lightly floured hands to bring the dough together – it will be a sticky dough. Use lightly floured hands to roll into 2 cm balls and place randomly over the top of the fruit.
  5. Use a pastry brush to lightly brush the top of the cobbler mixture with the extra buttermilk and then sprinkle with the extra raw sugar.
  6. Bake in preheated oven for 40–45 minutes or until golden brown and the Cobbler Topping is cooked through and the fruit is tender when tested with a skewer. If browning too quickly cover the top with a piece of foil towards the end of baking. Serve warm with ice cream or cream.

Baker's Tips

  • The pears can be replaced by apples in this recipe. Cut them into thin wedges before combining them with the rhubarb, sugar, vanilla and cinnamon.

This recipe is from Anneka's SBS Food online column, Bakeproof: Scones.

CLICK HERE for more Bakeproof recipes.

Photography by Alan Benson.

Pear & Rhubarb Cobbler
Prep 30min (+5min standing time)Bake 1hr 5min-1hr 15minMakes 10-12 serves


This is one of my favourite cakes – ever! Not only is it super easy to whip up and can be made with a whole variety of different fruits (you can replace the pears with the same quantity of plums, firm ripe nectarines or peaches for example), but it is also incredibly versatile when it comes to serving it. It not only makes for the perfect morning or afternoon tea cake but it is also wonderful served warm with lashings of cream or ice cream for dessert. I’ve also been known to eat the leftovers for breakfast (which I would also highly recommend!)

Ingredients

Melted butter, to grease
185g (1¼ cups/6½oz) self-raising flour 
165g (⅔ cup, firmly packed/5¾oz) brown or raw caster sugar, plus 1 tablespoon extra 
125g (4½oz) salted butter, at room temperature 
85g (⅓ cup/3oz) sour cream 
2 eggs, at room temperature
1½ teaspoons natural vanilla extract or essence
2 (about 200g/7oz each) firm but ripe Williams pears, cored and each cut into 12 wedges
Icing sugar, to dust
Cream or ice cream, to serve (optional)

Crumble Topping
50g (⅓ cup/1¾oz) plain flour 
55g (¼ cup, firmly packed/2oz) brown or raw caster sugar 
1 teaspoon ground cinnamon
60g (2oz) salted butter, chilled, diced 
50g (½ cup/1¾oz) flaked almonds

Method

  1. Preheat oven to 170°C/340°F (150°C/300°F fan-forced). Grease a 21cm (81⁄4in), base measurement, springform tin with melted butter and line the base with non-stick baking paper.
  2. To make the Crumble Topping, combine the flour, sugar, and cinnamon in a medium bowl. Use your fingertips to quickly rub in the butter just until the mixture resembles coarse breadcrumbs (it will be quite moist). Stir in the almonds. Cover and put in the fridge while making the cake.
  3. To make the cake, place the flour, sugar, butter, sour cream, eggs and vanilla in a large mixing bowl. Use an electric mixer fitted with a paddle attachment to beat on low speed until combined. Increase the speed to high and beat for 3 minutes or until the mixture is well combined, very pale in colour and silky smooth in texture. Spoon the mixture into the prepared tin and smooth the surface with the back of a spoon.
  4. Toss the pear wedges with the extra 1 tablespoon sugar. Arrange the pears evenly over the top of the cake and then press gently into the batter. Sprinkle with the prepared Crumble Topping to cover.
  5. Bake in preheated oven for 65-75 minutes (the baking time will depend on how juicy the pears are) or until a skewer inserted into the centre comes out clean. Stand the cake in the tin for 5 minutes before transferring, still on the base of the tin, to a wire rack. Serve warm or at room temperature on its own or accompanied by cream or ice cream, if desired.

Variation

Brown Butter Pear Crumble Cake: Replace the butter in the cake with 125g (4½oz) brown butter, solidified but softened. Replace the butter in the crumble with 60g (2oz) browned butter, chilled and diced.

Pear Crumble Cake
Prep 40min (+20min chilling and 1hr 25min cooling time)Bake 45minMakes 8 serves

Traditionally made with apples, this classic upside-down French tart was created by the Tatin sisters who ran a hotel in France in the early 1900s. If you don't have an ovenproof frying pan, transfer the cooled caramel and pears to a base-lined 22cm round cake tin before covering them with the pastry and baking.

Ingredients

Ground cinnamon, to sprinkle
Vanilla ice-cream, cream or crème fraiche, to serve
1 quantity Shortcrust Pastry
80g (2¾oz) salted butter, cubed
110g (½ cup/4oz) caster sugar
1.1kg (2lb 7oz) small (about 7) pears (such as Josephine), peeled, halved and cored

    Method

    1. Prepare the Shortcrust Pastry.
    2. Meanwhile, melt the butter in a 20–22cm/8-8¼in(base measurement) heavy-based frypan over medium-high heat. Sprinkle with the sugar and then arrange the pears, cut-side up, in the pan, cutting some of the halves into quarters to fill the gaps. Reduce the heat to medium and cook, uncovered, for 15 minutes or until the liquid becomes a dark caramel and the pears are almost tender and golden underneath. Remove the pan from the heat and set aside for 1 hour 15 minutes or until cooled completely.
    3. Preheat oven to 190°C/375°F (170°C/340°F fan-forced).
    4. Use a lightly floured rolling pin to roll the pastry out on a lightly floured bench top to about 5mm/¼in thick and then cut into a circle about 26cm/10½in in diameter. Place the pastry over the cooled pears in the pan and carefully tuck the pastry edge around the fruit and down the side of the pan. Bake in preheated oven for 45 minutes or until the pastry is deep golden and cooked through and the pear juices are bubbling. Remove from the oven and set aside for 10 minutes to cool slightly.
    5. Place a serving plate with a lip over the top of the tart and invert. Serve immediately cut into wedges and accompanied by ice-cream, cream or crème fraiche.

    This recipe is from Anneka's SBS Food online column, The real secrets of French baking.

    CLICK HERE for more Bakeproof recipes.

    Photography by Alan Benson.

    Pear Tarte Tatin
    Prep 40min (+1.5hr chilling and 20min standing time)Bake 18-22min (per batch)Makes about 40

    These delicious biscuits get their name from the pepper that, along with the ginger, gives them their "warming" flavour. I’ve made these as reindeer, but you can make them any shape you wish. Also, have fun experimenting with the icing decoration, giving them your own creative touch.

    Ingredients

    150g (5¼oz) unsalted butter, softened
    150g (5¼oz/¾ cup, lightly packed) brown sugar
    2 tablespoons golden syrup
    2 tablespoons treacle
    1 egg yolk, chilled
    450g (3 cups/15¾oz) plain flour
    2 teaspoons ground ginger
    1 teaspoon ground cinnamon
    ½ teaspoon ground cardamom
    ½ teaspoon ground cloves
    ¼ teaspoon finely ground black pepper
    ½ teaspoon baking powder
    ½ teaspoon bicarbonate of soda
    60ml (¼ cup/2fl oz) milk

    Icing
    375g (3 cups/13¼oz) pure icing sugar
    2-3 tablespoons (40-60ml/1⅓fl oz-2fl oz) water

    Method

    1. Use an electric mixer to beat the butter and sugar until just pale and creamy. Add the golden syrup, treacle and egg yolk and beat to combine.
    2. Sift together the flour, ginger, cinnamon, cardamom, cloves, pepper, baking powder and bicarbonate of soda. Add half the flour to the butter mixture and beat on lowest possible speed until just combined. Mix in the milk and then the remaining flour until just combined and a soft dough forms.
    3. Divide the dough into 4 portions. Shape each into a disc, wrap in plastic wrap and place in the fridge for 1 hour or until firm enough to roll.
    4. Preheat the oven to 170°C/340°F (150°C/300°F fan-forced). Line 3 large oven trays with non-stick baking paper.
    5. Use a lightly floured rolling pin to roll out one portion of dough on a lightly floured surface until 3mm/⅛in thick.
    6. Use a cutter/s of your choice to cut out shapes from the rolled dough and use a palette knife to carefully transfer to a lined tray, leaving a little room between each. Repeat with the remaining dough portions, rerolling any leftover dough. Place the trays of biscuits in the fridge for 30 minutes to chill.
    7. Bake two trays of biscuits in preheated oven for 18-22 minutes, swapping the trays halfway through baking, or until they start to colour around the edges and are cooked through. Cool on the trays. Bake the remaining tray of biscuits as before.
    8. To make the icing, sift the icing sugar into a medium bowl. Gradually add 2 tablespoons (40ml/1⅓fl oz) of the water and mix until smooth. The icing should be a piping consistency (see Baker’s Tips). If it's too thick, stir in the remaining water ½ tsp at a time until the icing reaches the correct consistency. Divide the icing between two resealable plastic bags, seal and then cut a small hole in one of the corners of each to pipe through.
    9. Use the icing to decorate the cooled biscuits as desired. Set aside for about 20 minutes or until the icing sets before serving or storing.

    Baker's Tips

    • To test if the icing is the correct consistency for piping, drizzle a little on a plate and set aside for a few minutes. If it keeps its shape, it's ready.
    • These biscuits are lovely iced with a lemon icing. Replace the water in the icing with strained fresh lemon juice.
    • These biscuits will keep in an airtight container or jar at room temperature for up to 1 week.
    Pepperkaker (Norwegian Christmas Biscuits)
    Prep 30min (+20min cooling time)Bake 15minMakes about 50

    Often associated with Christmas in Germany, these bite-sized mouthfuls of gingerbread deliciousness actually originated in Scandinavia. The combination of a soft, highly spiced centre hidden beneath a crisp, sugar-powdered outer coat is pure, festive heaven.

    Ingredients

    125g (4½oz) unsalted butter, softened slightly
    110g (½ cup, firmly packed/4oz) dark brown sugar
    1 lemon, zest finely grated
    1 orange, zest finely grated
    90g (¼ cup/3oz) honey
    1 egg, at room temperature
    40g (¼ cup/1½oz) finely chopped candied citrus rind / mixed peel
    350g (2⅓ cups/12¼oz) plain flour
    ½ teaspoon baking powder
    ½ teaspoon bicarbonate of soda
    2 teaspoon ground cinnamon
    ½ teaspoon ground black pepper
    ½ teaspoon ground ginger
    ¼ teaspoon crushed aniseed
    ½ teaspoon ground nutmeg
    ¼ teaspoon ground cloves
    ¼ teaspoon ground allspice
    125g (1 cup/4½oz) pure icing sugar, to dust

    Method

    1. Preheat oven to 160°C/315°F (140°C/285°F fan-forced). Line two large oven trays with non-stick baking paper.
    2. Use an electric mixer with a paddle beater to beat the butter, sugar and citrus zest until just creamy. Add the honey and beat until just combined. Add the egg and beat until evenly combine. Mix in the candied citrus rind / mixed peel.
    3. Sift together the flour, baking powder, bicarbonate of soda and spices. Add the flour mixture to the butter mixture and beat on lowest possible speed until just combined and a soft dough forms.
    4. Roll heaped teaspoonfuls of the mixture into balls and place 5cm/2in apart on the lined trays. Bake in preheated oven for 10-12 minutes, swapping the trays halfway through baking, or until they start to crack and are just cooked through.
    5. Sift the icing sugar into a medium bowl. Add about 6 warm biscuits to the icing sugar and toss to coat generously. Place on a wire rack to cool and repeat with the remaining biscuits.

    Baker's Tips

    • The uncooked dough will keep covered in the fridge for up to 2 days. Roll and bake straight from the fridge.
    • These biscuits will keep in an airtight container at room temperature for up to 1 month.
    • Dust with icing sugar again just before serving if desired.
    This recipe is from Anneka's SBS Food online column, Bakeproof: Festive Cookies.
    CLICK HERE for more Bakeproof recipes.

    Photography by China Squirrel.
    Pfeffernüsse (Spice Cookies)

    $50.00/pp

    more info
    Physical Gift Certificate
    - Products -

    Special offer! Buy a BakeClub & Co. 6-month or 1-year membership Physical Gift Certificate and get a BakeClass book for free! Simply add both to your cart and the offer will be activated at checkout.

    The perfect gift for any occasion, a BakeClub Gift Certificate will give someone special an experience to remember!

    Gift Certificates can be redeemed for an online class, workshop, Make Me a Baker programs, BakeClub & Co. membership or in our shop.

    If you are purchasing a BakeClub & Co. membership for someone else, please include their name and email address in the 'Special delivery requests' box on the next page.

    Prep 25min (+ lemon curd making time)Bake 50minMakes 10-12 serves

    This wonderful cake was created by one of our Make Me a Baker graduates, Lisa Frost, for her graduation ceremony. Mor-ish with a lovely 'wholesomeness', the secret to this wonderful cake is that  a layer of Lisa's  vegan lemon curd is baked into the cake giving it a fabulously tangy, moist centre.

    Ingredients

    1 quantity Vegan Lemon Curd, chilled
    Double / thick cream, to serve
    2 tablespoons coarsely chopped pistachios, to serve

    Cake

    Cooking oil spray, to grease
    160g (1¼ cups) finely chopped pistachios kernels
    125g unsalted butter, at room temperature
    150g (¾ cup) organic coconut sugar 
    1½ tablespoons finely grated lemon rind
    50g (¼ cup) apple puree
    3 eggs, at room temperature
    100g (⅔ cup) plain cake flour
    1 teaspoon baking powder 

      Method

      1. Preheat oven to 180°C (160°C fan-forced). Grease a 22cm round springform tin then line base and sides with 2 layers of baking paper. Spray the side lining paper with oil, avoiding the base of the pan. Place ¼ cup of the pistachios in the pan and rotate pan on its side to coat the side with nuts.
      2. Use an electric mixer to beat the butter, sugar and lemon rind until pale and creamy, scraping down the side of the bowl when necessary. Mix in the apple puree on low speed. Add the eggs one at a time, beating well after each addition until well combined.
      3. Sift together the flour and baking powder. Add ⅔ cup of the remaining pistachios and stir to combine. Use a large metal spoon or spatula to fold the dry ingredients into the egg mixture until just combined.
      4. Spoon the cake mixture into tin, spreading evenly. Drop the tin on the bench to settle the mixture. Spread 1 cup of the chilled curd over batter, spreading evenly. Sprinkle with the remaining pistachios. Cover the surface of the remaining curd with plastic wrap and return to the fridge.
      5. Bake for 40 minutes. Cover the surface of the cake lightly with a round of baking paper to prevent the nuts from burning and return to the oven for another 10 minutes or until a skewer inserted into the centre comes out clean (the top of the cake will still be slightly wobbly).
      6. Allow the cake to stand in the pan for at least 10 minutes before removing the side. Serve warm or at room temperature with the cream, remaining lemon curd and pistachios.
        Pistachio & Lemon Curd Cake
        Makes 8 serves

        The recipe for this lovely, tangy cake was given to me by the wonderful food writer and cooking teacher Elise Pascoe, and I have made it time and again since she passed it on to me. The original version was made with lemons; however, as our lime trees are such bountiful providers for so much of the year, I tend to make it with limes instead. It’s a gorgeous, simple cake: light, tangy and so eye-catching with its mantel of pistachios and pale-green hue. In season, translucent beads of pomegranate look extraordinarily beautiful scattered over the cake, giving it a mysterious, exotic quality.

        Just a note about the pistachios for this cake – to grind them, I pulse them in the food processor with a tablespoon of flour from the recipe, as the flour helps prevent them becoming oily and forming a paste. Nonetheless, you do have to be watchful as they can go from being perfectly chopped to pasty in the blink of an eye. 

        Ingredients

        60g plain flour
        1 teaspoon baking powder 
        100g pistachios, finely ground
        finely grated zest of 3 large limes
        120g almond meal 
        250g unsalted butter, at room temperature
        200g caster sugar
        4 (60g) eggs, at room temperature
        ⅓ cup (80g) pomegranate seeds, to decorate, optional
        softly whipped cream or thick Greek-style yoghurt, to serve
         
        Pistachio and lime syrup topping
        90g caster sugar
        ½ cup (125ml) fresh lime juice (from approximately 3 large limes), strained
        90g pistachios, roughly chopped

        Method

        1. Preheat your oven to 170°C. Butter a 22–24cm round cake tin, line the base with buttered baking paper then dust the tin with flour. (I use a torte tin that I’ve had for years to make this – it has slightly sloping sides and measures 24cm across the top and 22cm across the base.)
        2. Tip the flour, baking powder, ground pistachios, lime zest and almond meal into a medium-sized bowl. Whisk them together with a balloon whisk for a minute or so, then set the bowl aside.
        3. Put the butter and sugar into the bowl of an electric mixer (or use a hand-held electric beater) and beat them on medium speed for about 4 minutes, stopping and scraping down the sides occasionally, until the mixture looks creamy. Beat in the eggs, one at a time, allowing each egg to be absorbed before adding the next. (Don’t worry if the mixture looks a little curdled after adding the last egg – it will come together again when you add the dry ingredients.) Tip in the flour mixture and mix everything together on low speed just until it is combined – be careful not to over-mix it, or the cake may be a bit tough. Scrape the batter into the prepared tin and smooth the top.
        4. Bake the cake for 45–50 minutes, or until it springs back when lightly pressed in the centre and a skewer inserted in the middle comes out clean. Transfer it to a wire rack and leave it to cool a little in the tin.
        5. When the cake is lukewarm, make the syrup. To do this, put the sugar and lime juice into a small saucepan over low heat and stir until the sugar dissolves. Add the chopped pistachios, increase the heat and bring the mixture to the boil.
        6. Turn the cake out onto a serving plate and peel away the paper. Slowly spoon the hot pistachio and lime syrup evenly over the top, then leave the cake to cool completely. Just before serving, scatter it with pomegranate seeds, if using. Serve with softly whipped cream or yoghurt. 

        This recipe is from Belinda Jeffery's In Belinda's Kitchen.

        You can read more about what Belinda is baking this winter here.

        Pistachio & Lime Syrup Cake with Pomegranate Seeds by Belinda Jeffery

        $100.00/pp

        more info
        Puff Pastry
        - Products -

        Puff Pastry LIVE will take place on Sunday 24th May 2026 from 10am-1pm.

        Master the art of making delicate puff pastry in this accessible and informative live online baking class!

        CLICK HERE TO BOOK NOW!


        We highly recommend that you complete our Shortcrust Pastry online course before taking part in this course. If you book our 3 pastry classes together (Puff Pastry, Shortcrust Pastry and Leavened Puff Pastry), you can save 15% with our special bundle deal.
        CLICK HERE TO BUY THE 3-COURSE BUNDLE!


        If you have already completed Shortcrust Pastry, you can book our advanced pastry bundle (Puff Pastry and Leavened Puff Pastry) and save 15%.
        CLICK HERE TO BUY THE 2-COURSE BUNDLE!

        Not only did I get what I expected out of the course, but I got so much more ... Hands on is the best way to learn and the live demonstration and instant feedback from Anneka is priceless. The tips and skills you learn are so helpful and instructive. Who thought making puff pastry could be so relaxing and rewarding at the same time?

        Mary, Sydney

        Master the art of making delicate puff pastry – right in your very own kitchen!

        Puff Pastry is an informative and accessible 3-hour LIVE virtual baking class where you will learn all there is to know about making puff pastry (also known as mille feuilles) – all from your very own kitchen. This class will take place on Sunday 24th May 2026 from 10am-1pm (AEST).

        Anneka Manning will take you through the process and share her more than 35 years of baking experience, knowledge and research, as well as all of her practical and handy tips and tricks.

        The virtual Live Session will be supported by printable recipes and resources that you can study at your own pace ensuring that you gain the confidence and skill to bake your own delicious puff at home. Anneka will also share some of her tried-and-tested recipes from Lamb and Harissa Sausage Rolls to a classic Vanilla Slice.

        At the end of this class, you will walk away with all the knowledge, skill and confidence you need to be able to bake your own divine puff pastry at home and never rely on store-bought pastry again.

        Dates

        Sunday 24th May 2026 at 10am-1pm, Australian Eastern Standard Time (UTC+10) via Zoom.

        If you are interested in joining a future class and would like to be notified when new dates are released, please fill in your details at the bottom of this page. 

        Please note: The Live Session will be recorded and available for you to watch afterwards if you are unable to attend, or rewatch it at a later date if you would like to.

        Cost

        $100 (50% off for all BakeClub & Co. Members).

        CLICK HERE TO BOOK NOW!
        Student numbers

        We will only be accepting a limited number of bakers for this class so that Anneka can answer your baking questions during the Live Session and provide personal feedback.

        Who is this course suitable for?

        This course is aimed at intermediate to experienced bakers. We highly recommend that you complete our Shortcrust Pastry online class before taking part in this course. If you book our 3 pastry classes together (including this course, Shortcrust Pastry and Leavened Puff Pastry), you can save 15% with our special bundle deal.

        CLICK HERE TO BUY THE 3-COURSE BUNDLE!


        As this course is completed online, it is suitable for students from all over the world.

        What will I learn?
        • The basics of laminated pastries
        • Laminating techniques
        • How the puff is created
        • How to shape and incorporate your butter
        • Making puff pastry in advance
        • Making your dough in a food processor
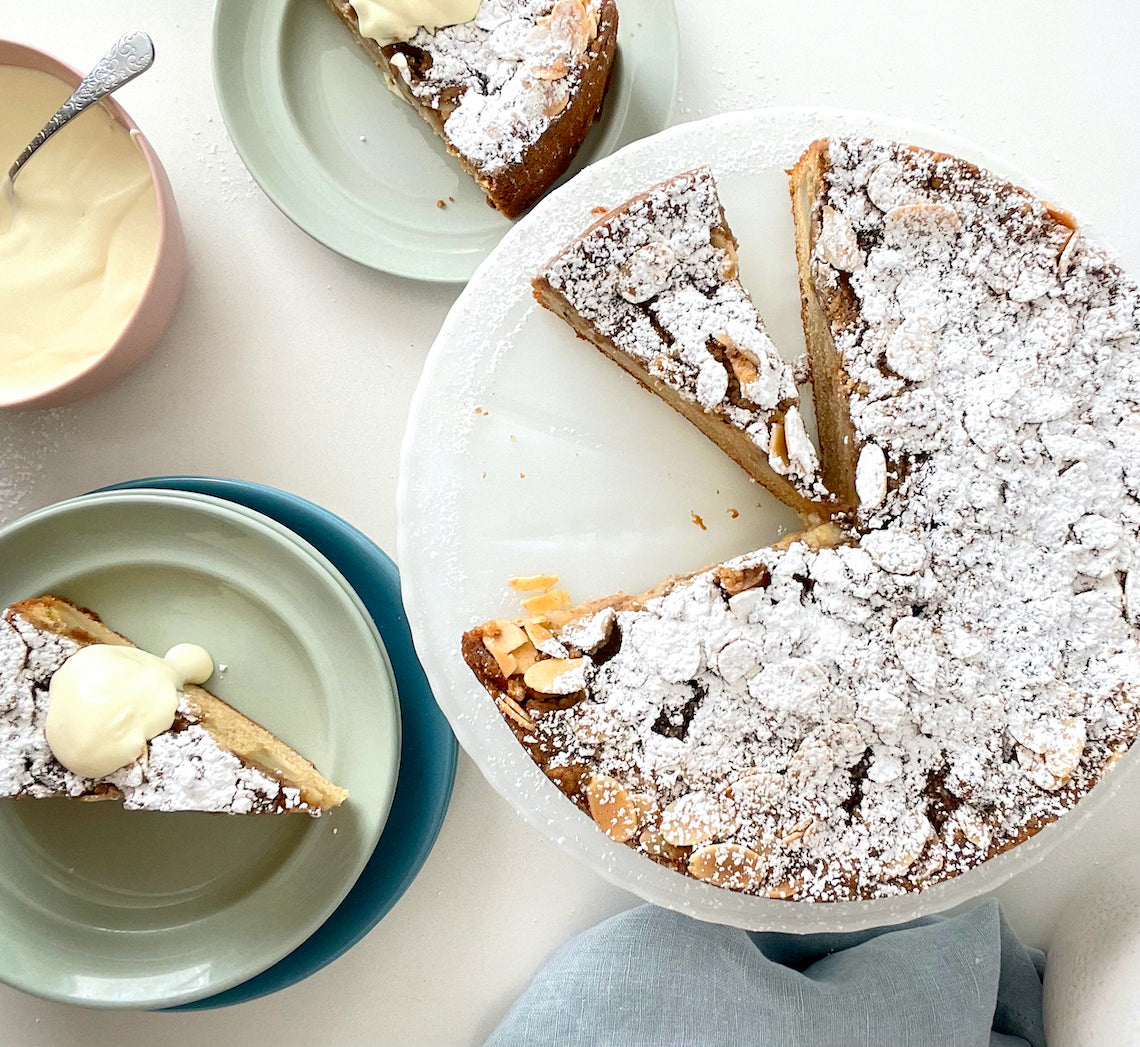
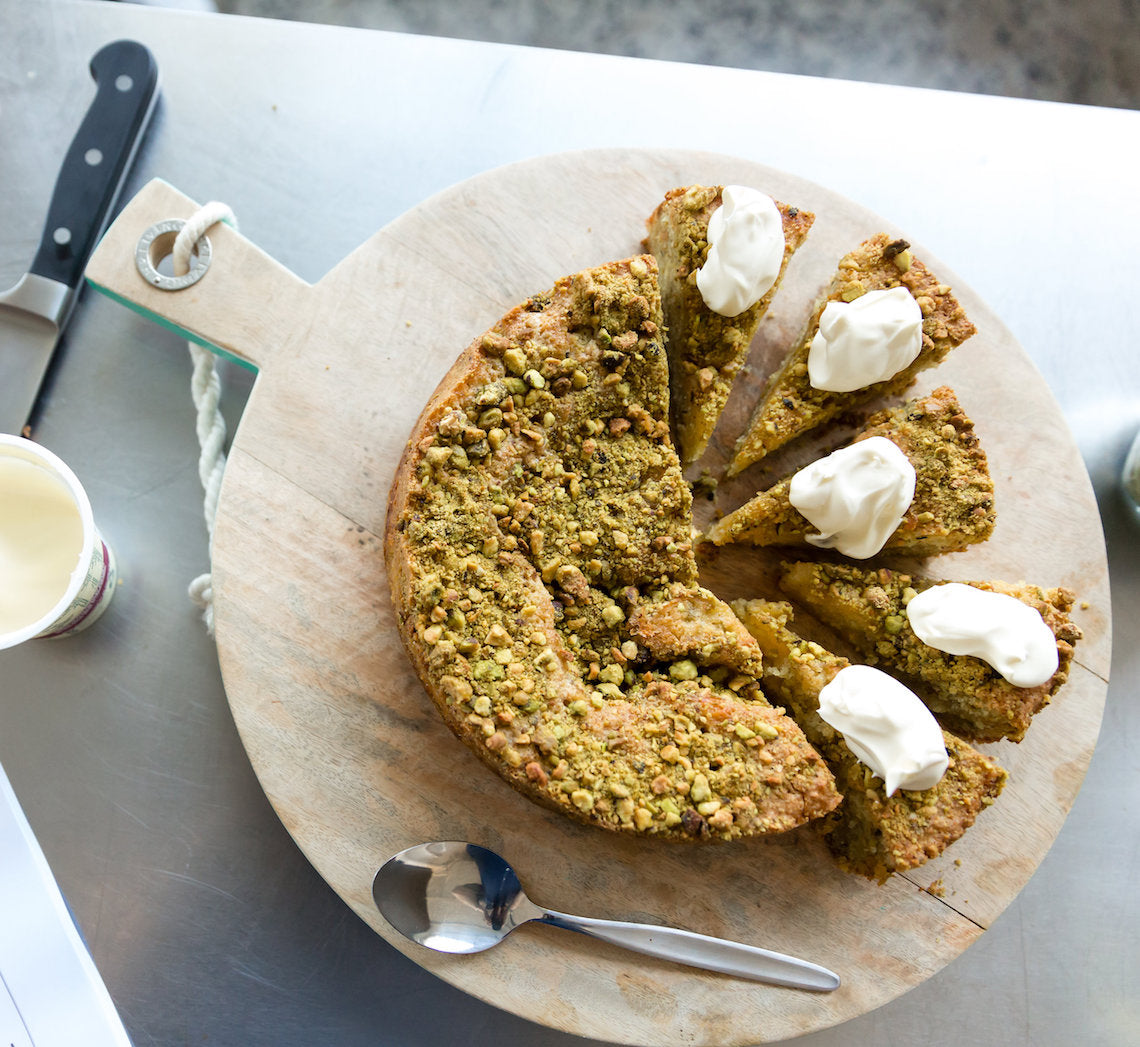
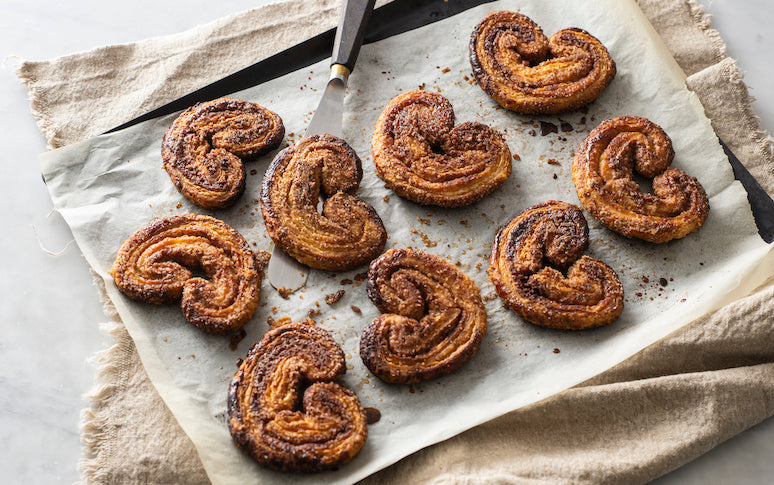
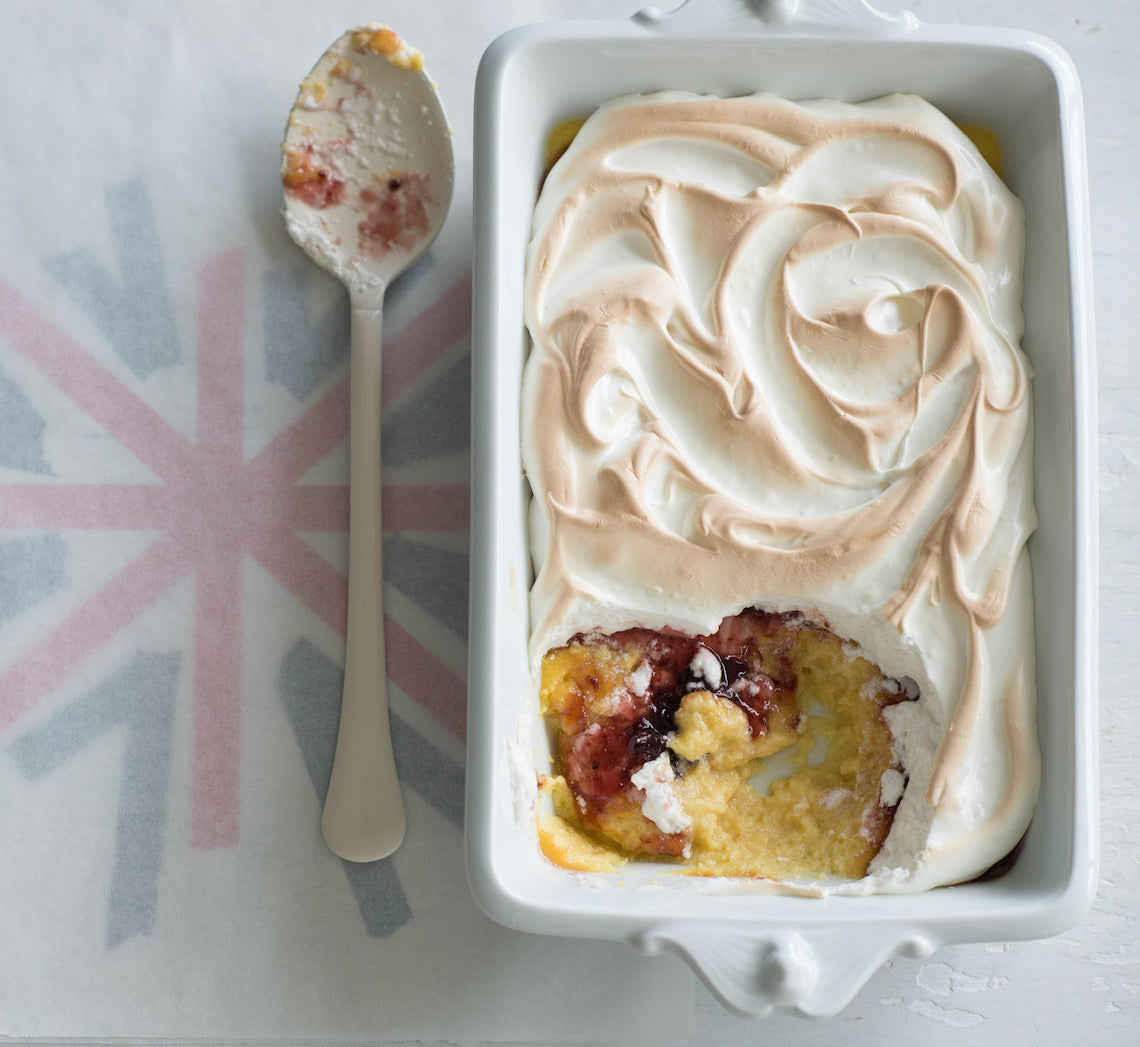
        • Recipes included: Cinnamon Palmiers, Apple and Raisin Turnovers, Lamb and Harissa Sausage Rolls, Eggplant Galette with Roasted Capsicum and Walnut Sauce and White Peach and Basil Mille Feuille
        What will I receive?
        • A 3-hour virtual live baking demonstration on Zoom (recorded for you to rewatch at your convenience) where Anneka Manning will guide you step-by-step through the process of making your own puff pastry – including the opportunity to bake Cinnamon Palmiers alongside her.
        • Access to Anneka’s 35+ years of baking experience and expertise, with the ability to ask any questions that arise during the class.
        • The chance to connect (virtually) with like-minded bakers and share your creations within The Kitchen Table online group.
        • A thorough understanding of how to make shortcrust pastry, plus the knowledge to troubleshoot and apply these skills in the future for consistent baking success.
        • Invaluable printable information sheets and recipes to support your learning and reference in your own kitchen.
        • Lifetime access to the live video and all course materials, so you can revisit the class whenever you like.
        • Membership to BakeClub’s exclusive The Kitchen Table online group, providing a space to ask questions and share your baking journey.
        • Lasting baking confidence, knowledge and skills you can use regularly at home.

        There is no comparison between commercially made and homemade puff pastry. What seems so exotic and unattainable is made absolutely possible by Anneka's expert and easily mastered explanation and demonstration and support. Do the course and access a whole range of recipes you have always lusted over but thought you had to be a qualified pastry chef to attempt. You will be that pastry chef!

        Irene, New South Wales

        How will I get the most out of this online class?

        To get the most from this class, we recommend setting aside time to attend the Live Session with Anneka and review the supporting materials beforehand. If you’re unable to join live, the session will be recorded so you can watch it at a time that suits you.

        For the best experience and results, we encourage you to bake along during the class – it’s the perfect way to put the techniques into practice and gain the full benefit of Anneka’s guidance.

        What if the dates don't suit me? Can I still enrol in the class?

        If the date of this class doesn't work for you, you can still enrol and take part in your own time. While you may miss out on the Live Session, it will be recorded and will be available to watch when it suits you. You will have lifetime access to the video, as well as all the course material (including all of the resources and recipes).

        I was always intrigued by homemade puff pastry but was always a little unsure of how to go about it. It seemed such a daunting kitchen task to overcome! The course gave me the confidence and showed me that it’s not that hard after all. I loved the virtual hands on class ... to be able to watch Anneka online was wonderful ... she is a wonderfully generous teacher!

        Amy, Victoria

        CLICK HERE TO BOOK NOW!


        CLICK HERE FOR OUR OTHER ONLINE COURSES!


        If you are interested in joining a future LIVE class, please fill out your details below and we'll be in touch when new dates are released.


        Prep 25minBake 30-35minMakes 8-10 serves

        This traditional English pudding is quintessential nursery food – nurturing, soul-warming and economical. Feel free to replace the mixed berry jam with raspberry, plum or strawberry to ensure the sweet but subtle middle layer suits your tastes.

        Ingredients

        500ml (2 cups/17fl oz) milk
        55g (¼ cup/2oz) caster sugar
        30g (1 oz) salted butter, diced
        Finely grated zest of 1 lemon
        5 egg yolks (from 60g/2oz eggs), at room temperature
        2½ teaspoons natural vanilla essence or extract
        150g (2½ cups, lightly packed/5¼oz) fresh white breadcrumbs
        85g (¼ cup/3oz) mixed berry jam (see Baker’s Tips)
        1 tablespoon icing sugar, to dust

        Meringue Topping
        3 egg whites (form 60g/2oz eggs)
        Large pinch of salt
        110g (½ cup/4oz) caster sugar
        1 teaspoon natural vanilla extract or essence

          Method

          1. Put the milk, sugar, butter and lemon zest in a medium saucepan and stir over medium heat until the sugar dissolves and the butter melts. Use a balloon whisk to whisk the egg yolks in a medium heatproof bowl until smooth. Gradually add the warm milk mixture, whisking constantly until well combined. Stir in the vanilla and breadcrumbs.
          2. Pour the custard mixture into a shallow 1-litre (4-cup/1.75pt) ovenproof dish. Set aside for 15 minutes for the bread to soak up some of the custard.
          3. Preheat oven to 170ºC/340°F (150ºC/300°F fan-forced).
          4. Place the ovenproof dish into a roasting pan or larger ovenproof dish. Add enough boiling water to the roasting pan or larger ovenproof dish to reach halfway up the sides of the dish with the custard mixture to create a water bath or bain-marie.
          5. Bake in preheated oven for 20-25 minutes or until the custard has almost set but still wobbles slightly when touched on the top. Remove from the oven and remove the custard dish to a wire rack. Set aside for 20 minutes or until cooled slightly (stop here if pre-preparing your pudding, see Baker's Tips). 
            Increase the oven temperature to 190ºC/375°F (170ºC/340°F fan-forced).
          6. To make the Meringue Topping, use an electric mixer with a whisk attachment to whisk the egg whites and salt on medium-high speed until soft peaks form. With the motor running, gradually add the sugar, a spoonful at a time, and whisk until the sugar has dissolved completely and the mixture is thick and glossy. Whisk in the vanilla.
          7. Carefully spread the jam over the top of the custard (see Baker's Tips). Spread the Meringue Topping over the jam to cover, swirling as desired.
          8. Bake in preheated oven for 10 minutes or until the meringue is lightly golden (see Baker’s Tips). Serve immediately.

          Baker's Tips

          • You can cover the bottom of the roasting pan or larger ovenproof dish with a folded tea towel to stop the dish with the custard sliding around when transferring it to and from the oven.
          • You can make this pudding up to the end of step 4 (note in method) up to 2 days before serving. Stand the puddings at room temperature for 30 minutes before continuing with the recipe.
          • If your jam is a little thick you can warm it in a small saucepan over a low heat, stirring often, until runny, to make it easier to spread.
          • You can caramelise the meringue topping with a blowtorch instead of baking it a second time for a more ‘dramatic’ effect if you wish.

          This recipe is from Anneka's SBS Food online column, Bakeproof: Best of British Baking.

          CLICK HERE for more Bakeproof recipes.

          Photography by Alan Benson.

          Queen of puddings
          Prep 15minBake 25minMakes about 30

          Crisp, moreish and flavoursome this shortbread is everything a good biscuit should be. As a bonus it is also simple and super quick to make!

          It's a perfect one to make ahead of time and as you can keep it in the fridge or freezer ready to slice. And if you don't want to bake all of the biscuits at once, simply return any leftovers to the freezer to have freshly baked biscuits at a moment's notice.

          Ingredients

          150g (1 cup/ 5¼oz) plain flour, plus extra for dusting
          30g (¼ cup/1oz) cornflour
          70g (⅔ cup/2½oz) almond meal
          110g (4oz) icing sugar mixture
          1 orange or lemon, zest finely grated
          150g (5¼oz) salted butter, diced, at room temperature
          Finely grated lemon or orange zest, extra, to decorate (optional)


          Method

          1. Place all the ingredients in the bowl of a food processor and process using the pulse button for about 1 minute or until the mixture starts to form a dough  – be careful not to over mix.
          2. Turn the dough onto a very lightly floured bench top, bring together with your hands and then knead briefly until smooth. Divide into two equal portions and roll each into thick sausages about 4cm/1½in in diameter and 15cm/6in long. Wrap in plastic wrap or baking paper and place in the fridge for at least 1 hour or until ready to bake.
          3. Preheat the oven to 160°C/315°F (140°C/285°F fan-forced). Line two oven trays with non-stick baking paper.
          4. Unwrap the biscuit dough, slice into 1cm-thick rounds and place on the baking trays about 3cm/1¼in apart to allow for spreading. Sprinkle each biscuit with a little extra citrus zest if using.
          5. Bake immediately in preheated oven for 25 minutes, swapping the trays halfway through baking, or until pale golden and cooked through. Remove from the oven and cool on the trays.

          Baker's Tips

          • If you don’t have a food processor, leave the butter at room temperature for 10-30 minutes or until it has softened slightly and then use your fingertips to rub the butter through the dry ingredients until a dough starts to form. Continue from Step 2.
          • These biscuits will keep in an airtight container or jar for up to 2 weeks. They also freeze well – seal in a snaplock bag, label with the date date and freeze for up to 3 months. Thaw at room temperature.
          • The uncooked dough, rolled into logs and wrapped well in plastic wrap, can be kept in the fridge for up to 2 weeks. It can also be kept in the freezer, sealed in freezer bags or an airtight container, for up to 3 months. Stand at room temperature for 10-20 minutes to soften slightly or thaw completely in the fridge before slicing and baking.

          Variations

          Quick-Mix Chocolate & Hazelnut Shortbread – Replace 35g(¼ cup/1¼oz) plain flour with 30g (¼ cup/1oz) sifted cocoa powder and replace the almond meal with the same quantity of hazelnut meal.

          Quick-Mix Pistachio & Cardamom Shortbread – Replace the vanilla with ½ teaspoon ground cardamom. In step 2, add 70g (½ cup/2½oz) pistachio kernels, chopped, and mix in as you knead until evenly combined. Continue with the recipe.

          Quick-Mix Almond & Citrus Shortbread
          Prep 25min (+overnight standing time)Bake 55minMakes 6-8 serves

          Quinoa porridge is currently the darling of the café menu. This one is a no-fuss baked version teamed with tangy rhubarb and a vanilla and honey-spiked labna, so you can enjoy this beauty without even leaving home.

          Ingredients

          300g (1½ cups) white quinoa
          500ml (2 cups) boiling water
          55g (¼ cup, firmly packed) brown sugar
          1 cinnamon stick
          375ml (1½ cups) milk
          Toasted pistachio kernels, chopped, to serve

          Vanilla-honey labna
          1½ vanilla beans, split and seeds scraped
          390g (1½ cup) greek-style natural yoghurt
          ¼ cup honey

          Roasted rhubarb
          550g trimmed rhubarb (about 2 bunches), cut into 6cm lengths
          110g (½ cup) raw sugar

            Method

            1. To make the Vanilla labna, place the vanilla seeds (reserve the bean for the rhubarb), yoghurt and honey in a bowl and stir to combine evenly. Line a sieve with two layers of muslin cloth or a linen tea towel and place over a bowl. Spoon the yoghurt into the sieve, fold any overhanging cloth over to enclose the yoghurt. Refrigerate overnight (at least 8 hours) to drain.
            2. Preheat oven to 200ºC (180ºC fan-forced). To make the Oven-baked quinoa, combine the quinoa, boiling water, brown sugar and cinnamon in a 1.5 litre capacity (6 cup) ovenproof dish. Cover with foil and bake for 30 minutes, stirring occasionally.
            3. Meanwhile, to make the Roasted rhubarb, rinse the rhubarb and shake off any excess water. Place in a bowl with the sugar and reserved vanilla bean and toss to combine. Transfer to an ovenproof dish just large enough to hold the rhubarb in a single layer and cover with foil.
            4. After the quinoa has been baking for 30 minutes, stir in the milk, cover and return to the oven with the rhubarb. Bake for another 20 minutes, stirring the quinoa 2-3 more times during baking.
            5. Remove the foil from the rhubarb and bake both for a further 5 minutes or until the quinoa is tender and porridge-like and the rhubarb is still holding its shape but tender when tested with a skewer.
            6. Immediately spoon the quinoa porridge into bowls, top with the rhubarb and pan juices, and a spoonful of labna. Sprinkle with pistachios and serve immediately.

            Baker's Tips

            • The rhubarb can be roasted up to 2 days before serving and kept in an airtight container in the fridge. Remove from the fridge about 1 hour before serving to bring to room temperature
            • The vanilla and honey labna can be made up to 3 days before serving. Keep in an airtight container in the fridge.

            This recipe is from Anneka's SBS Food online column, Bakeproof: Autumn Brunch

            CLICK HERE for more Bakeproof recipes.

            Photography by Alan Benson.

            Quinoa Porridge with Roasted Rhubarb and Vanilla-Honey Labna
            • 1
            • …
            • 11
            • 12
            • 13
            • 14
            • 15
            • …
            • 18

            Follow @bakeclub_australia on Instagram

            Our partners

            SUBSCRIBE!
            contact us
            • info@bakeclub.com.au

            • FOLLOW US
            CUSTOMER INFORMATION
            • FAQ
            • Terms of Use
            • Privacy Policy
            • Terms of Service
            • Refund policy

            © 2025 BakeClub. All Rights Reserved.

            Site by Fruitful Creative.