SUBSCRIBE TO BAKECLUB!
  •  
0 CART/CHECKOUT

Learn, connect & share through a love of baking

  • Home
  • Classes
    • Live & Guided Online Classes
    • Self-paced Online Classes
    • How to choose an online class
    • Special Events
  • BakeClub & Co.
    • Join BakeClub & Co.
    • Log in to BakeClub & Co.
    • Gift BakeClub & Co.
  • Make Me a Baker Program
    • Make Me a Baker Online
    • Testimonials
    • Graduation gallery
  • Shop
    • Anneka's Books
    • BakeClub Aprons
    • Baking Gifts
    • Gift Certificates
  • Recipes
    • Browse All
    • Bakes that Travel Well
    • Bakes to Share with a Cuppa
    • Baking with Kids
    • Café Favourites
    • Flour-free Recipes
    • International Recipes
    • Recipes to Nurture, Comfort & Calm
    • Savoury Tummy Fillers
    • Winter Warmers
  • Resources
    • BakeClub Blog
    • BakeClub Tips
    • BakeClub Q&A
    • BakeClub Videos
    • BakeNews Archives
    • Subscribe to BakeClub
  • About
    • Who is Anneka Manning?
    • About BakeClub
    • What Our Students Say
    • BakeClub Partners
    • Media
    • Contact Us
  • home
  • Products

Prep 20min (+1day macerating, 30min cooling and 1-2hr chilling time)Bake 40-50minMakes 10-12 serves

The secret to a silky smooth baked custard is the balance of eggs to milk and cream and gentle baking. This velvety one is teamed with macerated prunes for a memorable dessert.

Ingredients

Baked custard
500ml (2 cups/17fl oz) milk
500ml (2 cups/17fl oz) pouring cream
1 vanilla bean, split lengthways and seeds scraped, or 1½ teaspoons vanilla bean paste
5 x 60g/2oz eggs, at room temperature
110g (½ cup/4oz) caster sugar

Macerated prunes
250ml (1 cup/9fl oz) port
400g (14oz) prunes, pitted and halved

Method

  1. To make the Macerated Prunes, heat the port in a small saucepan over medium heat until hot but not simmering. Pour over the prunes in a heatproof bowl, cover and set aside to macerate for at least 1 day. 
  2. Preheat oven to 160°C/315°F (140°C/285°F fan-forced). Brush a shallow 2-litre (8-cup/3.5-pt) ovenproof dish with the melted butter to lightly grease and place in a large roasting pan or ovenproof dish. 
  3. Combine the milk, cream and vanilla bean and seeds in a medium saucepan and heat over low heat until almost simmering. Use a balloon whisk to whisk the eggs and sugar until well combined. Gradually whisk in the hot milk mixture. Strain the custard into a large jug and then pour into the greased dish. Add enough boiling water to the roasting pan to reach halfway up the sides of the dish.
  4. Bake in preheated oven for 40-50 minutes (see Baker’s tips) or until set on top but the custard still wobbles slightly when the dish is shaken gently. Remove from the oven and transfer to a wire rack to cool for 30 minutes. Place the custard in the fridge for 1-2 hours or until cooled completely.
  5. Serve the custard in spoonfuls accompanied by the macerated prunes with some of the port.

Baker's Tips

  • The baking time will depend on the depth of your dish – the deeper the dish the longer the baking time will be. Always check your custard after 40 minutes though and return to the oven for another 5-10 minutes if it’s not ready.
  • This custard will keep covered in the fridge for up to 2 days. Stand at room temperature for 30 minutes before serving.

This recipe is from Anneka's SBS Food online column, Bakeproof: Comforting Custard.

CLICK HERE for more Bakeproof recipes.

Photography by Alan Benson.

Classic Baked Custard
Prep 15min (+ 30min cooling time)Bake 20minMakes about 30

These good old-fashioned cookies are simple to make and even easier to devour! Either dark or milk chocolate (or a combination of the two) will work well – just take your pick. Eat them with a glass of cold milk.

Ingredients

125g butter, at room temperature, cubed

220g (1 cup, firmly packed) brown sugar

1 teaspoon natural vanilla extract or essence

2 eggs, at room temperature

300g (2 cups) plain (all-purpose) flour

1 teaspoon baking powder

200g good-quality dark or milk chocolate, chopped, or chocolate chips

Method
  1. Preheat the oven to 180°C or (160°C fan-forced). Line two large baking trays with baking paper.
  2. Use an electric mixer to beat the butter, sugar and vanilla until pale and creamy. Add the eggs one at a time, beating well after each addition. Sift together the flour and baking powder, add to the butter mixture and use a wooden spoon or spatula to mix until well combined. Mix in the chocolate.
  3. Roll tablespoonfuls of the mixture into balls and place on the oven trays, leaving about 5cm between each for spreading. Flatten each ball to about 5 cm in diameter.
  4. Bake in the preheated oven for 20 minutes, swapping the trays around halfway through baking, or until light golden and cooked through. Leave the cookies on the trays until cool (about 30 minutes).
Baker's Tips
  • These cookies will keep in an airtight container at room temperature for up to 1 week.
Recipe and image from BakeClass by Anneka Manning (Murdoch Books).
Classic Chocolate Chip Cookies

$100.00/pp

more info
Classic Christmas
- Products -

Get your classic Christmas baking sorted – just in time for the festive season – in this fun and casual online baking class.

Classic Christmas will run on Sunday 23rd November 2025 from 10.00am-1.00pm.

CLICK HERE TO BOOK NOW!


This course, in this format, with Anneka on our screens and in our kitchens, along with the comprehensive course notes is an excellent way to learn and gain confidence with Christmas baking. To be able to watch Anneka at work, and ask questions and make comments in real time was valuable and inspiring, particularly for those of us who are not Sydney-based ... I hoped to improve my baking skills and gain confidence around fruit cakes and Christmas puddings and I feel that I have gained more than I expected ... All the content of the course, from enrolment to delivery, was precise and happened exactly as was stated and I was more than happy with my experience.

Ann, Adelaide


Get your Christmas baking organised in time for the festive season – right in your very own kitchen!

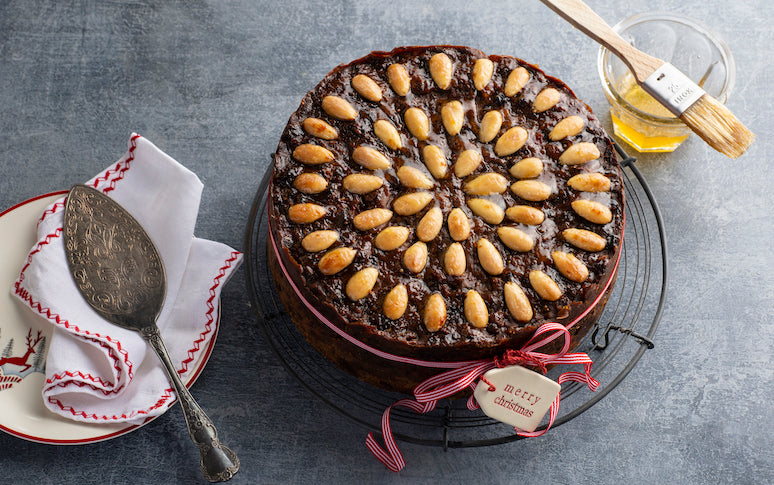
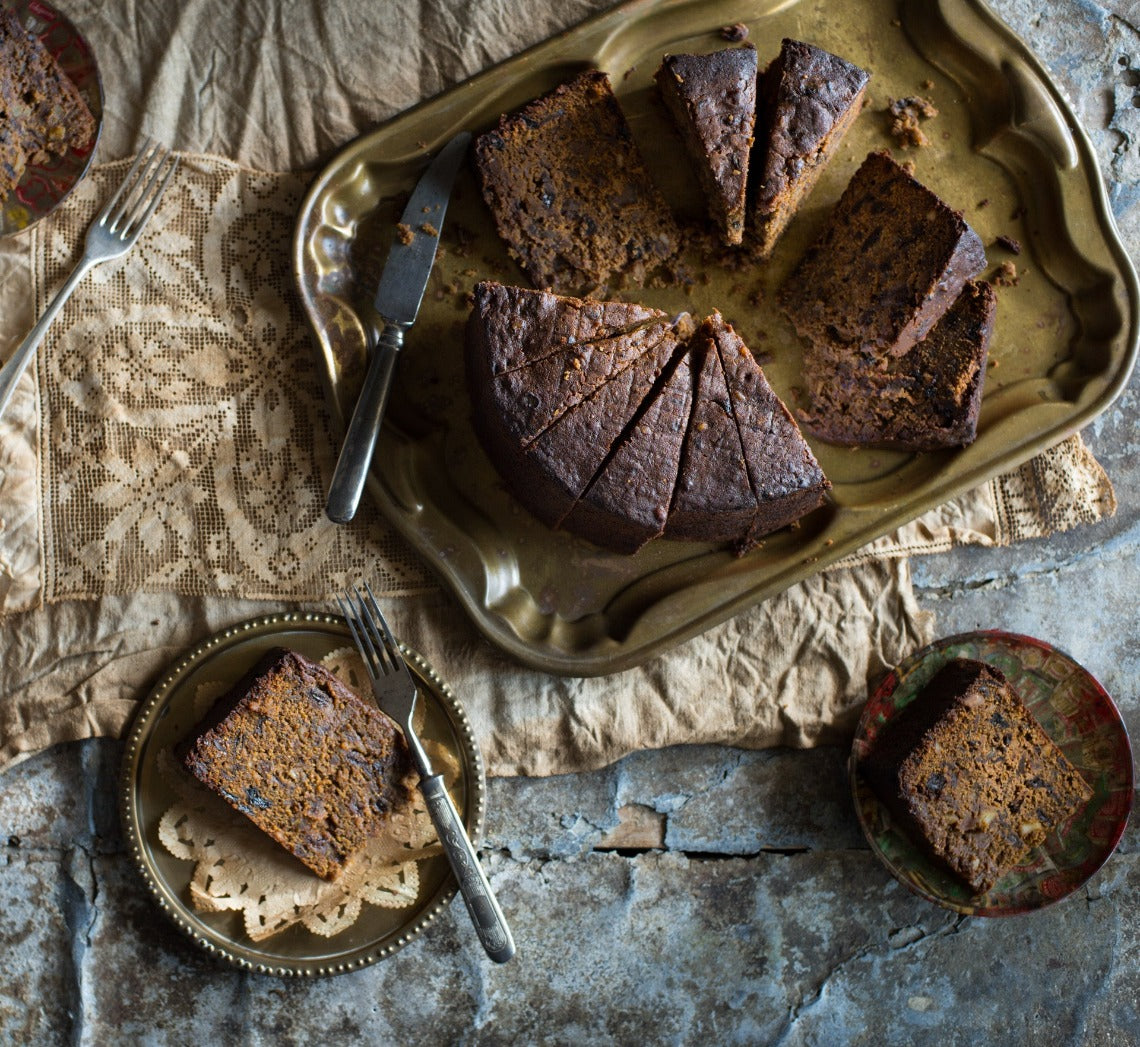
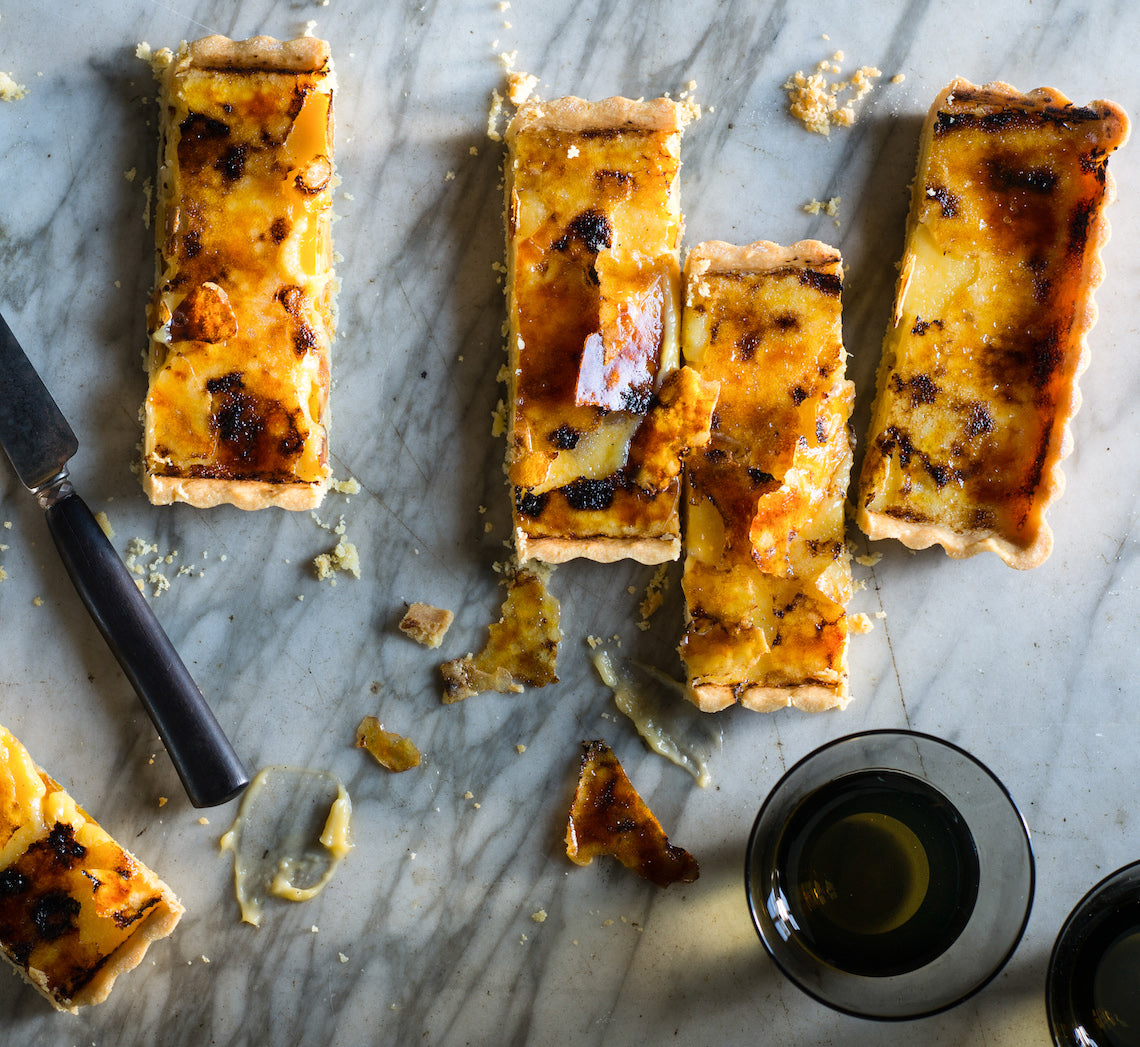
Classic Christmas is a fun and casual 3-hour LIVE virtual baking class where you will be guided through how to make your own traditional rich fruitcake, Christmas pudding and fruit mince pies – all cleverly made using the same base fruit mixture! This class will take place on Sunday 23rd November 2025 from 10.00am-1.00pm.

Anneka Manning will share all of her practical tips and tricks, helping you to troubleshoot your way through your own Christmas baking and ultimately making the whole experience more efficient and more pleasurable.

You will also have the ability to bake your own Traditional Christmas Cake* along with Anneka as well as ask any questions that arise as you bake together during the session. Anneka will also be demonstrating the Traditional Christmas Pudding and Fruit Mince Pies recipes, which you can then bake after the class in your own time. The virtual Live Session will be supported by printable recipes and resources which will become your go-to Christmas baking kit year after year.

At the end of this class, you will come away not only with new-found skills and confidence but you can tick one thing off your "to-do" list with a Christmas Cake, Christmas Pudding and Fruit Mince Pies ready for your festive feast!

*Gluten-free option available.

Dates

Sunday 23rd November 2025, 10.00am-1.00pm (Australian Eastern Standard Time UTC+10) via Zoom.

Please allow at least 3 hours baking time for your cake after the Live Session finishes.

CLICK HERE TO BOOK NOW!

Please note: The Live Session will be recorded and available for you to watch afterwards if you are unable to attend, or rewatch it at a later date if you would like to.

If you're interested in joining in a future LIVE class and would like to be notified when new dates are released, please fill in your details at the bottom of this page.

Cost

$100 (50% off for all BakeClub & Co. Members).


I had a fabulous morning learning about Christmas baking with Anneka Manning. If you want to give Christmas baking a go, then this is a fun way to to do it. I feel I got everything out of the course and then some!

Michele, Lake Macquarie

Who is this class suitable for?

This class is, quite simply, suitable for everyone – from absolute beginners to more experienced bakers. As this class is completed online, it is suitable for students from all over the world.

What will I get?
  • A 3-hour Live Session where Anneka Manning will guide you through the process of making a traditional Christmas cake, pudding and fruit mince pies
  • Access to Anneka's baking experience, knowledge, tips and tricks, and the ability to ask her any questions that come up during the session
  • A chance to learn surrounded (virtually) by like-minded people
  • A complete guide to traditional Christmas baking which you can refer to and use to troubleshoot in the future to ensure baking success year after year
  • Invaluable printable information sheets and recipes
  • Lifetime access to the live video and course material
  • Membership to BakeClub's exclusive The Kitchen Table online group to continue asking questions and share your baking
  • Baking confidence, knowledge and skill to use regularly at home
CLICK HERE TO BOOK NOW!


CLICK HERE TO BROWSE OUR OTHER ONLINE CLASSES!


It was brilliant. Much more than I expected. Things made sense as Annneka explained everything so well ... Presenting the course with 1 mixture making 3 recipes was brilliant. It saves time and effort and is therefore economical as well.

Sophia, Brisbane

If you are interested in taking part in this class in 2026, please fill out your details below and we will be in touch when dates are released.


Prep 25minBake 18-20minMakes 8 serves

There are two main tricks when making a sponge: don’t over whisk the mixture once you have added the flour, and keep a close eye on your sponge in the oven – it will be dry if over baked.

Ingredients

15g butter, melted and combined with 1½ teaspoons plain flour
4 x 59g eggs, at room temperature
165g (¾ cup) caster sugar
60ml (¼ cup) milk
30g butter, room temperature, diced
110g (¾ cup) self-raising flour, plus extra to dust
30g (¼ cup) cornflour
125ml (½ cup) pure cream, chilled
225g (⅔ cup) strawberry or raspberry jam
Icing sugar, to dust

    Method

    1. To make the Sponge Layers, place the oven rack in the oven so that the cake tins will sit in the middle of the oven and then preheat it to 180°C (160°C fan-forced). Brush two shallow 20cm/8in round cake tins with the melted butter mixture to grease and line the base of each with a round of non-stick baking paper. Brush the bases again with the melted butter mixture.
    2. Use an electric mixer with a whisk attachment on medium-high speed to whisk the eggs in a large bowl until frothy. Add the sugar a spoonful at a time, whisking well after each addition, until the mixture is very thick and pale (this will take about 8 minutes). Lift the whisk out of the mixture and draw a figure eight, if the trail stays on the surface long enough to finish drawing, then the mixture is ready. If not, continue to whisk for a further minute.
    3. Meanwhile, heat milk and butter in a small saucepan over medium heat until almost simmering. Remove from heat and pour down the side of the mixing bowl. Quickly sift the flour and cornflour together over the egg mixture and then immediately whisk again with the electric mixer on low speed briefly until the flour mixture is just incorporated (be careful not to overmix). Scrape the base of the bowl and then whisk briefly again, if necessary.
    4. Divide the mixture evenly between the cake tins (see Baker’s Tips) and gently tap the tins on the bench top three times to settle the mixture. Bake in preheated oven for 18-20 minutes or until the cakes are a pale golden colour, spring back when lightly touched in the centre and start pulling away from the sides of the tins. Remove from the oven and immediately use a small palette knife to loosen the top of the sponges from the tins and turn onto a wire rack (see Baker’s Tips), top side up, to cool completely.
    5. When ready to fill, use a hand-held electric mixer with a whisk attachment or a balloon whisk to whisk the cream until soft-firm peaks form. Spread one cake with the jam and then the whipped cream. Top with the remaining cake and dust with icing sugar.

    Baker's Tips

    • To divide the mixture evenly between the tins, weigh the tins with the mixture in them to make sure they are the same weight.
    • When removing the cakes from the tins, turn them onto a wire rack covered with a tea towel before inverting onto another rack. The tea towel will prevent the rack marking the tops of the cakes.
    • Sponge cakes are best eaten the day they are baked. Sandwich them together just before serving.

    Photography by Julie Renouf.

    Classic Sponge

    $285.00/pp

    more info
    Clever Entertaining: BakeClub at Milk HAUS
    - Products -

    This workshop is SOLD OUT. If you are interested in future BakeClub classes at Milk HAUS please fill out the form at the bottom of this page.

    An inspiring and delicious workshop to create the perfect menu for entertaining at home with ease
    This workshop is part of the inaugural Milton Mollymook Meet the Makers Festival

    Join Anneka Manning, founder of BakeClub and author of BakeClass, on Sunday 22nd September 2024, 10.00am-3.00pm at Milk HAUS in Milton, on the beautiful south coast of NSW, for a demonstration-style workshop to create a collection of impressive dishes perfect for entertaining.

    After a garden tour and harvesting, Anneka will take you into the kitchen to create a collection of her tried and tested recipes inspired by spring entertaining and the produce gathered from the garden.

    You will leave this class with not only new collection of low-stress, high-impress recipes to add to your repertoire but also do-ahead tricks and invaluable confidence to create your own stress-free and completely delicious menu for entertaining at home.

    This class is suitable for everyone from absolute beginners through to experienced cooks. It will include morning tea, a walk and harvesting in Milk HAUS’ on-site kitchen garden, a demonstration-style workshop, and lunch based on the recipes from the class to conclude. An intimate group size will allow for "hands-on" opportunities throughout the workshop.

    CLICK HERE TO BOOK NOW!

    Friendly, engaging and lots of opportunities to try hands-on and ask questions.

    Nicole

      Class includes:
      • Expert culinary advice, guidance and inspiration from Anneka Manning
      • A tour and harvesting in the Milk HAUS Kitchen Garden
      • A chance to experience the gorgeous surroundings of Milk HAUS, Milton, on the South Coast of NSW
      • A selection of the delicious recipes made in the class to take home
      • An invaluable recipe & information kit
      • Morning tea and light lunch based on the recipes made in the class plus tastings throughout the class
      • Your chance to get the answers to any baking and cooking questions you’ve always wanted to ask
      • A fun session of learning and laughs surrounded by like-minded people
      • Kitchen and fresh produce confidence, knowledge and skill to take home, keep and use regularly in your own kitchen
      • Membership to BakeClub's exclusive The Kitchen Table online group
      Class details:

      This workshop will take place from 10.00am-3.00pm at Milk HAUS, 170 Woodstock Rd, Woodstock, NSW 2538.

      If you are travelling to the area and require accommodation, here are a few of our local recommendations:

      • The Old School House
      • The Rooms 
      • Milk HAUS Accommodation
      • Hotel Molly
      • Banisters Pavilion

      A fun, informative day. Anneka is a delight!

      Jenni

      If you are interested in future classes at Milk HAUS, please fill out your details below and we will be in touch when new classes are scheduled.


      Prep 15minBake 50minMakes 12 serves

      This banana bread is heaven. The addition of coconut oil adds a wonderful richness and heavenly aroma that you won’t be able to resist. This loaf also keeps well and becomes more moist and flavoursome with time, so try not to eat it all at once! It's wonderful served on its own or toasted and spread with butter or ricotta and drizzled with honey.

      Ingredients

      Melted coconut oil, to grease
      240g (1½ cups) wholemeal spelt flour
      1 teaspoon baking powder
      1 teaspoon bicarbonate of soda
      70g (1 cup) shredded coconut
      100g (½ cup) coconut oil, at room temperature
      180g (1 cup) coconut palm sugar
      1 egg
      2 large (about 200g each) very ripe bananas
      130g (½ cup) Greek-style natural yoghurt

        Method

        1. Preheat oven to 180°C (160°C fan-forced). Grease a 21 x 10.5cm (base measurement) loaf pan with the melted coconut oil and line the base and two long sides with one piece of non-stick baking paper. 
        2. Sift together the flour, baking powder and bicarbonate of soda into a large bowl, returning any husks to the flour mixture. Stir in the coconut. 
        3. Use an electric mixer to beat the coconut oil and sugar in a mixing bowl until well combined (it will look like wet sand). Add the egg and beat well, scraping down the sides of the bowl if necessary. Mash the bananas, add to the coconut mixture with the yoghurt and beat until well combined. Add the dry ingredients and beat on low speed until just combined.
        4. Pour the mixture into the prepared tin. Use the back of a spoon to smooth the surface and then tap the tin lightly on the benchtop to settle the mixture. Bake in preheated oven for 45-50 minutes or until golden brown and a skewer inserted into the centre comes out clean. Stand in the tin for 5 minutes before turning onto a wire rack to cool. Serve in slices.

        Baker's Tips

        • This banana bread will keep in an airtight container at room temperature for up to 4 days.

        This recipe is from Anneka's SBS Food online column, Bakeproof: Coconut.

        CLICK HERE for more Bakeproof recipes.

        Photography by Alan Benson.

        Coconut Banana Bread
        Takes 2hr (+30min for the fruit)Makes a cake for 6–8 and approximately 800g (1lb 12oz) fruit and syrup

        Coconut Sugar Pavlova Roll

        Reasons why my meringue preference is for a roll over a classic dome: 1. The crust quotient (CQ) is higher. More crunch balances the soft inside and creamy parts. 2. No shaping surprises with a flat pavlova. The proud dome you shape with meringue can sometimes end up baking into an askew beret! 3. Faster! No slooowww cool down keeping you from putting a slice of pavlova on your plate a minute longer than necessary.

        Ingredients

        Cooking oil spray
        300g (10½oz) caster (superfine) sugar
        70g (2½oz) coconut sugar
        5g (⅛oz/½ teaspoon) vanilla paste
        5g (⅛oz) cornflour (cornstarch)
        5g/ml (⅛oz) white or apple-cider vinegar
        2g (¹⁄₁₆oz/¼ teaspoon) fine sea salt
        225g (8oz) egg white (from approx. 12 eggs)
        2g (¹⁄₁₆oz/¼ teaspoon) cream of tartar 
        600g/ml (1lb 5oz) cream (45% milkfat) 
        1 × batch Spiced Grilled Blood Plums (below), chilled

        Method

        1. Preheat the oven to 140°C (285°F). Lightly spray a flat and heavy 30cm × 40cm (12in × 15¾in) shallow baking tray with cooking oil, then lay a piece of baking paper on the tray, to cover the entire surface. Don’t spray again.
        2. Weigh the caster sugar into a small bowl with a small scoop. Weigh the coconut sugar separately. Next, weigh the vanilla, cornflour vinegar and salt together and stir together, then set aside. Coconut sugar impedes getting a stiff meringue structure, so we will add it at the end – when the meringue is strong.
        3. Put the egg white and cream of tartar in the bowl of an electric stand mixer. Using the whisk attachment, whip on speed 8 (under high) for 3–5 minutes. Once the whites have changed from foamy to stiff and white, start adding the caster sugar, 1 tablespoon at a time, over 3 minutes to make a very shiny and rigid meringue.
        4. Turn the mixer off and add the coconut sugar. Slowly turn the mixer on, increasing up to speed 8 (under high) for 5 seconds. Stop the mixer and add the cornflour/vinegar mixture. Re-whip for 5 seconds. Take the bowl off the mixer and use your fingers to push the meringue off the whisk back into the bowl. Give it a final and thorough mix with a plastic spatula so the colour is a uniform pale malt brown. Don’t worry that the meringue has sugary speckles.
        5. Scrape the mix out onto the prepared baking tray. Using an offset spatula, smooth it evenly over the tray, leaving a 1.5cm (½ in) border around the edges to allow for some expansion during baking. Bake for 1 hour until the top feels like a crunchy pillow that cracks when gently pressed. Remove and allow to cool at room temperature on the tray, until ready to roll (see Baker's Tips). Moving it off the tray while it’s hot makes the sheet prone to breaking.
        6. While the meringue cools, whip the cream to billowy soft and cut most of the grilled plum pieces into smaller pieces (four pieces per plum half). Reserve a few slices or whole pieces for the top.
        7. To roll, lay two overlapping pieces of plastic wrap on the work surface to make a sheet slightly larger than the meringue sheet. Carefully flip the meringue sheet off the tray, with the shortest side closest to you, and peel off the baking paper. The meringue should now be crunchy top side down and the underside, now exposed, should feel soft and a little sticky.
        8. Keeping the short side closest to you, evenly spread 400g (14 oz) of the cream over the meringue, but only smooth a light smear over the 2cm (¾ in) strip at the top of the sheet. This will become the seal, so it’s best not to overload it with cream that will ooze out upon rolling. Scatter the grilled plums evenly over the cream (except for the strip along the top). Tear the pieces up a little if they are too big, as big pieces make a lumpy roll.
        9. Take a firm hold of the plastic wrap closest to you and use a repetitive ‘lift and roll’ motion to gradually roll the meringue, until you do a final full roll to reach the end, with the seam underneath. Form a spine of reserved cream then plum pieces. Drizzle the reserved syrup on top.

        Baker's Tips

        • Takes: Two hours from start to serve. Or you can bake the meringue sheet the day before and fill the next day 
        • Keeps: Always best served just after rolling. When filled, this will keep refrigerated for 1 day, well covered or in an airtight container. Unfilled, the meringue will hold for up to 3 days, but give it a 10 minute re-crisp in a 140°C (285°F) oven, then cool before filling.
        • Overbaked meringue will be uber-crisp and unbending, threatening to snap. To repair, place the cream and fruit on the sheet and chill for an hour, then roll. If your meringue is underbaked, bake the meringue sheet for another 20 minutes at 140°C (285°F), even if you do this the day after. If the sheet has cracked irreparably, stack large shards with the cream and fruit in an avant-garde (but totally meant it) way.

        Adaptrix

        Other fruit:

        • Use a similar weight of raspberries or strawberries in place of the plums. The Sumac blackberries are also incredible here!
        • Toffeed bananas are a year-round fruity friend … and add fresh passionfruit to bring the zing.
        • Roasted quinces or toffee figs are my autumnal go-to, and coconut is such a bosom buddy to them both. With quince, this roulade is beyond next level.


        Spiced Grilled Blood Plums

        These plums are another example of Christine Manfield’s (tysm) dessert genius! The grill char imparts a seductive smokiness. The syrup floods them while warm and they absorb all the honey sweetness and glorious spices and fresh citrus zing. These plums love to be served with chocolate mousse, panna cottas or store-bought gelato. I can’t help falling in love with this recipe every time the syrup sizzles on the fruit.

        Ingredients

        750g (1lb 11oz) blood plums, still firm, not yieldingly ripe (around 8)
        30g (1oz) demerara sugar

        Spiced syrup
        1 orange
        1 lemon
        100g (3½oz) caster (superfine) sugar
        40g (1½oz) honey
        40g/ml (1½oz) cold water
        4 star anise
        2 whole allspice berries few grinds black pepper
        1–2 fresh bay leaves (optional)

        Method

        1. To start the spiced syrup, peel four wide strips each from the orange and the lemon and place into a small, non-reactive saucepan. Set the fruit aside (you’ll add their juice to the syrup later).
        2. Add the remaining syrup ingredients to the saucepan. Bring to the boil over a medium–high heat, stirring at first to loosen the sugar. When it boils, turn it down to a simmer and cook for 3–4 minutes until syrupy like maple syrup. Remove from the heat and cool to room temperature.
        3. While the syrup cools, heat your grill (broiler) to High (100%). Cut the plums in half, following their natural seam. Twist and pull apart and remove the stone (if it doesn’t prise out easily, cut around it with a small, pointy knife). Place the plums, cut-side up, on a non-reactive, ovenproof, shallow-lipped tray (or line a tray with foil). Sprinkle the demerara sugar evenly over the plums, then grill for 10–12 minutes, until the cut side has blistered and some have a collar of blackened flesh (see Baker's Tips).
        4. Remove the plums from the grill. Squeeze the juice from the orange and lemon into the syrup and pour over the plums. Adding the juice when the syrup has cooled will retain the fresh acidity. Overheated juice loses vibrancy.
        5. Allow to stand for 30 minutes, turning once in the syrup. Cool to room temperature before using.

        Baker's Tips

        • Takes: 30 minutes. Can be served warm or cool to fill the Coconut sugar pavlova roll
        • Keeps: Chilled for up to 4 days. Can be frozen after that and defrosts pretty well!
        • If you don’t have a grill, halve the plums, remove the stones and set in a baking tray. Scatter the sugar on the cut sides and caramelise with a blowtorch until dark brown. If the plums are large and still firm, bake for 10–15 minutes in a 180°C (360°F) oven until they soften but hold their shape.

        Adaptrix

        Peaches, nectarines

        • Substitute in any peak-season ripe stone fruit. Exclude apricots from grilling – they need a gentle and less scorching treatment.

        This is an edited extract from Beatrix Bakes: Another Slice by Natalie Paull (Hardie Grant Books, RRP $50. 

        Photographer: © Rochelle Eagle 2024

        You can read more about what Natalie is baking this winter here.

        Coconut Sugar Pavlova Roll with Spiced Grilled Blood Plums by Natalie Paull
        Prep 30min (+3days soaking and overnight cooling time)Bake 2hr 30minMakes 20 serves

        This is Colombia’s version of a rich fruit cake. Dense with prunes, raisins and figs, generously spiked with both rum and port, and cleverly flavoured with aromatic spices, it is hard to stop at one piece. Traditionally dulce quemado (sweet burnt brown sugar), either homemade or bought, is used to sweeten this cake, but molasses makes a perfectly acceptable substitute as I've done in this recipe.

        You will need to start this cake at least 6 days before baking.

        Ingredients

        200g (1 cup) pitted prunes
        170g (1 cup) seedless raisins
        80ml (⅓ cup) port, plus 80ml (⅓ cup) extra
        60ml (¼ cup) dark rum, plus 60ml (¼ cup) extra
        80g (½ cup) blanched almonds
        50g (½ cup) pecans
        melted butter, to grease
        200g (1 cup) tenderised figs or drained figs in syrup (see Baker's Tips), finely chopped
        250g butter, at room temperature
        275g (1¼ cups) caster sugar
        2 teaspoons vanilla essence
        5 eggs, at room temperature
        250g (1⅔ cups) plain flour
        1 teaspoon baking powder
        ½ teaspoon ground cinnamon
        ¼ teaspoon ground nutmeg
        ¼ teaspoon ground cloves
        ¼ teaspoon salt
        2 tablespoons molasses (see Baker's Tips)

        Method

        1. Process the prunes and raisins in a food processor using the pulse button until chopped. Transfer to a bowl and stir in the port and rum. Cover and set aside for at least 3 days to soak (see Baker's Tips).
        2. Preheat oven to 170°C (150°C fan-forced). Grease a deep round 20 cm cake tin with melted butter and line the base and sides with non-stick baking paper.
        3. Process the almonds and pecans in a food processor until chopped. Add to the prune mixture with the figs and stir to combine evenly. Use an electric mixer to beat the butter, sugar and vanilla until pale and creamy, scraping down the sides of the bowl when necessary. Add the eggs one at a time, beating well after each addition.
        4. Sift together the flour, baking powder, spices and salt. Add to the butter mixture and beat on lowest possible speed until just combined. Add the molasses and beat on low until just combined. Use a wooden spoon to stir in the fruit and nut mixture until evenly combined.
        5. Spoon the mixture into the prepared tin, pressing well into the corners, and then smooth the surface with the back of a spoon. Cover the tin with a piece of foil and then bake in preheated oven for 2 hours and 25 minutes to 2 hours and 35 minutes or until cooked when tested with a skewer.
        6. Remove from the oven and stand in the tin for 10 minutes before turning onto a wire rack. Combine the extra port and rum and brush over the top of the cake. Wrap the warm cake in plastic wrap and then foil and set aside overnight to cool.
        7. Store for at least 3 days at room temperature before serving.

        Baker's Tips

        • The prunes and raisins require 3 days or more to soak, so you could start the soaking one weekend and cook the cake the next.
        • Dulce quemado (sweet burnt brown sugar) is traditionally used in this cake and is considered more important than the alcohol or spices to add flavour. It not only adds a rich colour but also a sweet/bitter flavour to the cake. It can be home made or bought, although outside of Latin America it can be hard to track down. Molasses makes a good substitute.
        • This cake will keep wrapped well in plastic wrap and sealed in an airtight container in a cool spot, but not in the fridge, for up to 3 months.
        • To make the lattice pattern on the top of the cake as we have, turn the cake upside down on a cake rack after cooling and press down firmly. Turn the cake 90 degrees and press again.

        This recipe is from Anneka's SBS Food online column, Bakeproof: Latin American Cakes.

        CLICK HERE for more Bakeproof recipes.

        Photography by Alan Benson.

        Colombian Black Cake (Torta Negra Colombiana)
        Prep 25min (1hr cooling time)Bake 60-65minMakes 8 serves

        Spiked with chunks of crystalised ginger this luscious crème brûlée custard makes a divine tart filling. I have to confess, that this is one of my all-time favourite desserts!

        Ingredients

        1 quantity sweet shortcrust pastry
        50g ( 1¾oz) crystalised ginger, cut into small pieces (about 8mm/3/8in)
        2 tablespoons cater sugar, to sprinkle

        Crème Brûlée Filling
        250ml (1 cup/9fl oz) pouring cream
        1 vanilla bean, split lengthways and seeds scraped
        3 egg yolks, at room temperature
        55g (¼ cup/2oz) caster sugar

        Method

        1. Preheat oven to 200°C/400°F (180°C/350°F fan-forced). Use a lightly floured rolling pin to roll out the pastry on a lightly floured bench top to a rectangle about 3mm/ ⅛in thick. Carefully drape the pastry loosely around the rolling pin. Place it over an ungreased 2.5cm/1in deep, 34.5cm x 11.5cm (13½in x 4½in), base measurement, tart tin with a removable base and then unroll the pastry being careful not to stretch it. Gently lift the edge of the pastry and ease it into the tart tin to line the base and sides and settle it into the corners. Use your fingertips to press it gently into the corners without stretching it. Then, working around the tin, press the pastry into the side using your thumb or finger. Roll the rolling pin over the top of the tart tin to trim any overhanging pastry.

        2. Place the tart tin on an oven tray. Prick the pastry base with a fork about 12 times. Line the pastry case with crumpled baking paper or foil and fill with pastry weights, or raw rice, making sure they press into the corners. Bake in preheated oven for 20 minutes.

        3. Remove the pastry case from oven and use the paper or foil to carefully lift the weights out of the case. Return to the oven and bake for a further 20 minutes or until golden and cooked through.

        4. Meanwhile to make the Crème Brûlée Filling, combine the cream and vanilla bean and seeds in a medium saucepan and bring almost to a simmer over medium heat. Remove from heat and set aside. Use a balloon whisk to whisk together the egg yolks and sugar until well combined. Gradually stir in the hot cream mixture (don’t over-mix – you don’t want it to be frothy). Strain the custard into a heatproof jug.

        5. Remove the tart case from the oven and reduce the oven temperature to 160°C/315°F (140°C/285°F fan-forced). Sprinkle the base evenly with the ginger and then pour the warm custard immediately into the hot tart case. Carefully return to the oven and bake for a further 20-25 minutes or until the custard is just set and it still wobbles slightly in the centre when the tin is shaken gently.

        6. Remove the tart from the oven and set aside on a wire rack for at least 1 hour or until cooled to room temperature.

        7. To serve, sprinkle the top of the tart evenly with the sugar and use a blowtorch to caramelise the sugar until a deep golden. Stand for 5 minutes for the toffee to set before serving.


        Baker's Tips

        • This tart will keep in an airtight container in the fridge for up to 2 days. Stand at room temperature for 30-60 minutes to bring back to room temperature before serving.
The pastry will soften slightly on storing.

        This recipe is from Anneka's SBS Food online column, Bakeproof: Comforting Custard.

        CLICK HERE for more Bakeproof recipes.

        Photography by Alan Benson.

        Crème Brûlée Ginger Tart
        Prep 30min (+1hr cooling and 30min standing time) Bake 40minMakes 10 serves

        This dairy-free, flourless number is the Jewish Passover dessert of choice.

        Ingredients

        75g (⅔ cup) cocoa powder, sifted
        165ml (⅔ cup) boiling water
        200g pecans, toasted
        1 teaspoon gluten-free baking powder
        4 eggs, at room temperature
        220g (1 cup) raw caster sugar
        200ml light olive oil, plus extra to grease
        1½ teaspoons natural vanilla essence or extract

        Dairy-free ganache
        185g dairy-free dark chocolate, chopped
        60g dairy-free spread

        Method
        1. Preheat oven to 170°C (150°C fan-forced). Grease a 22cm springform tin with extra oil and line the base with non-stick baking paper.
        2. Place the cocoa in a medium bowl and gradually stir in the boiling water until smooth. Set aside to cool.
        3. Process the pecans in a food processor until finely ground. Transfer to a medium bowl and stir through the baking powder until evenly combined.
        4. Use an electric mixer with a whisk attachment to whisk the eggs, sugar, oil and vanilla on high speed for about 5 minutes or until thick and pale. Add the cocoa mixture and whisk until just combined. Add the pecan mixture and stir until just combined.
        5. Pour the mixture into the prepared tin and bake in preheated oven for 40 minutes or until wet crumbs cling to a skewer inserted into the centre. Cool the cake in the tin sitting on a wire rack.
        6. To make the dairy-free ganache, combine the chocolate and dairy-free spread in a medium heatproof bowl over a saucepan of barley simmering water (make sure the waster doesn’t touch the bottom of the bowl). Stir occasionally until the chocolate melts and the mixture is smooth. Remove the bowl form the saucepan and set aside for 10 minutes, stirring occasionally, until the ganache thickens to a thick spreadable consistency.
        7. Remove the cake from the tin and place on serving plate. Spoon the ganache over the cake and use the back of a spoon to spread. Set the cake aside for 30 minutes or until the ganache sets. Serve in wedges.


        Baker's Tips
        • This cake will keep in an airtight container at room temperature for up to 1 week.


        This recipe is part of Anneka's SBS Food Bakeproof: Jewish Baking online column. For more Bakeproof columns and recipes, click here.

        Photography by Alan Benson.

        Dairy-Free Flourless Chocolate Cake
        Prep 15minBake 12-15min (per batch)Makes about 20

        These macaroons are commonly crumbled and used in the traditional Danish Lagkage (layer cake), a traditional Danish birthday cake. They are wonderfully crisp on the outside while being mor-ishly soft on the inside and are truly addictive as a ‘sweet’ treat. While not traditional, I’ve taken the liberty of adding a sprinkling of flaked almonds for extra texture.

        Ingredients

        100g almond meal
        100g pure icing sugar, sifted
        Good pinch of bicarbonate of soda
        2 egg whites, at room temperature
        Pinch of salt
        25g (¼ cup) flaked almonds, to sprinkle

          Method

          1. Preheat the oven to 180°C. Line a large baking tray with non-stick baking paper.
          2. Put the almond meal, icing sugar and bicarbonate of soda in a medium bowl and mix until evenly combined.
          3. Use an electric mixer with a whisk attachment to whisk the egg whites and salt in a medium clean, dry bowl until stiff peaks form. Add the almond meal and icing sugar mixture and use a spatula or large metal spoon to fold together until evenly combined.
          4. Use two metal teaspoons to spoon slightly heaped spoonfuls of the mixture onto the lined tray about 4 cm apart to allow for spreading. Sprinkle with the flaked almonds and then bake in the third top of the preheated oven for 12-15 minutes or until golden and aromatic.
          5. Cool the macaroons on the tray. Repeat with the remaining mixture to make about 20 macaroons in total.

          Baker's Tips

          • These macaroons will keep in an airtight container at room temperature for up to 1 week.

          This recipe is from Anneka's SBS Food online column, Bakeproof: Danish Baking. CLICK HERE for more Bakeproof recipes. 

          Photography by Alan Benson. 

          Danish Macaroons (Makroner)
          Prep 30min (+overnight +45min resting timeBake 20-25minMakes 12

          Danish pastries are possibly Denmark’s most well-recognized food specialty, even though it is Austria that should actually be credited for originally creating them! Traditionally based on a leavened puff pastry (basically a puff pastry made with a yeast dough) the making of them is quite an involved process. Luckily, the pastry used here is a short-cut one with chunks of butter already incorporated into the pastry when initially mixed which cuts out the process of interleaving it with the pastry dough as you fold it – if you haven’t made puff pastry before, this is a great recipe to start with.

          Ingredients

          • 125ml (½ cup) lukewarm milk
          • 7g (1 sachet) dried yeast
          • 250g (1⅔ cups) plain flour
          • 185g butter, chilled and cut into 2 cm cubes
          • 1 egg, at room temperature, lightly whisked
          • 2 tablespoons caster sugar
          • ¼ teaspoon ground cardamom
          • 5 tablespoons good-quality raspberry jam
          • 2 tablespoons flaked almonds, toasted, to decorate

          Icing

          • 125g (1 cup) pure icing sugar
          • 1 tablespoon boiling water
          • ¼ teaspoon natural almond extract   

          Method

          1. Put the milk in a large bowl and sprinkle the yeast over the top. Set aside for 5 minutes.
          2. Put the flour and butter into the bowl of a food processor and use the pulse button to process until the butter is cut into 1 cm pieces (make sure your don’t process any further). Transfer to a large bowl.
          3. Add the egg, sugar and cardamom to the milk mixture and stir to combine. Add the flour and butter mixture and use a wooden spoon and then your hands to mix until it is just combined. Cover the bowl with plastic wrap and place in the fridge overnight.
          4. Turn the dough onto a lightly floured surface and bring together with your hands. Knead for 30 seconds or until smooth. Shape into a rectangle and then  use a lightly floured rolling pin to roll the out until about 40 x 25cm, keeping the edges as straight as possible. With a long side nearest to you, fold the right third of the dough in to cover the centre third and then fold the left side in also. Turn the dough clockwise a quarter turn. Fold the dough into thirds as before to make a small rectangle.  Flip the dough over on the bench and repeat the rolling and folding process again. You will finish with a small rectangle. Wrap well in plastic wrap and chill for 30 minutes.
          5. Preheat the oven to 200°C. Line a baking tray with non-stick baking paper.
          6. Roll out the pastry with a lightly floured rolling pin on a lightly floured surface to a rectangle about (30 x 35cm) and about 5mm thick. Cut in half to make two 15 x 35cm rectangles. Spread the raspberry jam down the centre to cover the centre third of both rectangles. Cut the pastry diagonally into 2cm-wide strips down both sides of the jam and then fold the strips, alternating form each side, into the centre over the jam. Transfer the pastries on the lined tray. Cover loosely with a slightly damp tea towel and set aside in a warm, draught-free place for 15 minutes or until the pastry is ‘puffy’.
          7. Bake in preheated oven for 20-25 minutes or until the pastry is golden, crisp and cooked through. Remove from oven and cool on the tray.
          8. To make the Icing, put the icing sugar in a medium bowl and stir in the water and almond extract to make a smooth pouring consistency. Drizzle over the cooled pastry and sprinkle with the almonds and set aside to set. Serve at room temperature cut into slices.

          Baker's Tips

          • This Danish Pastry is best eaten the day it is baked but will keep in an airtight container for up to 2 days.

          This recipe is from Anneka's SBS Food online column, Bakeproof: Danish Baking. 

          CLICK HERE for more Bakeproof recipes.

          Photography by Alan Benson.

          Danish Pastry (Wienebrod)
          • 1
          • …
          • 3
          • 4
          • 5
          • 6
          • 7
          • …
          • 17

          Follow @bakeclub_australia on Instagram

          Our partners

          SUBSCRIBE!
          contact us
          • info@bakeclub.com.au

          • FOLLOW US
          CUSTOMER INFORMATION
          • FAQ
          • Terms of Use
          • Privacy Policy
          • Terms of Service
          • Refund policy

          © 2025 BakeClub. All Rights Reserved.

          Site by Fruitful Creative.