- home
- BAKERECIPES
BakeRecipes
Bringing real baking into your home with deliciously simple recipes.
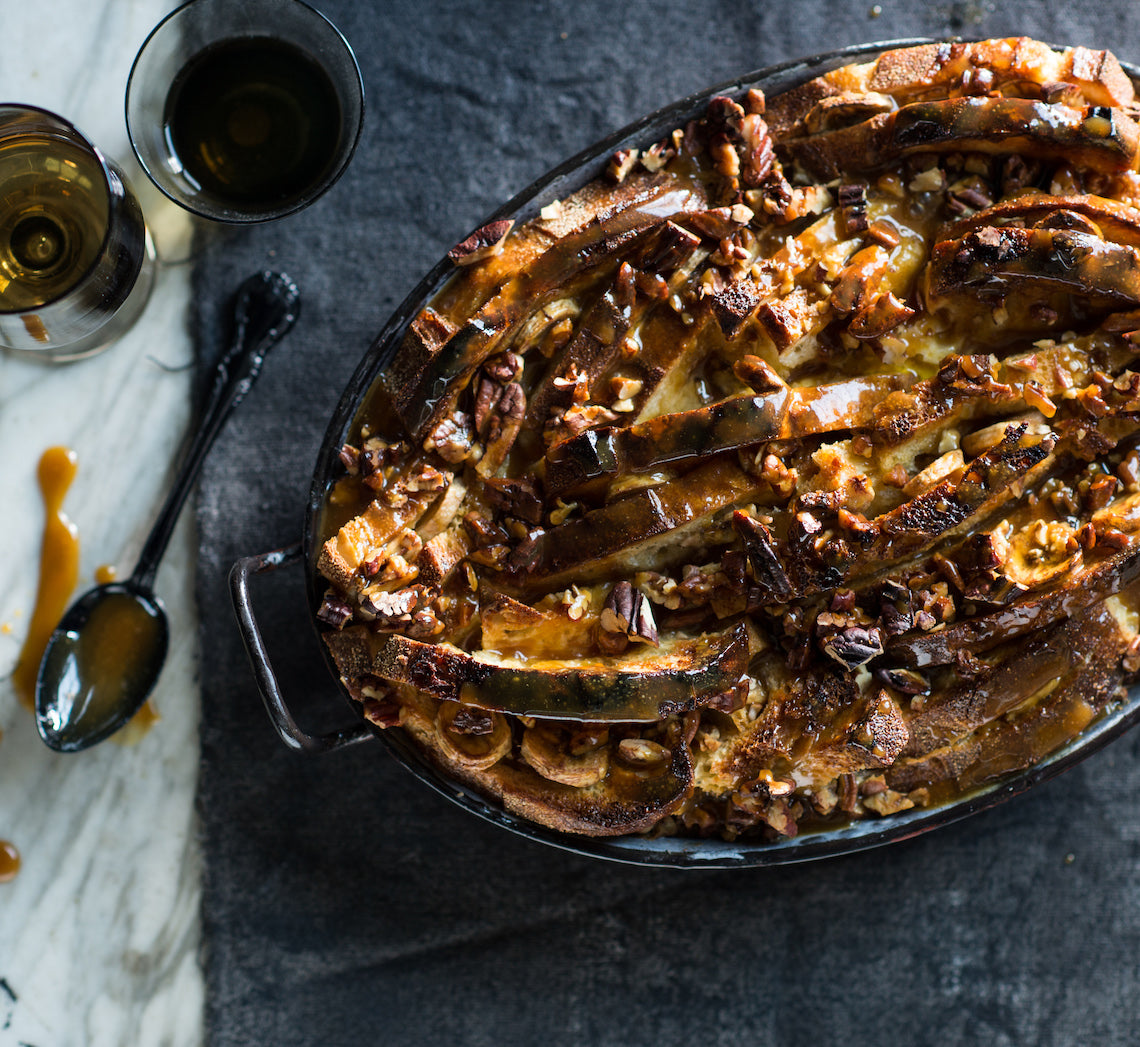
Prep 30min (+30-60min standing time)Bake 1hr 10minMakes 10-12 serves
Indulgent is the one word (and possibly the only) that comes to mind when describing this dessert. Custardy bread, pecans, bananas and a rich caramel sauce combine to make this one very decent over-the-top offering.
Ingredients
Melted butter, to grease
600g (1lb 5oz) day-old sourdough or crusty loaf, cut into 1cm-thick slices, crusts partially removed
60g (2oz) salted butter, softened
3 ripe medium bananas (about 200g/7oz each), thinly sliced
100g (3 ½oz) pecans, toasted and coarsely chopped
4 eggs, at room temperature
110g (½ cup/4oz) caster sugar
500ml (2 cups/17fl oz) milk
375ml (1½ cups/13fl oz) pouring cream
2 teaspoons natural vanilla essence or extract
Vanilla ice-cream, to serve
Caramel sauce
100g (½ cup, lightly packed/3 ½oz) brown sugar
115g (⅓ cup/4oz) golden syrup
40g (1 ½oz) salted butter
125ml (½ cup/4fl oz) pouring cream
Method
- Preheat oven to 170°C/340°F (150°C/300°F fan-forced). Brush a deep 2-litre (8-cup/3.5pt) ovenproof dish with melted butter to grease.
- Spread the bread slices with the butter. Top half of the slices with the banana and then cover with the remaining bread slices. Cut each ‘sandwich’ diagonally into half. Arrange the layered bread in the ovenproof dish, allowing it the stick up a little, and then sprinkle with the pecans.
- Use a balloon whisk to whisk together the eggs, sugar, milk, cream and vanilla until well combined. Pour evenly over the bread in the dish and set aside for 30-60 minutes or until the bread has absorbed all the custard.
- Meanwhile, to make the Caramel Sauce, combine the sugar, golden syrup and butter in a small saucepan. Stir over low heat until the sugar dissolves. Bring to a simmer and simmer for 2-3 minutes or until thickened slightly.
- Sprinkle the pudding with the remaining pecans, pour over half the caramel sauce (reserve the remaining sauce) and bake in preheated oven for 1 hour and 10 minutes or until the top is golden and the custard is set.
- Meanwhile, add the cream to the remaining Caramel Sauce and stir over medium heat until well combined and heated through.
- Remove the pudding from the oven and stand for 5 minutes before serving with the warm Caramel Sauce and ice cream.
Baker's Tip
- This bread and butter pudding will keep covered in the fridge for up to 2 days. Serve at room temperature or cover with foil and warm gently in an oven preheated to 150°C/300°F (130°C/265°F fan-forced) for 10-20 minutes (depending on the portion size).
This recipe is from Anneka's SBS Food online column, Bakeproof: Comforting Custard.
CLICK HERE for more Bakeproof recipes.
Photography by Alan Benson.
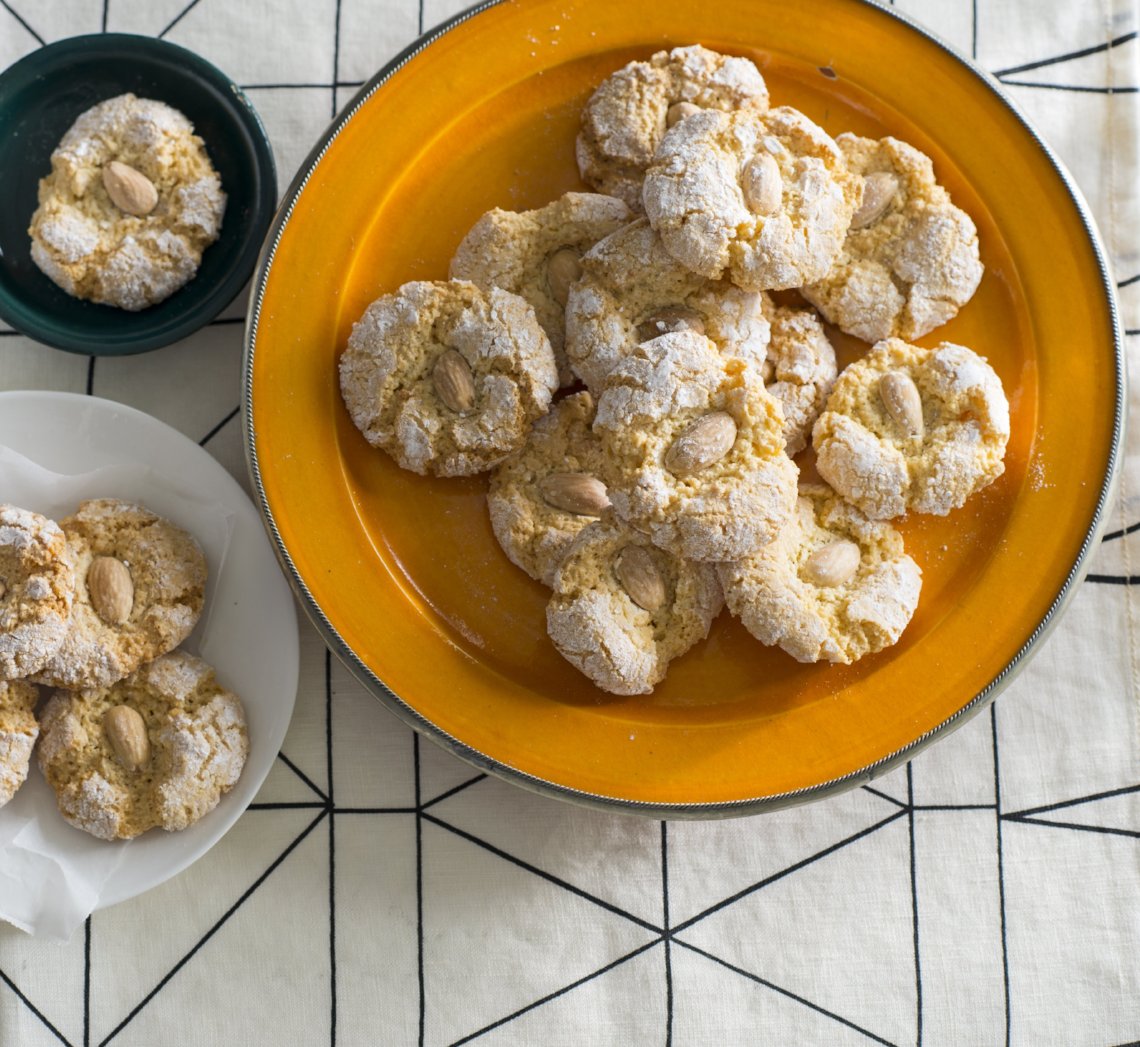
Prep 20minBake 30minMakes about 30
These "very Moroccan" cookies are dead-easy to make, but still special with the addition of orange flower water. They have a crisp macaroon-like character that softens and becomes chewy the longer they're kept.
Ingredients
240g (1½ cups) blanched almonds, plus 30 extra to decorate (optional)125g (1 cup) pure icing sugar, plus 2 tablespoons extra to coat
1 teaspoon baking powder
3 egg yolks
2 teaspoons orange flower water
Method
- Preheat oven to 180°C (160°C fan-forced). Line two large oven trays with non-stick baking paper.
- Spread the almonds on one of the baking trays and toast in preheated oven, shaking the tray occasionally, for 8-10 minutes or until lightly golden and aromatic. Set aside for 5 minutes to cool slightly.
- Use a food processor to process the almonds until finely ground. Transfer to a medium mixing bowl.
- Sift together the icing sugar and baking powder over the almond meal. Add the egg yolks and orange flower water and use an electric mixer to beat until well combined and a soft dough forms. Roll heaped teaspoonfuls of the mixture into balls. Roll in the extra icing sugar to coat lightly and then place on the lined oven trays about 5cm apart. Flatten the balls until about 1cm thick and then press a whole extra almond into the center of each, if desired.
- Bake in preheated oven for 20 minutes, swapping the trays around halfway through baking, or until lightly golden around the edges and cracked on top. Remove from the oven and cool on the trays.
Baker's Tips
- These ghoribas will keep in an airtight container at room temperature for up to 2 weeks.
- For a slightly soft centre bake these biscuits for only 16 minutes.
This recipe is from Anneka's SBS Food online column, Bakeproof: Moroccan Spice.
CLICK HERE for more Bakeproof recipes.
Photography by Alan Benson.
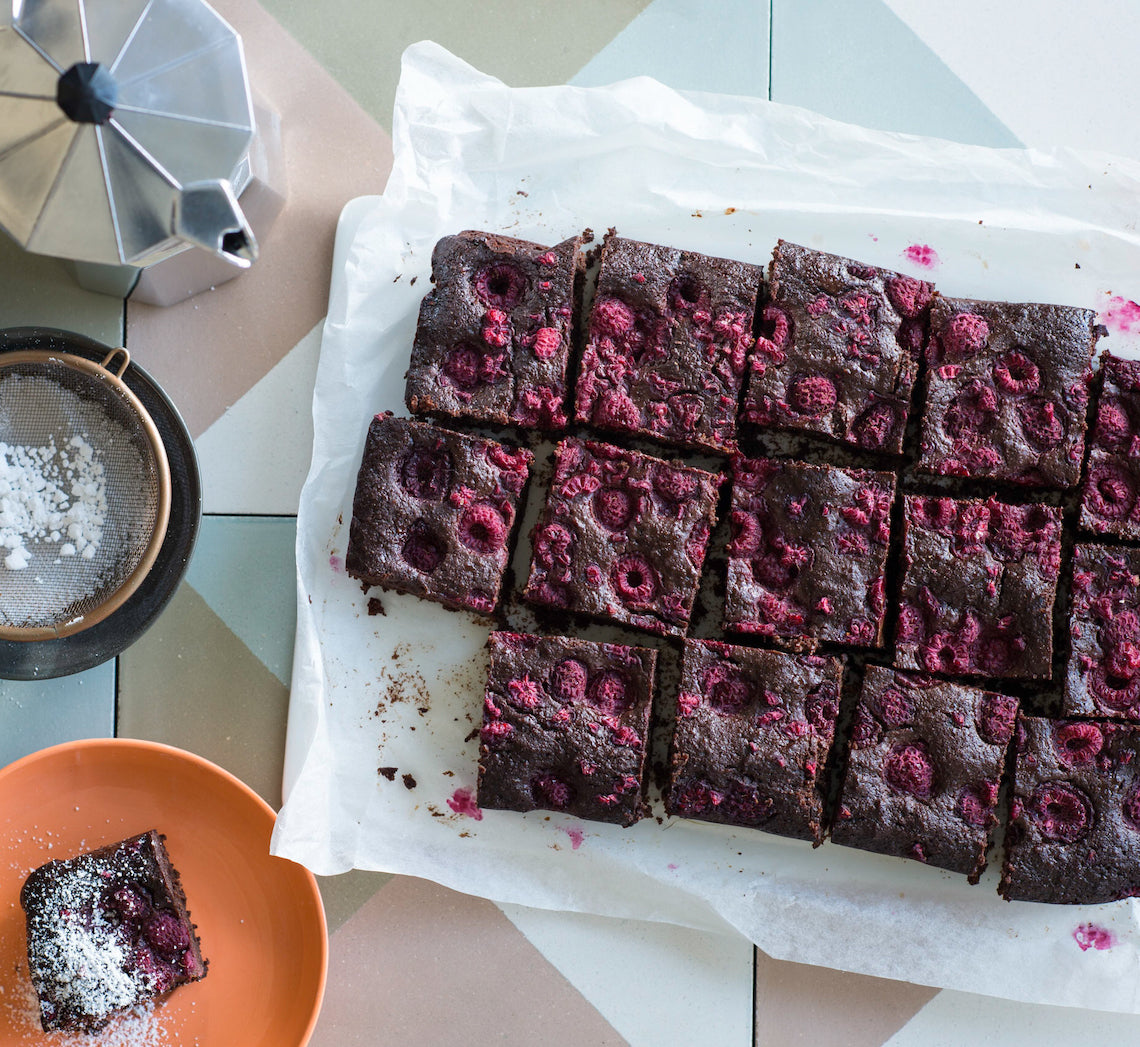
Prep 15minBake 35minMakes about 15
Wickedly rich, this gluten-free brownie can match it with the best of them. Fudgy, rich and studded with tart raspberries, you won't be able to stop at just one piece!
Ingredients
Coconut oil, to grease150g gluten-free, good-quality dark chocolate, chopped
100g (½ cup) coconut oil
135g (¾ cup) coconut sugar
2 eggs, at room temperature, light whisked
60ml (¼ cup) coconut milk
1 teaspoon natural vanilla essence or extract
30g (¼ cup) cocoa powder
2 tablespoons coconut flour
¾ teaspoon gluten-free baking powder
50g (½ cup) almond meal
150g frozen raspberries
Pure icing sugar, to dust (optional)
Method
- Preheat oven to 160°C (140°C fan-forced). Grease a 16cm x 26cm shallow slice tin with coconut oil and line the base and long sides with one piece of baking paper.
- Place the dark chocolate and coconut oil in a medium heatproof bowl over a saucepan of simmering water (don't let the base of the bowl touch the water). Stir occasionally until chocolate and coconut oil melt and the mixture is smooth. Remove bowl from the saucepan.
- Add the sugar, eggs, coconut milk and vanilla to chocolate mixture and use a balloon whisk to stir until well combined. Sift together the cocoa powder, coconut flour and baking powder into a bowl, add the almond meal and stir to combine. Add to chocolate mixture and stir with a spatula until just combined. Add the frozen raspberries and fold gently until just combined.
- Pour mixture into prepared tin and use the back of a metal spoon to spread evenly. Bake in preheated oven for 35 minutes or until moist crumbs cling to a skewer inserted in the centre. Cool in tin and then chill for at least 1 hour (see Baker's Tips).
- Remove brownie from the tin using the baking paper to carefully lift it out. Cut into portions and serve dusted with icing sugar, if desired.
Baker's Tips
- These brownies are a little more fragile than normal fudge brownies and will be easier to cut if you chill them for at least an hour before removing from the tin to cut.
- These brownies will keep in an airtight container in the fridge for up to 5 days. Serve straight from the fridge or stand at room temperature for 30 minutes before serving.
This recipe was originally published in Anneka's SBS Food online column, Bakeproof: Coconut.
Click here for more Bakeproof recipes.
Photography by Alan Benson.
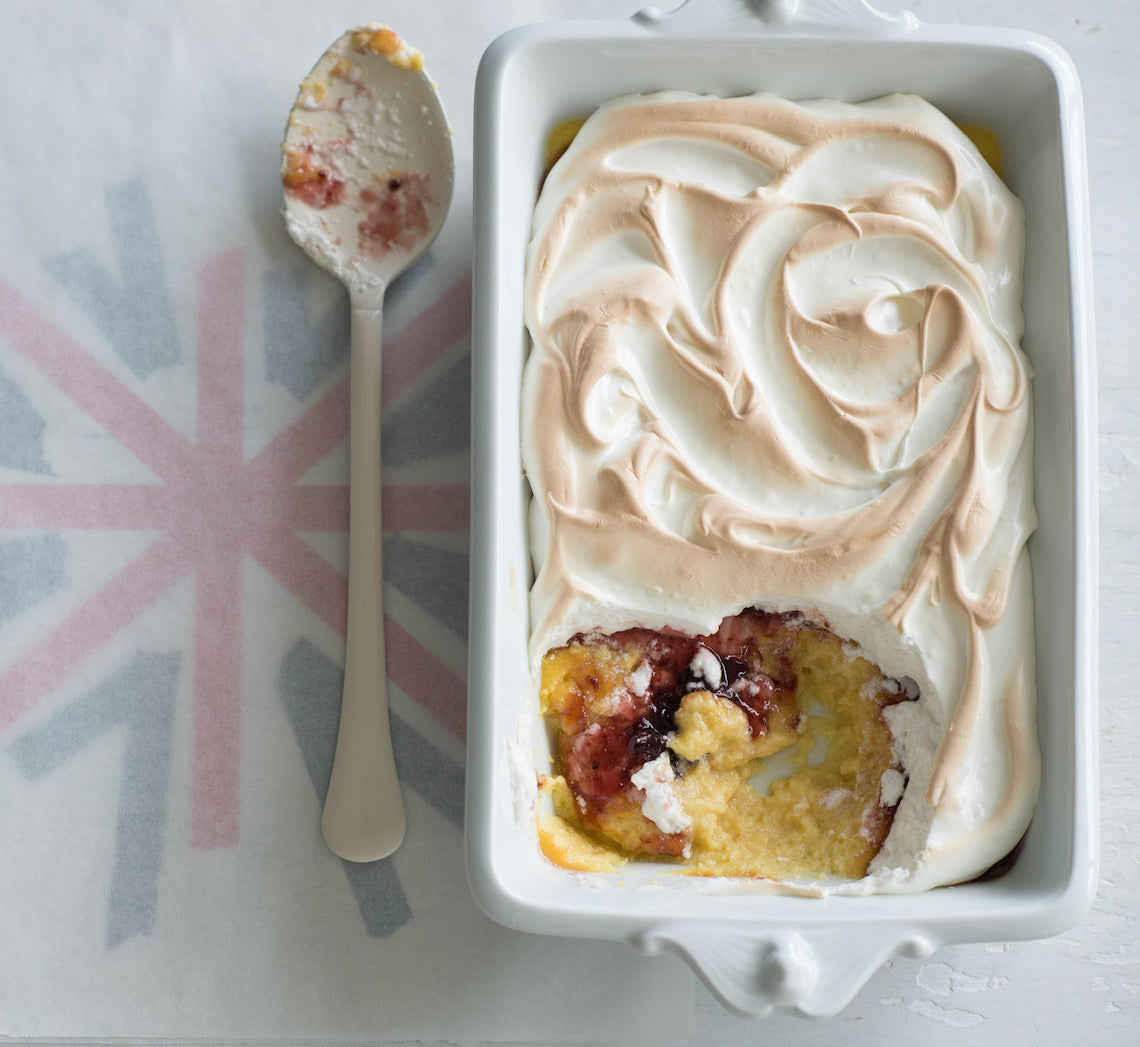
Prep 25minBake 30-35minMakes 8-10 serves
This traditional English pudding is quintessential nursery food – nurturing, soul-warming and economical. Feel free to replace the mixed berry jam with raspberry, plum or strawberry to ensure the sweet but subtle middle layer suits your tastes.
Ingredients
500ml (2 cups/17fl oz) milk
55g (¼ cup/2oz) caster sugar
30g (1 oz) salted butter, diced
Finely grated zest of 1 lemon
5 egg yolks (from 60g/2oz eggs), at room temperature
2½ teaspoons natural vanilla essence or extract
150g (2½ cups, lightly packed/5¼oz) fresh white breadcrumbs
85g (¼ cup/3oz) mixed berry jam (see Baker’s Tips)
1 tablespoon icing sugar, to dust
Meringue Topping
3 egg whites (form 60g/2oz eggs)
Large pinch of salt
110g (½ cup/4oz) caster sugar
1 teaspoon natural vanilla extract or essence
Method
- Put the milk, sugar, butter and lemon zest in a medium saucepan and stir over medium heat until the sugar dissolves and the butter melts. Use a balloon whisk to whisk the egg yolks in a medium heatproof bowl until smooth. Gradually add the warm milk mixture, whisking constantly until well combined. Stir in the vanilla and breadcrumbs.
- Pour the custard mixture into a shallow 1-litre (4-cup/1.75pt) ovenproof dish. Set aside for 15 minutes for the bread to soak up some of the custard.
- Preheat oven to 170ºC/340°F (150ºC/300°F fan-forced).
- Place the ovenproof dish into a roasting pan or larger ovenproof dish. Add enough boiling water to the roasting pan or larger ovenproof dish to reach halfway up the sides of the dish with the custard mixture to create a water bath or bain-marie.
- Bake in preheated oven for 20-25 minutes or until the custard has almost set but still wobbles slightly when touched on the top. Remove from the oven and remove the custard dish to a wire rack. Set aside for 20 minutes or until cooled slightly (stop here if pre-preparing your pudding, see Baker's Tips).
Increase the oven temperature to 190ºC/375°F (170ºC/340°F fan-forced).
- To make the Meringue Topping, use an electric mixer with a whisk attachment to whisk the egg whites and salt on medium-high speed until soft peaks form. With the motor running, gradually add the sugar, a spoonful at a time, and whisk until the sugar has dissolved completely and the mixture is thick and glossy. Whisk in the vanilla.
- Carefully spread the jam over the top of the custard (see Baker's Tips). Spread the Meringue Topping over the jam to cover, swirling as desired.
- Bake in preheated oven for 10 minutes or until the meringue is lightly golden (see Baker’s Tips). Serve immediately.
Baker's Tips
- You can cover the bottom of the roasting pan or larger ovenproof dish with a folded tea towel to stop the dish with the custard sliding around when transferring it to and from the oven.
- You can make this pudding up to the end of step 4 (note in method) up to 2 days before serving. Stand the puddings at room temperature for 30 minutes before continuing with the recipe.
- If your jam is a little thick you can warm it in a small saucepan over a low heat, stirring often, until runny, to make it easier to spread.
- You can caramelise the meringue topping with a blowtorch instead of baking it a second time for a more ‘dramatic’ effect if you wish.
This recipe is from Anneka's SBS Food online column, Bakeproof: Best of British Baking.
CLICK HERE for more Bakeproof recipes.
Photography by Alan Benson.
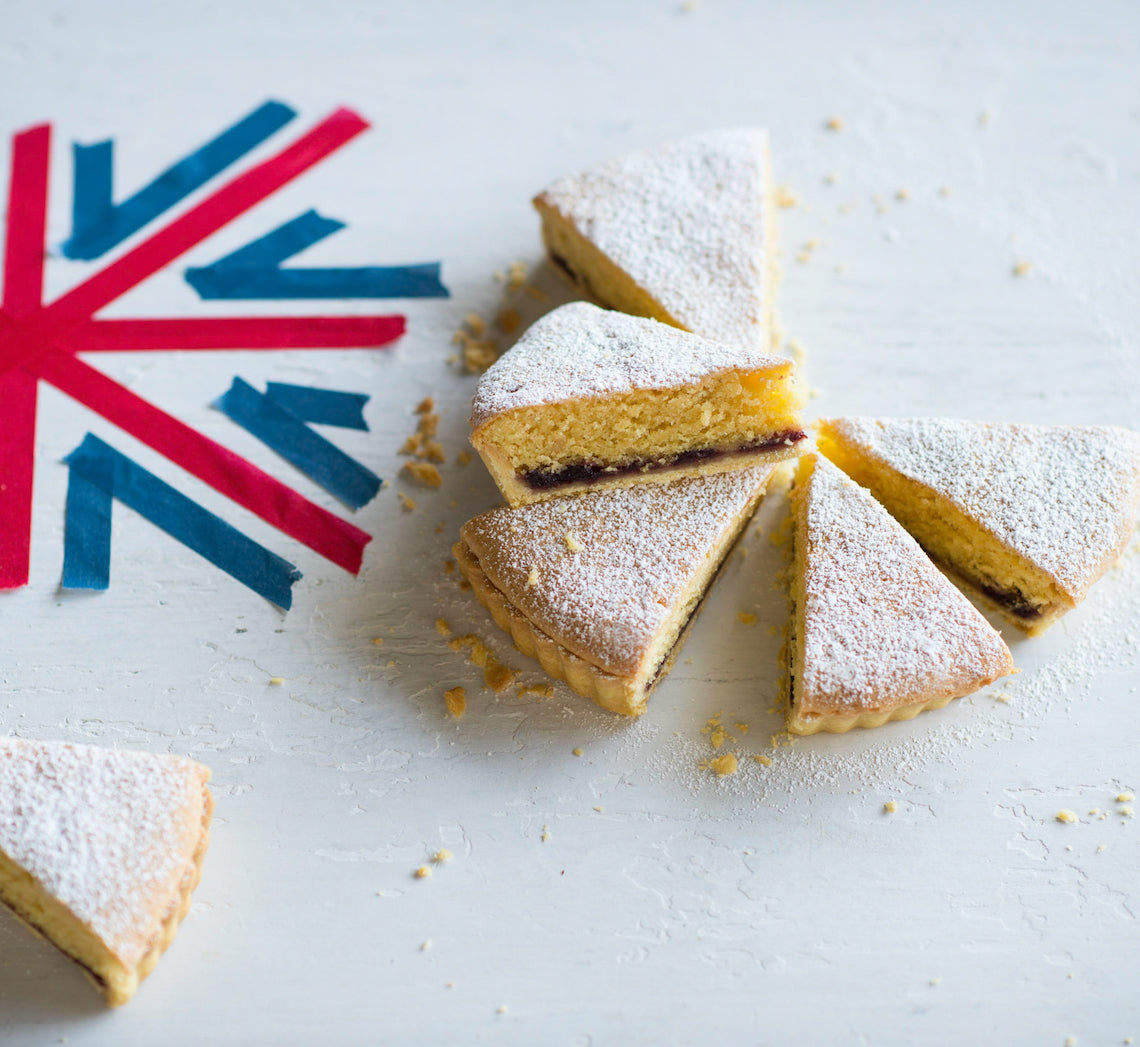
Prep 30minBake 1hr20minMakes about 8-10 serves
Bakewell tart is simply a buttery almond cake in a tart case with a welcome layer of jam in the middle. On first consideration you may not think this combination would work, but take my word for it, it does!
Ingredients
1 quantity sweet shortcrust pastry115g (⅓ cup) raspberry or cherry jam
125g unsalted butter, at room temperature
110g (½ cup) caster sugar
3 drops of almond essence or finely grated zest of 1 lemon
3 eggs
100g (1 cup) almond meal
35g (¼ cup) self-raising flour
icing sugar, to dust
Method
- Preheat oven to 200ºC (180ºC fan-forced).
- Use a lightly floured rolling pin to roll out the pastry on a lightly floured bench top to a round about 3mm thick. Carefully drape the pastry loosely around the rolling pin. Place it over an ungreased round 23cm (base measurement) tart tin with a removable base and then unroll the pastry being careful not to stretch it. Gently lift the edge of the pastry and ease it into the tart tin to line the base and sides and settle it into the corners. Use your fingertips to press it gently into the corners without stretching it. Then, working around the tin, press the pastry into the side using your thumb or finger. Roll the rolling pin over the top of the tart tin to trim any overhanging pastry.
- Place the tart tin on an oven tray. Prick the pastry base with a fork about 12 times. Line the pastry case with baking paper or foil and fill with pastry weights, dried beans or raw rice, making sure they press into the corners and they fill the case. Bake in preheated oven for 15 minutes.
- Remove the pastry case from oven and use the paper or foil to lift the weights out of the case. Return to the oven and bake for a further 15-20 minutes or until cooked through and lightly golden. Remove from the oven.
- Spread the jam evenly over the base of the tart case and set aside. Reduce the oven temperature to 160ºC (140ºC fan-forced).
- Use an electric mixer to beat the butter, sugar and almond essence or lemon zest until pale and creamy. Add the eggs one at a time, beating well after each addition. Combine the almond meal and flour, add to the butter mixture and beat on lowest possible speed until just combined. Spread the mixture evenly over the jam in the tart case.
- Bake in preheated oven for 40-45 minutes or until golden brown and a skewer inserted into the centre comes out clean. Cool in the tin for 10 minutes before removing, dusting with icing sugar and serving warm. Alternatively cool in the tin and serve at room temperature.
Baker's Tips
- This tart will keep in an airtight container at room temperature for up to 2 days.
This recipe is from Anneka's SBS Food online column, Bakeproof: Best of British Baking.
CLICK HERE for more Bakeproof recipes.
Photography by Alan Benson.
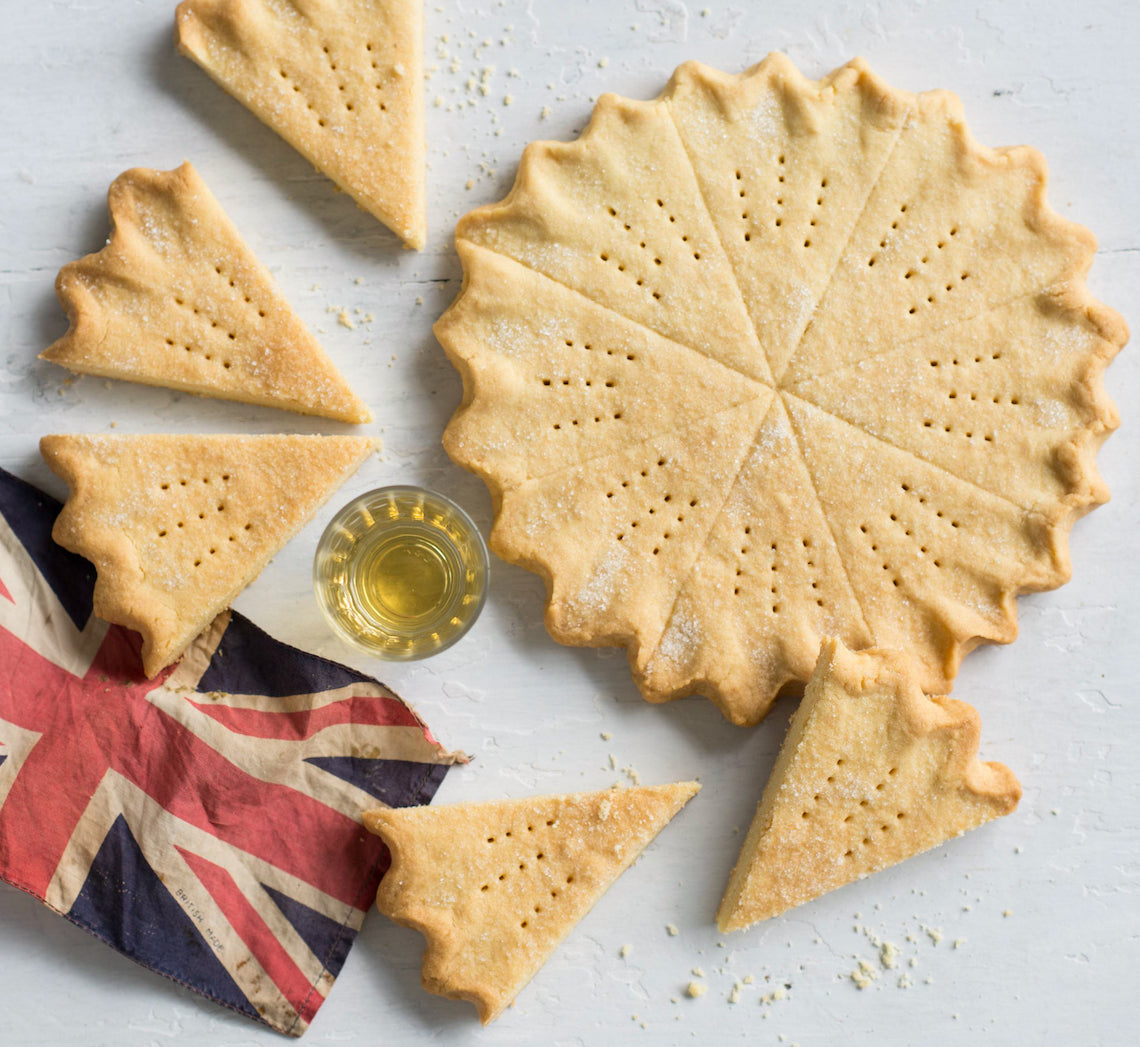
Prep 20minBake 40-45minMakes 16 serves/wedges
Mary Queen of Scots' fondness for shortbread is said to be the reason for its increased popularity in the 1500s. Nowadays it is loved so much there is even a National Shortbread Day on the 6th January each year! The key to good shortbread is slow baking until it is pale golden and cooked through – if over baked, or baked too quickly, it will become slightly bitter in taste due to the ‘burnt’ butter.
Ingredients
250g (9oz) salted butter, cubed and softened slightly
110g (½ cup/4oz) white granulated sugar, plus 1 tablespoon extra to sprinkle
300g (2 cups/10½oz) plain flour
55g (⅓ cup/2oz) rice flour
Method
- Preheat oven to 160ºC/315°F (140ºC/285°F fan-forced). Use a 20cm/4cm cake tin to draw a circle on two separate pieces of non-stick baking paper, turn over and set aside.
- Use an electric mixer to beat the butter and sugar until starting to become pale and creamy, but not too aerated (do not over mix).
- Sift together the plain flour and rice flour, add to the butter mixture and use a wooden spoon and then your hands to mix until evenly combined and a soft dough forms. Divide the dough in half and shape both portions into discs.
- Place each disc in the centre of the marked circles on the baking paper and use a lightly floured rolling pin to roll each out to fill the circles. Use your fingertips to neaten the edges and then pinch the edges to create a decorative edge. Use the baking paper to lift the shortbread rounds onto two oven trays. Sprinkle with the extra sugar, dividing evenly between the rounds. Use a large sharp knife to mark each round into 8 wedges and then use a fork to pick each wedge three times.
- Bake in preheated oven for 40-45 minutes, swapping the trays around half way through baking, or until pale golden and cooked through. Cool on the trays. Cut into wedges to serve.
Baker's Tip
- This shortbread will keep in an airtight container at room temperature for up to 1 week.
Variations
Shortbread Fingers: Use a lightly floured rolling pin to roll a dough portion until about 8mm/3/8in thick. Sprinkle with the extra sugar. Use a large sharp knife to cut into 4cm x 7cm (1½in x 2¾in) fingers, re-rolling and cutting any offcuts. Place on the oven trays about 2cm/¾in apart and use a fork to prick each finger four times. Repeat with the reaming dough portion. Bake in preheated oven for 25-30 minutes, swapping the trays around half way through baking, or until pale golden and cooked through.
Brown Sugar Shortbread: Replace the white granulated sugar with brown sugar or dark brown sugar.
This recipe is from Anneka's SBS Food online column, Bakeproof: Best of British Baking.
CLICK HERE for more Bakeproof recipes.
Photography by Alan Benson.
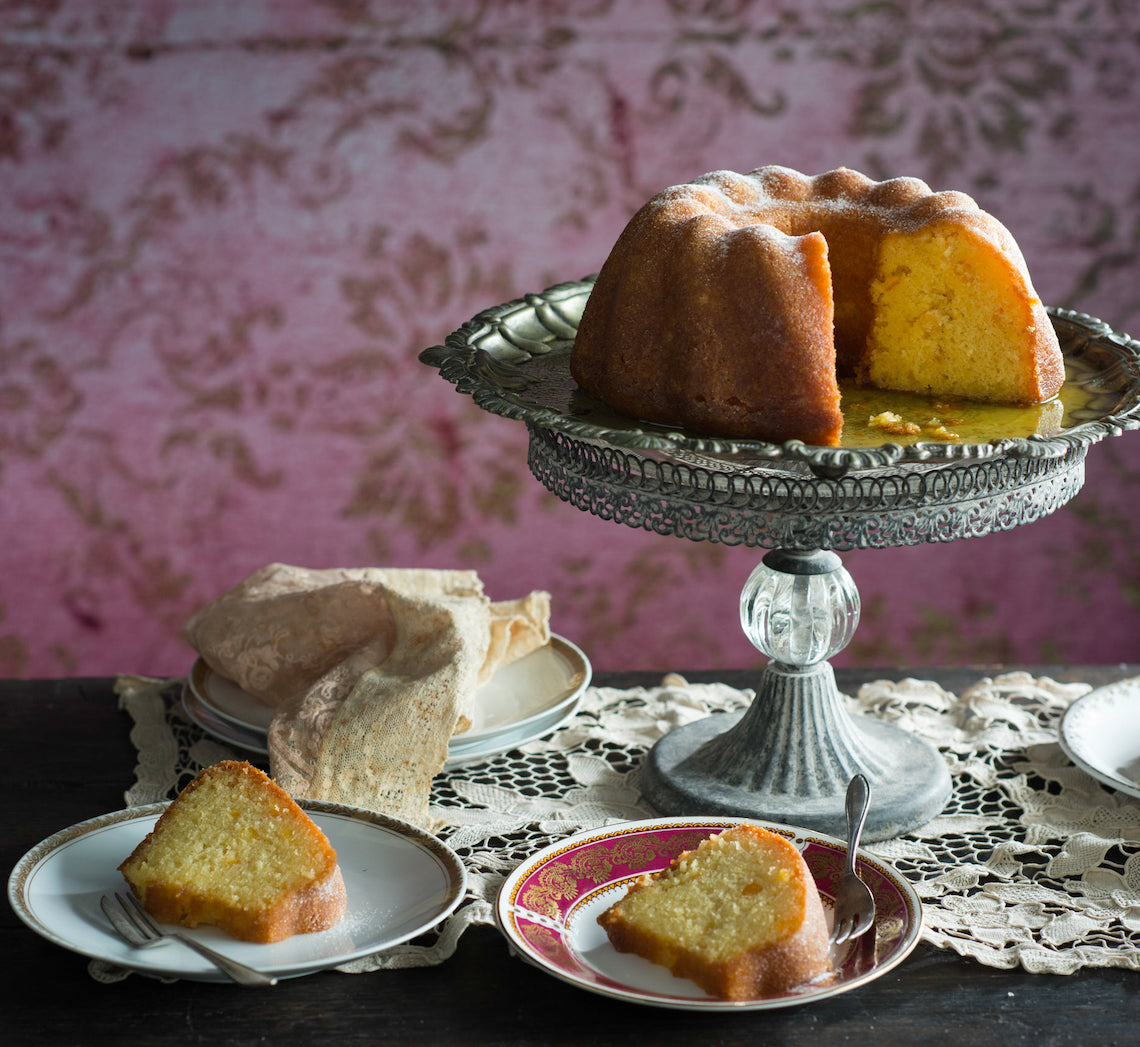
Prep 30minBake 50minMakes 12 serves
Originally a cake of the poor, Gugelhupf is a firm staple in Austria and is of the most popular afternoon tea offerings especially in the local kafes (coffee houses). But, as Emperor Franz Josef preferred, it is often eaten for breakfast. There seem to be as many variations of this yeast or sponge-based cake as there are days in the year – this one has a luscious orange syrup to keep it lovely and moist.
Ingredients
20g (¾oz) butter, melted, combined with 1½ teaspoons plain flour, to grease
250g (9oz) unsalted butter, at room temperature
125g (1 cup/4½oz) icing sugar, sifted
2 teaspoons natural vanilla essence or extract
4 eggs, at room temperature, separated
250g (1⅔ cups/9oz) plain flour, plus extra to dust
1½ teaspoons baking powder
Good pinch of salt
75g (2¾oz) candied orange rind
110g (½ cup/4oz) caster sugar, plus 1 tablespoon extra to sprinkle
Orange Syrup
250ml (1 cup/9fl oz) strained fresh orange juice
145g (⅔ cup/5oz) caster sugar
50ml (2½ tablespoons/1¾fl oz) orange liqueur
Method
- Preheat oven to 180°C/350°F (160°C/315°F fan-forced). Brush a 2.5 litre/5.25pt (24cm/ 9½in diameter) bundt tin with the melted butter and flour mixture to grease.
- Use an electric mixer to beat the butter and icing sugar and vanilla until pale and creamy. Add the egg yolks and beat until well combined and creamy.
- Sift together the flour, baking powder and salt and then stir through the candied rind. Use an electric mixer with a whisk attachment to whisk the egg whites with the salt until soft peaks form. Add the caster sugar and whisk until thick and glossy. Use a large metal spoon or spatula to fold the egg whites into the butter mixture until evenly combined. Then gently fold in the flour mixture until just combined.
- Spoon the mixture into the prepared tin and smooth the surface with the back of a spoon. Bake in preheated oven for 45-50 minutes or until a skewer inserted comes out clean. Stand in the tin for 5 minutes before turning onto a plate with a lip.
- Meanwhile, to make the Orange Syrup, combine the orange juice and sugar in a small saucepan and stir over medium heat until the sugar dissolves. Bring to a simmer and then remove from the heat. Stir in the orange liqueur.
- Slowly pour the hot syrup over the hot cake, allowing it to soak in as much as possible. Sprinkle with the extra caster sugar and cool to room temperature (this will take about 1 hour). Serve in slices for morning or afternoon tea or dessert on its own or with cream.
Baker's Tips
- This cake will keep in an airtight container at room temperature for up to 3 days.
This recipe is from Anneka's SBS Food online column, Bakeproof: Austrian Baking.
CLICK HERE for more Bakeproof recipes.
Photography by Alan Benson.
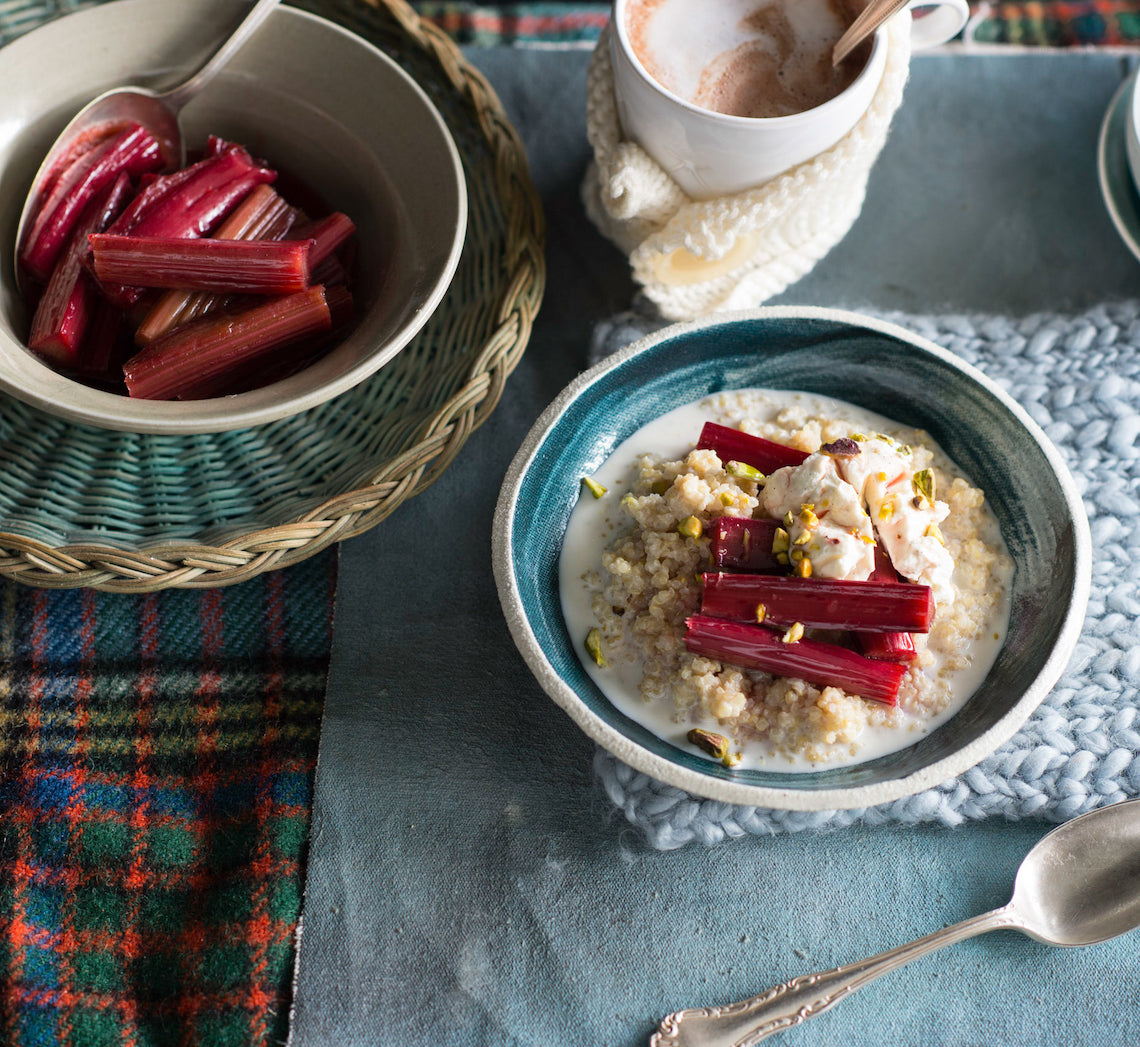
Prep 25min (+overnight standing time)Bake 55minMakes 6-8 serves
Quinoa porridge is currently the darling of the café menu. This one is a no-fuss baked version teamed with tangy rhubarb and a vanilla and honey-spiked labna, so you can enjoy this beauty without even leaving home.
Ingredients
300g (1½ cups) white quinoa
500ml (2 cups) boiling water
55g (¼ cup, firmly packed) brown sugar
1 cinnamon stick
375ml (1½ cups) milk
Toasted pistachio kernels, chopped, to serve
Vanilla-honey labna
1½ vanilla beans, split and seeds scraped
390g (1½ cup) greek-style natural yoghurt
¼ cup honey
Roasted rhubarb
550g trimmed rhubarb (about 2 bunches), cut into 6cm lengths
110g (½ cup) raw sugar
Method
- To make the Vanilla labna, place the vanilla seeds (reserve the bean for the rhubarb), yoghurt and honey in a bowl and stir to combine evenly. Line a sieve with two layers of muslin cloth or a linen tea towel and place over a bowl. Spoon the yoghurt into the sieve, fold any overhanging cloth over to enclose the yoghurt. Refrigerate overnight (at least 8 hours) to drain.
- Preheat oven to 200ºC (180ºC fan-forced). To make the Oven-baked quinoa, combine the quinoa, boiling water, brown sugar and cinnamon in a 1.5 litre capacity (6 cup) ovenproof dish. Cover with foil and bake for 30 minutes, stirring occasionally.
- Meanwhile, to make the Roasted rhubarb, rinse the rhubarb and shake off any excess water. Place in a bowl with the sugar and reserved vanilla bean and toss to combine. Transfer to an ovenproof dish just large enough to hold the rhubarb in a single layer and cover with foil.
- After the quinoa has been baking for 30 minutes, stir in the milk, cover and return to the oven with the rhubarb. Bake for another 20 minutes, stirring the quinoa 2-3 more times during baking.
- Remove the foil from the rhubarb and bake both for a further 5 minutes or until the quinoa is tender and porridge-like and the rhubarb is still holding its shape but tender when tested with a skewer.
- Immediately spoon the quinoa porridge into bowls, top with the rhubarb and pan juices, and a spoonful of labna. Sprinkle with pistachios and serve immediately.
Baker's Tips
- The rhubarb can be roasted up to 2 days before serving and kept in an airtight container in the fridge. Remove from the fridge about 1 hour before serving to bring to room temperature
- The vanilla and honey labna can be made up to 3 days before serving. Keep in an airtight container in the fridge.
This recipe is from Anneka's SBS Food online column, Bakeproof: Autumn Brunch
CLICK HERE for more Bakeproof recipes.
Photography by Alan Benson.
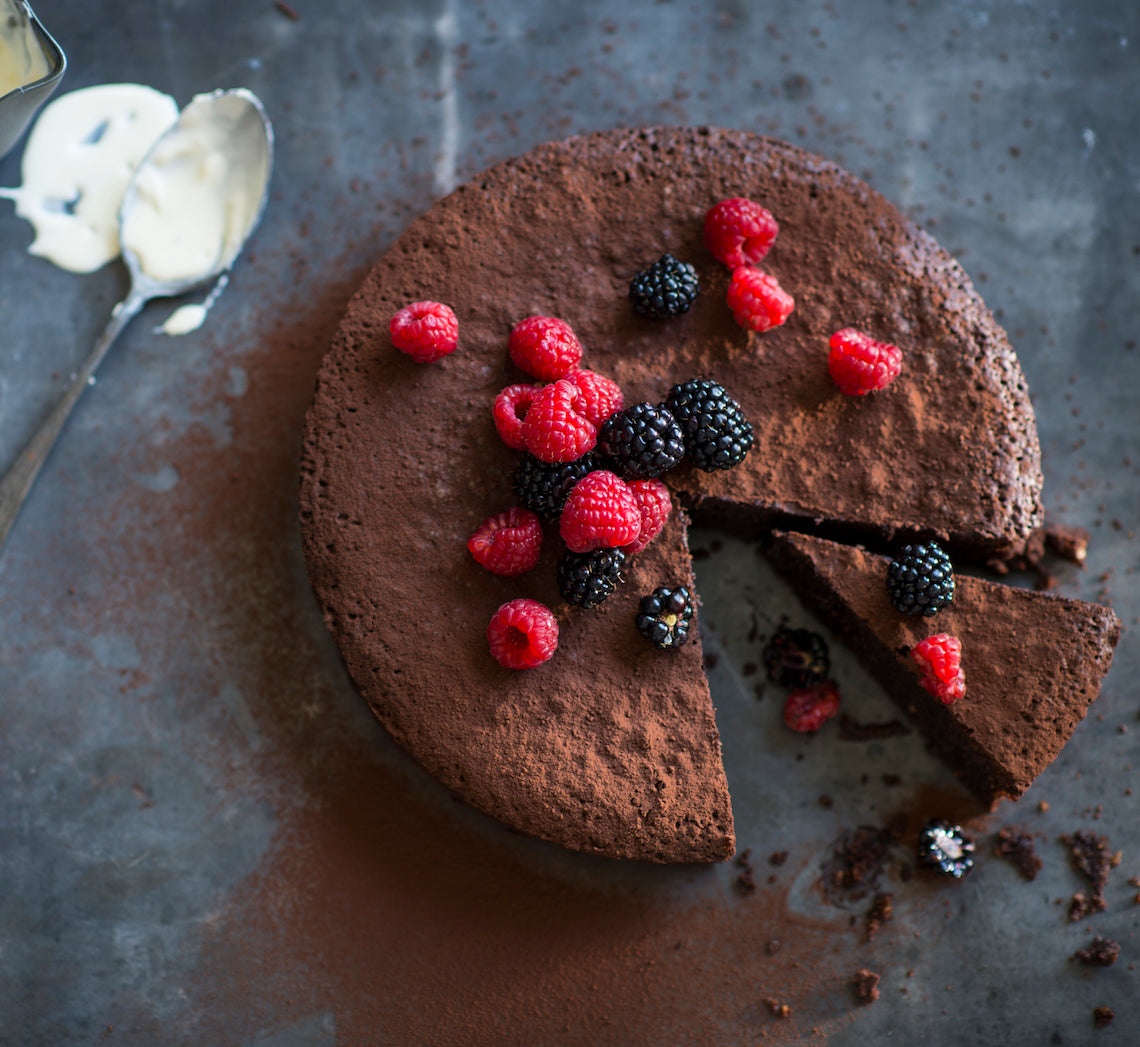
Prep 25min (+2hr 30min cooling time)Bake 45-50minMakes 12-16 serves
I love this cake. Rich, decadent and completely addictive, it is one of the easiest cakes I have ever made but also one of the most impressive. The toasted hazelnuts give a wonderful 'toasty' undertone, but you can use ground toasted pecans, almonds or pistachios (or a combination of nuts) instead – just take your pick!
Ingredients
Melted butter, to grease
200g (7oz) roasted and peeled hazelnuts
250g (9oz) good-quality dark chocolate (45-54% cocoa), chopped
185g (6½oz) unsalted butter, cubed
40g (1⅓oz/⅓ cup) cocoa powder, sifted
60ml (2fl oz/¼ cup) strong, freshly brewed coffee
6 eggs, at room temperature
275g (9¾oz/1¼ cups) caster sugar
Cocoa powder or icing sugar, to dust
Cream or ice cream, and fresh berries, to serve
Method
- Preheat oven to 180°C/350°F (160°C/315°F fan-forced). Brush a 22cm (8¾in), base measurement, springform tin with the melted butter to grease and line the base with non-stick baking paper. Place the tin on a lined baking tray.
- Process the hazelnuts in a food processor using the pulse button until finely ground. Set aside.
- Combine the chocolate, butter and cocoa powder in a medium heatproof bowl over a saucepan of simmering water (don’t let the base of the bowl touch the water). Heat, stirring occasionally, until melted and smooth. Remove from heat and stir in the coffee. Set aside.
- Use a balloon whisk to mix the eggs and sugar until just combined. Stir in the chocolate mixture and then the ground hazelnuts until evenly combined.
- Pour into the prepared tin and bake in preheated oven for 45-50 minutes or until the centre 10cm (4in) still wobbles slightly when the tin is shaken gently. Remove from the oven and cool in the tin on a wire rack (this will take about 2½ hours).
- Serve dusted with cocoa powder or icing sugar and accompanied by cream or ice-cream, and berries.
Baker's Tips
-
This cake will keep in an airtight container in the fridge for up to 5 days. Bring to room temperature to serve.
Photography by Alan Benson.
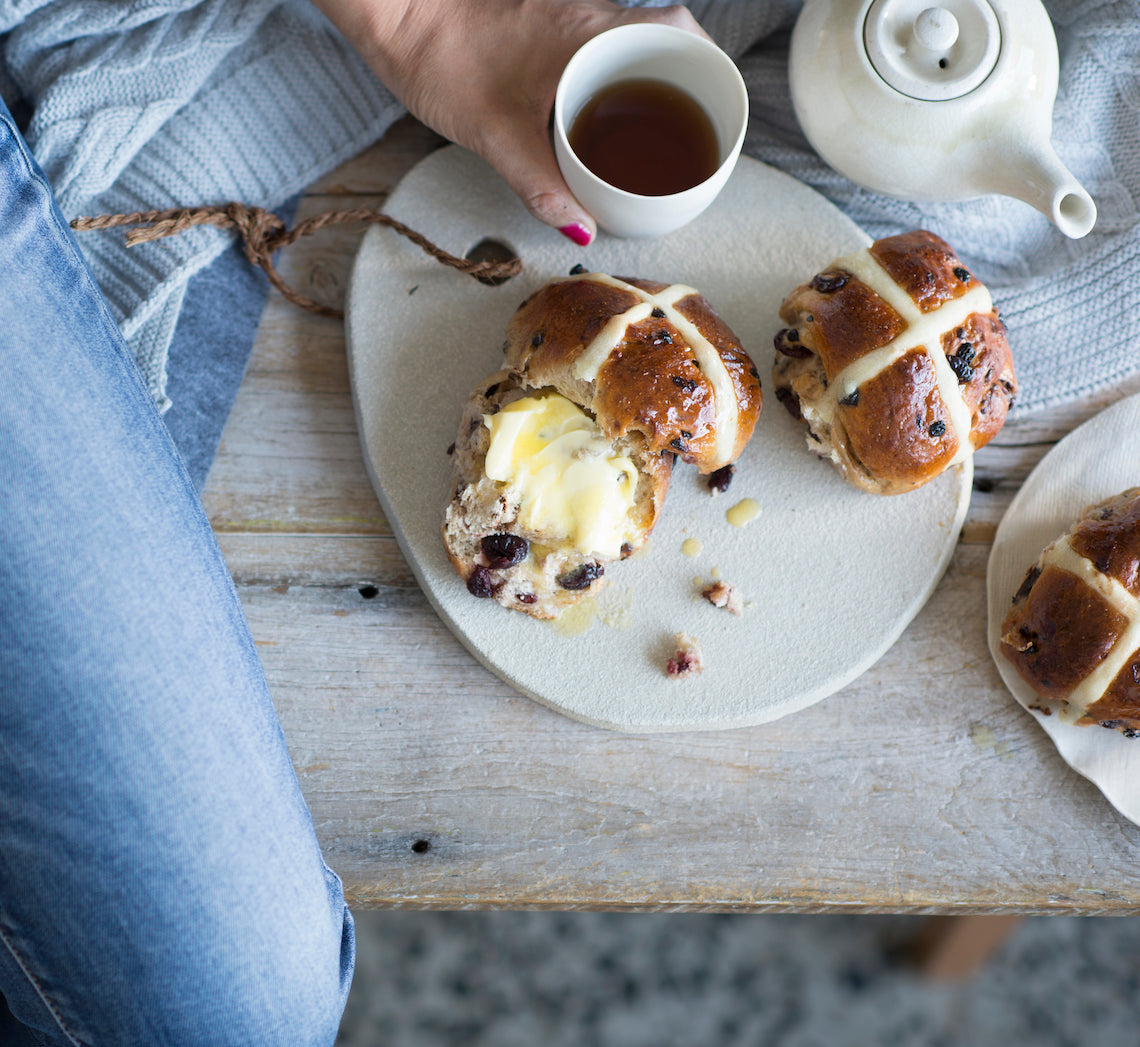
Prep 25min (+1hr 30min proving time)Bake 25minMakes 12
An updated version of the traditional favourite, these hot cross buns are studded with chunks of dark chocolate and tart, dried cherries. They're simply too hard to resist – especially when served warm with lashings of butter!
Ingredients
750g (5 cups/1lb 10½oz) strong bread or pizza (high protein) flour (see Baker's Tips)
55g (¼ cup/2oz) caster sugar
2 x 7g sachets (4 teaspoons) instant dried yeast
1½ teaspoons mixed spice
1½ teaspoons ground cinnamon
1 teaspoon salt
150g (1 cup/5¼oz) dried cherries (see Baker's Tips)
75g (½ cup/2¾oz) currants
435ml (1¾ cups/14¾fl oz) milk
60g (2fl oz) salted butter, cubed, plus extra, to grease and serve
2 eggs, at room temperature
1 teaspoon natural vanilla essence or extract
100g (3½oz) good-quality dark chocolate, chopped
Flour paste
75g (½ cup/2¾oz) plain flour
75ml (2½fl oz) water
Glaze
55g (¼ cup/ 2oz) caster sugar
2 tablespoons water
Method
- Put the bread flour, sugar, yeast, mixed spice, cinnamon and salt in a large bowl and mix to combine. Stir through the dried cherries and currants.
- Heat the milk and butter in a small saucepan over medium heat until the butter has just melted and the milk is lukewarm. Whisk one of the eggs with the vanilla and add to the milk mixture. Whisk to combine. Add to the dry ingredients and use a wooden spoon and then your hands to mix to a soft dough.
- Turn out onto a lightly floured bench top. Knead for 8-10 minutes or until smooth and elastic. Lightly grease a clean large bowl with a little butter, add the dough and turn to coat the dough. Cover with plastic wrap and set aside in a warm, draught-free place for 1 hour or until doubled in volumn.
- Line a large baking tray with baking paper. Punch the centre of the dough down with your fist. Turn onto a lightly floured bench top. Knead for 2-3 minutes or until smooth. Knead in the chocolate until evenly combined. Divide the dough into 12 equal portions. Roll each portion into a ball and place on the tray, allowing a little room for spreading. Cover with a damp tea towel and set aside in a warm, draught-free place for 30 minutes or until almost doubled in size.
- Preheat the oven to 180°C/350°F (160°C/315°F fan-forced). Meanwhile, make the Flour Paste. Combine the flour and water in a bowl and beat with a wooden spoon until smooth. Spoon into a small, good-quality snap-lock bag and seal.
- Whisk the remaining egg and brush the tops of the buns with it. Snip a small hole in the corner of the snap-lock bag containing the Flour Paste and pipe crosses on the buns.
- Bake in the preheated oven for 25 minutes or until the buns are cooked and sound hollow when tapped on the base.
- Meanwhile, make the Glaze. Combine the sugar and water in a small saucepan over medium heat and stir until the sugar dissolves. Bring to a simmer and simmer for 1 minute. Transfer the hot cross buns to a wire rack and brush the tops with the glaze. Serve warm, spread with butter.
Baker's Tips
- Bread and pizza flour (also known as 'strong' flour) has a higher gluten content than regular plain flour. This type of flour is more suited to use in yeast-based bread recipes like these buns and will give you a better final texture (the resulting bread will be more 'bread-like' with a slightly chewy texture rather than a fine, cake-like texture). Look for a protein content of around 11-13 percent for the best results with this recipe.
- Dried cherries are available at selected supermarkets, delicatessens, grocery shops and specialty food stores. You can replace them with good-quality dried cranberries.
- These hot cross buns are best eaten the day they are made although they will freeze well. To freeze, wrap in plastic wrap and then seal in an airtight container or freezer bag and freeze for up to 3 months. Thaw them at room temperature or split while still frozen and toast.
Recipe from BakeClass by Anneka Manning (Murdoch Books).
Photography by Alan Benson.
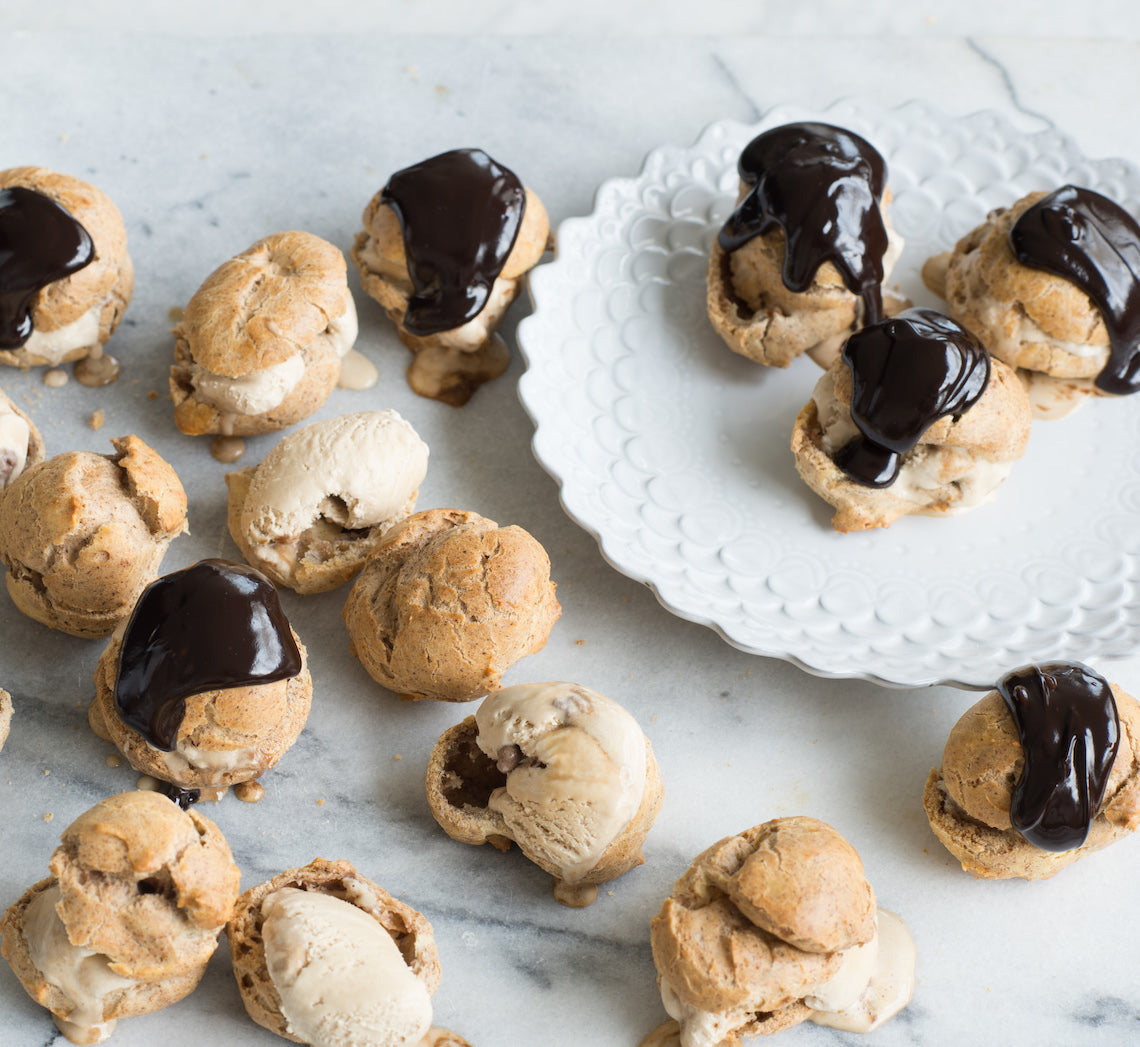
Prep 20min (+pastry making and 30min cooling time)Bake 40minMakes 10
Also called choux a la crème or cream puffs, profiteroles are basically choux pastry balls filled with crème patissiere, whipped cream or, as in these, ice-cream. These profiteroles, a heavenly combination of cinnamon, coffee and chocolate, are just a little bit addictive!
Ingredients
- 1 quantity basic choux pastry
- 2 teaspoons caster sugar
- 2 teaspoons ground cinnamon
- 1 egg, lightly whisked, to glaze
- 1 litre homemade or bought espresso or coffee ice-cream, to serve
Fudge sauce
- 200ggood quality dark chocolate (70% cocoa works well), chopped
- 125ml (½ cup) pouring cream
- 2 tablespoons golden syrup
- 1 teaspoon natural vanilla essence or extract
- ¼ teaspoon salt
Method
- Preheat oven to 200°C. Line 2 large oven trays with non-stick baking paper.
- Use a wooden spoon to beat the sugar and cinnamon into the warm prepared choux pastry until well combined.
- Spoon 30 heaped teaspoonfuls of the choux pastry onto the lined trays about 2cm apart to allow for spreading. Use a damp fingertip to smooth any peaks. Sprinkle the trays with a little water.
- Bake in preheated oven for 20 minutes or until well puffed and golden. Reduce the oven to 180°C and bake for a further 20 minutes. Turn off the oven and leave the puffs to cool in the oven for at least 30 minutes to dry. Remove from the oven and set aside to cool completely.
- Meanwhile, to make the fudge sauce, combine all the ingredients in a small saucepan and stir over low heat until the chocolate melts and the sauce is smooth. Set aside and keep warm.
- To serve, cut each of the cinnamon choux puffs in half and fill each with small scoop of ice-cream. Place three on each serving plate and spoon over the warm chocolate fudge sauce. Serve immediately.
Baker's Tips
- The cinnamon choux puffs can be made up to 3 days ahead of serving. Store in an airtight container at room temperature. Refresh by placing on an oven tray and reheating in an oven preheated to 180°C for 10 minutes. Cool, assemble and serve.
- The chocolate fudge sauce can be made up to 1 week ahead of serving. Keep in an airtight jar or container in the fridge. Reheat in a small saucepan over a low heat, stirring occasionally, until smooth and heated through.
This recipe is from Anneka's SBS Food online column, Bakeproof: Choux Pastry.
CLICK HERE for more Bakeproof recipes.
Photography by Alan Benson.
Prep 20-30minMakes 30 profiteroles or 12 average-sized éclairs
Completely unique in the pastry world, choux pastry goes against every rule in the book – eggs are more important than butter, the mixture is heated, and beating, as opposed to 'rubbing', is the method of mixing.
Ingredients
- 150g (1 cup) plain flour
- 185ml (¾ cup) water
- ½ teaspoons salt
- 75g salted butter, diced
- 4 eggs (59g each)
Method
- Sift the flour onto a sheet of baking paper.
- Combine the water, salt and butter in a medium saucepan and heat over medium heat until just boiling. Remove immediately from the heat, add all the flour at once and stir vigorously with a wooden spoon to combine.
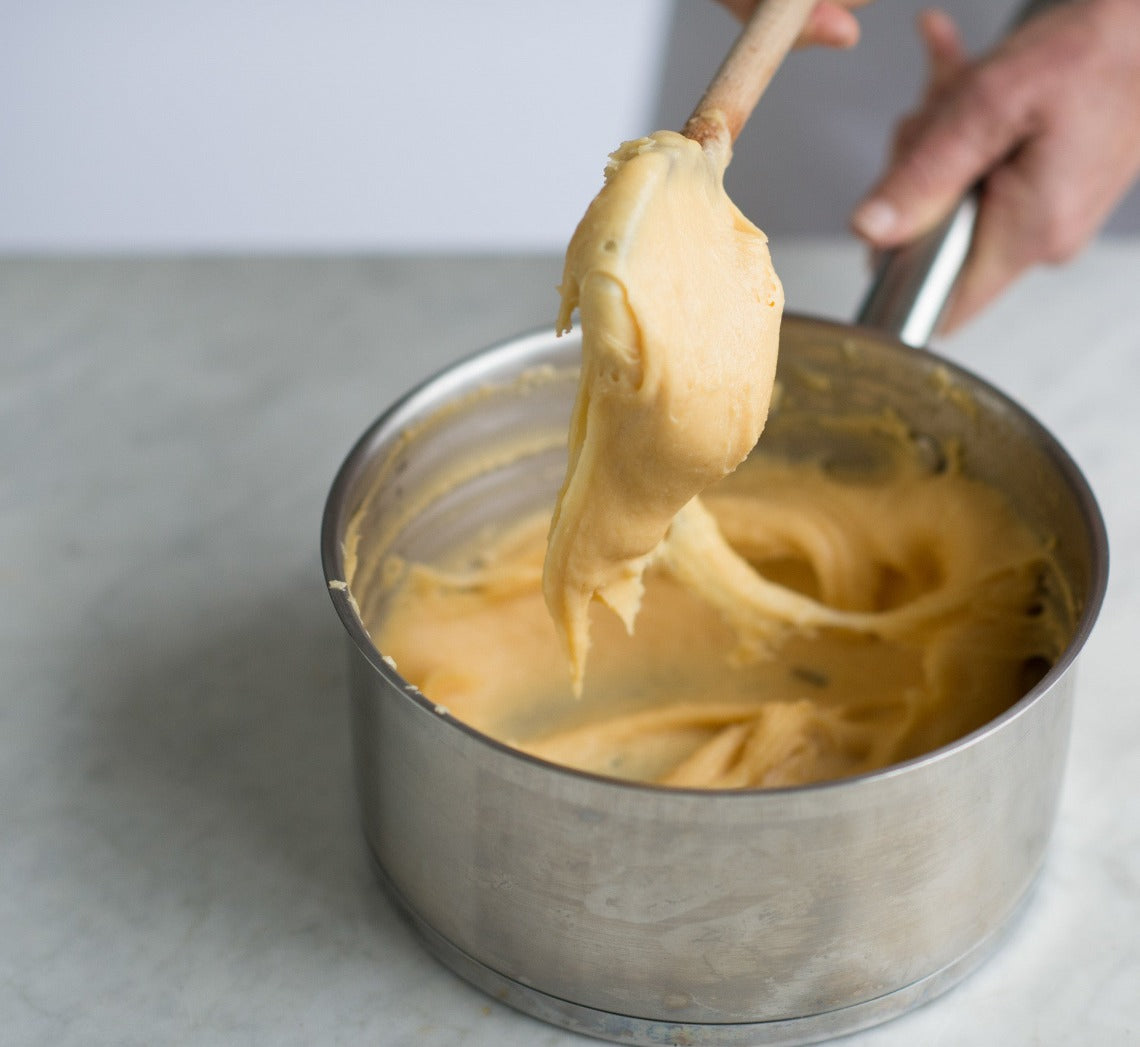
- Return the saucepan to the heat and beat vigorously over a low heat for 30 seconds or until the mixture is smooth and starts to pull away from the sides of the pan and a flour film forms on the bottom of the pan (image 1). Remove the saucepan from the heat and set aside for 3-5 minutes or until cooled slightly.
- Use a fork to whisk together the 3 eggs. Add about one-quarter of the whisked eggs to the flour mixture at a time (image 2), beating well with the wooden spoon after each addition until well combined and the mixture thickens and becomes smooth before adding more (image 3 and 4). Use a fork to lightly whisk the extra egg and gradually add to the flour mixture a teaspoon at a time (image 5) and beating well after each addition until the mixture is thick, shiny and falls heavily from the spoon (image 6). You may not need to use all of the last egg.
- Pipe (as below) and bake immediately, or cover well and keep in the fridge for up to 24 hours before baking as directed. Bring to room temperature before using.
Baker's Tips
Making choux pastry
There are three main things to keep in mind when making choux pastry to ensure success:
- Measure your ingredients accurately, as the key to good choux pastry is a balance between the major ingredients of flour, water and eggs. If there is an imbalance between these, there is a great chance your choux won’t puff, become crisp or turn a golden brown colour.
- Add the egg gradually. The amount of egg needed will vary and is determined by how much can be absorbed by the flour (which can vary slightly from batch to batch). If too much egg is added or if it is added too quickly, the consistency of the choux pastry will be affected, and in turn its ability to rise. Similarly, if not enough egg is incorporated, the choux pastry won’t puff and it will be dense inside. This is because it is the moisture in the egg that is converted to steam in the heat of the oven and that, in turn, creates the air pocket inside. So the more egg, the more the mixture will puff.
- Oven temperature is important. If the oven temperature is too low or if the oven door is opened for too long and valuable heat is lost during baking, your choux pastry won’t rise as well. The same applies if you don’t bake it for long enough.
Piping choux pastry
- Choux pastry can either be spooned or piped onto a baking paper-lined oven tray for baking, depending on the desired result.
- Sprinkle the lined baking tray with a little water before piping or shaping your choux pastry – this creates extra steam in your oven and will help the choux pastry rise and puff.
- Spoon the choux pastry into a large pastry bag filled with a large piping nozzle. Twist the end of the pastry bag to contain the mixture and push it towards the nozzle end and expel any air pockets. Place the twisted end between your index finger and thumb of your writing hand and place the bag in the palm of your hand. Use your other hand to hold the nozzle end and guide it as you pipe.
- Firmly hold the bag about 1 cm above the lined tray and at a slight angle. Press gently with the hand holding the bag, pushing the pastry through the nozzle and moving the bag to create the desired shape. (For profiteroles and small rounds, hold the bag and nozzle directly over the tray, perpendicular to the tray and pipe the desired size.)
- When you reach the desired length, pipe the mixture back onto the shape when finished to avoid a peaked end. Use a damp fingertip to press and neaten any peaks.
- To help create uniformed lengths for éclairs, you can mark lines on the underside of the baking paper with a pencil. For evenly-sized choux puffs, you can mark the lined tray with a flour-dipped cutter of the desired size.
- Bake the choux pastry as directed in the recipe.
Cooling choux pastry
- Perfect choux pastry is puffy and crisp, hollow inside and is a deep golden colour. To help the éclairs and puffs dry out inside you can either split them in half or piece a hole in the base or side before they cool to allow any excess steam to escape.
To make choux pastry with an electric mixer
- Follow the recipe until the point of removing the flour mixture from the heat. Transfer the mixture to the bowl of an electric mixer with a paddle attachment and beat in the 3 eggs, one at a time, beating until well combined and smooth after each addition. Use a fork to lightly whisk the last egg and gradually add to the flour mixture, a teaspoon at a time, beating well after each addition until the mixture is thick, glossy and falls heavily from the spoon. You may not need to use all of the last egg.
This recipe is from Anneka's SBS Food online column, Bakeproof: Choux Pastry.
CLICK HERE for more Bakeproof recipes.
Photography by Alan Benson.


