
- home
- BAKERECIPES
BakeRecipes
Bringing real baking into your home with deliciously simple recipes.
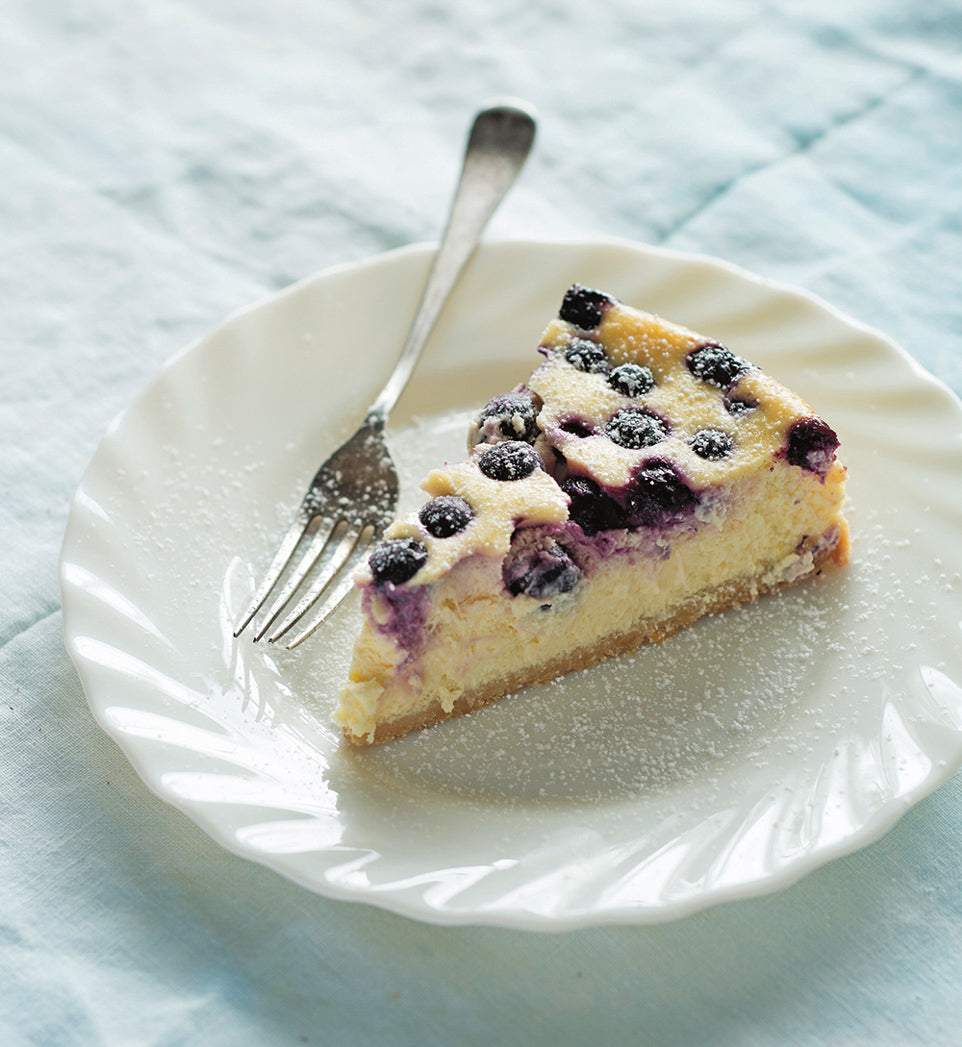
Prep 25min (+ 3-4hr cooling and 3hr or overnight chilling time)Bake 1hr 10minMakes 10 serves
Baked low and slow, then cooled gradually, this Lemon & Blueberry Cheesecake has a beautifully smooth, luscious texture throughout. The creamy, gently tangy filling is lifted with fresh lemon and studded with bursts of juicy blueberries, all set on a simple buttery biscuit base. It’s an easy make-ahead dessert that feels quietly special — fresh, vibrant and perfect for sharing.
Ingredients
Melted butter, extra, to grease
375g (13 oz) cream cheese, at room temperature, cubed (see Baker's Tips)
3 eggs, at room temperature
185g (¾ cup/6½oz) sour cream
125ml (½ cup/4fl oz) thin (pouring) cream
165g (¾ cup/5¾oz) caster (superfine) sugar
1 tablespoon finely grated lemon zest
2 tablespoons freshly squeezed lemon juice
200g (7oz) fresh or frozen blueberries (see Baker's Tips)
Icing sugar, to dust
Biscuit Base
100g (3½ oz) plain sweet biscuits
60g (2¼oz) salted butter, melted
Method
- Preheat the oven to 150°C/300°F (130°C/265°F fan-forced). Line the base of a 20cm (8in) springform tin with a square of non-stick baking paper, allowing it to overhang. Brush the side of the tin with a little melted butter to grease.
- To make the Biscuit Base, process the biscuits in a food processor until finely crushed. Add the butter and process until well combined. Sprinkle the mixture over the base of the tin and use the back of a metal spoon or the base of a glass to press down to cover evenly. Put the tin on a baking tray and place in the fridge.
- Clean the food processor bowl and process the cream cheese until smooth. Add the eggs and process until smooth, scraping down the side and base of the bowl when necessary. Add the sour cream, thin cream, sugar, lemon zest and juice and process until well combined and smooth, scraping down the side and base of the bowl when necessary. Pour into the tin over the base. Scatter the blueberries over the top.
- Bake for 1 hour 10 minutes or until the cheesecake is just set but the centre trembles slightly when the tin is shaken gently. Turn off the oven, use a wooden spoon to keep the oven door ajar and leave the cheesecake in the oven for 1 hour (this will help stop the cheesecake from cracking). Stand at room temperature until cool (this will take 2-3 hours). Transfer the cheesecake, still in the tin, to the fridge and chill for at least 3 hours or overnight or until well chilled. Serve dusted with icing sugar.
Baker's Tips
- Having the cream cheese at room temperature means it will easily become smooth and creamy in the food processor. If you use it straight from the fridge it will take longer and you’ll need to scrape the side and base of the food processor frequently so that no lumps are left after processing.
- If using frozen blueberries, use them straight from the freezer – do not thaw.
- This cheesecake will keep in an airtight container in the fridge for up to 4 days.
Variations
Orange & Raspberry Cheesecake – Replace the lemon zest and juice with orange zest and juice. Replace the blueberries with fresh or frozen raspberries.
Blueberry & White Chocolate Cheesecake – Replace the lemon zest and juice with 1½ teaspoons natural vanilla extract or essence. Melt 180g (6½oz) good-quality white chocolate and cool to room temperature. Add to the bowl of the food processor just before transferring the mixture to the tin and process until just combined.
Individual Lemon & Blueberry Cheesecakes – Line a 12-hole 80ml (⅓ cup) capacity muffin tin with paper cases. Divide the biscuit base, cream cheese mixture and blueberries evenly among the cases. Bake at 160°C/315°F (140°C/285°F fan-forced) for 30 minutes. Cool as per the recipe, then chill in the fridge for at least 1 hour before removing the paper cases and serving.
Recipe and image from BakeClass by Anneka Manning (Murdoch Books).
Prep 50min (+30min cooling time)
Bake 50minMakes 8-10 serves
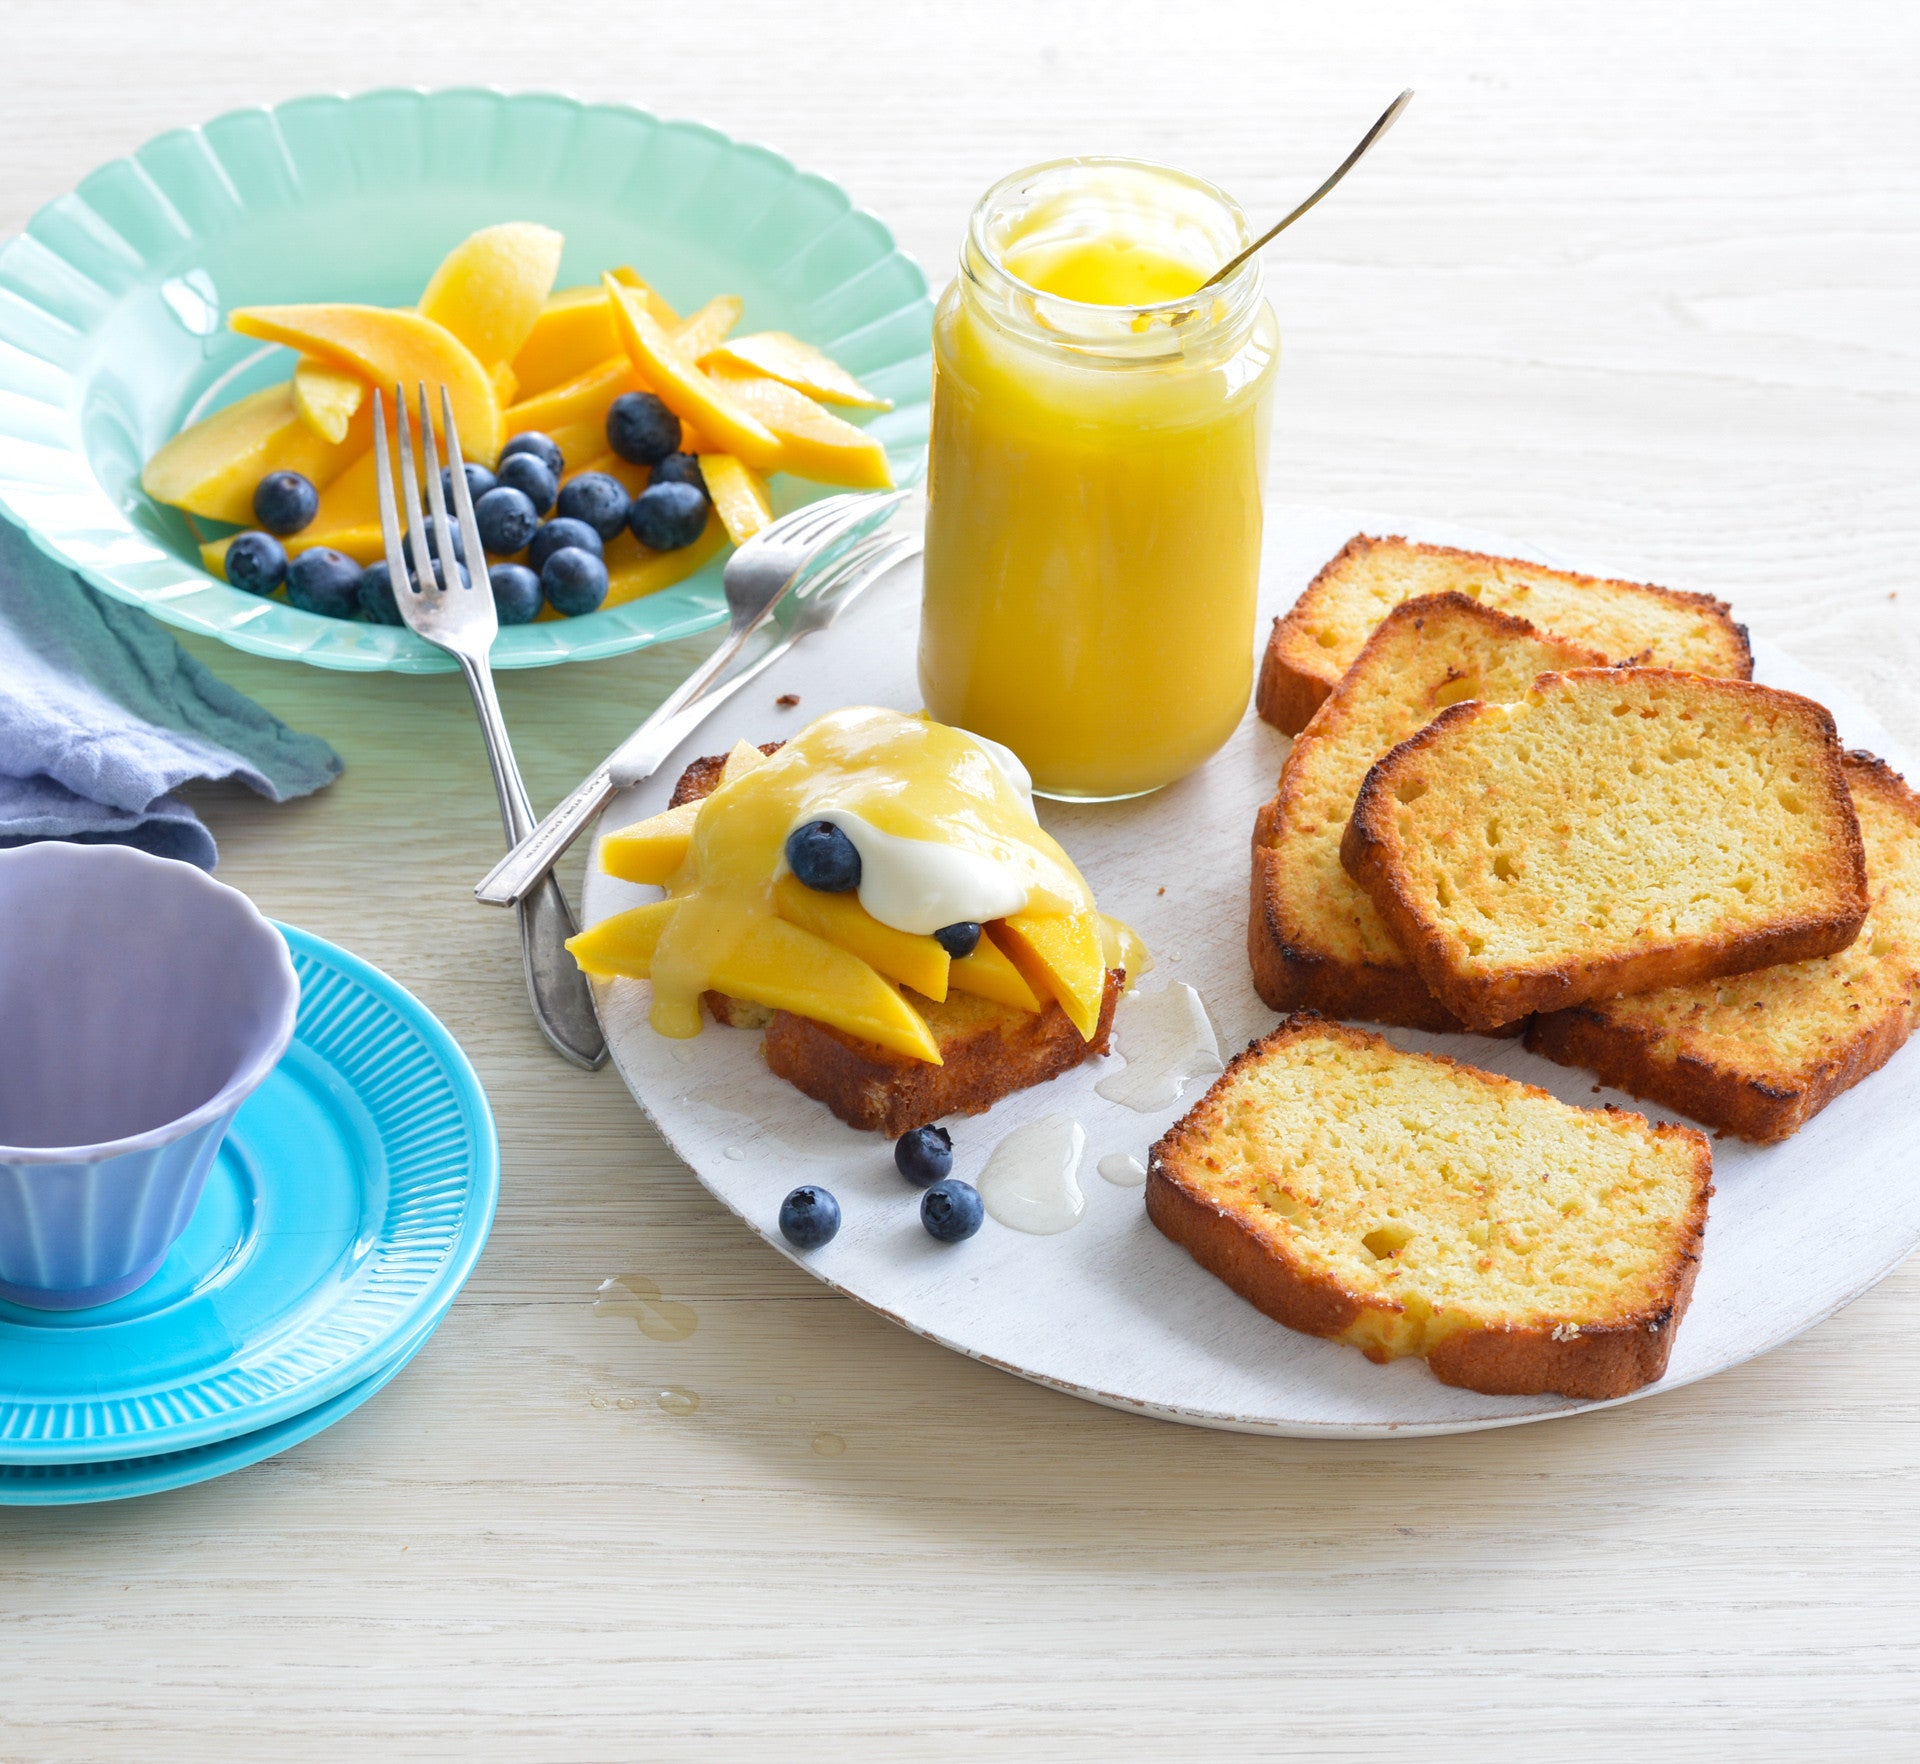
A heavenly layering of mouth-puckering lemon pound cake, curd and syrup, teamed with summer fruits and ‘soured’ cream, this dessert is one for lemon-lovers. The cake is just as delicious served either plain, toasted or chargrilled – just take your pick!
Ingredients
- melted butter, to grease
- 125ml (½ cup) sour cream
- 125ml (½ cup) thickened cream
- 2 x 125g punnets blueberries, to serve
- 2 ripe medium mangoes, sliced, to serve
Lemon buttermilk pound cake
- 125g butter, at room temperature
- 220g (1 cup) caster sugar
- 2 eggs
- 1 tablespoon finely grated lemon zest
- 225g (1½ cups) plain flour
- ½ teaspoon bicarbonate of soda
- 125ml (½ cup) buttermilk
- 1 tablespoon strained fresh lemon juice
Lemon curd
- 125ml (½ cup) strained fresh lemon juice
- 165g (¾ cup) caster sugar
- 3 eggs, whisked and strained
- 100g unsalted butter, cubed, at room temperature
Lemon syrup
- 110g (½ cup) caster sugar
- 160ml (⅔ cup) strained fresh lemon juice
- 2 tablespoons water
Method
- To make the lemon buttermilk pound cake, preheat oven to 180°C (160°C fan-forced). Grease a 9cm x 19cm (base measurement) loaf tin and line the base and long sides with one piece of non-stick baking paper. Use an electric mixer to beat the butter and sugar until pale and creamy. Add the eggs one at a time, beating well after each. Beat in the lemon zest. Sift together the flour and bicarbonate of flour. Combine the buttermilk and lemon juice. On lowest possible speed beat in half the flour mixture and then half the buttermilk mixture until just combined. Repeat with the remaining flour and buttermilk mixtures in two more batches until just combined. Pour the mixture into the prepared tin and smooth the surface with the back of a spoon. Bake in preheated oven for 50 minutes or until a skewer inserted into the centre comes out clean. Leave to stand in the tin for 5 minutes before transferring to a wire rack to cool (this will take about 30 minutes).
- To make the lemon curd, combine the lemon juice, sugar and eggs in a medium heatproof bowl and place over a saucepan of simmering water (make sure the bowl doesn’t touch the water). Stir with a wooden spoon for 10-12 minutes or until the mixture thickens to a consistency similar to pouring cream (do not boil). Remove the bowl from the saucepan and gradually stir in the butter until the butter is evenly incorporated and the curd is smooth. Cover with plastic wrap (see Baker’s tips) and place in the fridge to chill.
- To make the lemon syrup, combine the sugar, water and lemon juice in a small saucepan and stir over medium heat until the sugar dissolves. Bring to the boil and boil for 3 minutes or until reduced slightly.
- To serve, combine the cream and sour cream in a medium bowl and use a balloon whisk to whisk until soft peaks form. Transfer to a serving bowl. Preheat a chargrill pan on high (see Baker’s tips). Cut the cake into 1.5 cm-thick slices and toast in a toaster until lightly golden and warmed through. Transfer to a plate and place in the centre of the table with the curd, syrup, fruit and cream for guests to assemble their own dessert.
Baker's Tips
- The Lemon buttermilk pound cake will keep in an airtight container at room temperature for up to 2 days.
- If making the curd ahead of time, you can transfer it straight into a clean airtight jar, cover with an airtight lid and place in the fridge. It will keep in an airtight jar or container in the fridge for up to 1 week.
- The lemon syrup will keep in an airtight jar or container in the fridge for up to 2 weeks.
- The cake can be also toasted in a sandwich press or in a toaster until golden.
- The combined whipped cream and sour cream can be replaced by scoops of good-quality vanilla ice-cream if desired.
Photography by Alan Benson.

Prep 20min (+4hr freezing and 20min cooling time)Bake 12-15minMakes 8 serves
A blissful combination of truly Aussie flavours — Anzac biscuits, macadamias and honeycomb — these ice-cream sandwiches are the ultimate summer indulgence.
Ingredients
Anzac Biscuits
75g (½ cup/2¾oz) plain flour
70g (¾ cup/2¾oz) rolled oats
45g (½ cup/1½oz) desiccated coconut
75g (⅓ cup/2¾oz) caster sugar
60g (⅓ cup/2oz) unsalted macadamia nuts, toasted and chopped
75g (2¾oz) salted butter, cubed
2 tablespoons golden syrup
2 teaspoons water
½ teaspoon bicarbonate of soda
Honeycomb Ice Cream
2 litres (3½pt) good-quality vanilla ice cream
2 x 50g (1¾oz) Violet Crumble bars or chocolate-coated honeycomb, coarsely chopped
Method
- To make the Honeycomb ice cream, line a freezer-proof tray with non-stick baking paper. Scoop the ice cream into a large bowl and set aside for 5 minutes or until softened slightly. Working quickly, sprinkle with the crushed Violet Crumble over the ice cream and use a large metal spoon or spatula to fold together until just combined, being careful not to overwork as the ice cream may start to melt. Spread the ice-cream evenly over the lined freezer proof tray until about 2cm/¾in thick. Cover with another piece of baking paper and quickly smooth the surface. Place in the freezer for at least 4 hours or until set.
- To make the Anzac biscuits, preheat the oven to 180°C/350°F (160°C/315°F fan-forced). Line 2 large oven trays with non-stick baking paper.
- Put the flour, rolled oats, coconut, sugar and macadamia in a medium mixing bowl and stir to combine.
- Put the butter, golden syrup and water in a small saucepan and heat over medium heat, stirring occasionally with a wooden spoon, until the butter melts and the mixture is hot. Remove from the heat, add the bicarbonate of soda and stir to combine; the mixture will foam up. Add to the dry ingredients and stir with the wooden spoon until evenly combined.
- Roll tablespoonfuls of the mixture into balls and place about 7cm/2¾in apart on the lined trays. Use your fingers to flatten the balls until they are about 1cm/½in thick and about 6.5cm/2½in in diameter.
- Bake in preheated oven for 12-15 minutes, swapping the trays after 6 minutes, or until golden and cooked through. Remove the biscuits from the oven and cool on the trays (this will take about 20 minutes).
- To assemble the sandwiches, line a metal tray with baking paper and place in the freezer. Use a 6-7cm/2¼in-2¾in round cutter to cut out rounds from the firm ice-cream. Sandwich the ice-cream between two biscuits, pressing firmly together. Place on the tray in the freezer. Repeat with the remaining ice-cream and biscuits to make 8 sandwiches in total. Serve straight away or leave in the freezer until ready to serve.
Baker's Tips
- The unfilled biscuits will keep in an airtight container at room temperature for up to 2 weeks.
- The assembled ice-cream sandwiches will keep in an airtight container in the freezer for up to 1 week.
This recipe is from Anneka's SBS Food online column, Bakeproof: Aussie Day Favourites. CLICK HERE for more Bakeproof recipes.
Photography by Alan Benson.
Prep 25min (+30min chilling and 30min cooling time)Bake 25minMakes about 40
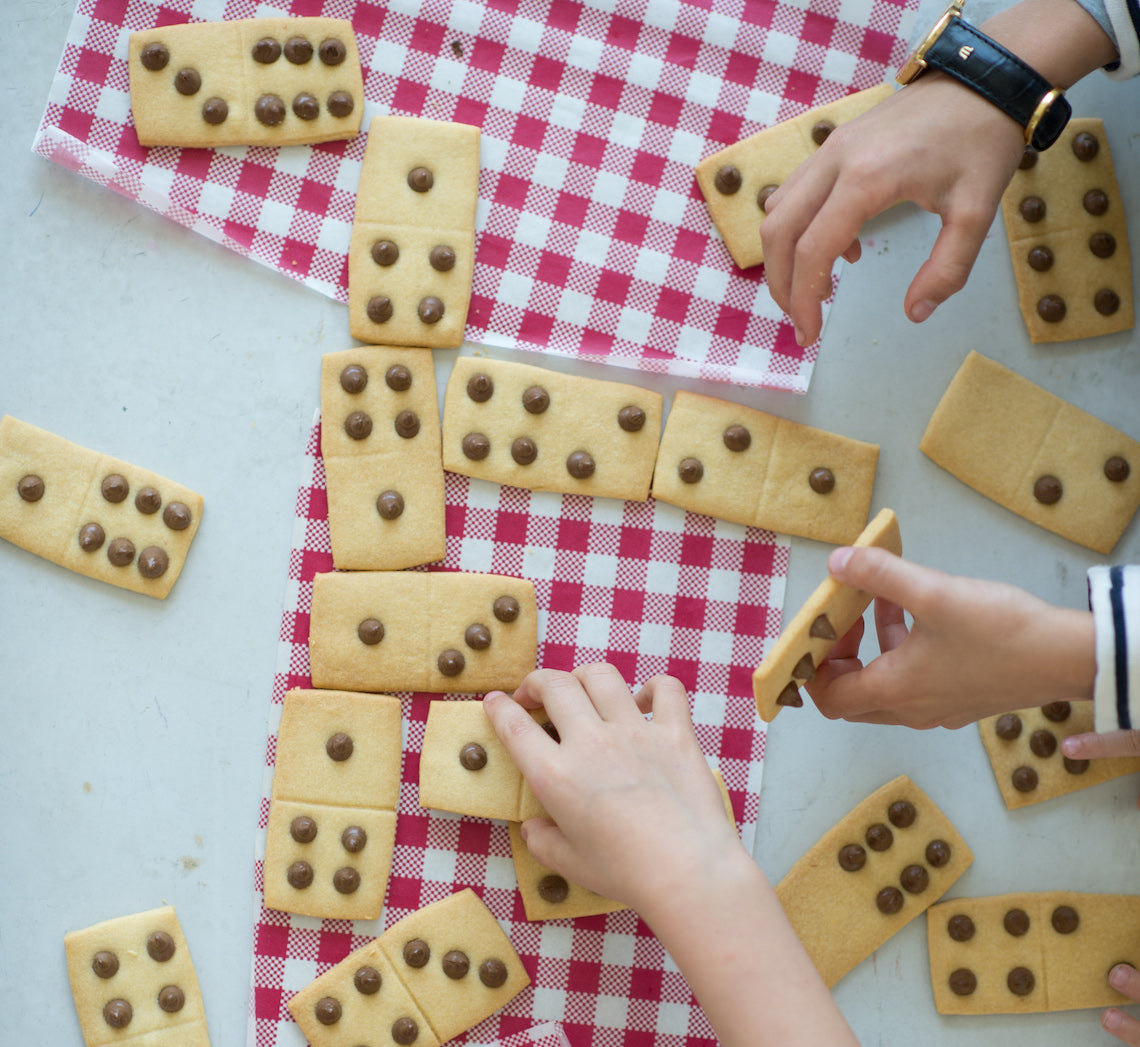
Sipping on malted milk milkshakes and playing dominos is a vivid childhood memory. These biscuits combine the two and kids will love not only creating them, but also playing with them as they snack — all you need is a glass of milk!
Ingredients
250g butter, softened slightly
110g (½ cup) caster sugar
1 egg yolk
375g (2½ cups) plain flour
60g (½ cup) malted milk powder
Dark or milk Choc Bits (chocolate chips), to decorate
Method
- Preheat the oven to 160°C (140°C fan-forced). Line two large oven trays with non-stick baking paper.
- Use an electric mixer to beat the butter and sugar until smooth and just combined. Add the egg and beat until well combined.
- Add the flour and malted milk powder to the butter mixture and beat on low speed until just combined evenly and a dough forms.
- Turn the dough onto a lightly floured surface and knead lightly and briefly until it just comes together. Divide the dough into two portion. Use a lightly floured rolling pin to roll out one portion to 5mm thick. Use a large sharp knife and a ruler to cut the dough into 4cm x 8cm rectangles; re-rolling any off cuts as necessary. Use the knife to make a shallow indent across the middle of each biscuit. Place on the lined oven trays, leaving about 2cm between each. Press the Choc Bits into the biscuits to resemble dominos. Repeat with the remaining dough portion and Choc Bits. Place in the fridge to chill for 30 minutes.
- Bake in preheated oven for 25 minutes, swapping the trays around after 10 minutes, or until pale golden and cooked through. Cool on the trays.
Baker's Tips
- These biscuits will keep in an airtight container at room temperature for up to 1 week.
This recipe is from Anneka's SBS Food online column, Bakeproof: Kids in the Kitchen.
CLICK HERE for more Bakeproof recipes.
Photography by Alan Benson.
Prep 20minBake 35minMakes 8-10 serves
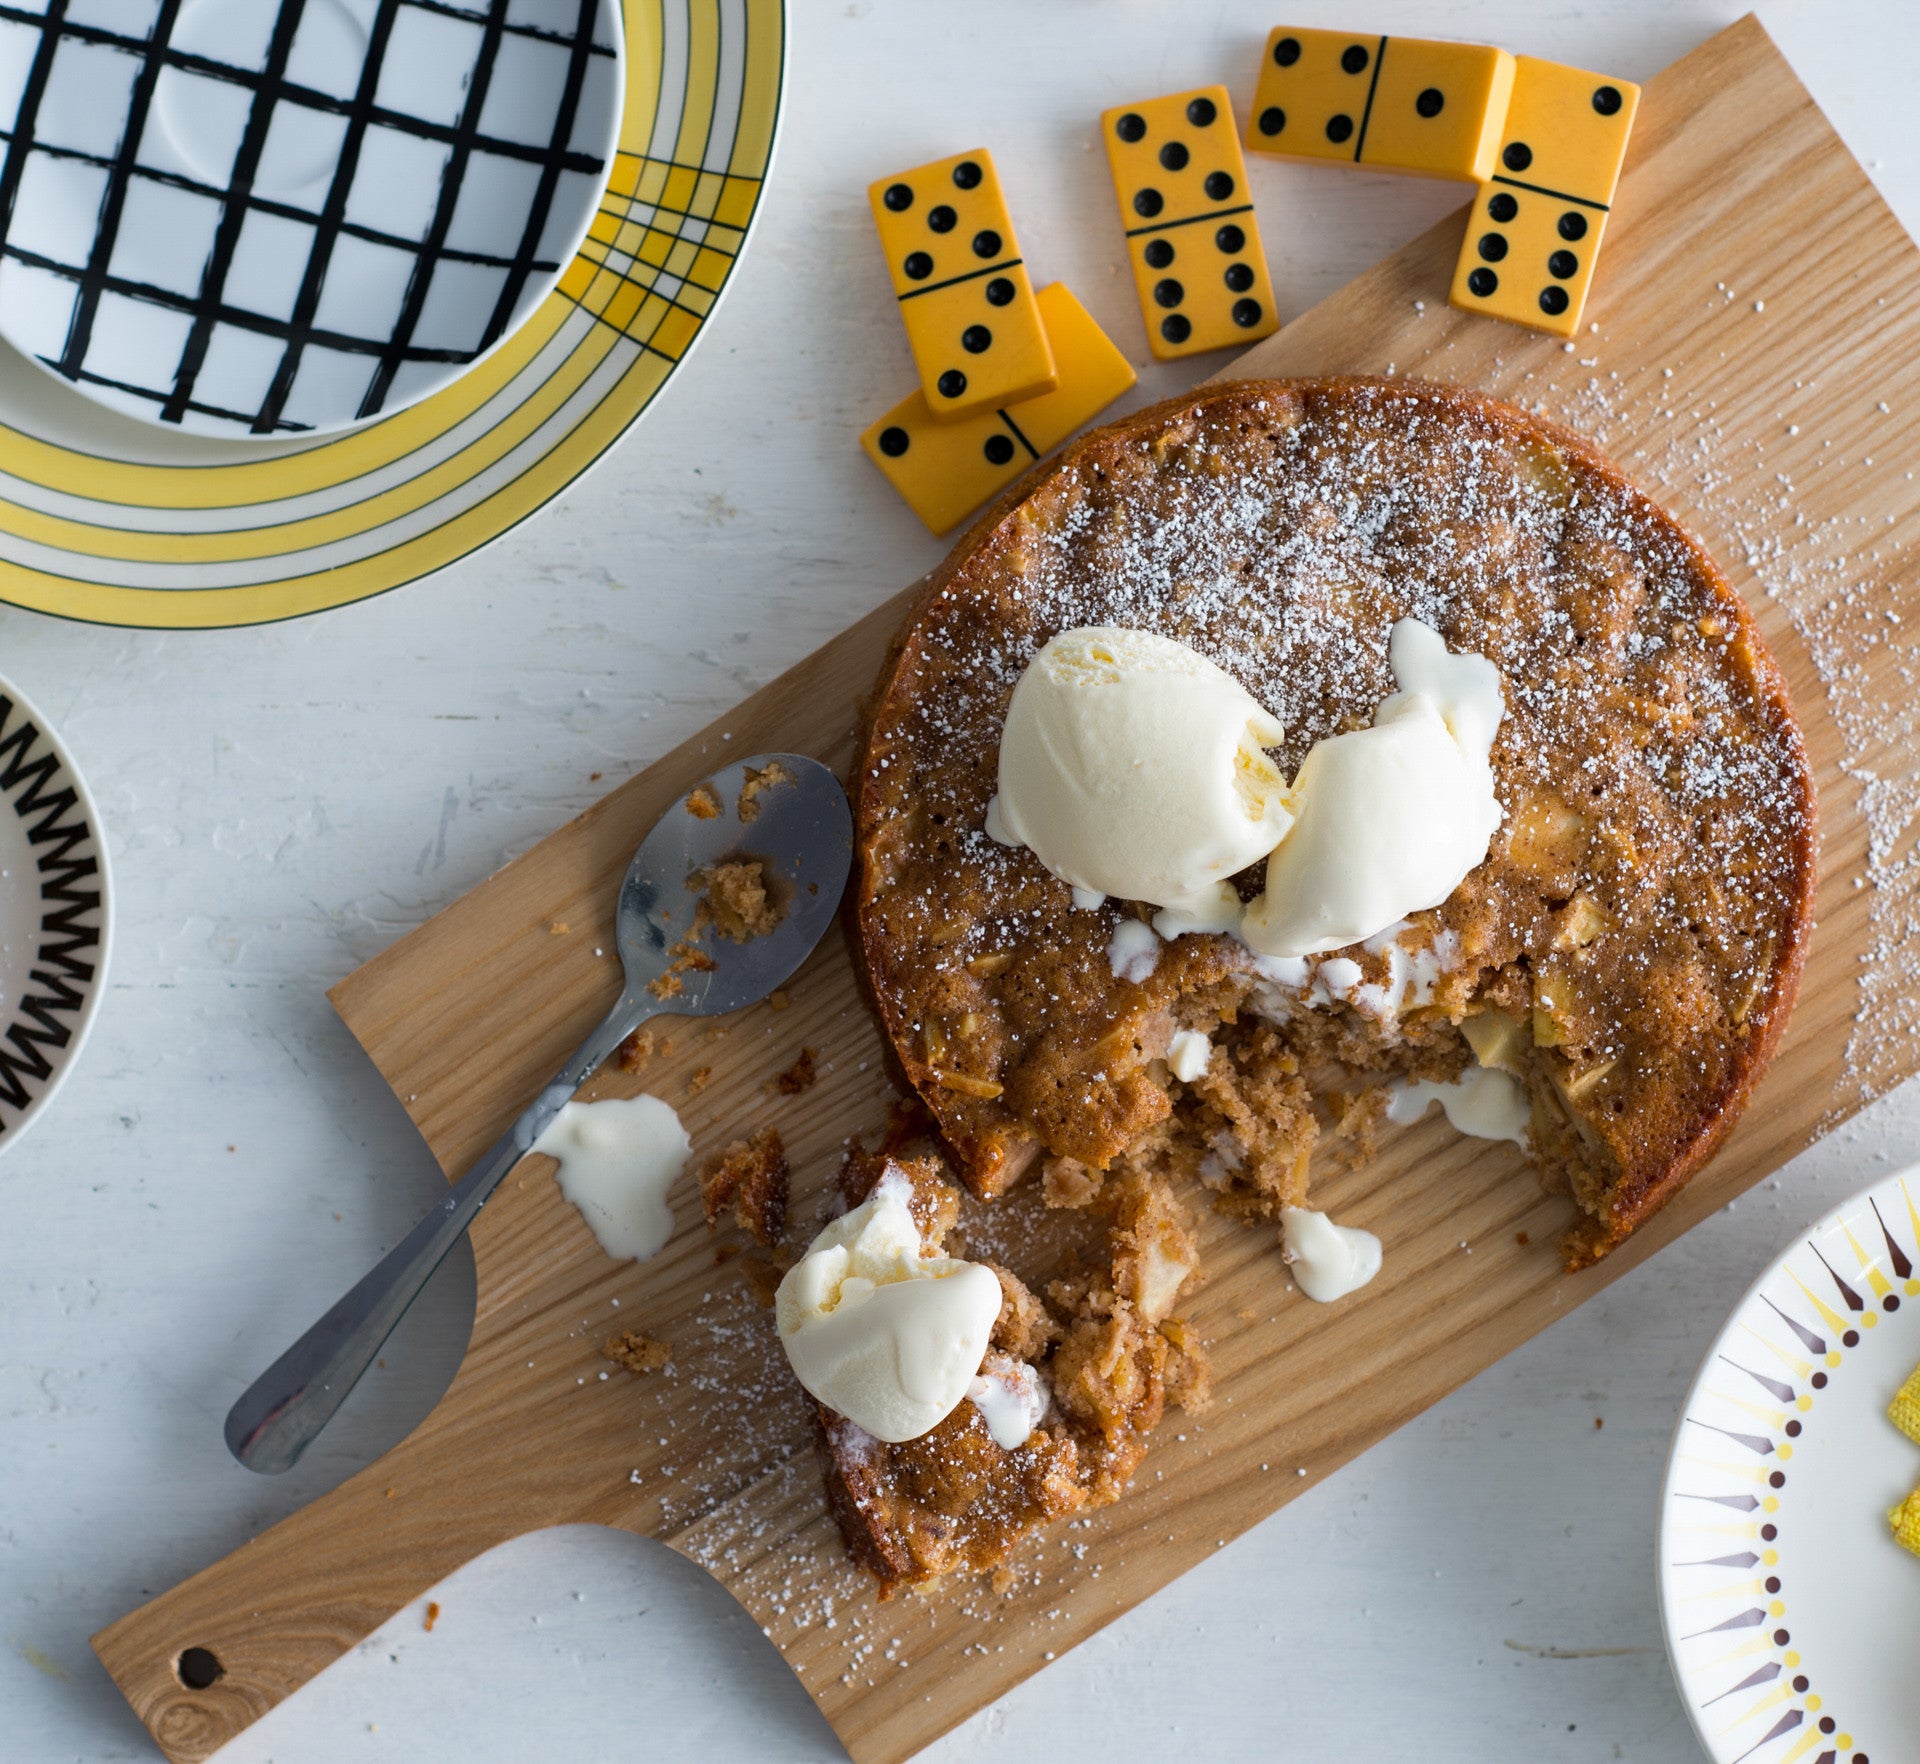
Much more like a cake than a pie, this apple-dense traditional Norwegian dessert is comforting, homely and can warm the soul with just one mouthful – especially when served straight from the oven in generous scoops and topped with ice-cream or a large dollop of thick cream. Don’t overlook the fact that it is also pretty good served like any other cake, cooled and in wedges. The trick to this recipe is not to over-mix – only mix until the wet and dry ingredients are evenly combined.
Ingredients
- Melted butter, to grease
- 110g (¾ cup) plain flour
- 1 teaspoon baking powder
- 1 teaspoon ground cinnamon
- ½ teaspoon ground cardamom
- 110g (½ cup) caster sugar
- 3 medium (about 150g each) apples (such as golden delicious, royal gala or pink lady), peeled, cored and cut into 2 cm pieces
- 80g slivered almonds, toasted
- 100g butter, melted and cooled
- 1 egg
- 2 tablespoons milk
- 1½ teaspoons natural vanilla essence or extract
- Vanilla ice-cream or thick cream, to serve
Method
- Preheat the oven to 180°C (160°C fan-forced). Grease a 20cm springform tin with melted butter and line the base with baking paper.
- Sift together the flour, baking powder, cinnamon and cardamom into a large bowl. Stir in the sugar, apple and almonds. Use a fork to whisk together the butter, egg, milk and vanilla. Add to the flour mixture and use a spatula to mix until just combined.
- Spoon the mixture into the prepared tin and spread evenly with the back of a spoon. Bake in the preheated oven for 35 minutes or until golden and a skewer inserted into the centre comes out clean.
- Stand the pie in the tin for 5–10 minutes before removing the sides of the tin. Serve warm in scoops or at room temperature in wedges with ice-cream or cream.
Baker's Tips
- This pudding/cake will keep in an airtight container at room temperaturein a cool spot for up to 3 days.
This recipe is from Anneka's SBS Food online column, Bakeproof: Scandi Baking. CLICK HERE for more Bakeproof recipes.
Photography by Alan Benson.
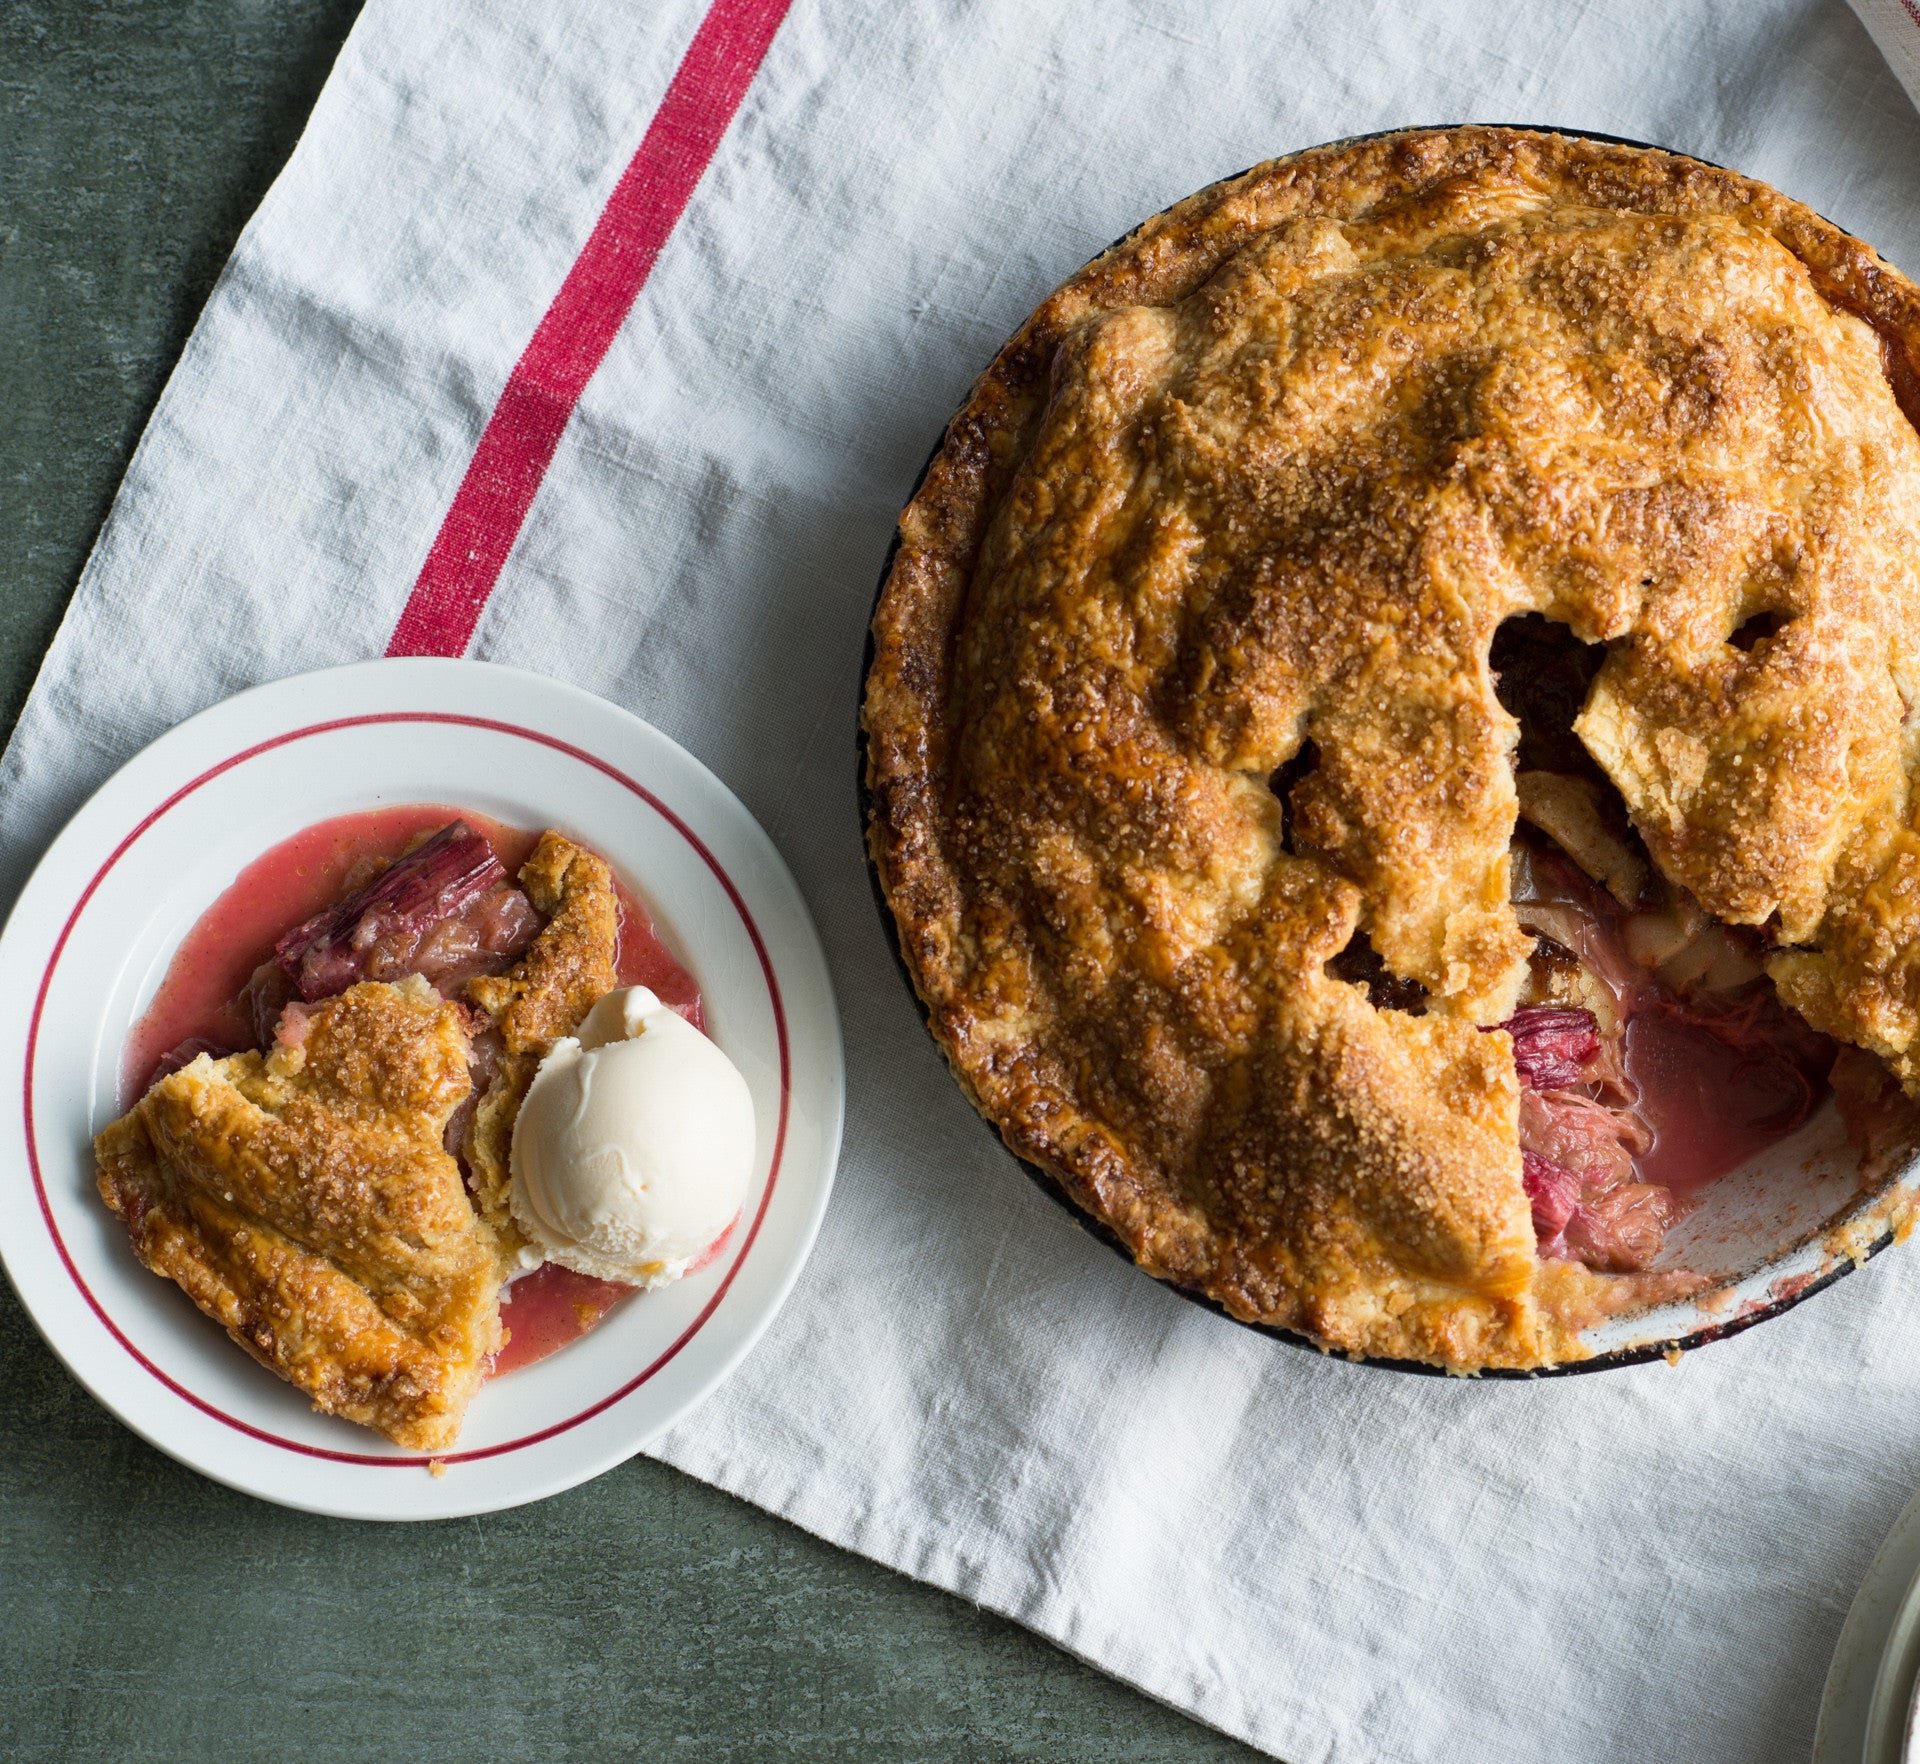
Prep 30min (+35min pastry making time)Bake 1hr 15minMakes 8-10 serves
Classic apple pie (served with a overly-generous scoop of vanilla ice-cream, of course) is one of the perennial delights of winter and can only be improved by the addition of rhubarb and a deliciously rich vanilla sour cream pastry. This pie just may be a little hard to beat.
Ingredients
1 egg, whisked, for brushing1 quantity vanilla sour cream pastry, shaped into a disc before wrapping and chilling as directed
2 teaspoons demerara sugar, to sprinkle
pouring cream, vanilla ice-cream or custard, to serve
Apple and rhubarb filling
1 teaspoon ground cinnamon1 teaspoon vanilla bean paste
1 orange, rind finely grated
110g (½ cup) demerara sugar
1½ tablespoons plain flour
1kg (about 6 medium) Granny Smith apples
750g trimmed rhubarb, cut into 4 cm lengths (see Baker’s Tips)
30g unsalted butter, finely diced
Method
- Preheat the oven to 200°C (180°C fan-forced).
- To make the apple and rhubarb filling, use your fingertips to rub the cinnamon, vanilla bean paste and orange rind through the sugar in a medium bowl. Stir in the flour. Peel, core and cut the apples into thin (about 3 mm) slices and place in a separate large bowl, along with the rhubarb and the sugar mixture. Use your hands to toss gently to combine evenly.
- Spoon the apple and rhubarb filling into an ungreased 23cm diameter (top measurement) ceramic or metal pie dish (see Baker’s Tips) and then dot with the diced butter. Brush the edge of the pie dish with the whisked egg.
- Roll out the vanilla sour cream pastry to make a pie lid about 5 mm thick. Use a 2cm round cutter to cut out a circle form the centre of the pastry. Carefully drape the pastry loosely around the rolling pin and place on top of the pie. Use your thumb and index finger to press the pie pastry top onto the rim of the pie dish to seal. Use a small sharp knife to trim the excess pastry from around the edge. Brush the top of the pie with some of the remaining whisked egg and then sprinkle with demerara sugar.
- Bake for 30 minutes. Reduce the oven temperature to 160°C (140°C fan-forced) and bake for a further 40-45 minutes or until the pastry is golden and cooked through and the apples are tender (see Baker’s Tips). Remove the pie from the oven and stand for 5 minutes before serving warm with cream, ice cream or custard.
Baker's Tips
- For this recipe you will need a ceramic pie dish measuring 23cm across the top, 17cm across the base and 7cm deep.
- You will need about 1kg untrimmed rhubarb for this recipe.
- To check if the apples are tender, insert a skewer into the centre of the pie.
This recipe is from Anneka's SBS Food online column, Bakeproof: Pies.
CLICK HERE for more Bakeproof recipes.
Photography by Alan Benson.
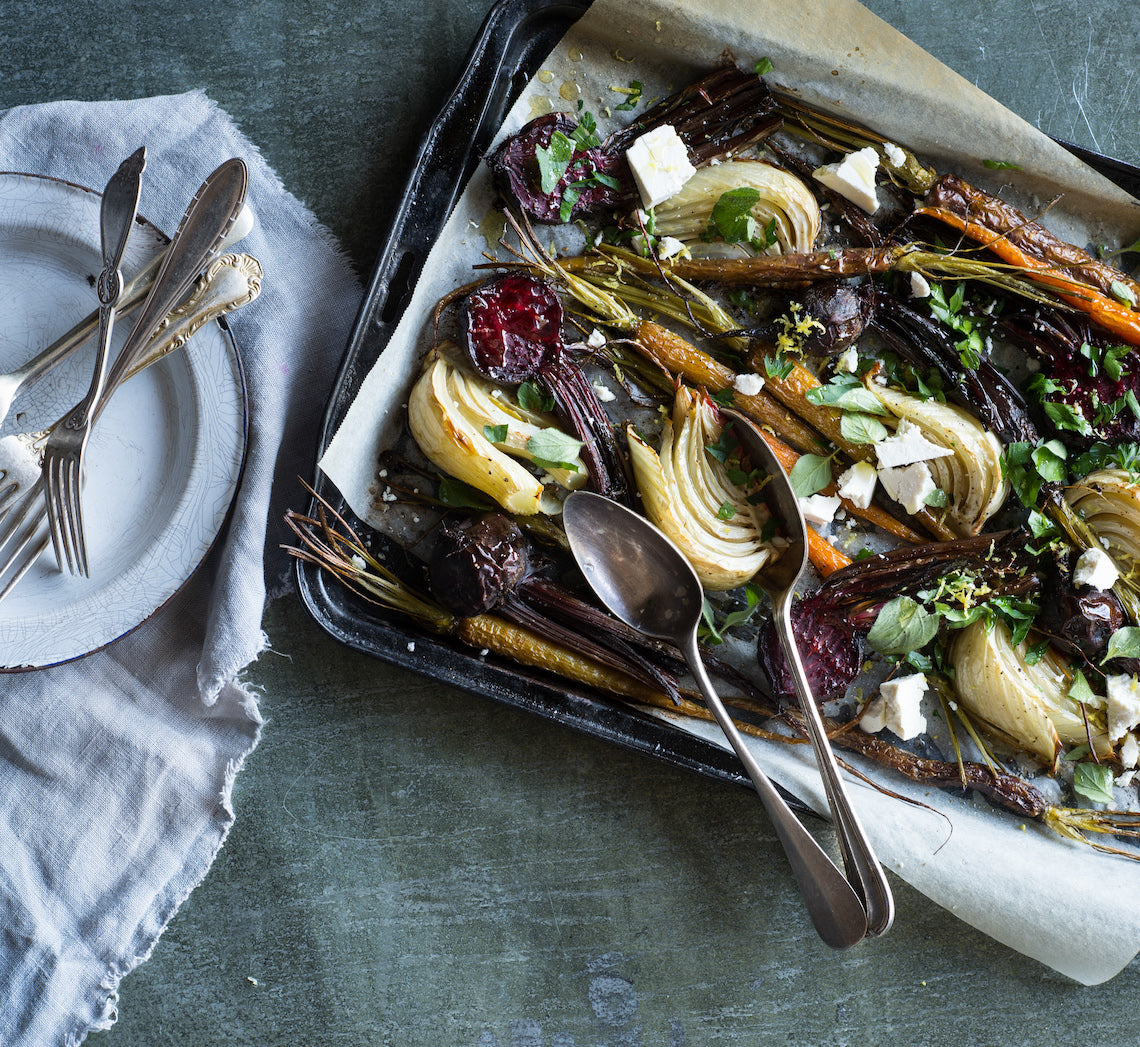
Prep 15minBake 40minMakes 6 serves
The simplicity of these roasted winter root vegetables allows their true flavours to shine – especially when finished with fresh herbs, lemon and ricotta salata.
Ingredients
- 1 bunch baby beetroot, scrubbed, trimmed and halved if large
- 1 bunch baby (Dutch) carrots, scrubbed, trimmed and halved
- 1 fennel bulb, trimmed and cut into 8 wedges
- 3 small parsnips, scrubbed, trimmed and quartered
- 2 tablespoons extra-virgin olive oil, plus extra to drizzle
- 40g ricotta salata (see Baker's Tips) or sheep's milk feta, crumbled or coarsely grated
- 1½ tablespoons oregano leaves
- 1½ tablespoons chopped flat-leaf parsley
- 1 lemon, zest finely grated
- lemon wedges or cheeks, to serve
Method
- Preheat the oven to 220°C (200°C fan-forced)
- Toss the beetroot, carrots, fennel and parsnip with the oil to coat. Spread over the base of a roasting dish and bake for 40 minutes, tossing once halfway through baking, or until the beetroot is tender when pierced with a skewer.
- Remove the vegetables from the oven and transfer to a serving platter. Drizzle with a little more oil. Combine the ricotta salata, oregano, parsley and lemon zest and scatter over the vegetables. Serve warm or at room temperature with lemon wedges.
Baker's Tips
- Ricotta salata is an Italian ricotta cheese that has been pressed, salted and aged for at least 90 days. It has a wonderfully salty flavour and firm texture which is perfect for crumbling, slicing or grating.
This recipe is from Anneka's SBS Food online column, Bakeproof: Winter Root Vegetables. CLICK HERE for more Bakeproof recipes.
Photography by Alan Benson.
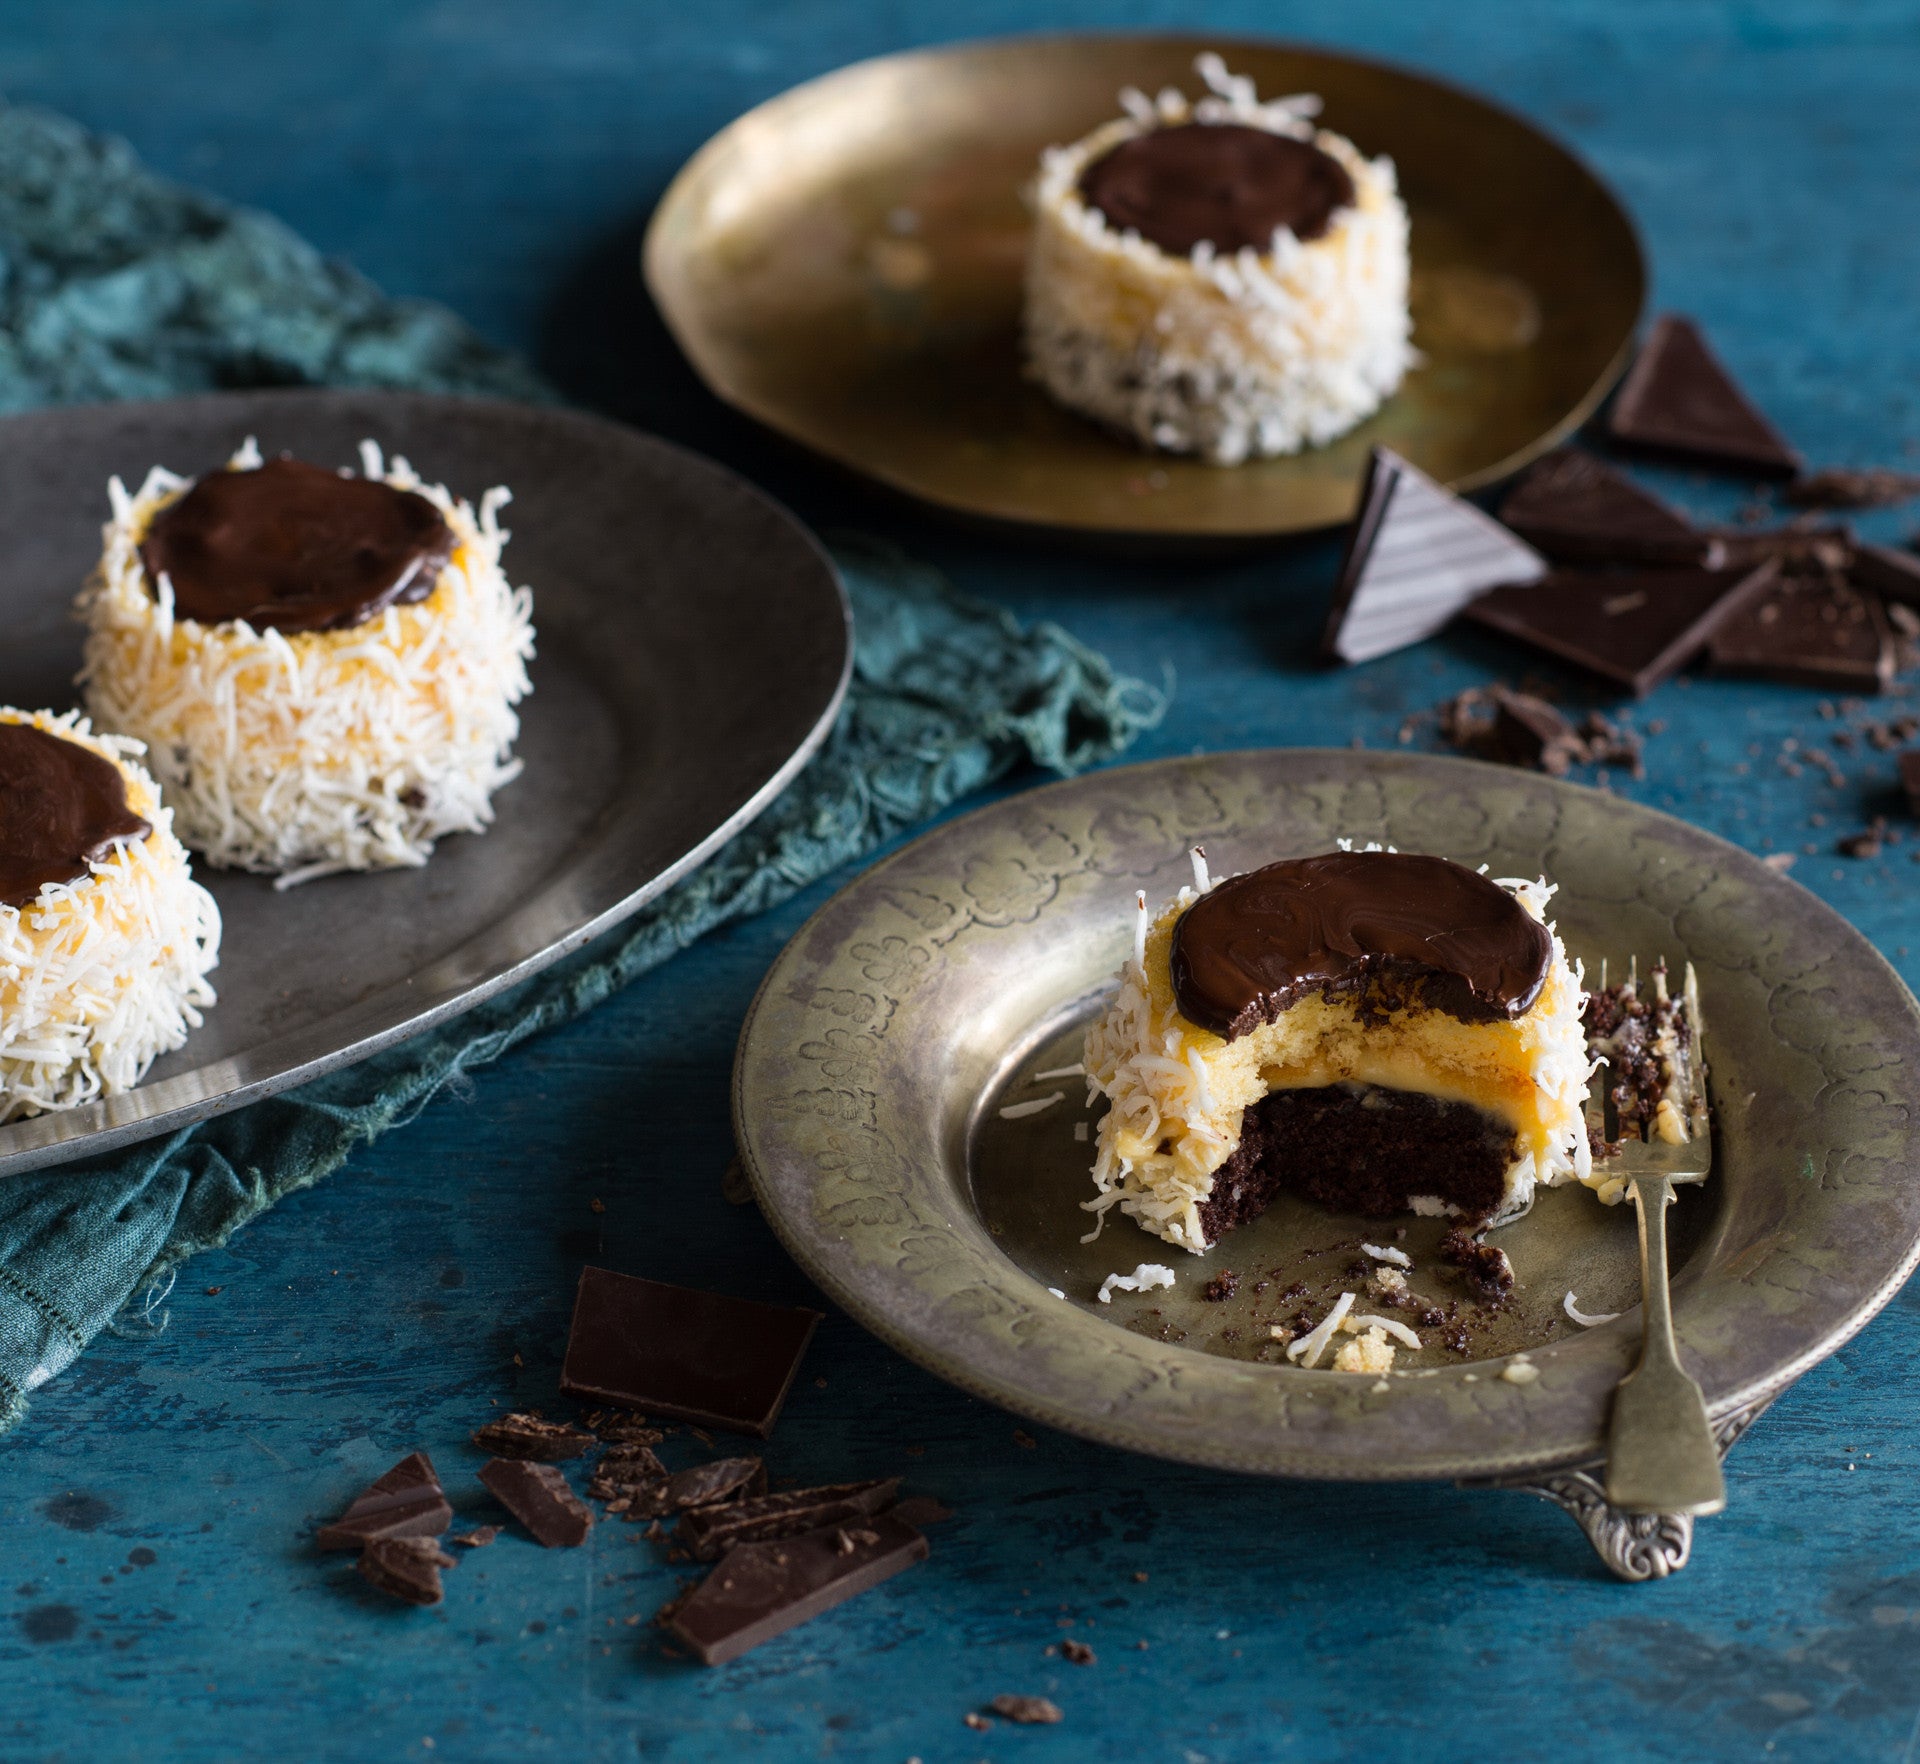
Prep 40min (+20min cooling and 2.5hr chilling)Bake 15minMakes 6 serves
These little layered cakes are the sweetest hats you'll find. Made up of custard cream and a chocolate topping they are covered in shredded coconut for a little texture but you can also use nuts as well, if you have them handy. They are best served chilled and if you aren't much for a dessert fork, then eating these with your hands like a cupcake is absolutely acceptable!
Ingredients
- 100g (1½ cups) shredded coconut, to coat
Sponge Layers
- melted butter, to grease
- 4 eggs, at room temperature
- 165g (¾ cup) caster sugar
- 2 tablespoons boiling water
- 2 tablespoons vegetable oil
- 100g (⅔ cup) self-raising flour, sifted
- 2 tablespoons cocoa powder mixed to a paste with 60 ml (¼ cup) boiling water and cooled
Custard cream
- 1 tablespoon cornflour
- 1 tablespoon custard powder
- 2 tablespoons caster sugar
- 200ml milk
- 20g butter, cubed
- 1 egg yolk
- 1½ teaspoons natural vanilla essence or extract
Chocolate glaze
- 50g dark chocolate, chopped
- 2 teaspoons vegetable oil
Method
- To make the custard cream, sift together the cornflour and custard powder into a small saucepan. Add the sugar and then use a balloon whisk to gradually stir in the milk. Place the saucepan over a medium heat and cook, stirring frequently, until the mixture boils and thickens. Remove from the heat and stir in the butter, egg yolk and vanilla until well combined. Pour into a medium bowl, cover the surface of the custard directly with a piece of plastic wrap and set aside to cool (this will take about 2 hours).
- To make the sponge layers, preheat oven to 180°C (160°C fan-forced). Brush two 16 x 26 cm shallow cake tins with a little melted butter to lightly grease and then line the base and two long sides of each with one piece of non-stick baking paper.
- Use an electric mixer with a whisk attachment on high speed to whisk the eggs and sugar in a large bowl until the mixture is very thick and pale (this will take 5-8 minutes). Lift the whisk out of the mixture and draw a figure eight, if the trail stays on the surface long enough for you to finish drawing then the mixture is ready. If not, continue to whisk for a further minutes and then test again.
- Combine the boiling water and oil. Sift the flour over the egg mixture. Immediately pour the warm water and oil mixture down the side of the bowl and use a spatula to fold until just evenly combined (be careful not to overmix).
- Pour half of the mixture into one of the prepared cake tins. Add the cocoa paste to the mixture still in the bowl and fold together until just combined. Pour into the second cake tin. Gently tap the tins on the bench top three times to settle the mixture. Bake in preheated oven for 12-15 minutes or until the cakes spring back when lightly touched in the centre and start pulling away from the sides of the tins. Stand the cakes in the tins for 2 minutes before turning onto a wire racks to cool completely.
- To assemble, use a 6 cm round cutter to cut each of the Sponge cakes into 6 rounds. Place the round cutter over a chocolate sponge. Top the chocolate sponge round with about 1 tbsp of the Custard cream and then cover with around of plain sponge. Remove the pastry cutter. Repeat with the remaining chocolate and plain sponge rounds and 1 tbsp of Custard cream for each cake to make 6 layered cakes in total. Spread the sides of the cakes with the remaining Custard cream. Roll the sides of the cakes in the coconut to coat and place on a serving plate. Place in the fridge while making the Chocolate glaze.
- Place the chocolate and oil in a heatproof bowl. Place over a saucepan of simmering water, stirring occasionally, until melted and smooth. Carefully spread about 1 tsp of the Chocolate glaze over the tops of each of the cakes to cover. Return the cakes to the fridge for 30 minutes or until the Chocolate glaze is set. Serve chilled.
Baker's Tips
These cakes will keep in an airtight container in the fridge for up to 2 days.This recipe is from Anneka's SBS Food online column, Bakeproof: Bosnian Baking.
CLICK HERE for more Bakeproof recipes.
Photography by Alan Benson.
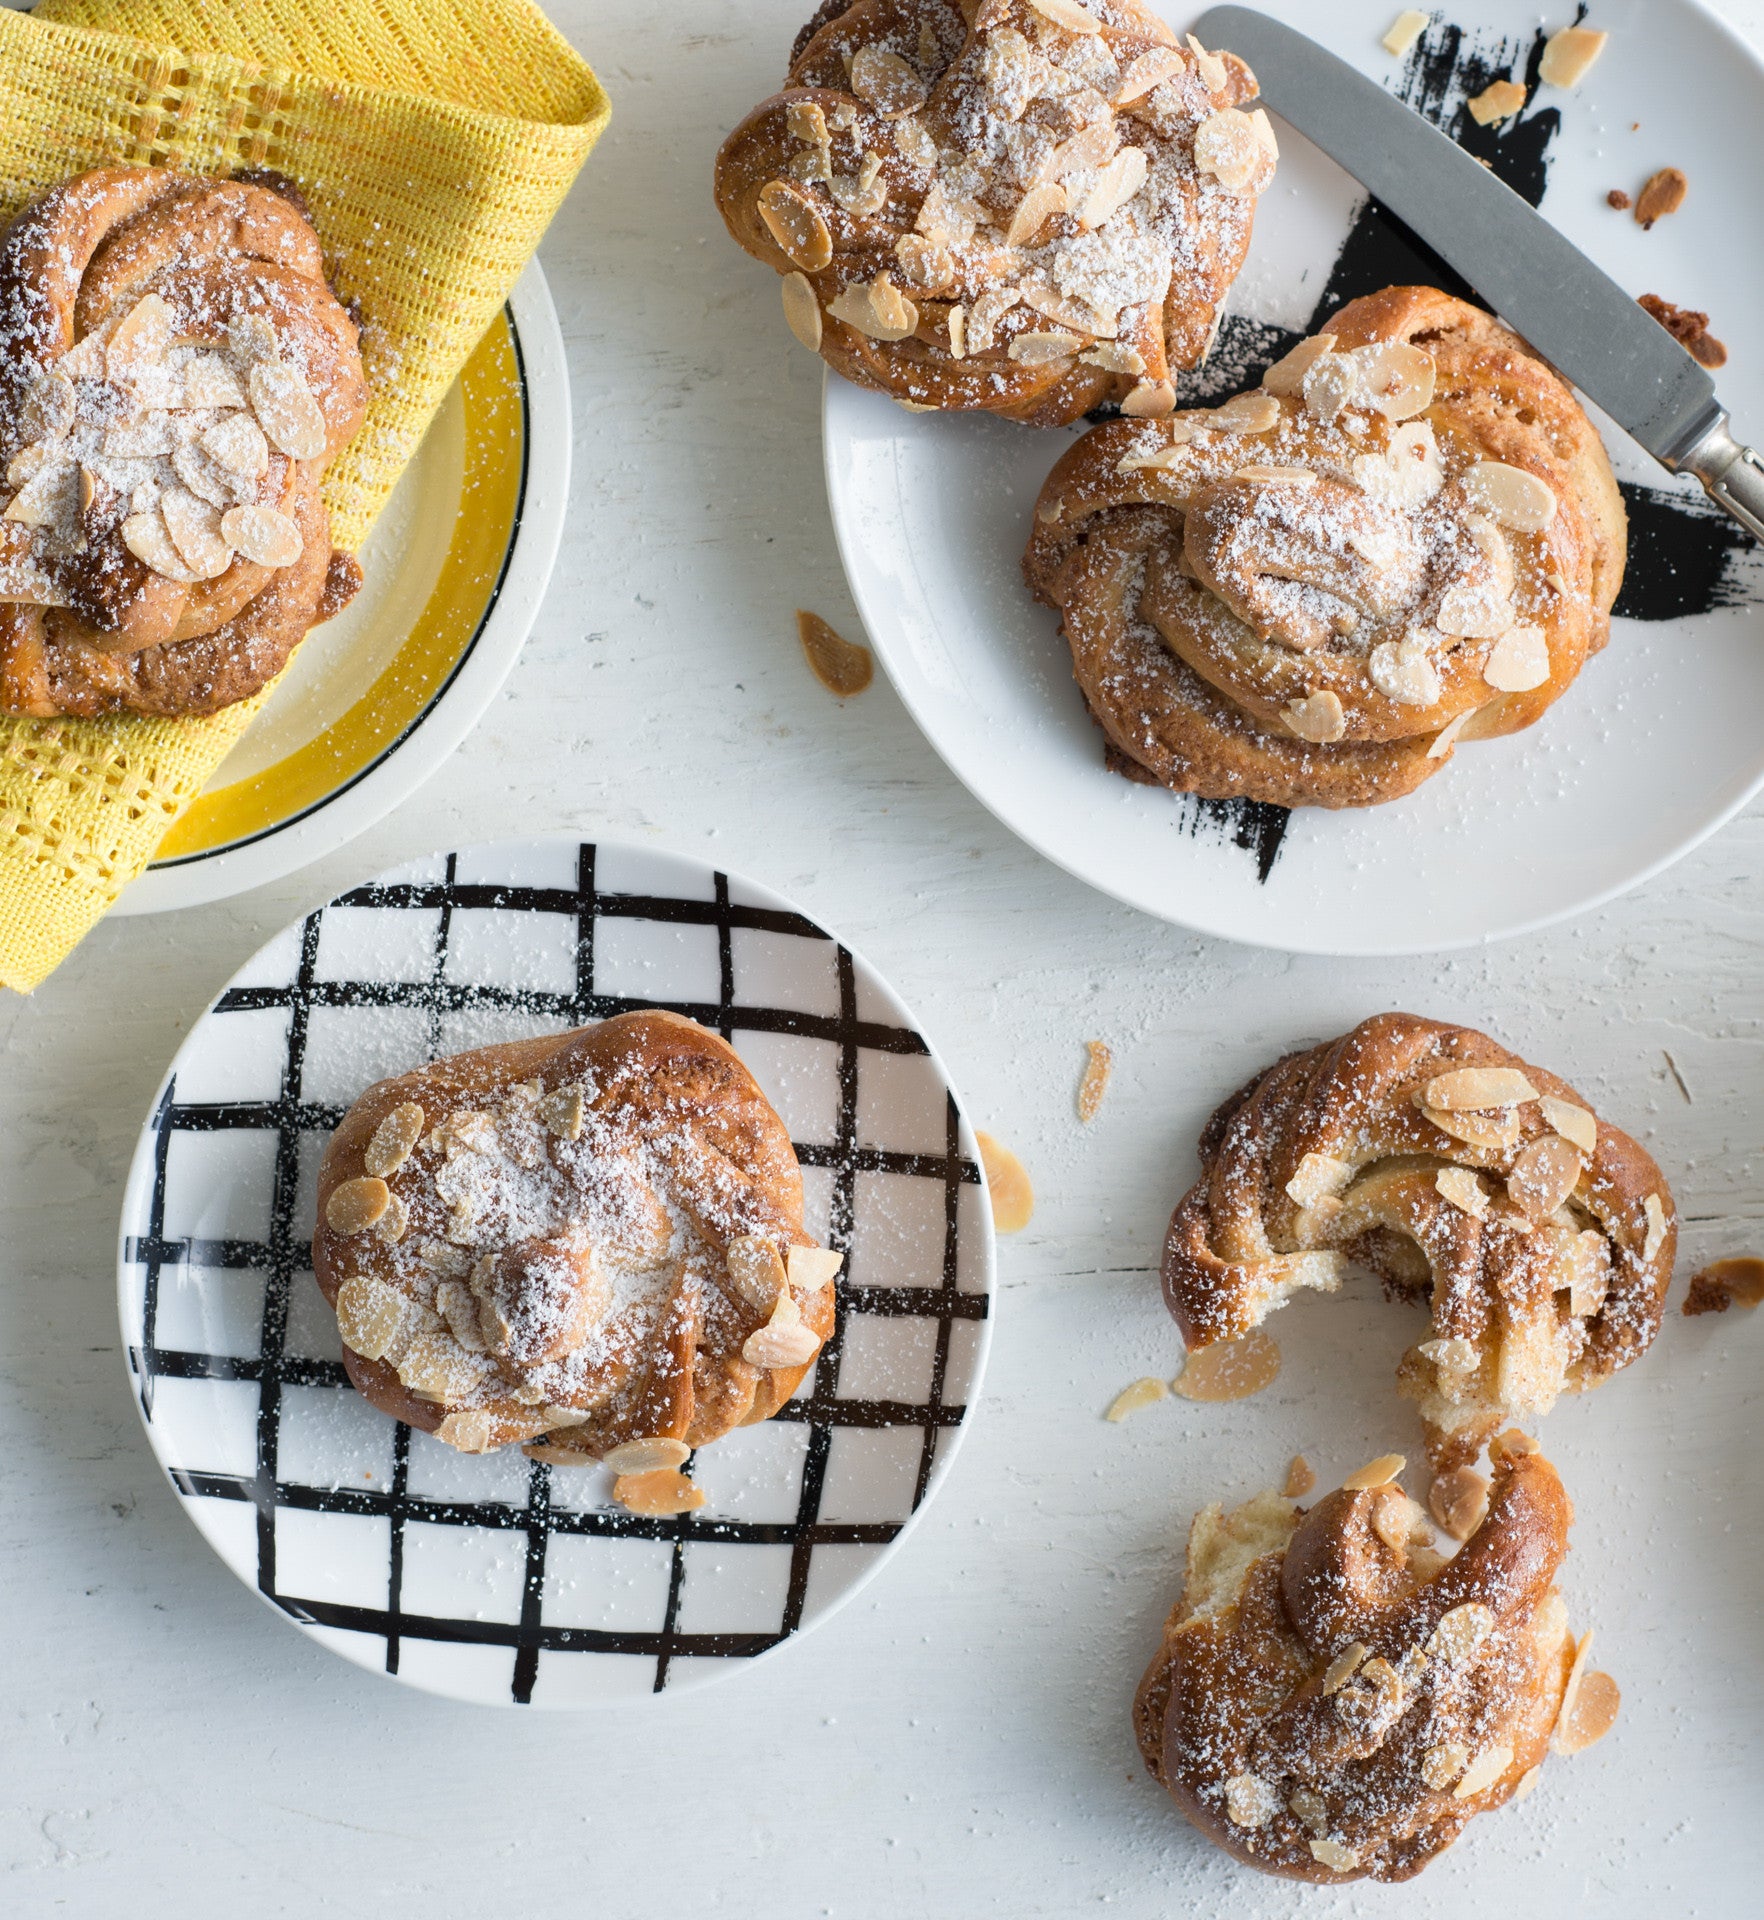
Prep 40min (+1hr 15min proving time)Bake 25minMakes about 16
The Swedes love their sweet buns so much they have even declared 4 October National Cinnamon Bun Day! These more-ish cinnamon-almond filled buns are the quintessential accompaniment to a fika (or coffee). The traditional twisting and shaping of them may seem a little tricky to start with but follow my instructions and watch this quick video and you’ll have it mastered in no time.
Ingredients
melted butter, to grease1 egg, lightly whisked, to glaze
flaked almonds or pearl sugar (see Baker's Tips), to sprinkle
Dough
450g (3 cups) strong bread or pizza flour, plus extra to dust55g (¼ cup) caster sugar
7g (1 sachet) dried yeast
1 teaspoon ground cardamom
½ teaspoon salt
300ml milk
100g butter, diced
1 teaspoon natural vanilla essence or extract
Almond filling
80g butter, at room temperature50g (½ cup) almond meal
50g marzipan
55g (¼ cup) caster sugar
1½ teaspoon ground cinnamon
Method
- To make the dough, combine the flour, sugar, yeast, cardamom and salt in a large bowl and make a well in the centre. Combine the milk and butter in a small saucepan and heat over low heat for 3–5 minutes or until the milk is lukewarm. Remove from heat, stir in the vanilla and set aside for 5 minutes, stirring occasionally with a fork, until the butter melts. Add to the flour mixture and use a wooden spoon and then your hands to mix to a soft dough.
- Turn the dough onto a lightly floured surface and knead for 8–10 minutes or until it is smooth and elastic and springs back when you push your finger into it (see Baker's Tips).
- Brush a large bowl with melted butter to grease. Add the dough turning it to coat lightly with the butter. Cover with plastic wrap and place in a warm, draught-free place for 1 hour or until doubled in size. (See Baker's Tips).
- To make the almond filling, place all the ingredients in a food processor and process until smooth and well combined, scraping down the side of the bowl when necessary. Set aside.
- Line two large baking trays with baking paper.
- When the dough has doubled in size knock it back by punching it in the centre with your fist. Turn onto a lightly floured surface and knead for 2–3 minutes or until smooth and elastic. Use a lightly floured rolling pin to roll out the dough into a 30 cm x 50 cm rectangle, about 0.5cm thick. Place the dough on the benchtop so that a long side is closest to you.
- Use a palette knife to spread the almond filling evenly over the lower half of the dough. Fold the top third down to cover the filling and then the bottom third up, pressing down firmly.
- Use a large, sharp knife to cut the dough into 16 strips, each about 3.5cm wide. Use the knife to cut each strip in half three-quarters of the way up towards the folded end to make two 'legs'. Hold a strip at opposite ends and pull gently to stretch slightly. Then twist the two 'legs' separately about three times. Tie the two 'legs' together in a simple knot and then tuck the opposite end under the knot.
- Repeat with the remaining dough strips, placing them about 5cm apart on the lined trays as they are shaped. Cover with a damp tea towel and set aside in a warm, draught-free place for 25–30 minutes or until risen and the dough no longer springs back when you poke it gently with a finger.
- Preheat the oven to 190°C (170°C fan-forced).
- Brush the rolls with the whisked egg to glaze and sprinkle with flaked almonds or pearl sugar. Bake the rolls in preheated oven for 25 minutes or until golden and sound hollow when tapped on the base. Serve warm or at room temperature.
Baker's Tips
- Pearl sugar (also known as hail or nib sugar) is a coarse white sugar used extensively in European baking. Because it retains its shape (it doesn’t melt during cooking) it adds a lovely textural sweet crunch to pastries, sweet breads and biscuits. Pearl sugar is available at specialty food stores and European-style delicatessens.
- The dough can be kneaded with an electric mixer, fitted with a dough hook, on low speed for 5–8 minutes or until smooth and elastic and comes away from the side of the bowl.
- The dough can be proved in the fridge overnight (in the greased, covered bowl). Stand in a warm, draught-free place for 1–2 hours, or until the dough reaches room temperature, before continuing with the recipe.
- These rolls are best eaten the day they are baked, however they do freeze well. To freeze, wrap individually in plastic wrap, seal them in an airtight container or freezer bag and freeze for up to 3 months. Thaw at room temperature. To reheat, place on a lined baking tray in an oven preheated to 160°C (140°C fan-forced) for 10 minutes or until heated through.
This recipe is from Anneka's SBS Food online column, Bakeproof: Scandi Baking.
CLICK HERE for more Bakeproof recipes.
Photography by Alan Benson.
Prep 30min (+40min proving)
Bake 15minMakes 4serves
Similar to Indian Naan, just lighter and flakier (and in my opinion yummier), taftan is a hearth-baked flatbread from Persia and Pakistan. It is often flavoured with saffron – as this one is – which gives it a striking golden hue and alluring flavour perfect to serve alongside curries and soups (although don’t discount just nibbling it on its own).
Ingredients
- 260g (1¾ cups) bread or pizza flour
- 2 teaspoons sugar
- 1 teaspoon salt
- ½ teaspoon instant dried yeast
- 70g (3½ tbsp) ghee, melted
- 2 tablespoon Greek-style natural yoghurt
- 80ml (⅓ cup) milk
- 1 tablespoon vegetable oil, plus extra to grease
- 2 teaspoons nigella seeds
- 1 good pinch saffron, soaked in 1 tbsp hot water
Method
- Combine the flour, sugar, salt and yeast in a large bowl and make a well in the centre. Combine the milk, yoghurt and 40g (2 tablespoons) of the melted ghee, add to the dry ingredients and use a wooden spoon and then your hands to mix to a soft dough. Turn onto a lightly floured bench top and knead for 8-10 minutes or until smooth and elastic and springs back when you push your finger into it.
- Brush a medium bowl with extra oil to grease, add the dough and turn to coat. Cover with plastic wrap and set aside in a warm, draught-free place for 40 minutes or until risen slightly.
- Preheat the oven to 200°C (180°C fan-forced). Line two large heavy baking trays with baking paper.
- Knock back the dough by punching it in the centre with your fist. Turn onto a lightly floured bench top and knead for 2-3 minutes or until smooth and elastic and the dough has returned to its original size. Divide the dough evenly into 2 portions and brush each with the oil to coat.
- Use a rolling pin to roll out a portion into a rough circle about 22cm in diameter and 5mm thick. Then use your hands to pull one end to shape into a teardrop, about 17cm x 24cm, pressing the centre to create a thicker edge. Transfer to a baking tray and then use your fingertips to make indents all over the surface of the flatbread. Repeat with the remaining dough portion. Brush the flatbreads with the saffron liquid and then sprinkle with the nigella.
- Bake for 10 minutes. Brush the surface of the flatbreads with the remaining melted ghee. Swap the trays around and then bake for a further 5-10 minutes or until the flatbreads are golden and cooked through.
- Serve warm or at room temperature along side a soup or curry.
Baker's Tips
This flatbread will keep in an airtight container at room temperature for up to 2 days but it is best eaten the day it is baked.This recipe is from Anneka's SBS Food online column, Bakeproof: Yeast-leavened Flatbreads.
CLICK HERE for more Bakeproof recipes.
Photography by Alan Benson.
Prep 30min (+2hr proving)
Bake 40-50minMakes 4 serves
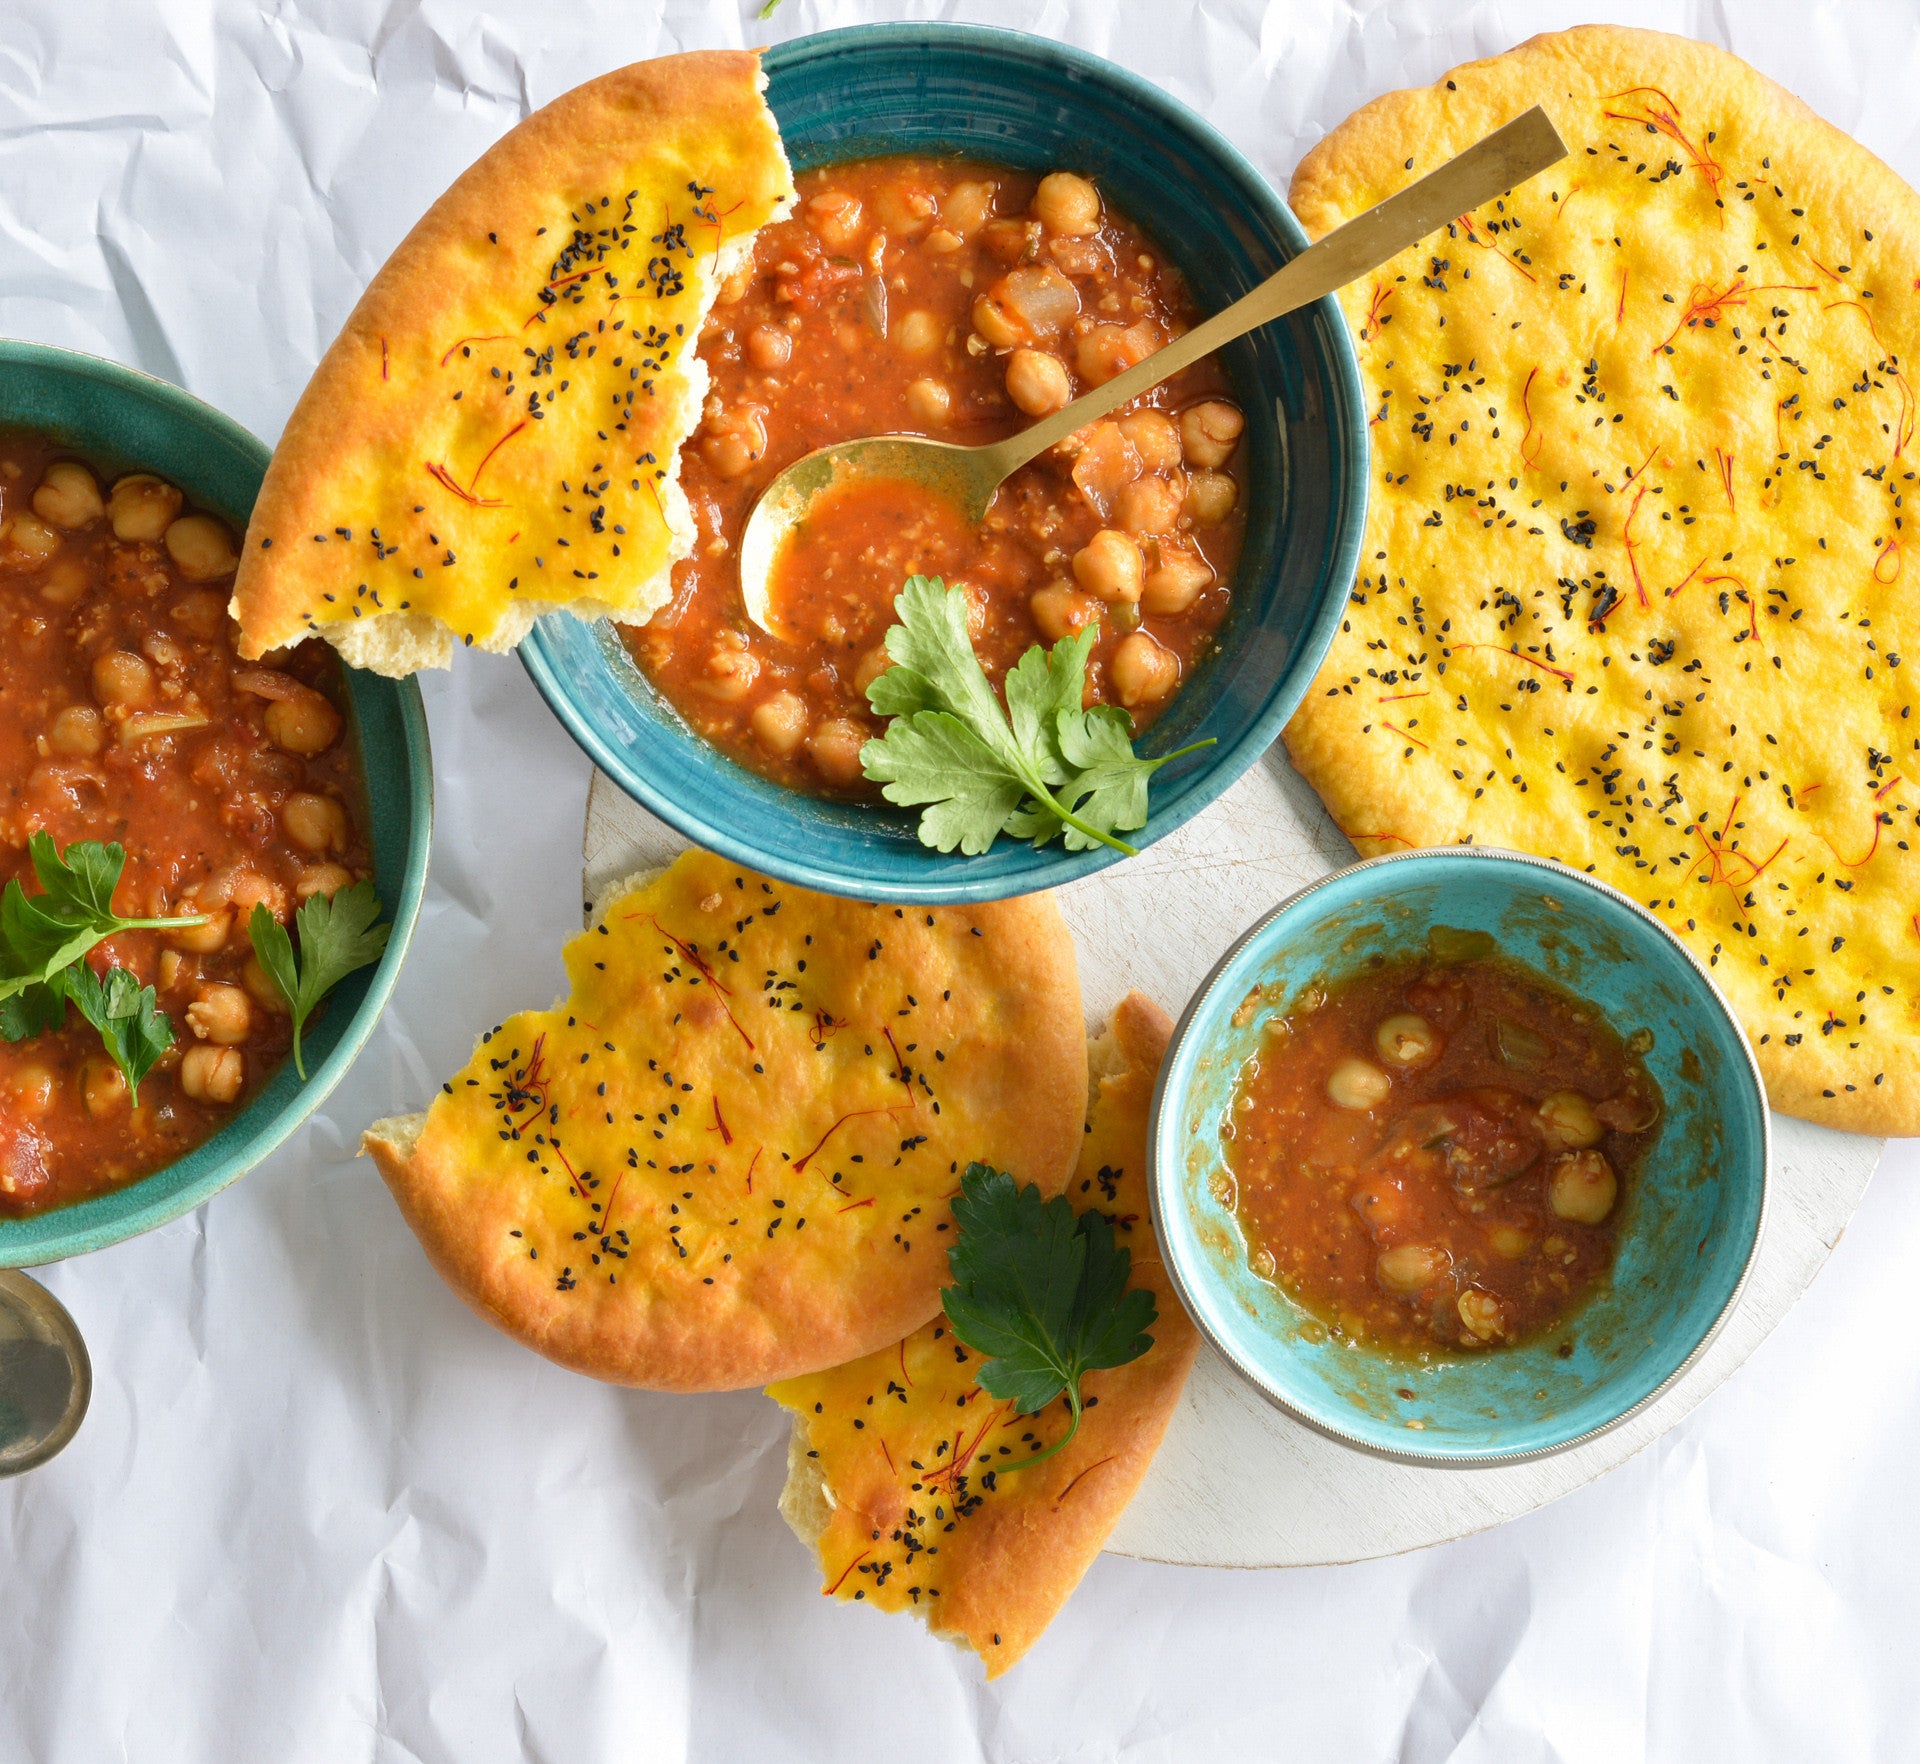
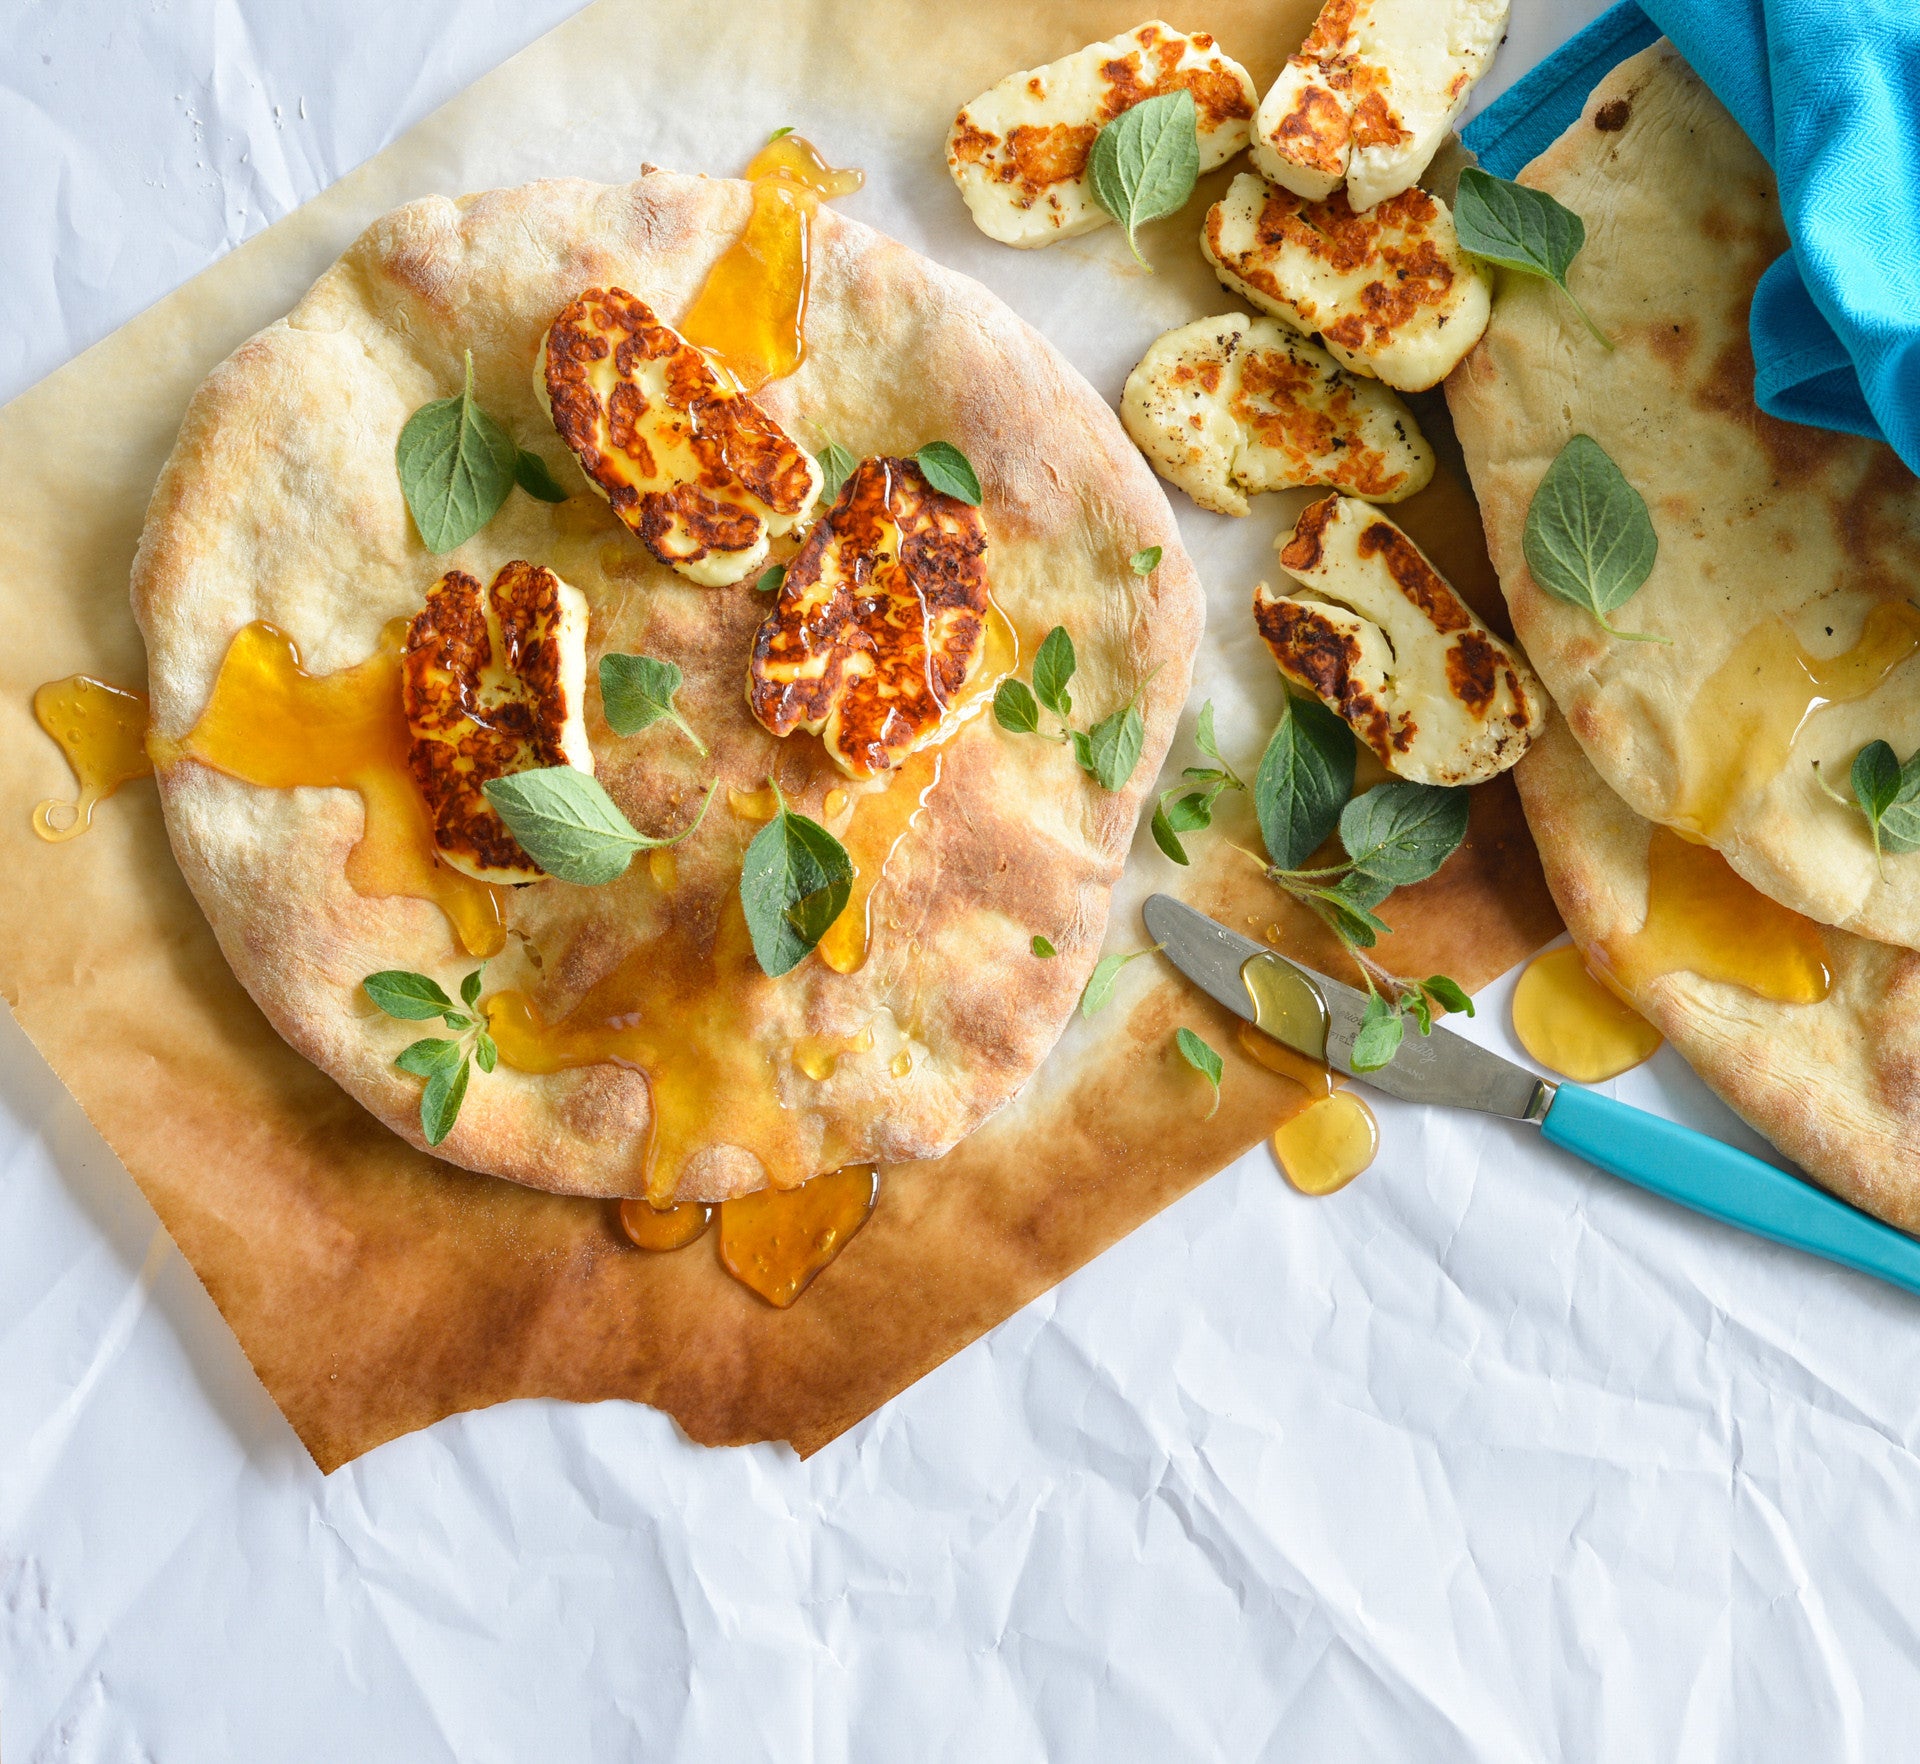
This mor-ish flatbread has a long fermentation time that gives its distinctive well-developed and slightly sour flavour. It’s perfect for dipping into and sopping up fragrant Middle Eastern stews and dips.
Ingredients
- 600 g (4 cups) plain flour
- 1 sachet (7 g) instant dried yeast
- 2 tsp sugar
- 1½ tsp salt
- 375 ml (1½ cups) warm water
- 130 g (½ cup) Greek-style natural yoghurt, at room temperature
- 1 tbsp olive oil
- Honey, good-quality pan-fried or grilled haloumi and fresh oregano leaves, to serve
Method
- Combine the flour, yeast, sugar and salt in a large bowl. Combine the water, yoghurt and oil, add to the flour mixture and use a wooden spoon and then your hands to mix to a soft dough (the dough will be quite sticky at this stage). Cover the bowl with a damp tea towel and set aside in a warm, draught-free place for 2-3 hours or until well risen.
- Place a pizza stone in the oven on the centre and preheat to 250°C (230°C fan-forced).
- Divide the dough into 4 portions. Use your hands to flatten each portion into a round on a floured bench top to about 26 cm in diameter and 6-7 mm thick. Place on a piece of baking paper on a tray and cover with a damp tea towel. Set aside in a warm, draft-free place for 15 minutes to rise slightly. Repeat with the remaining 3 dough portions.
- Use the baking paper to lift a bread round onto the pizza stone in the oven and bake for 10-13 minutes or until golden and baked though. Remove from the oven and wrap in a clean tea towel to keep warm while baking the remaining flatbreads in the same way (the flatbread will be crusty on the outside to start with and then will soften as it stands wrapped in the tea towel).
- Serve warm topped with honey, haloumi and oregano leaves.
Baker's Tips
You can also bake these flatbreads on baking paper-lined oven trays for 15 minutes.These flatbreads are best eaten the day they are baked.
This recipe is from Anneka's SBS Food online column, Bakeproof: Yeast-leavened Flatbreads.
CLICK HERE for more Bakeproof recipes.
Photography by Alan Benson.
Prep 20min (+ cooling time)Bake 25-30minMakes 12
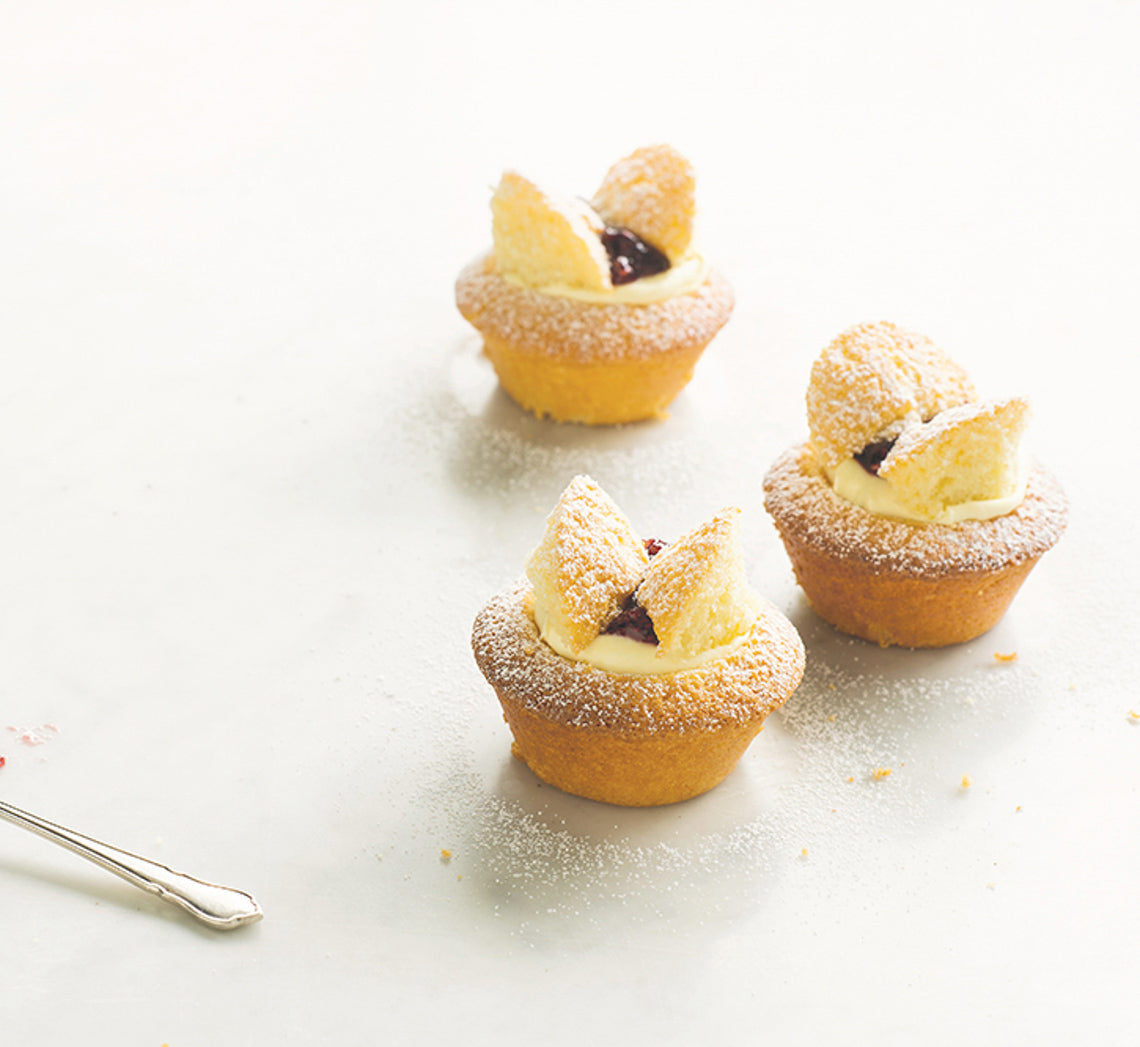
Based on a cake I have made for years as a wedding cake for friends, this recipe is incredibly simple but still has a wonderful celebratory feel. It also makes truly divine individual cakes like these sweet butterfly cakes.
Ingredients
Melted butter, to grease (optional)
200g (7oz) good-quality white chocolate, chopped
150g (5¼oz) unsalted butter, cubed
185ml (¾ cup/6½fl oz) water
220g (1 cup/7¾) caster sugar
2 eggs, at room temperature, lightly whisked
1½ teaspoons natural vanilla extract or essence
225g (1½ cup/8oz) plain flour
50g (½ cup/1¾oz) almond meal
1½ teaspoons baking powder
125ml (½ cup/4fl oz) thick (double) cream
165g (½ cup/5¾oz) raspberry or blackberry jam
Icing sugar, to dust
Method
- Preheat oven to 180°C/350°F (160°C/315°F fan-forced). Grease a 12-hole 80ml (⅓ cup/2½fl oz) capacity muffin tray with melted butter or line with paper cases.
- Put the chocolate, butter and water in a medium saucepan and stir over medium heat just until the chocolate and butter have melted and the mixture is smooth. Remove from the heat and set aside until cooled to room temperature.
- Add the sugar, eggs and vanilla to the chocolate mixture and use a balloon whisk to stir until well combined.
- In a medium bowl, use a clean whisk or fork to whisk together the flour, almond meal and baking powder, combining the ingredients evenly and breaking up any lumps of almond meal. Add to the chocolate mixture and stir with the whisk until just combined.
- Divide the mixture evenly among the muffin holes and lightly tap the tin on the bench top to remove any large air bubbles. Bake in the preheated oven for 25–30 minutes or until a skewer inserted in the centre of a cake comes out clean. Leave the cakes to stand in the tin for 5 minutes before turning out onto a wire rack to cool completely.
- When cool, cut a shallow cone-shaped piece out of the top of a cake, leaving about a 1cm/½in border. Cut the piece of cake in half. Spoon a little cream and then some jam into the hole to fill. Arrange the two pieces of cake in the jam to form wings. Repeat with the remaining cakes, cream and jam. Dust with icing sugar to serve.
Baker's Tips
- The unfilled cakes will keep in an airtight container at room temperature in a cool spot for up to 2 days. Alternatively they will freeze well sealed in a freezer bag or airtight container for up to 1 month. Thaw at room temperature.
- These cakes are best eaten the day they are filled.


