- home
- BAKERECIPES
BakeRecipes
Bringing real baking into your home with deliciously simple recipes.
Prep 20min (+ 30-60min simmering, cooling and 20min standing time)Bake 15-18minMakes 12
These cakes are a play on the original (and wonderful) Middle Eastern Orange Cake from the one and only Elizabeth David. Making use of seasonal mandarins and with the addition of coconut and polenta, this version is also flourless and gluten-free.
Ingredients
2 large mandarins (about 110g)
Melted butter, to grease
100g (1 cup) almond meal
95g (½ cup) instant polenta
45g (½ cup) desiccated coconut
½ teaspoon gluten-free baking powder
3 eggs, at room temperature
165g (¾ cup) caster (superfine) sugar
1½ teaspoons natural vanilla extract or essence
250g (2 cups) pure icing (confectioners') sugar
1½–2 tablespoons mandarin juice
Method
- Put the whole mandarins in a small saucepan, cover with water and set over high heat. Bring to the boil, reduce the heat and simmer for 30–60 minutes, or until very soft when tested with a skewer. (You may need to place a small saucer over the mandarins to keep them submerged.) Remove the mandarins from the water and set aside to cool slightly.
- Meanwhile, preheat the oven to 180°C (160°C fan-forced). Brush a 12-hole 80ml (⅓ cup) capacity silicone or metal muffin tin with melted butter to grease. Quarter the mandarins and remove and discard the centre core and any seeds. Purée the skin and flesh in a small food processor or blender until smooth.
- Put the almond meal, polenta, coconut and baking powder in a medium bowl and mix well to combine.
- Put the eggs, sugar and vanilla in a medium bowl and use an electric mixer with a whisk attachment to whisk on high speed until very thick and pale and a ribbon trail forms when the whisk is lifted (about 3–4 minutes).
- Add the mandarin purée to the egg mixture and use a spatula or large metal spoon to fold in until just combined. Add the polenta mixture and fold together until combined. Divide the mixture evenly among the muffin holes (you can pour it from a jug or use a ladle).
- Bake in the preheated oven for 15–18 minutes, or until a skewer inserted in the cakes comes out clean. Cool the cakes in the tin for 5 minutes. Use a palette knife to ease the cakes out and transfer to a wire rack to cool.
- To make the Mandarin icing, sift the icing sugar into a medium bowl. Gradually stir in the juice until the mixture is smooth and has a thick coating consistency, adding a little more juice if too thick. Cover with plastic wrap and set aside at room temperature until ready to use.
- Spread the tops of the cooled cakes with the icing. Set aside for 20 minutes or until set.
Baker's Tips
- These cakes will keep in an airtight container in a cool place (but not in the fridge) for up to 2 days.
Prep 2hr (+3hr cooling and 1hr chilling time)Bake 50minMakes 8 serves
This pie is one of my all-time favourites and brings together some of Greece’s most popular ingredients – silverbeet, haloumi, Kalamata olives, rice and filo pastry. It takes a little while to prepare but don’t be put off, I promise it will be well worth the effort.
Ingredients
20g butter, plus extra melted for brushing
80ml (⅓ cup) olive oil
2 leeks, white section only, trimmed and thinly sliced
200g (1 cup) long-grain white rice
1 bunch silverbeet (about 960 g), thick stems discarded, leaves washed and coarsely chopped
250ml (1 cup) pouring (thin) cream
70g pitted Kalamata olives, sliced
225g haloumi, cut into 1 cm pieces
¼ cup chopped flat-leaf parsley
1 tablespoon thyme leaves
salt and freshly ground black pepper, to taste
12 sheets filo pastry
60ml (¼ cup) olive oil
3 teaspoon sesame seeds, to sprinkle
lemon wedges, to serve
Poached chicken
1.5kg whole chicken
2 carrots, sliced
2 celery stalks, sliced
1 brown onion, unpeeled, quartered
10 whole peppercorns
4 litres water (about)
Herbed yoghurt
260g (1 cup) plain Greek-style yoghurt
1 garlic clove, finely grated
1 tablespoon chopped dill
1 tablespoon chopped flat-leaf parsley
Method
- To make the poached chicken, put the chicken, carrot, celery, onion and peppercorns in a large saucepan or stockpot and add enough water to cover the chicken by about 2cm. Cover and bring to the boil over medium heat. Reduce heat to low and poach gently, covered, for 40 minutes or until just cooked though. Remove from heat and stand the chicken in the stock at room temperature for 1 hour to cool slightly. Transfer to the fridge and cool the chicken in the stock completely (this will take about 2 hours).
- Strain the stock, discarding the solids. Return 1 litre (4 cups) stock to the saucepan and bring to the boil (see Baker’s Tips). Continue boiling the stock for a further 12-15 minutes or until reduced to 375ml (1½ cups). Set aside.
- Remove the meat from the chicken, discarding the skin and bones. Use your fingers to shred the chicken meat, cover and place in the fridge until required.
- Put the butter, 1 tbsp oil and leek in a medium saucepan and cook over medium-low heat, covered and stirring occasionally, for 15 minutes or until the leek is just soft. Add the rice and stir to coat in the oil. Add the 375ml (1½ cups) reduced stock and bring to the boil over high heat. Reduce the heat to the lowest possible setting, cover the saucepan with a lid, and cook gently for 10 minutes or until the stock is absorbed and the rice is almost tender. Transfer to a large bowl and place in the fridge to cool (this will take about 1 hour).
- Meanwhile, put the silverbeet in a large saucepan, cover with a lid and cook over high heat, stirring occasionally, for 5 minutes or until wilted. Strain and cool slightly, then use your hands to squeeze out any excess moisture. Set aside.
- To make the herbed yoghurt, combine the yoghurt, garlic and herbs in a small bowl and stir to combine. Cover and refrigerate until required.
- Preheat the oven to 180°C (160°C fan-forced). Brush a 20cm x 30cm (base measurement) shallow slice tin with some of the melted butter.
- When the rice has cooled, add the chicken, silverbeet, cream, olives, haloumi, parsley and thyme and stir gently to combine. Taste and season with salt and pepper.
- Lay the filo sheets in a stack, cover with a dry tea towel and then a damp one to stop them from drying out. Take 1 sheet of filo (keeping the remaining sheets covered with the tea towels) and brush generously with the remaining olive oil. Lay another sheet on top. Continue to layer with the remaining filo to make two stacks, each with 6 sheets. Place the filo stacks widthways and slightly overlapping, into the greased tin to line, allowing the ends to overhang the top.
- Spoon the chicken and rice mixture into the tin. Fold the overhanging filo over the top to cover. Brush top with remaining oil and sprinkle with sesame seeds.
- Bake for 45-50 minutes or until filo is golden and crisp. Remove from oven and stand in tin for 10 minutes before transferring to a serving plate or board. Serve warm or at room temperature with the herbed yoghurt and lemon wedges.
Baker's Tips
- Any leftover pie will keep in an airtight container in the fridge for up to 2 days. Serve at room temperature or reheat, covered with foil, in a preheated 160°C oven for 15 minutes, then uncover and bake for a further 5-10 minutes or until the filling is heated through and the pastry is crisp.
Photography by Alan Benson.
Prep 1hr (+30min cooling and 30min standing time)Bake 20minMakes 12
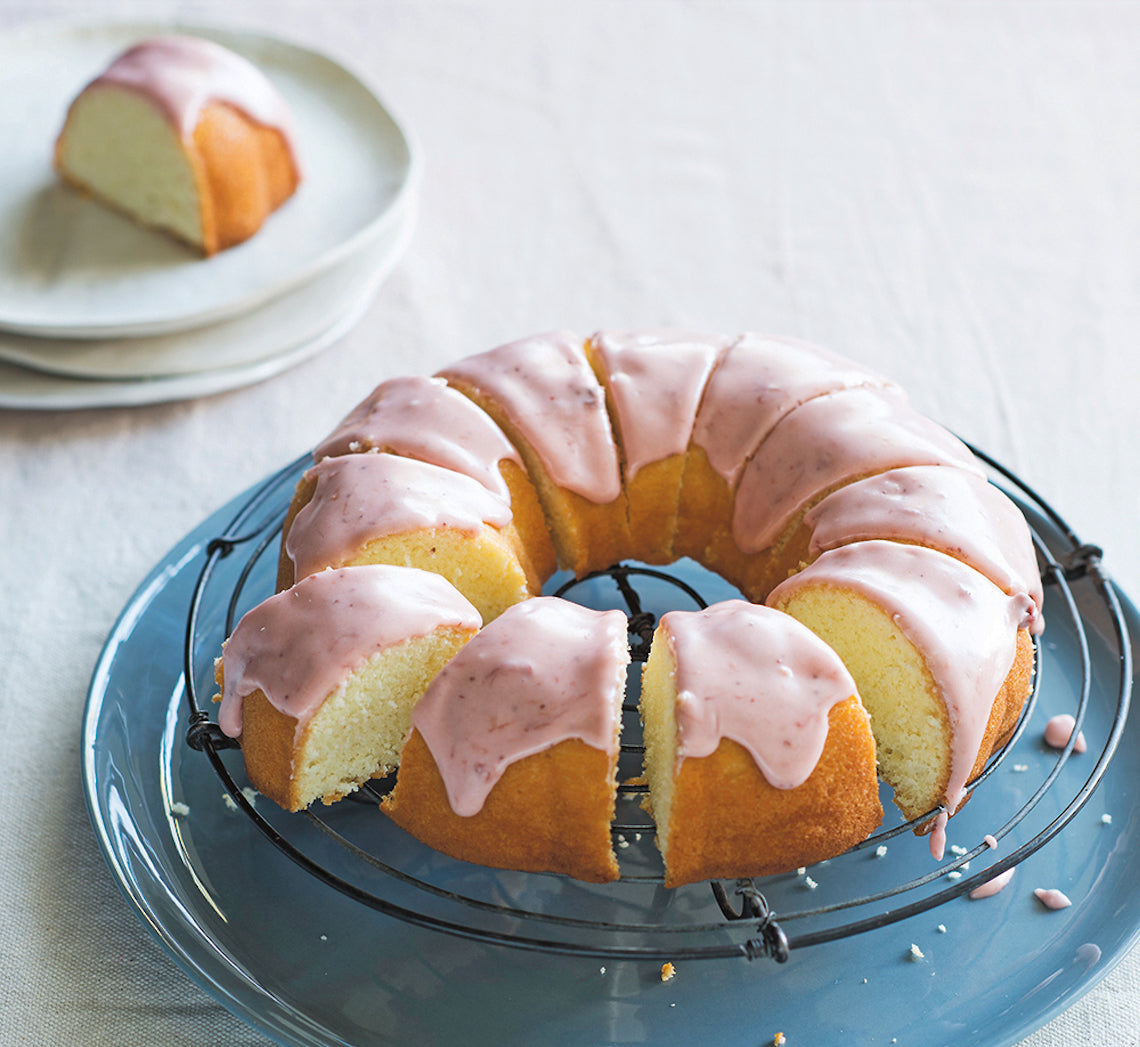
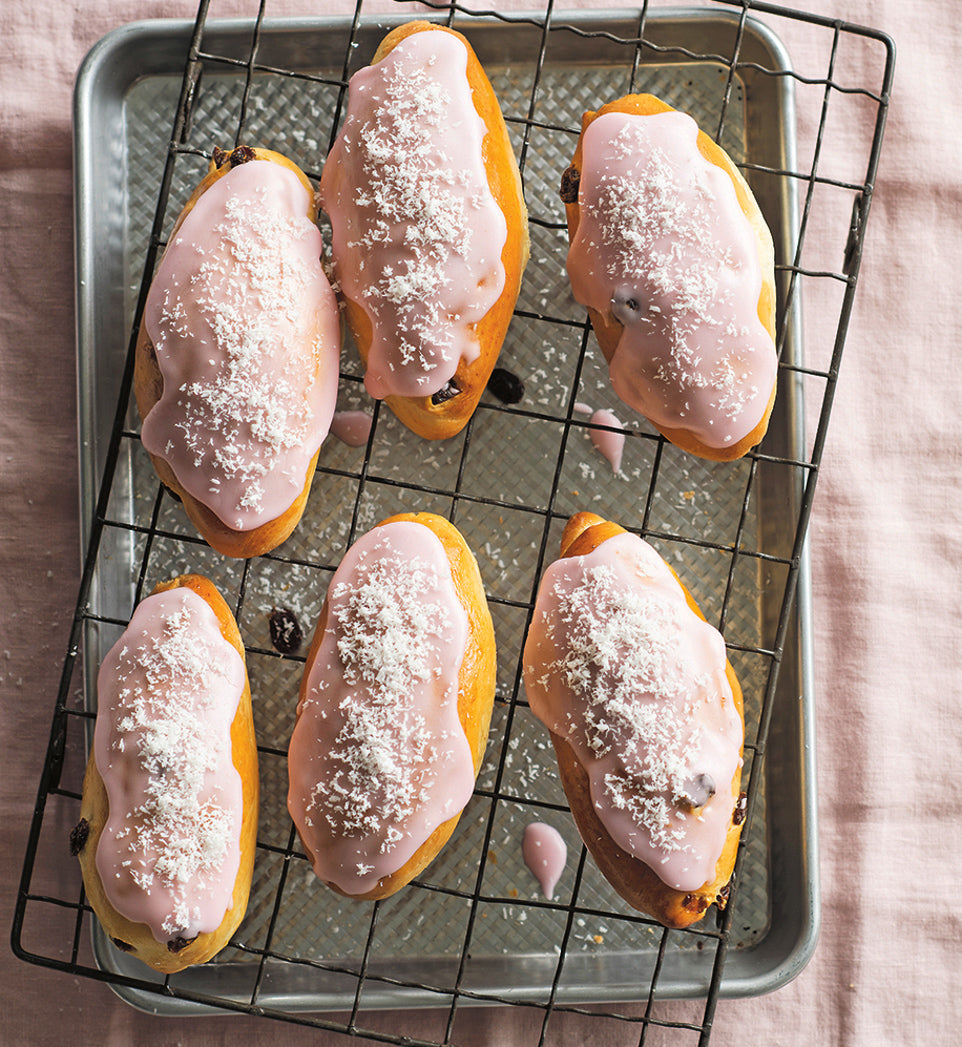
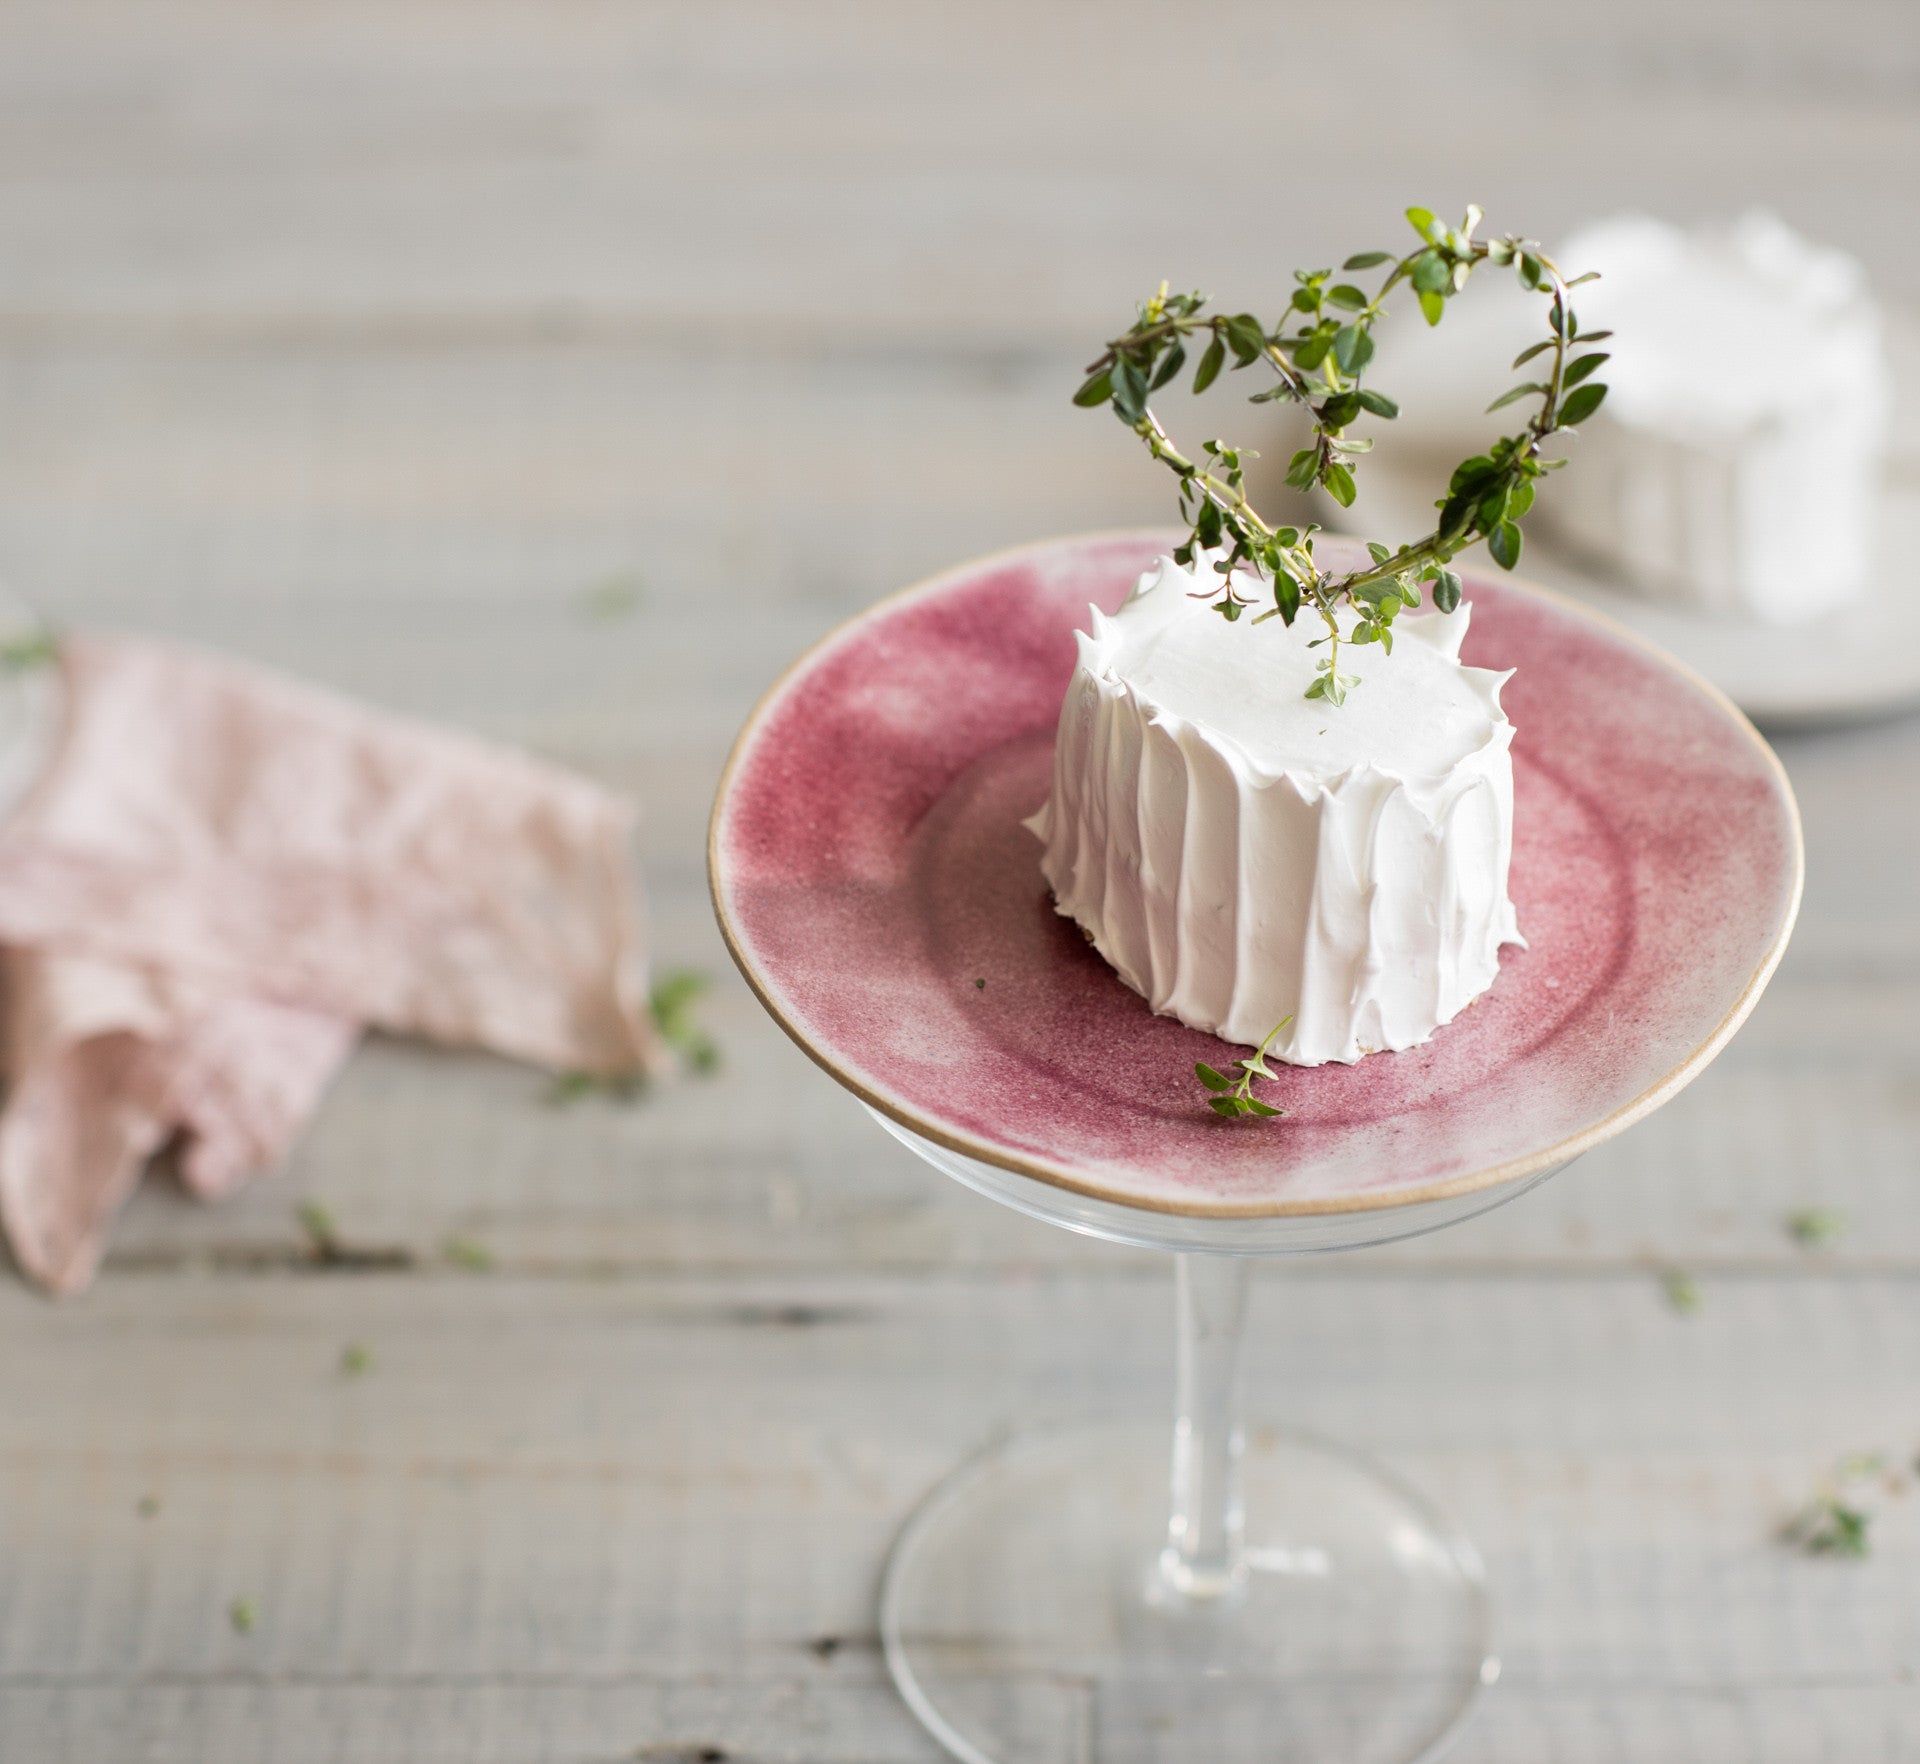
Hailing from the deep south of North America, Lady Baltimore cake is a classic wedding cake choice. With its simple buttercake layers, fruit and nut filling and dreamy meringue frosting, the resulting flavour combination is delightfully complex. These individual cakes are made just for one.
Ingredients
Melted butter, to grease185g butter, softened
145g (⅔ cup) caster sugar, plus 75g (⅓ cup) extra
1 teaspoon natural vanilla essence or extract
1 orange, zest finely grated
225g (1½ cups) plain flour
2 teaspoons baking powder
165ml (⅔ cup) milk
3 egg whites
Filling
45g (¼ cup) raisins, chopped45g (¼ cup) chopped dried figs
2 tablespoons brandy
40g (⅓ cup) chopped toasted walnuts
Meringue Frosting
- 3 egg whites
- 150g (⅔ cup) caster sugar
- 1 teaspoons natural vanilla essence or extract
Method
- Preheat the oven to 180°C (160°C fan-forced). Brush a 12-hole 125ml (½ cup) friand pan with melted butter to grease.
- To make the filling, combine the raisins, figs and brandy in a small saucepan and heat over low heat for 3-5 minutes or until heated through. Remove from the heat and set aside to cool.
- Use an electric mixer to beat the butter, 145g (⅔ cup) caster sugar, vanilla and orange zest, scraping down the sides of the bowl when necessary, until pale and creamy.
- Sift together the flour and baking powder. With the motor running on the lowest possible speed, beat in the flour alternately with the milk, in 2 separate batches each, until just combined.
- In a separate clean dry medium mixing bowl, use a whisk attachment to whisk the egg whites until soft peaks form. Gradually add the extra caster sugar, a spoonful at a time, and whisk on medium-high speed until thick and glossy. Use a large metal spoon or spatula to fold a large spoonful of the egg white mixture through the butter mixture until well combined. Add the remaining egg white mixture and fold until just combined. Divide the mixture evenly among the friand holes and smooth the surfaces. Bake for 20 minutes or until a skewer inserted in the the centre of the cakes comes out clean. Stand the cakes in the tin for 5 minutes before turning out onto a wire rack to cool completely.
- Meanwhile, make the meringue frosting. Choose a medium heatproof mixing bowl that sits snugly on top of a medium saucepan. Quarter-fill the saucepan with water and bring to the boil. Reduce the heat to the lowest possible setting. Put the eggwhites and sugar in the heatproof bowl and place over the simmering water. Use a spatula to stir until the sugar dissolves. (You can tell if the mixture is ready by rubbing a little between your fingers – if it still feels grainy, then continue to stir for another minute or until it no longer feels grainy.) Transfer the mixture to the bowl of an electric mixer and use a whisk attachment to whisk on high speed for 5-8 minutes or until the meringue has cooled to room temperature and is very thick and glossy. Whisk in the vanilla. Transfer two-thirds of the frosting to a bowl, cover with plastic wrap and set aside.
- To finish the filling, transfer the remaining third of the frosting to a medium bowl and fold in the chopped walnuts and the fruit mixture.
- Use a small sharp serrated knife to cut the cakes in half horizontally and trim the tops to level, if necessary. Spread a little of the filling over the bottom halves of the cakes and sandwich with the top halves, pressing down.
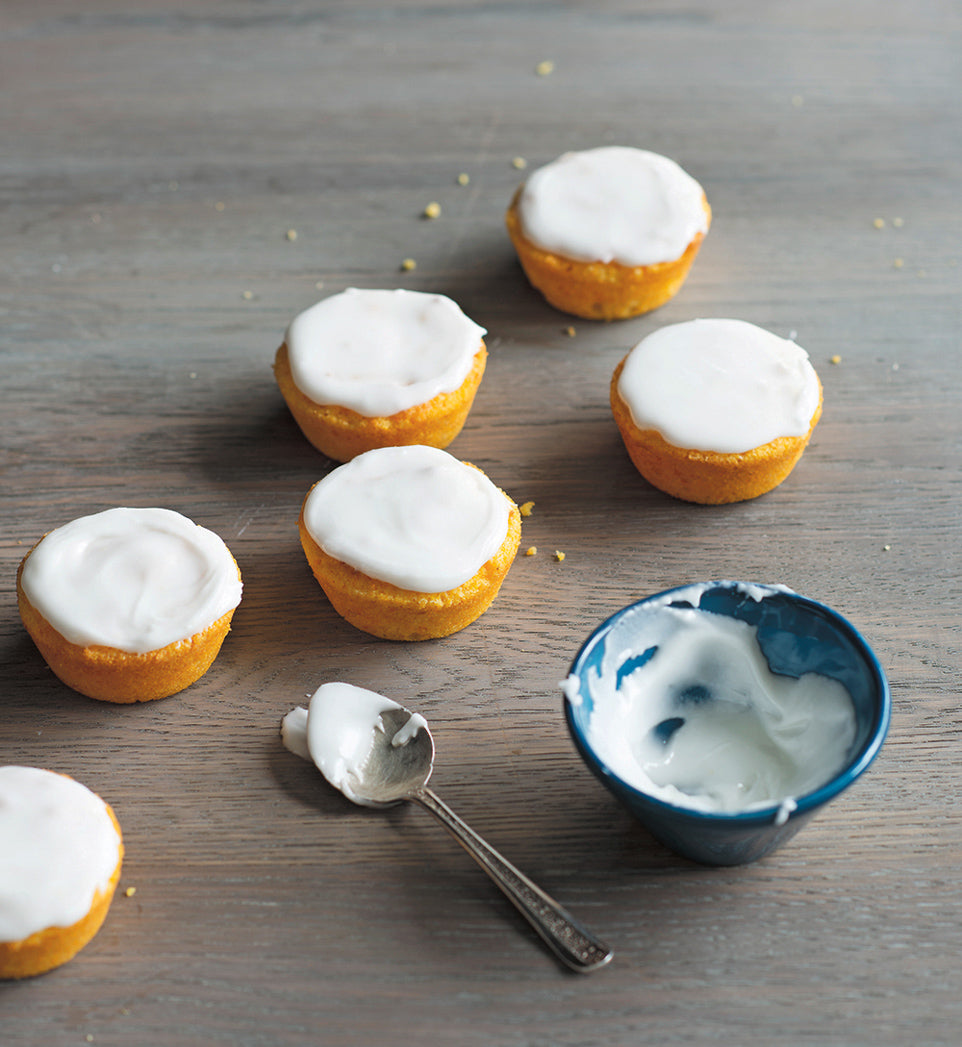
- Spread the reserved meringue frosting over the sides and tops of the cakes to cover, swirling as desired. Set aside for 30 minutes for the frosting to firm slightly before serving.
Baker's Tips
- These cakes will keep in an airtight container at room temperature for up to 2 days.
Photography by Alan Benson.
Prep 35min (+1hr cooling time)
Bake 25minMakes 12 serves
Layer upon layer, this impressive cake is deceptively simple to make. What’s more, you could call it a hazelnut hummingbird cake with the added bonus of lashings of caramel. Now what’s not to love about that!
Ingredients
Banana and hazelnut cake layers
melted butter, to brush
300g (2 cups) plain flour
3½ teaspoons baking powder
2 teaspoons ground cinnamon
½ teaspoon ground cardamom
220g (1 cup, firmly packed) brown sugar
100g hazelnut meal
60g (⅔ cup) desiccated coconut
150g butter, melted and cooled
3 eggs, lightly whisked
4 ripe medium bananas (about 200g each), mashed
2 teaspoons natural vanilla extract or essence
Caramel
165g (¾ cup) caster sugar
60ml (¼ cup) water
150ml pouring cream
30g butter, cubed
Cream cheese frosting
250g cream cheese, cubed, at room temperature
80g butter, cubed, at room temperature
1 teaspoon natural vanilla essence or extract
185g (1½ cups) icing sugar
Method
- To make the cake layers, preheat the oven to 180°C (160°C fan-forced). Brush three shallow 20cm round cake tins with melted butter and line the bases with non-stick baking paper.
- Sift together the flour, baking powder, cinnamon and cardamom into a large bowl. Stir in the brown sugar, hazelnut meal and coconut and stir with a wooden spoon to combine, breaking up any lumps. Make a well in the centre. Use a fork to whisk together the butter, eggs, banana and vanilla. Add to the dry ingredients and use a spatula or large metal spoon to fold together until just combined.
- Divide the cake mixture evenly among the prepared cake tins, smoothing the surface with the back of a spoon. Bake in preheated oven for 25 minutes, swapping the tins around halfway through baking, until pale golden and a skewer inserted into the centre of the cakes comes out clean. Stand the cakes in the tins for 5 minutes before transferring to wire racks to cool.
- Meanwhile, to make the caramel, combine the caster sugar and water in a small saucepan and use a wooden spoon to stir over low heat until the sugar dissolves. Increase the heat to medium and bring to the boil. Boil for about 10 minutes, brushing down the side of the pan with a pastry brush dipped in water to dissolve any sugar crystals, until the mixture turns a deep caramel. Remove immediately from the heat and carefully add the cream and butter. Stir with a wooden spoon until well combined and the caramel is smooth. Brush a little of the hot caramel over the warm cakes.
- Pour the caramel into a heatproof bowl or jug and set aside to cool, stirring occasionally, with the cakes (this will take about 1 hour).
- Meanwhile to make the cream cheese frosting, use an electric mixer to beat the cream cheese, butter and vanilla until well combined and creamy. With the mixer running, gradually beat in the icing sugar until well combined and smooth. Cover and set aside in a cool spot (but not in the fridge).
- To assemble the cake, spread about ½ cup of the cream cheese frosting over the top of one of the cake layers. Top with another cake layer, another ½ cup frosting and the remaining cake layer. Spread a thin layer of frosting around the outside of the cake so that the cake layers show through. Spread the remaining frosting on top. Pour a generous amount of the caramel over the top of the cake, allowing it to drizzle down the sides. Serve in wedges with the remaining caramel passed separately, if desired.
Baker's Tips
- This cake will keep in an airtight container in the fridge for up to 3 days. Stand at room temperature for 30 minutes before serving.
Photography by Alan Benson.
Prep 25min (+ 1hr cooling and 3hr chilling time)Bake 1hr 10minMakes 10 serves
Bringing together sweet blueberries and sour lemons, this simple cheesecake is light but luscious. It's the perfect end to a lazy summer meal.
Ingredients
Melted butter, extra, to grease
375g cream cheese, at room temperature, cubed (see Baker's Tips)
3 eggs, at room temperature
185g (¾ cup) sour cream
125ml (½ cup) thin (pouring) cream
165g (¾ cup) caster (superfine) sugar
1 tablespoon finely grated lemon zest
2 tablespoons freshly squeezed lemon juice
200g fresh or frozen blueberries (see Baker's tips)
Icing sugar, to dust
- 100g plain sweet biscuits
- 60g butter, melted
Method
- Preheat the oven to 150°C. Line the base of a 20cm (8 in) spring-form cake tin with baking paper. Brush the side of the tin with a little melted butter to grease.
- To make the Biscuit base, process the biscuits in a food processor until finely crushed. Add the butter and process until well combined. Sprinkle the mixture over the base of the tin and use the back of a metal spoon or the base of a glass to press down to cover evenly. Put the tin on a baking tray and place in the fridge.
- Clean the food processor bowl and process the cream cheese until smooth. Add the eggs and process until smooth. Add the sour cream, thin cream, sugar, lemon zest and juice and process until well combined and smooth, scraping down the side and base of the bowl when necessary. Pour into the tin over the base. Scatter the blueberries over the top.
- Bake for 1 hour 10 minutes or until the cheesecake is just set but the centre trembles slightly when the tin is shaken gently. Turn off the oven, use a wooden spoon to keep the oven door ajar and leave the cheesecake in the oven for 1 hour (this helps prevent the cheesecake from cracking). Transfer the cheesecake, still in the tin, to the fridge and chill for at least 3 hours or until well chilled. Dust with icing sugar and serve.
Variations
- Orange & Raspberry Cheesecake – Replace the lemon zest and juice with orange zest and juice. Replace the blueberries with fresh or frozen raspberries.
- Blueberry & White Chocolate Cheesecake – Replace the lemon zest and juice with 1½ teaspoons natural vanilla extract or essence. Melt 180g good-quality white chocolate and cool to room temperature. Add to the bowl of the food processor just before transferring the mixture to the tin and process until just combined.
- Individual Lemon & Blueberry Cheesecakes – Line a 12-hole 80ml (⅓ cup) capacity muffin tin with paper cases. Divide the biscuit base, cream cheese mixture and blueberries evenly among the cases. Bake at 160°C for 30 minutes. Cool as per the recipe, then chill in the fridge for at least 1 hour before removing the paper cases and serving.
Baker's Tips
- Having the cream cheese at room temperature means it will easily become smooth and creamy in the food processor. If you use it straight from the fridge it will take longer and you’ll need to scrape the side and base of the food processor frequently so that no lumps are left after processing.
- If using frozen blueberries, use them straight from the freezer – do not thaw.
Prep 50min (+30min cooling time)
Bake 50minMakes 8-10 serves
A heavenly layering of mouth-puckering lemon pound cake, curd and syrup, teamed with summer fruits and ‘soured’ cream, this dessert is one for lemon-lovers. The cake is just as delicious served either plain, toasted or chargrilled – just take your pick!
Ingredients
- melted butter, to grease
- 125ml (½ cup) sour cream
- 125ml (½ cup) thickened cream
- 2 x 125g punnets blueberries, to serve
- 2 ripe medium mangoes, sliced, to serve
Lemon buttermilk pound cake
- 125g butter, at room temperature
- 220g (1 cup) caster sugar
- 2 eggs
- 1 tablespoon finely grated lemon zest
- 225g (1½ cups) plain flour
- ½ teaspoon bicarbonate of soda
- 125ml (½ cup) buttermilk
- 1 tablespoon strained fresh lemon juice
Lemon curd
- 125ml (½ cup) strained fresh lemon juice
- 165g (¾ cup) caster sugar
- 3 eggs, whisked and strained
- 100g unsalted butter, cubed, at room temperature
Lemon syrup
- 110g (½ cup) caster sugar
- 160ml (⅔ cup) strained fresh lemon juice
- 2 tablespoons water
Method
- To make the lemon buttermilk pound cake, preheat oven to 180°C (160°C fan-forced). Grease a 9cm x 19cm (base measurement) loaf tin and line the base and long sides with one piece of non-stick baking paper. Use an electric mixer to beat the butter and sugar until pale and creamy. Add the eggs one at a time, beating well after each. Beat in the lemon zest. Sift together the flour and bicarbonate of flour. Combine the buttermilk and lemon juice. On lowest possible speed beat in half the flour mixture and then half the buttermilk mixture until just combined. Repeat with the remaining flour and buttermilk mixtures in two more batches until just combined. Pour the mixture into the prepared tin and smooth the surface with the back of a spoon. Bake in preheated oven for 50 minutes or until a skewer inserted into the centre comes out clean. Leave to stand in the tin for 5 minutes before transferring to a wire rack to cool (this will take about 30 minutes).
- To make the lemon curd, combine the lemon juice, sugar and eggs in a medium heatproof bowl and place over a saucepan of simmering water (make sure the bowl doesn’t touch the water). Stir with a wooden spoon for 10-12 minutes or until the mixture thickens to a consistency similar to pouring cream (do not boil). Remove the bowl from the saucepan and gradually stir in the butter until the butter is evenly incorporated and the curd is smooth. Cover with plastic wrap (see Baker’s tips) and place in the fridge to chill.
- To make the lemon syrup, combine the sugar, water and lemon juice in a small saucepan and stir over medium heat until the sugar dissolves. Bring to the boil and boil for 3 minutes or until reduced slightly.
- To serve, combine the cream and sour cream in a medium bowl and use a balloon whisk to whisk until soft peaks form. Transfer to a serving bowl. Preheat a chargrill pan on high (see Baker’s tips). Cut the cake into 1.5 cm-thick slices and toast in a toaster until lightly golden and warmed through. Transfer to a plate and place in the centre of the table with the curd, syrup, fruit and cream for guests to assemble their own dessert.
Baker's Tips
- The Lemon buttermilk pound cake will keep in an airtight container at room temperature for up to 2 days.
- If making the curd ahead of time, you can transfer it straight into a clean airtight jar, cover with an airtight lid and place in the fridge. It will keep in an airtight jar or container in the fridge for up to 1 week.
- The lemon syrup will keep in an airtight jar or container in the fridge for up to 2 weeks.
- The cake can be also toasted in a sandwich press or in a toaster until golden.
- The combined whipped cream and sour cream can be replaced by scoops of good-quality vanilla ice-cream if desired.
Photography by Alan Benson.
Prep 25min (+30min chilling and 30min cooling time)Bake 25minMakes about 40
Sipping on malted milk milkshakes and playing dominos is a vivid childhood memory. These biscuits combine the two and kids will love not only creating them, but also playing with them as they snack — all you need is a glass of milk!
Ingredients
250g butter, softened slightly
110g (½ cup) caster sugar
1 egg yolk
375g (2½ cups) plain flour
60g (½ cup) malted milk powder
Dark or milk Choc Bits (chocolate chips), to decorate
Method
- Preheat the oven to 160°C (140°C fan-forced). Line two large oven trays with non-stick baking paper.
- Use an electric mixer to beat the butter and sugar until smooth and just combined. Add the egg and beat until well combined.
- Add the flour and malted milk powder to the butter mixture and beat on low speed until just combined evenly and a dough forms.
- Turn the dough onto a lightly floured surface and knead lightly and briefly until it just comes together. Divide the dough into two portion. Use a lightly floured rolling pin to roll out one portion to 5mm thick. Use a large sharp knife and a ruler to cut the dough into 4cm x 8cm rectangles; re-rolling any off cuts as necessary. Use the knife to make a shallow indent across the middle of each biscuit. Place on the lined oven trays, leaving about 2cm between each. Press the Choc Bits into the biscuits to resemble dominos. Repeat with the remaining dough portion and Choc Bits. Place in the fridge to chill for 30 minutes.
- Bake in preheated oven for 25 minutes, swapping the trays around after 10 minutes, or until pale golden and cooked through. Cool on the trays.
Baker's Tips
- These biscuits will keep in an airtight container at room temperature for up to 1 week.
This recipe is from Anneka's SBS Food online column, Bakeproof: Kids in the Kitchen.
CLICK HERE for more Bakeproof recipes.
Photography by Alan Benson.
Prep 20minBake 35minMakes 8-10 serves
Much more like a cake than a pie, this apple-dense traditional Norwegian dessert is comforting, homely and can warm the soul with just one mouthful – especially when served straight from the oven in generous scoops and topped with ice-cream or a large dollop of thick cream. Don’t overlook the fact that it is also pretty good served like any other cake, cooled and in wedges. The trick to this recipe is not to over-mix – only mix until the wet and dry ingredients are evenly combined.
Ingredients
- Melted butter, to grease
- 110g (¾ cup) plain flour
- 1 teaspoon baking powder
- 1 teaspoon ground cinnamon
- ½ teaspoon ground cardamom
- 110g (½ cup) caster sugar
- 3 medium (about 150g each) apples (such as golden delicious, royal gala or pink lady), peeled, cored and cut into 2 cm pieces
- 80g slivered almonds, toasted
- 100g butter, melted and cooled
- 1 egg
- 2 tablespoons milk
- 1½ teaspoons natural vanilla essence or extract
- Vanilla ice-cream or thick cream, to serve
Method
- Preheat the oven to 180°C (160°C fan-forced). Grease a 20cm springform tin with melted butter and line the base with baking paper.
- Sift together the flour, baking powder, cinnamon and cardamom into a large bowl. Stir in the sugar, apple and almonds. Use a fork to whisk together the butter, egg, milk and vanilla. Add to the flour mixture and use a spatula to mix until just combined.
- Spoon the mixture into the prepared tin and spread evenly with the back of a spoon. Bake in the preheated oven for 35 minutes or until golden and a skewer inserted into the centre comes out clean.
- Stand the pie in the tin for 5–10 minutes before removing the sides of the tin. Serve warm in scoops or at room temperature in wedges with ice-cream or cream.
Baker's Tips
- This pudding/cake will keep in an airtight container at room temperaturein a cool spot for up to 3 days.
This recipe is from Anneka's SBS Food online column, Bakeproof: Scandi Baking. CLICK HERE for more Bakeproof recipes.
Photography by Alan Benson.
Prep 30minBake 30minMakes 8 serves
Commonly referred to as potato ‘pita’ these filo pies are simplicity personified – and that is what makes them so good! Traditionally a homemade flaky dough is made to encase the simple potato filling and filo pastry is a great alternative, especially for the convenience. This recipe uses vegetable oil, but feel free to use olive oil in its place, if you wish.
Ingredients
- 125ml (½ cup) vegetable oil
- 16 sheets filo pastry
- sesame seeds (optional), to sprinkle
- natural yoghurt and freshly ground black pepper, to serve
Filling
- 1 tablespoon vegetable oil
- 1 small brown onion, finely diced
- 600g potatoes (such as Desiree), finely diced
- ½ teaspoon salt, or to taste
- freshly ground black pepper, to taste
Method
- Preheat the oven to 190°C (170°C fan-forced). Brush a large baking tray with a little of the oil.
- To make the filling, heat the oil in a small saucepan and cook the onion over medium heat for 5-8 minutes or until softened. Transfer to a medium bowl and set aside.
- Peel the potatoes and then use a mandolin to cut them into medium-thick slices (about 7 mm-thick). Use a sharp knife to then dice the potatoes finely. Add to the onion, season with the salt and pepper and set aside.
- Stack filo sheets flat on a bench top. Cover with a dry clean tea towel and then a slightly damp tea towel to help prevent them from drying out. Take one sheet of filo, lay it with a long side closest to you and brush with a little of the oil. Cover with another sheet of filo brush with oil again. Spread about ⅓ cup of the potato filling along the long edge closest to you, about 3 cm from the edge and about 3 cm in from each end. Fold in the pastry ends and then roll up to form a log and to enclose the filling. Shape the filo log into a coil and place on the oven tray. Brush with a little more oil and then sprinkle with the sesame seeds, if desired. Repeat with the remaining filo sheets and potato filling to make 8 coils in total.
Baker's Tips
The key to working with filo pastry is to work quickly so it doesn’t dry out and become brittle and tricky to work with. Covering the pastry sheet with a dry and then a slightly damp tea towel will always help keep them moist and pliable.This recipe is from Anneka's SBS Food online column, Bakeproof: Bosnian Baking.
CLICK HERE for more Bakeproof recipes.
Photography by Alan Benson.
Prep 30min (+35min pastry making time)Bake 1hr 15minMakes 8-10 serves
Classic apple pie (served with a overly-generous scoop of vanilla ice-cream, of course) is one of the perennial delights of winter and can only be improved by the addition of rhubarb and a deliciously rich vanilla sour cream pastry. This pie just may be a little hard to beat.
Ingredients
1 egg, whisked, for brushing1 quantity vanilla sour cream pastry, shaped into a disc before wrapping and chilling as directed
2 teaspoons demerara sugar, to sprinkle
pouring cream, vanilla ice-cream or custard, to serve
Apple and rhubarb filling
1 teaspoon ground cinnamon1 teaspoon vanilla bean paste
1 orange, rind finely grated
110g (½ cup) demerara sugar
1½ tablespoons plain flour
1kg (about 6 medium) Granny Smith apples
750g trimmed rhubarb, cut into 4 cm lengths (see Baker’s Tips)
30g unsalted butter, finely diced
Method
- Preheat the oven to 200°C (180°C fan-forced).
- To make the apple and rhubarb filling, use your fingertips to rub the cinnamon, vanilla bean paste and orange rind through the sugar in a medium bowl. Stir in the flour. Peel, core and cut the apples into thin (about 3 mm) slices and place in a separate large bowl, along with the rhubarb and the sugar mixture. Use your hands to toss gently to combine evenly.
- Spoon the apple and rhubarb filling into an ungreased 23cm diameter (top measurement) ceramic or metal pie dish (see Baker’s Tips) and then dot with the diced butter. Brush the edge of the pie dish with the whisked egg.
- Roll out the vanilla sour cream pastry to make a pie lid about 5 mm thick. Use a 2cm round cutter to cut out a circle form the centre of the pastry. Carefully drape the pastry loosely around the rolling pin and place on top of the pie. Use your thumb and index finger to press the pie pastry top onto the rim of the pie dish to seal. Use a small sharp knife to trim the excess pastry from around the edge. Brush the top of the pie with some of the remaining whisked egg and then sprinkle with demerara sugar.
- Bake for 30 minutes. Reduce the oven temperature to 160°C (140°C fan-forced) and bake for a further 40-45 minutes or until the pastry is golden and cooked through and the apples are tender (see Baker’s Tips). Remove the pie from the oven and stand for 5 minutes before serving warm with cream, ice cream or custard.
Baker's Tips
- For this recipe you will need a ceramic pie dish measuring 23cm across the top, 17cm across the base and 7cm deep.
- You will need about 1kg untrimmed rhubarb for this recipe.
- To check if the apples are tender, insert a skewer into the centre of the pie.
This recipe is from Anneka's SBS Food online column, Bakeproof: Pies.
CLICK HERE for more Bakeproof recipes.
Photography by Alan Benson.
Prep 15minBake 40minMakes 6 serves
The simplicity of these roasted winter root vegetables allows their true flavours to shine – especially when finished with fresh herbs, lemon and ricotta salata.
Ingredients
- 1 bunch baby beetroot, scrubbed, trimmed and halved if large
- 1 bunch baby (Dutch) carrots, scrubbed, trimmed and halved
- 1 fennel bulb, trimmed and cut into 8 wedges
- 3 small parsnips, scrubbed, trimmed and quartered
- 2 tablespoons extra-virgin olive oil, plus extra to drizzle
- 40g ricotta salata (see Baker's Tips) or sheep's milk feta, crumbled or coarsely grated
- 1½ tablespoons oregano leaves
- 1½ tablespoons chopped flat-leaf parsley
- 1 lemon, zest finely grated
- lemon wedges or cheeks, to serve
Method
- Preheat the oven to 220°C (200°C fan-forced)
- Toss the beetroot, carrots, fennel and parsnip with the oil to coat. Spread over the base of a roasting dish and bake for 40 minutes, tossing once halfway through baking, or until the beetroot is tender when pierced with a skewer.
- Remove the vegetables from the oven and transfer to a serving platter. Drizzle with a little more oil. Combine the ricotta salata, oregano, parsley and lemon zest and scatter over the vegetables. Serve warm or at room temperature with lemon wedges.
Baker's Tips
- Ricotta salata is an Italian ricotta cheese that has been pressed, salted and aged for at least 90 days. It has a wonderfully salty flavour and firm texture which is perfect for crumbling, slicing or grating.
This recipe is from Anneka's SBS Food online column, Bakeproof: Winter Root Vegetables. CLICK HERE for more Bakeproof recipes.
Photography by Alan Benson.
Prep 40min (+20min cooling and 2.5hr chilling)Bake 15minMakes 6 serves
These little layered cakes are the sweetest hats you'll find. Made up of custard cream and a chocolate topping they are covered in shredded coconut for a little texture but you can also use nuts as well, if you have them handy. They are best served chilled and if you aren't much for a dessert fork, then eating these with your hands like a cupcake is absolutely acceptable!
Ingredients
- 100g (1½ cups) shredded coconut, to coat
Sponge Layers
- melted butter, to grease
- 4 eggs, at room temperature
- 165g (¾ cup) caster sugar
- 2 tablespoons boiling water
- 2 tablespoons vegetable oil
- 100g (⅔ cup) self-raising flour, sifted
- 2 tablespoons cocoa powder mixed to a paste with 60 ml (¼ cup) boiling water and cooled
Custard cream
- 1 tablespoon cornflour
- 1 tablespoon custard powder
- 2 tablespoons caster sugar
- 200ml milk
- 20g butter, cubed
- 1 egg yolk
- 1½ teaspoons natural vanilla essence or extract
Chocolate glaze
- 50g dark chocolate, chopped
- 2 teaspoons vegetable oil
Method
- To make the custard cream, sift together the cornflour and custard powder into a small saucepan. Add the sugar and then use a balloon whisk to gradually stir in the milk. Place the saucepan over a medium heat and cook, stirring frequently, until the mixture boils and thickens. Remove from the heat and stir in the butter, egg yolk and vanilla until well combined. Pour into a medium bowl, cover the surface of the custard directly with a piece of plastic wrap and set aside to cool (this will take about 2 hours).
- To make the sponge layers, preheat oven to 180°C (160°C fan-forced). Brush two 16 x 26 cm shallow cake tins with a little melted butter to lightly grease and then line the base and two long sides of each with one piece of non-stick baking paper.
- Use an electric mixer with a whisk attachment on high speed to whisk the eggs and sugar in a large bowl until the mixture is very thick and pale (this will take 5-8 minutes). Lift the whisk out of the mixture and draw a figure eight, if the trail stays on the surface long enough for you to finish drawing then the mixture is ready. If not, continue to whisk for a further minutes and then test again.
- Combine the boiling water and oil. Sift the flour over the egg mixture. Immediately pour the warm water and oil mixture down the side of the bowl and use a spatula to fold until just evenly combined (be careful not to overmix).
- Pour half of the mixture into one of the prepared cake tins. Add the cocoa paste to the mixture still in the bowl and fold together until just combined. Pour into the second cake tin. Gently tap the tins on the bench top three times to settle the mixture. Bake in preheated oven for 12-15 minutes or until the cakes spring back when lightly touched in the centre and start pulling away from the sides of the tins. Stand the cakes in the tins for 2 minutes before turning onto a wire racks to cool completely.
- To assemble, use a 6 cm round cutter to cut each of the Sponge cakes into 6 rounds. Place the round cutter over a chocolate sponge. Top the chocolate sponge round with about 1 tbsp of the Custard cream and then cover with around of plain sponge. Remove the pastry cutter. Repeat with the remaining chocolate and plain sponge rounds and 1 tbsp of Custard cream for each cake to make 6 layered cakes in total. Spread the sides of the cakes with the remaining Custard cream. Roll the sides of the cakes in the coconut to coat and place on a serving plate. Place in the fridge while making the Chocolate glaze.
- Place the chocolate and oil in a heatproof bowl. Place over a saucepan of simmering water, stirring occasionally, until melted and smooth. Carefully spread about 1 tsp of the Chocolate glaze over the tops of each of the cakes to cover. Return the cakes to the fridge for 30 minutes or until the Chocolate glaze is set. Serve chilled.
Baker's Tips
These cakes will keep in an airtight container in the fridge for up to 2 days.This recipe is from Anneka's SBS Food online column, Bakeproof: Bosnian Baking.
CLICK HERE for more Bakeproof recipes.
Photography by Alan Benson.