- home
- BAKERECIPES
BakeRecipes
Bringing real baking into your home with deliciously simple recipes.
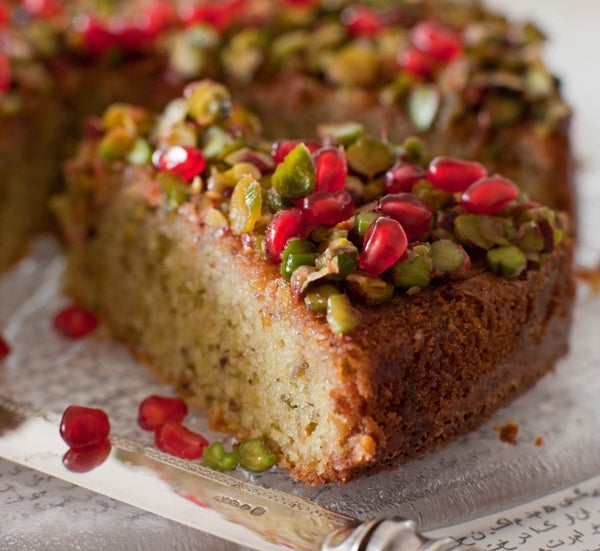
Makes 8 serves
The recipe for this lovely, tangy cake was given to me by the wonderful food writer and cooking teacher Elise Pascoe, and I have made it time and again since she passed it on to me. The original version was made with lemons; however, as our lime trees are such bountiful providers for so much of the year, I tend to make it with limes instead. It’s a gorgeous, simple cake: light, tangy and so eye-catching with its mantel of pistachios and pale-green hue. In season, translucent beads of pomegranate look extraordinarily beautiful scattered over the cake, giving it a mysterious, exotic quality.
Just a note about the pistachios for this cake – to grind them, I pulse them in the food processor with a tablespoon of flour from the recipe, as the flour helps prevent them becoming oily and forming a paste. Nonetheless, you do have to be watchful as they can go from being perfectly chopped to pasty in the blink of an eye.
Ingredients
60g plain flour
1 teaspoon baking powder
100g pistachios, finely ground
finely grated zest of 3 large limes
120g almond meal
250g unsalted butter, at room temperature
200g caster sugar
4 (60g) eggs, at room temperature
⅓ cup (80g) pomegranate seeds, to decorate, optional
softly whipped cream or thick Greek-style yoghurt, to serve
Pistachio and lime syrup topping
90g caster sugar
½ cup (125ml) fresh lime juice (from approximately 3 large limes), strained
90g pistachios, roughly chopped
Method
- Preheat your oven to 170°C. Butter a 22–24cm round cake tin, line the base with buttered baking paper then dust the tin with flour. (I use a torte tin that I’ve had for years to make this – it has slightly sloping sides and measures 24cm across the top and 22cm across the base.)
- Tip the flour, baking powder, ground pistachios, lime zest and almond meal into a medium-sized bowl. Whisk them together with a balloon whisk for a minute or so, then set the bowl aside.
- Put the butter and sugar into the bowl of an electric mixer (or use a hand-held electric beater) and beat them on medium speed for about 4 minutes, stopping and scraping down the sides occasionally, until the mixture looks creamy. Beat in the eggs, one at a time, allowing each egg to be absorbed before adding the next. (Don’t worry if the mixture looks a little curdled after adding the last egg – it will come together again when you add the dry ingredients.) Tip in the flour mixture and mix everything together on low speed just until it is combined – be careful not to over-mix it, or the cake may be a bit tough. Scrape the batter into the prepared tin and smooth the top.
- Bake the cake for 45–50 minutes, or until it springs back when lightly pressed in the centre and a skewer inserted in the middle comes out clean. Transfer it to a wire rack and leave it to cool a little in the tin.
- When the cake is lukewarm, make the syrup. To do this, put the sugar and lime juice into a small saucepan over low heat and stir until the sugar dissolves. Add the chopped pistachios, increase the heat and bring the mixture to the boil.
- Turn the cake out onto a serving plate and peel away the paper. Slowly spoon the hot pistachio and lime syrup evenly over the top, then leave the cake to cool completely. Just before serving, scatter it with pomegranate seeds, if using. Serve with softly whipped cream or yoghurt.
This recipe is from Belinda Jeffery's In Belinda's Kitchen.
You can read more about what Belinda is baking this winter here.
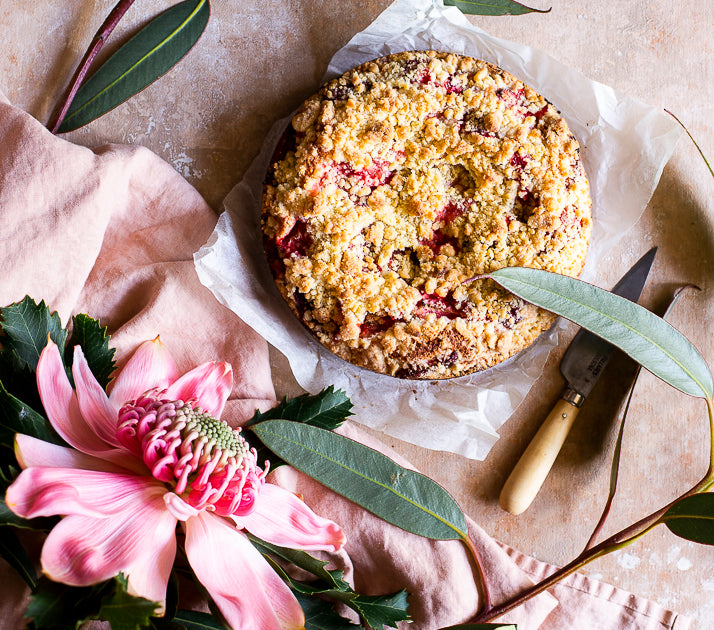
Makes one 22cm cake
I don’t know about you, but lately I have taken great comfort in the known; in tried and tested cakes, and all things familiar. This cake is a real favourite of mine – simple, delicious and easily adaptable (surely good qualities for navigating life in general, really). I make it often with strawberries as pictured, or plums, but raspberries or ripe apricots would be equally lovely. It’s inspired by the streusel cakes I ate in Germany when I was an exchange student, and in the absence of seeing old friends there, I’ll eat this cake.
Ingredients
Streusel topping
60g butter, cubed
½ teaspoon vanilla bean paste
55g caster sugar
75g plain flour
Pinch of salt
Cake
125g unsalted butter, melted and cooled
3 eggs
1 teaspoon vanilla bean paste
100g plain flour
1 teaspoon baking powder
Pinch of salt
150g almond meal
185g caster sugar
375g strawberries, hulled and quartered
Method
- Preheat oven to 170°C (fan-forced) and grease a 22cm round springform tin well with butter and line the base with baking paper.
- Place streusel ingredients into a small mixing bowl and use your fingertips to work butter and vanilla through the sugar, flour and salt until mixture resembles large breadcrumbs. Set aside.
- Place melted butter, eggs and vanilla in a medium mixing bowl and whisk to combine. In a separate large bowl, sift together flour and baking powder, before stirring in salt, almond meal, and caster sugar. Make a well in the centre of the dry ingredients and pour in the melted butter and egg mixture, stirring gently to combine.
- Spoon batter into lined baking tin and smooth the top with a spatula before scattering with strawberry quarters. Sprinkle with streusel topping and bake for 55-60 minutes or until cake is cooked through and streusel is starting to colour.
- Allow cake to cool in the tin for 10 minutes or so before carefully releasing from the tin and placing on a wire rack to cool further.
- Slice into large wedges and serve cake warm with ice-cream or cream. Whilst best eaten the day it is made, any leftover cake will keep happily in an air-tight container in the fridge for a day or two, just warm slightly before serving.
This recipe is from Tilly Pamment's The Plain Cake Appreciation Society (Murdoch Books, RRP $39.99).
You can read more about what Tilly is baking this winter here.
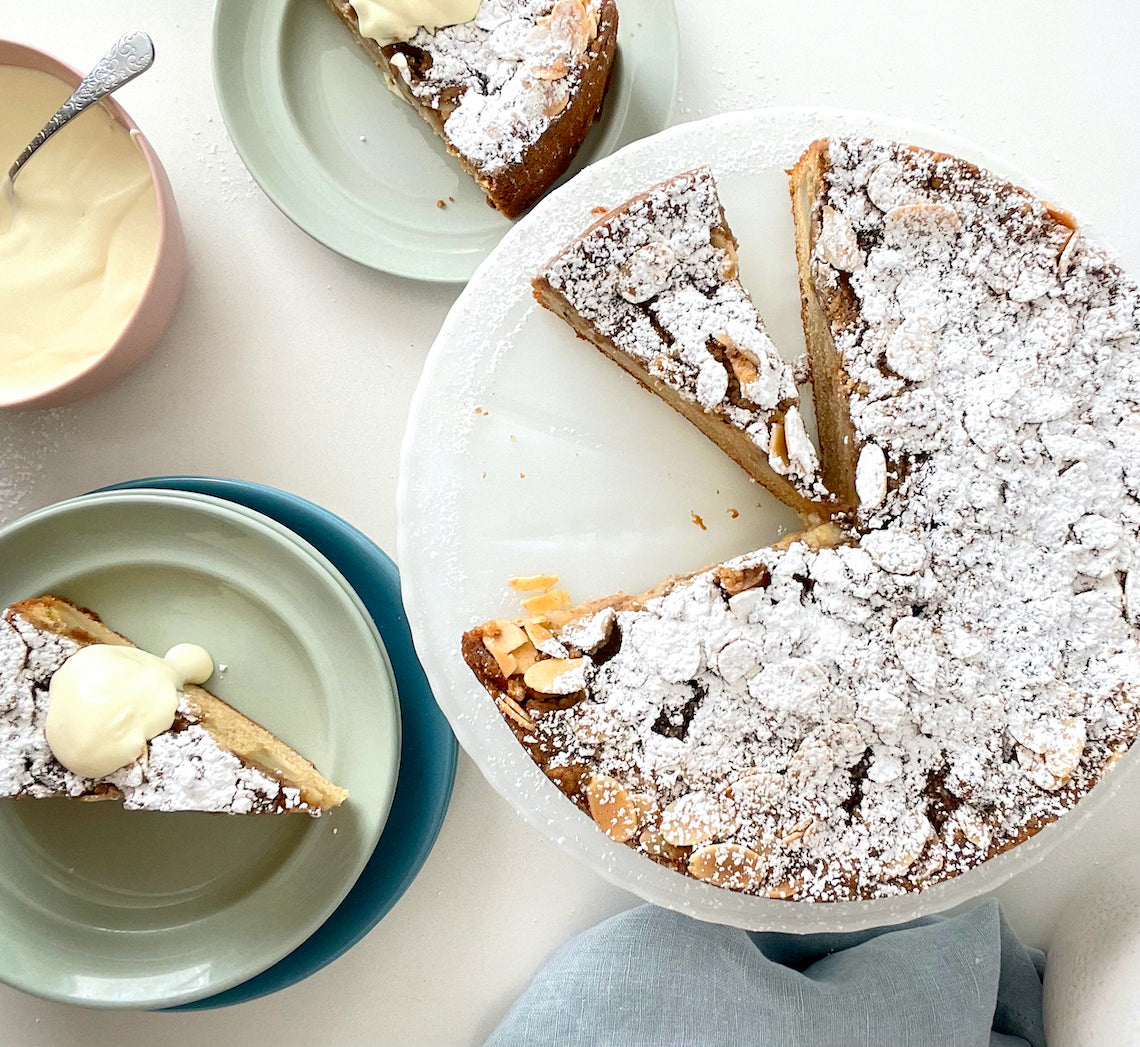
Prep 30min (+5min standing time)Bake 1hr 5min-1hr 15minMakes 10-12 serves
This is one of my favourite cakes – ever! Not only is it super easy to whip up and can be made with a whole variety of different fruits (you can replace the pears with the same quantity of plums, firm ripe nectarines or peaches for example), but it is also incredibly versatile when it comes to serving it. It not only makes for the perfect morning or afternoon tea cake but it is also wonderful served warm with lashings of cream or ice cream for dessert. I’ve also been known to eat the leftovers for breakfast (which I would also highly recommend!)
Ingredients
Melted butter, to grease
185g (1¼ cups) self-raising flour
165g (⅔ cup, firmly packed) brown or raw caster sugar, plus 1 tablespoon extra
125g salted butter, at room temperature
85g (⅓ cup) sour cream
2 eggs, at room temperature
1½ teaspoons natural vanilla extract or essence
2 (about 200g each) firm but ripe Williams pears, cored and each cut into 12 wedges
Icing sugar, to dust
Cream or ice cream, to serve (optional)
Crumble Topping
50g (⅓ cup) plain flour
55g (¼ cup, firmly packed) brown or raw caster sugar
1 teaspoon ground cinnamon
60g salted butter, chilled, diced
50g (½ cup) flaked almonds
Method
- Preheat oven to 170°C/340°F (150°C/300°F fan-forced). Grease a 21cm (8 1⁄4in), base measurement, springform tin with melted butter and line the base with non-stick baking paper.
- To make the Crumble Topping, combine the flour, sugar, and cinnamon in a medium bowl. Use your fingertips to quickly rub in the butter just until the mixture resembles coarse breadcrumbs (it will be quite moist). Stir in the almonds. Cover and put in the fridge while making the cake.
- To make the cake, place the flour, sugar, butter, sour cream, eggs and vanilla in a large mixing bowl. Use
an electric mixer fitted with a paddle attachment to beat on low speed until combined. Increase the speed to high and beat for 3 minutes or until the mixture is well combined, very pale in colour and silky smooth in texture. Spoon the mixture into the prepared tin and smooth the surface with the back of a spoon. - Toss the pear wedges with the extra 1 tablespoon sugar. Arrange the pears evenly over the top of the cake and then press gently into the batter. Sprinkle with the prepared Crumble Topping to cover.
- Bake in preheated oven for 65-75 minutes (the baking time will depend on how juicy the pears are) or until a skewer inserted into the centre comes out clean. Stand the cake in the tin for 5 minutes before transferring, still on the base of the tin, to a wire rack. Serve warm or at room temperature on its own or accompanied by cream or ice cream, if desired.
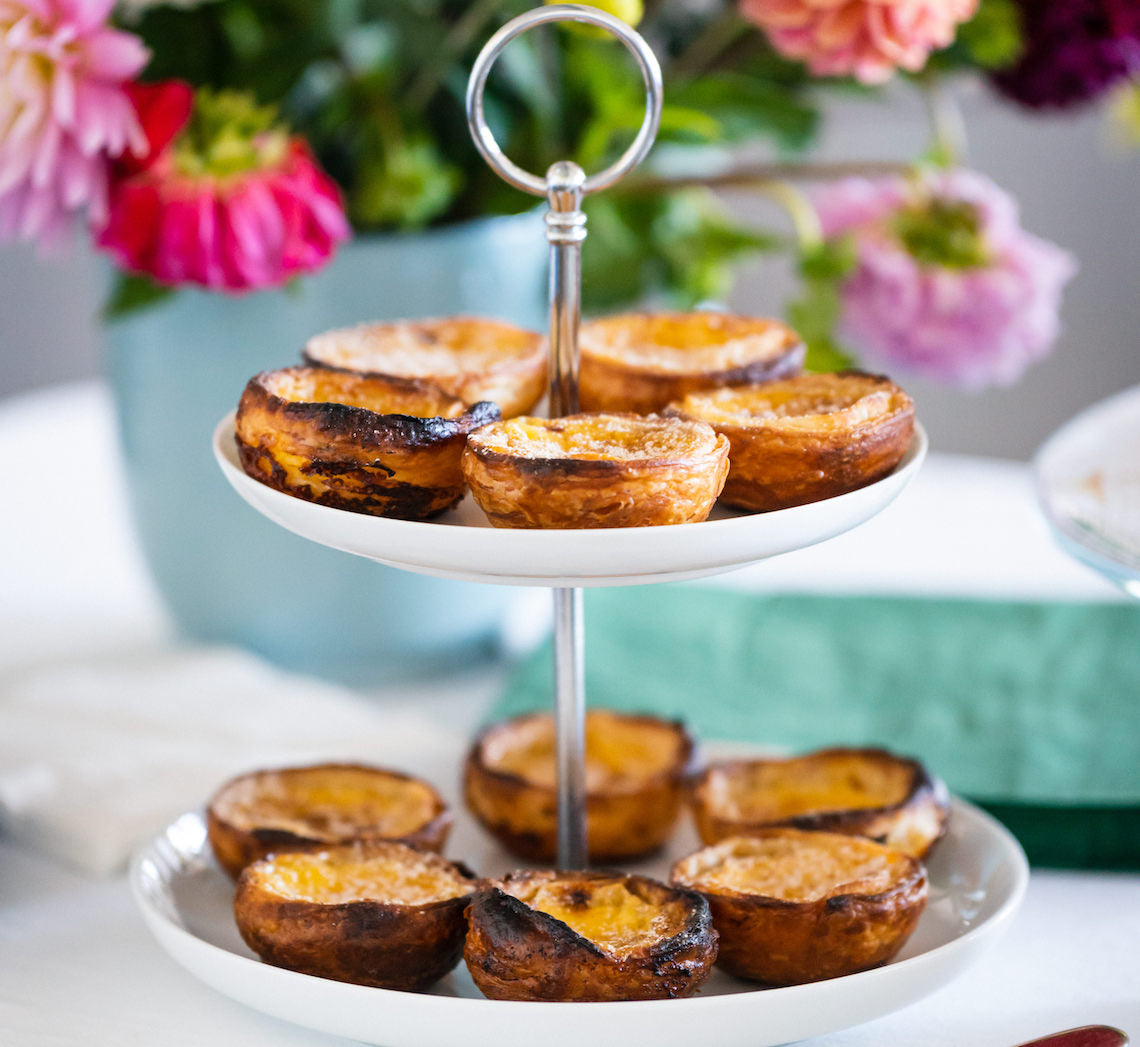
Prep 1hr (+20min resting, 2hr chilling and 30min cooling time)Bake 12-15min (per batch)Makes 24
Made by Make Me a Baker student Theresa Ling these Portuguese Custard Tarts will be some of the best you will try. The main trick with these tarts is to bake them at a very high heat (often as hot as your oven will go) for a short period of time to make sure the pastry is lovely and crisp while not over cooking the luscious creamy custard filling, creating a wonderful contrast between the two.
If you've never made portuguese custard tarts before or haven't got the results you wanted from a previous attempt CLICK HERE for my top tips when making them
at home before you start.
Ingredients
Icing sugar and ground cinnamon (optional), to sprinkle
Rough Puff Pastry
225g (1½ cups) plain flour
½ teaspoon salt
140g water
225g unsalted butter, softened
Custard
2 tablespoons plain flour300ml milk
220g (1 cup) caster sugar
160ml (⅔ cup) water
2 cinnamon sticks
½ teaspoon natural vanilla essence or extract
6 egg yolks, lightly whisked
Method
-
To make the Rough Puff Pastry, place the flour and salt in the bowl of a stand mixer. Add the water and mix with a paddle beater on low speed until well combined and a dough forms. Transfer the dough to a clean bench top and knead until smooth. Shape into a square about 1cm thick, wrap in plastic wrap and set aside to rest for 20 minutes.
- Use a lightly floured rolling pin to roll the pastry out on a well floured surface to a 35cm square, keeping the edges as neat as possible. Use your fingers to dot small pieces of 75g of the softened butter over the left two-thirds of the pastry, leaving about a 1cm border, and then spread it with your fingers so it covers the pastry roughly. Fold over the unbuttered right hand third of pastry, brush away any excess flour, then fold over the left hand third to cover. Starting from the top, use the rolling pin to tap the pastry widthways to release any air pockets and then press the open edges with your fingertips to seal and enclose the butter. Turn the pastry a quarter turn anticlockwise and then fold in the right hand third of pastry then fold over the left hand third to cover. Again, tap it gently widthways with the rolling pin.
- Reroll the pastry to a 35cm square and, with the folded edge closest to you repeat step 2 one more time, dotting and spreading the left hand two thirds with 75g of the remaining softened butter, folding, turning anti-clockwise and folding again.
- Reroll the pastry to a 35cm x 40cm rectangle. With a short edge closest to you, dot and spread the 75g of remaining softened butter over the whole surface, leaving a 1cm border. Starting from the short edge, roll into a tight log. Use a sharp knife to trim the ends and then cut the log in half. Wrap the logs separately in plastic wrap and place in the fridge to chill for at least 2 hours before using (see Baker’s Tips).
- Place two pizza stones in the oven, one in the top third and one in the bottom third. Place an oven rack in between them. Preheat oven to 300°C (280°C fan-forced) for at least 1 hour.
- To make the Custard, place the flour in a medium bowl and use a balloon whisk to gradually stir in 60ml (¼ cup) of the milk until smooth and well combined. Place the remaining milk in a small saucepan and bring just to a simmer over a medium heat. Use the balloon whisk to gradually stir the hot milk into the flour mixture and stir until smooth and well combined. Combine the sugar, water and cinnamon sticks in a medium saucepan and stir over medium heat until the sugar dissolves. Bring to the boil and simmer until it reaches 100°C on a thermometer. Remove the cinnamon sticks from the sugar syrup and gradually stir into the milk mixture. Add the vanilla and stir until cooled slightly. Stir in the egg yolks until evenly combined. Cover the surface of the custard with plastic wrap and place in the fridge to cool, stirring occasionally, this will take about 30 minutes (see Baker’s Tips).
- Cut one of the pastry logs into twelve 1.5cm lengths (each portion will be about 25g) and place each portion, with a cut side facing up, into an ungreased 50ml capacity (3cm base measurement and 6.5cm top measurement) round-based tartlet tin (see Baker’s Tips). Using your thumb, gently press into the centre of a pastry portion towards the base until about 5mm thick, and then, using your thumbs and working around the tart case, gently ease the pastry up the sides thinning it to about 5mm thick and so it extends about 2mm above the tart tin and forms a thicker lip at the top. Repeat with the remaining pastry portions.
- Place the tart tins on a heavy oven tray. Divide half the cooled custard among the pastry cases, filling each to no more than 5mm from the top edge of the pastry. Bake the tarts between the pizza stones in the preheated oven for 12-15 minutes or until the pastry is crisp and baked through, and the custard is just set and partially charred on the top.
- Remove the tarts from the oven and set aside to cool slightly for 2-3 minutes before removing from the tins. Repeat with the remaining pastry log and custard mixture to make 12 more tarts.
- Sprinkle the tarts with icing sugar and/or cinnamon if desired and serve warm or at room temperature (see Baker’s Tips).
Baker's Tips
- The pastry can be made up to 3 days ahead of using. Keep wrapped in the fridge.
- The custard can be made up to 3 days ahead of baking. Store in an airtight container or jar in the fridge. Stir well before pouring into the tart cases.
- Once cut into portions and before pressing into the tins, you may have to let the pastry stand at room temperature until it softens slightly and becomes pliable enough to be able to be pressed into the tins easily and without force.
- These tarts are best eaten warm or at room temperature the day they are made. However, they will keep in an airtight container in the fridge for up to 2 days. To refresh, place the chilled tarts back in the tart tins on an oven tray and place in an oven preheated to 180°C (160°C fan-forced) for 10 minutes or until the pastry is crisp and the custard is just warmed through (there is no need to use the pizza stones when reheating). Stand the tarts in the tins for at least 5 minutes before removing and serving warm or at room temperature.
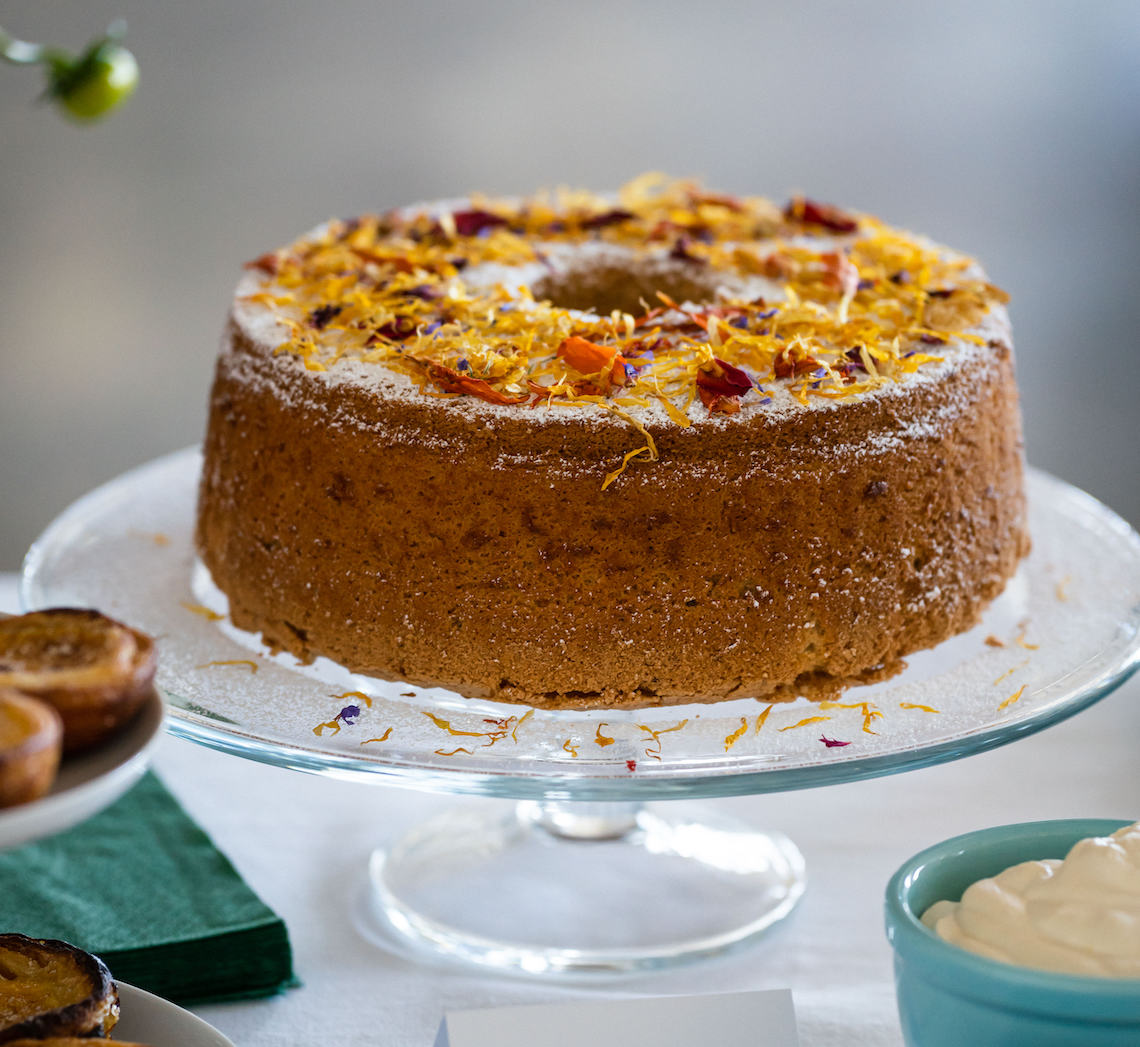
Prep 30min (+2hr cooling and overnight chilling time)Bake 45-50minMakes 8-10 serves
Created by Make Me a Baker student Jenny Wong for her graduation, this gorgeous cake is 'tea time' in a cake bringing together orange-scented chiffon cake and the subtle floral notes of French Earl Grey tea. And to make it complete, it's served with an Earl Grey tea-infused whipped cream and, of course a cup of freshly brewed French Earl Grey tea.
You will need a 21cm (base measurement) specialty angel food cake tin (basically a deep ring tin with a removable base and small 'feet' around the top rim) to make this recipe and they are available from specialty kitchenware stores. The key to achieving the classic feather-like texture of a chiffon cake is to make sure you leave it suspended in the inverted tin until cooled completely so that it doesn’t compress as it cools.
Ingredients
- 6 x T2 French Earl Grey tea bags
- 160ml ( ⅔ cup) boiling water
- 185g (1¼ cups) self-raising flour
- 30g (¼ cup) cornflour
- 1 teaspoon cream of tartar
- ½ teaspoon salt
- 6 x 59g eggs, at room temperature, separated
- 200g caster sugar, plus 110g (½ cup) extra
- 2 teaspoons finely grated orange zest
- 1 teaspoon natural vanilla essence or extract
- 100ml vegetable oil
- Icing sugar, to dust
- Dried edible flowers, to decorate (optional) (see Baker's Tips)
Earl Grey Whipped Cream
- 125ml (½ cup) full-cream milk
- 4 x T2 French Earl Grey tea bags
- 300ml thickened cream
- 1 ½ teaspoons finely grated orange zest
- 1 ½ teaspoons natural vanilla essence or extract
Method
- To make the Earl Grey Whipped Cream, place the milk and tea bags in a small saucepan and heat over medium heat until hot but not boiling. Remove form the heat and allow to cool. Transfer to a container or bowl, cover and place in the fridge to chill (preferably overnight).
- Preheat oven to 180°C (160°C fan-forced). Place an ungreased 21cm (base measurement) angel food cake tin on an oven tray.
- Place the tea bags in a jug, pour the boiling water over and set aside to infuse until the water is warm.
- Sift the flour, cornflour, cream of tartar and salt onto a piece of baking paper twice.
- Use an electric mixer with a whisk attachment to whisk the egg yolks and 200g caster sugar on high speed until thick and pale. Whisk in the orange zest and vanilla.
- Squeeze the tea bags to extract as much flavour as possible into the warm tea-infused water and measure 125ml ( ½ cup) - it should be dark in colour and very fragrant.
- Combine the warm tea and oil. Add the oil mixture to the egg mixture and whisk on low speed until well combined, scraping the side and the base of the bowl if necessary. With the motor running on low speed, add the flour mixture all at once and whisk gently until just combined. Transfer the mixture to a separate large bowl and set aside. Clean and dry the whisk and mixing bowl.
- Use the electric mixer with the whisk attachment to whisk the egg whites on medium-high speed until soft peaks form. Add the remaining 110g caster sugar and whisk until thick and glossy and the sugar has dissolved. Add about a third of the egg whites to the yolk mixture and use a large metal spoon or spatula to fold through until well combined. Add the remaining egg white mixture and fold until just combined.
- Spoon the mixture into the ungreased tin and gently smooth the surface with the back of a metal spoon. Bake in the lower third of the preheated oven for 45-50 minutes or until well risen, golden, and a skewer inserted into the cake comes out clean.
- Immediately turn the cake upside down on a wire rack and set aside, still in the tin so it is suspended, for 2 hours or until it is completely cool – don’t be tempted to remove it while still warm (see Baker's Tips).
- To finish the Earl Grey Whipped Cream, squeeze the tea bags to extract as much flavour as possible and then measure 60ml (1/4 cup) of the milk – it should be a pale Masala Chai colour and very fragrant. Use a balloon whisk the cream in a medium bowl until soft peaks form. Add the orange zest and vanilla and then whisk in the chilled Earl Grey-infused milk until soft peaks form again. Cover and chill until serving.
- Carefully run a small palette knife around the side of the tin to release the cake. Invert the cake onto a serving plate or cake stand, and gently shake the tin to release the cake. Then use the palette knife to release the cake from the base of the tin and remove (see Baker's Tips). Serve dusted liberally with icing sugar and edible flowers (if using), and accompanied by the Earl Grey Whipped Cream.
Baker's Tips
- The key to the classic light-as-air texture of a chiffon cake is to suspend the baked cake in an inverted tin until it cools completely so that the crumb texture doesn’t compress as it cools. That is why it is so important that the tin isn't greased or lined so that the cake sticks to the tin and that it doesn't fall out of the tin during cooling. However, because of this, once cooled you will need to carefully release it by running a small palette knife between the cake and the tin. You won’t get a perfect looking crust, but this will be overlooked as the result will be a beautifully airy crumb texture that can’t be achieved without using this technique.
- This cake is best cut with a sharp knife using a sawing action.
- This cake will keep for up to 2 days in an airtight container at room temperature but is best eaten on the day it is made.
- Jenny used sun-dried organic edible flowers from Percaya Farm
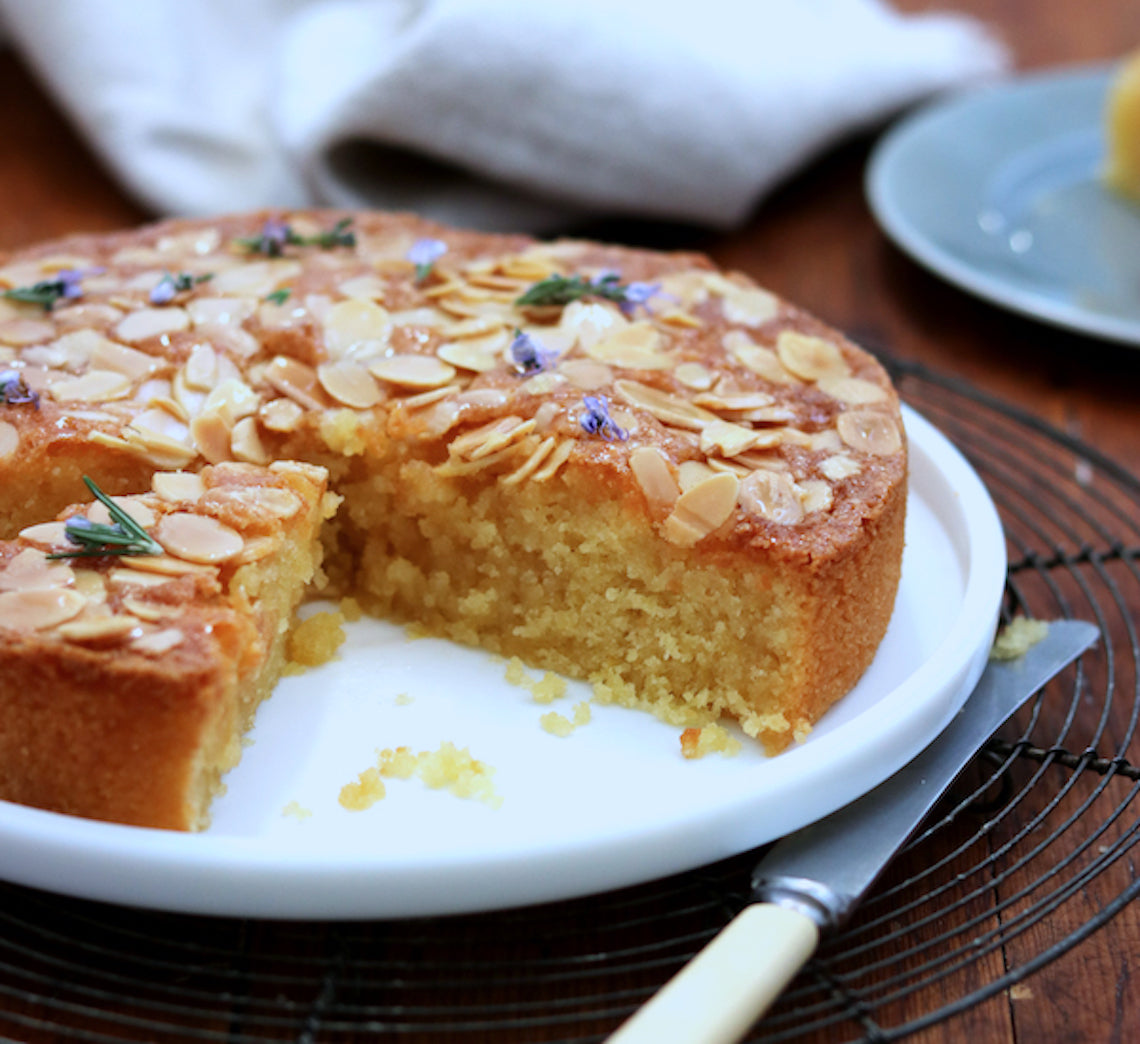
Prep 20min(+ 1hr cooling time)Bake 35-40minMakes 10 serves
Inspired by the wild rosemary found growing on the Gallipoli peninsula and the symbolic wearing of sprigs as a sign of remembrance for those who have made the ultimate sacrifice, this cake is the perfect way to pay your respects through your baking on Anzac Day. It's a simple cake, made special by the rosemary-infused syrup and is equally good accompanied by a cup of tea or lashings of cream or vanilla ice-cream for dessert (particularly when served while still warm)!
Ingredients
Olive oil, to grease
150g (5¼oz) caster sugar
125g (4½oz) almond meal
75g (½ cup/2¾oz) self-raising flour
180ml (¾ cup/6fl oz) olive oil
3 eggs, at room temperature
2 lemons, rind finely grated
40g (1½oz) flaked almonds
Fresh rosemary flowers (optional), to decorate
Lemon & Rosemary Syrup
60ml (¼ cup/2fl oz) strained fresh lemon juice
60ml (¼ cup/2fl oz) water
110g (½ cup/4oz) caster sugar
4 x 10cm sprigs fresh rosemary
Method
- Preheat oven to 180°C/350°F (160°C/315°F fan-forced). Brush a 20cm/8in spring form tin with olive oil and line the base with non-stick baking paper.
- Combine the sugar, almond meal and flour in a large bowl. Whisk together the olive oil, eggs and lemon rind until well combined. Add to the almond meal mixture and use a balloon whisk or spatula to stir until just evenly combined.
- Pour into the prepared tin and spread with the back of a spoon. Sprinkle evenly with the flaked almonds. Bake in preheated oven for 35-40 minutes or until a skewer inserted in the centre comes out clean. Stand the cake in the tin for 5 minutes before turning transferring to a wire rack sitting over a tray.
- Meanwhile, to make the Lemon & Rosemary Syrup, combine the lemon juice, water and sugar in a small saucepan and stir over medium heat until the sugar dissolves. Add the rosemary sprigs, bring to a simmer and simmer for 5 minutes or until reduced by about half.
- Slowly pour the hot syrup over the warm cake, allowing it to soak in as much as possible. Cool to room temperature (this will take about 1 hour). Decorate with the rosemary flowers (if using) and serve in slices.
Baker's Tip
- This cake will keep in an airtight container at room temperature in a cool spot for up to 3 days.
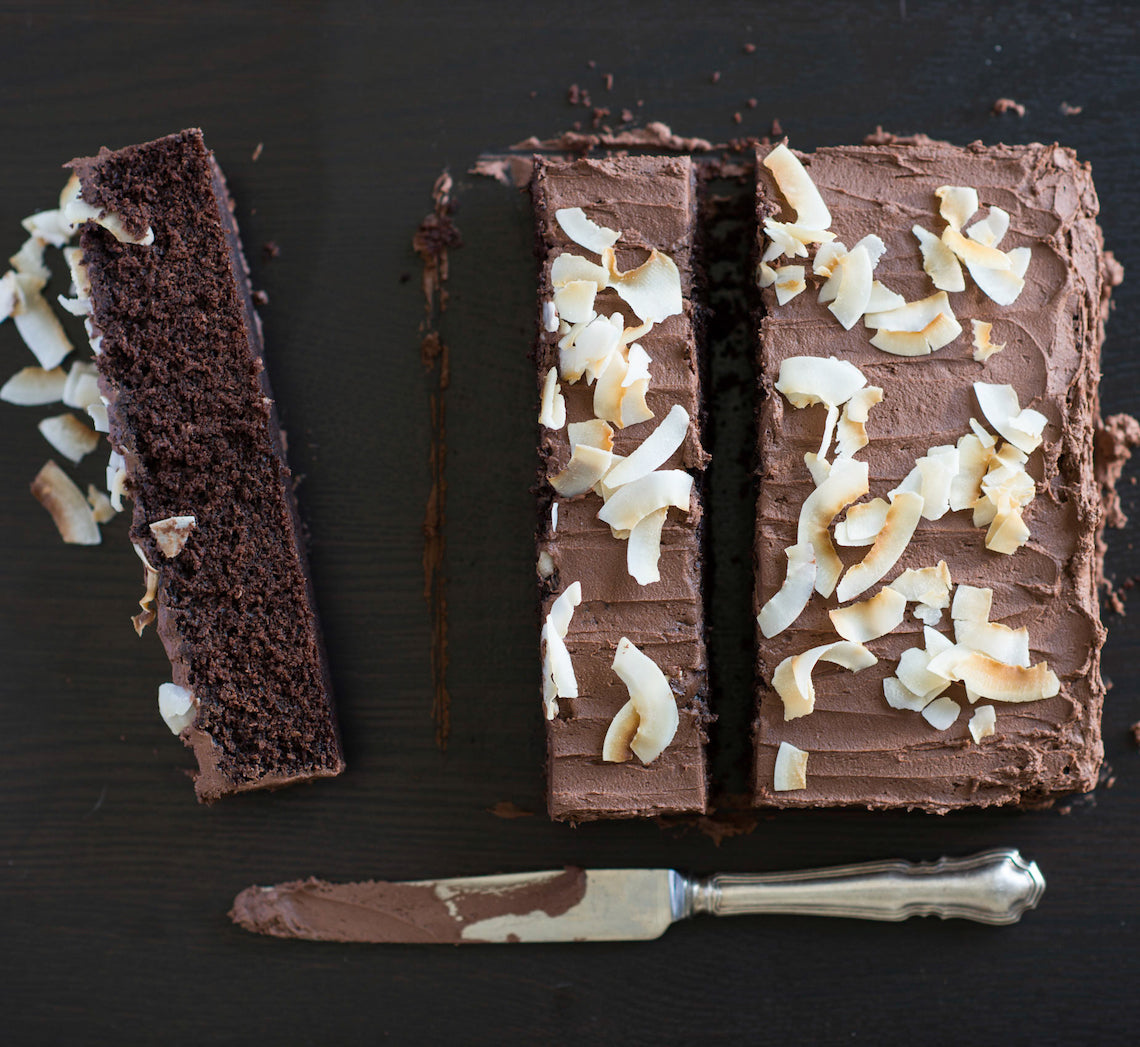
Prep 20min (+1hr 30min cooling time)Bake 30-35minMakes 10-12 serves
Everyone needs a good old-fashioned chocolate cake in their repertoire that is easy enough to whip up on a whim. Made with a simple melt-and-mix method this delicious cake is a real crowd-pleaser.
Ingredients
Melted butter, to grease
125g salted butter, diced, at room temperature
220g (1 cup) caster sugar
185ml (¾ cup) milk
2 eggs, at room temperature, lightly whisked
2 teaspoons natural vanilla essence or extract
150g (1 cup) self-raising flour
55g (½ cup) cocoa powder
1 teaspoon baking powder
45g (½ cup) desiccated coconut
Chocolate buttercream
125g salted butter, at room temperature
185g (1½ cups) icing sugar mixture, sifted
2 tablespoons cocoa powder, sifted
Method
- Preheat oven to 180°C (160°C fan-forced). Grease a square 20cm cake tin with melted butter and line the base with non-stick baking paper.
- Combine the butter, sugar and milk in a medium saucepan. Stir over medium heat until butter melts, sugar dissolves and mixture is combined (see Baker's Tips). Remove from heat and use a fork to whisk in the eggs and vanilla.
- Sift together the flour, cocoa powder and baking powder into a large bowl. Stir in the coconut. Add the butter mixture and use a balloon whisk to stir until just combined.
- Spoon the mixture into the prepared tin and use the back of a metal spoon to smooth the surface. Bake in preheated oven for 30-35 minutes or until a skewer inserted into the centre of the cake comes out clean. Stand in the tin for 5 minutes before turning onto a wire rack to cool (this will take about 1½ hours).
- To make the Chocolate buttercream, use an electric mixer to beat the butter, icing sugar and cocoa powder in a medium bowl until pale and creamy and it is a smooth spreadable consistency. Spread the cooled cake with the buttercream and cut into portions to serve.
Baker's Tips
- Don’t overheat the butter mixture – as soon as the butter melts and the sugar has dissolved, remove it from the heat.
- This cake will keep in an airtight container at room temperature in a cool spot for up to 3 days.
This recipe is from Anneka's SBS Food online column, Bakeproof: Easy Chocolate Cakes. CLICK HERE for more Bakeproof recipes.
Photography by Alan Benson.

Prep 40minBake 20-25minMakes about 18
These melt-in-the-mouth buttery biscuits, sandwiched with a creamy, sweet buttercream, are an all-time favourite. This version has the addition of orange zest in the filling, which adds a subtle citrus tang. They're the perfect accompaniment to a cuppa.
Ingredients
250g (9oz) salted butter, cubed, softened
110g (⅔ cup/4oz) icing sugar
1½ teaspoons natural vanilla essence or extract
250g (1⅔ cups/9oz) plain flour
60g (½ cup/2oz) cornflour (see Baker's Tips)
Orange buttercream filling
60g (2oz) salted butter, softened
1 orange, zest finely grated
125g (1 cup/4½oz) icing sugar, sifted
Method
- Preheat the oven to 160°C/315°C (140C/285°F fan-forced). Line 2 large baking trays with baking paper.
- Use an electric mixer on medium to beat the butter, icing sugar and vanilla until pale and creamy, scraping down the side of the bowl when necessary.
- Sift the flour and cornflour together over the butter mixture. Mix on low speed (or use your hands to mix) until just combined and a soft dough forms.
- Use lightly floured hands to roll heaped teaspoonfuls of the mixture into balls and place on the lined trays, about 5cm/2in apart (you should have about 36 balls). Dip a fork in flour and use it to flatten the balls to about 1cm/½in thick and 4cm/1½in in diameter.
- Bake in preheated oven for 20-25 minutes, swapping the trays after 8 minutes, or until the biscuits are a pale golden colour. Remove from the oven and cool on the trays.
- While the biscuits are cooling, make the orange buttercream filling. Put the butter and orange zest in a small mixing bowl and use an electric mixer to beat on medium speed until pale and creamy. Add the icing sugar and beat on low speed, scraping down the side of the bowl when necessary, until well combined and smooth.
- To join the biscuits, spread a little buttercream on the base of a cooled biscuit and sandwich with another biscuit. Repeat with the remaining biscuits and filling.
Baker's Tips
- The cornflour can be replaced with custard powder for a more intense vanilla/custardy flavour.
- These biscuits will keep in an airtight jar or container in a cool place (not the fridge) for up to 4 days.
Variations
Coffee Melting Moments – Replace the orange zest in the filling with 1 teaspoon instant coffee granules dissolved in 1 teaspoon boiling water, cooled before using.
Lemon Melting Moments – Replace the orange zest in the filling with the finely grated zest of 1 large lemon.
Passionfruit Melting Moments – Replace the orange zest in the filling with 1 tablespoon passionfruit pulp.

Prep 20minBake 30-35minMakes 12
Dense with fruit, studded with macadamias and finished with a thin lemon glaze, these muffins are wholesome yet slightly naughty. Enjoy them at morning or afternoon tea or even for brunch.
Ingredients
150g (1 cup/5¼oz) plain flour
150g (1 cup/5¼oz) wholemeal plain flour
1 tablespoon baking powder
1 teaspoon ground cinnamon
55g (¾ cup/2oz) shredded coconut
75g (½ cup/2¾oz) raw, unsalted macadamia nuts, toasted and coarsely chopped
200g (¾ cup/7¾oz) Greek-style natural yoghurt
80ml (⅓ cup/2½fl oz) light olive oil or sunflower oil
2 eggs, at room temperature
1½ teaspoons natural vanilla extract or essence
Lemon glaze
125g (1 cup/4½oz) pure icing sugar, sifted
1½ tablespoons (30ml/1fl oz) fresh lemon juice
Method
- Preheat the oven to 190°C/375°F (170°C/340°F fan-forced). Line a 12-hole 80ml (⅓ cup/2½fl oz) muffin tray with muffin paper cases.
- Sift together both the flours, the baking powder and cinnamon into a large mixing bowl, returning any husks to the bowl. Stir in the sugar, coconut and macadamias.
- Halve the peaches and remove the stones. Cut each half into 8 wedges. Add to the flour mixture and gently toss to combine evenly.
- Use a fork to whisk together the yoghurt, oil, eggs and vanilla in a bowl or jug. Add to the flour mixture and use a spatula or large metal spoon to fold together until just combined. (Don’t overmix – the batter should still be a little lumpy.)
- Spoon the mixture into the paper cases, dividing evenly. Bake in preheated oven for 30-35 minutes or until the muffins are golden and cooked when tested with a skewer.
- Meanwhile, to make the Lemon glaze, combine the icing sugar and lemon juice in a medium bowl and mix until smooth. Cover and set aside while the muffins finish baking.
- Remove the muffins from the oven and stand for a few minutes in the tin before transferring to a wire rack. Drizzle a little of the lemon glaze over each warm muffin. Serve warm or at room temperature.
Baker's Tips
- The peaches can be replaced with 400g (14oz) of nectarines, plums, apricots, pitted and cut into 8 wedges, or cherries, pitted and halved.
- The wholemeal plain flour can be replaced by 150g (1 cup/5¼oz) wholemeal spelt flour.
- These muffins are best eaten the day they are baked, though they freeze well. Wrap individually in plastic wrap and then seal in a plastic bag or airtight container. Freeze for up to 3 months. Thaw at room temperature.
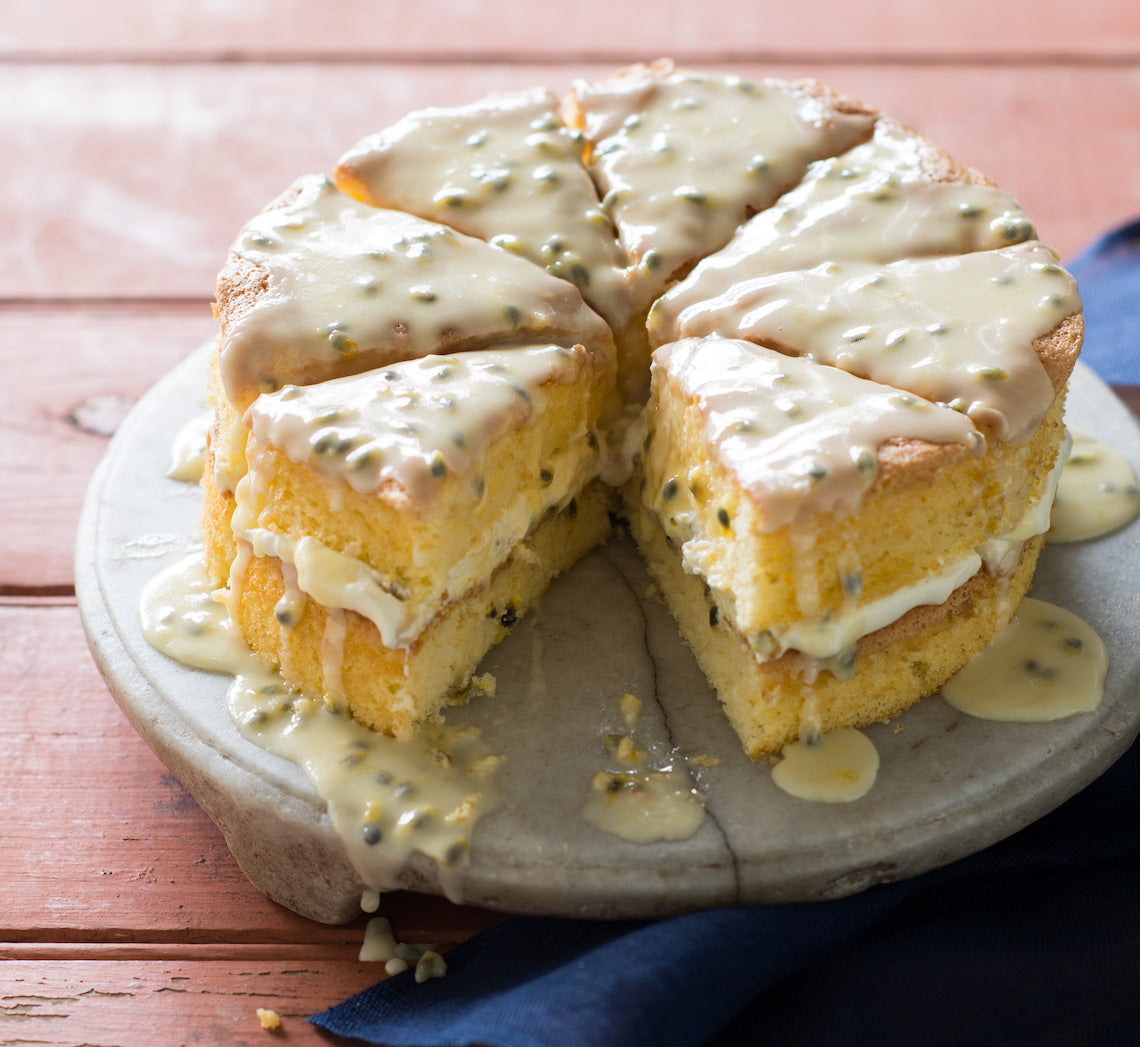
Prep 25min (+cooling time)Bake 18-20minMakes 8-10 serves
This sponge will have you wanting an excuse to make afternoon tea every day. There are two main tricks when making a sponge: don’t over-whisk the mixture once you have added the flour – only whisk it until the mixture is just combined. Also, sponges don’t take long to bake and, if overcooked, will easily become dry, so keep a close eye on them when baking.
Ingredients
160ml (⅔ cup/5¼fl oz) thickened cream
80ml (⅓ cup/2½fl oz) fresh passionfruit pulp
Sponge Layers
Melted butter, to grease
4 x 60g (2oz) fresh eggs, at room temperature
165g (¾ cup/5¾oz) caster sugar
60ml (¼ cup/2fl oz) milk
30g (1oz) salted butter, diced
110g (¾ cup/4oz) self-raising flour, plus extra to dust
30g (¼ cup/1oz) cornflour
Passionfruit Icing
180g (1½ cups/6½oz) pure icing sugar
1½ tablespoons fresh passionfruit pulp
Approx. 3 teaspoons boiling water
Method
- To make the Sponge Layers, place the oven rack in the lower third of the oven and then preheat it to 180°C/350°F (160°C/315°F fan-forced). Brush two 20cm/8in shallow (sandwich) cake tins with a little melted butter to lightly grease. Line the bases with circles of baking paper. Lightly brush the paper with a little more melted butter and then dust the bases and sides of the tins with a little flour to lightly coat, tapping out any excess.
- Use an electric mixer with a whisk attachment on medium-high speed to whisk the eggs in a medium bowl until frothy. Add the sugar a spoonful at a time, whisking well between each addition, until the mixture is very thick and pale and the sugar has dissolved (this will take about 8 minutes). Lift the whisk out of the mixture and draw a figure eight, if the trail stays on the surface long enough for you to finish drawing then the mixture is ready. If not, continue to whisk for a further minutes and then test again.
- Meanwhile, heat the milk and butter in a small saucepan over medium heat until the butter melts and the mixture is almost simmering. Remove from the heat. Pour the hot milk mixture down the side of the bowl with the egg mixture. Quickly sift the flour and cornflour together over the egg mixture and then immediately whisk again with the electric mixer briefly, until the flour mixture is just incorporated (make sure there is no flour caught at the bottom of the bowl and be careful not to overmix).
- Divide the mixture evenly between the cake tins (see Baker’s Tips) and gently tap the tins on the bench top three times to settle the mixture. Bake in preheated oven for 18-20 minutes or until the cakes are a pale golden colour, spring back when lightly touched in the centre and start pulling away from the sides of the tins. Remove from the oven and stand for 1 minute before turning onto a wire rack, top side up (see Baker’s Tips), to cool completely.
- When ready to fill, to make the Passionfruit Icing, sift the icing sugar into a medium bowl. Add the passionfruit pulp and enough boiling water to mix to a thin, spreadable icing. Cover tightly with plastic wrap and set aside. Use an electric mixer with a whisk attachment or a balloon whisk to whisk the cream in a medium mixing bowl until soft peaks form. Use a large metal spoon or spatula to gently fold the passionfruit pulp through the whipped cream until just swirled through. Place one layer of the sponge on a serving plate or cake stand and spread with the passionfruit cream. Top with the remaining sponge layer. Spread the Passionfruit Icing evenly over the top layer of the sponge, allowing it to drip down the sides slightly. Set aside or 20 minutes or until the icing sets before serving in slices.
Baker's Tips
- You will need about 5 large passionfruit for this recipe.
- To divide the mixture evenly between the tins, weigh the tins with the mixture in them to make sure they are the same weight.
- When removing the cakes from the tins, turn them onto a wire rack covered with a tea towel before inverting onto another rack. The tea towel will prevent the rack marking the tops of the cakes.
- The unfilled sponge cakes will keep in an airtight container at room temperature for up to 1 day. Once filled, the cake will keep in an airtight container in the fridge for up to 2 days. Stand at room temperature for at least 30 minutes before serving.
This recipe is from Anneka's SBS Food online column, Bakeproof: Sponge Cake.
CLICK HERE for more Bakeproof recipes.
Photography by Alan Benson.
Prep 30min (+30min standing time)
Bake 40min Makes about 24
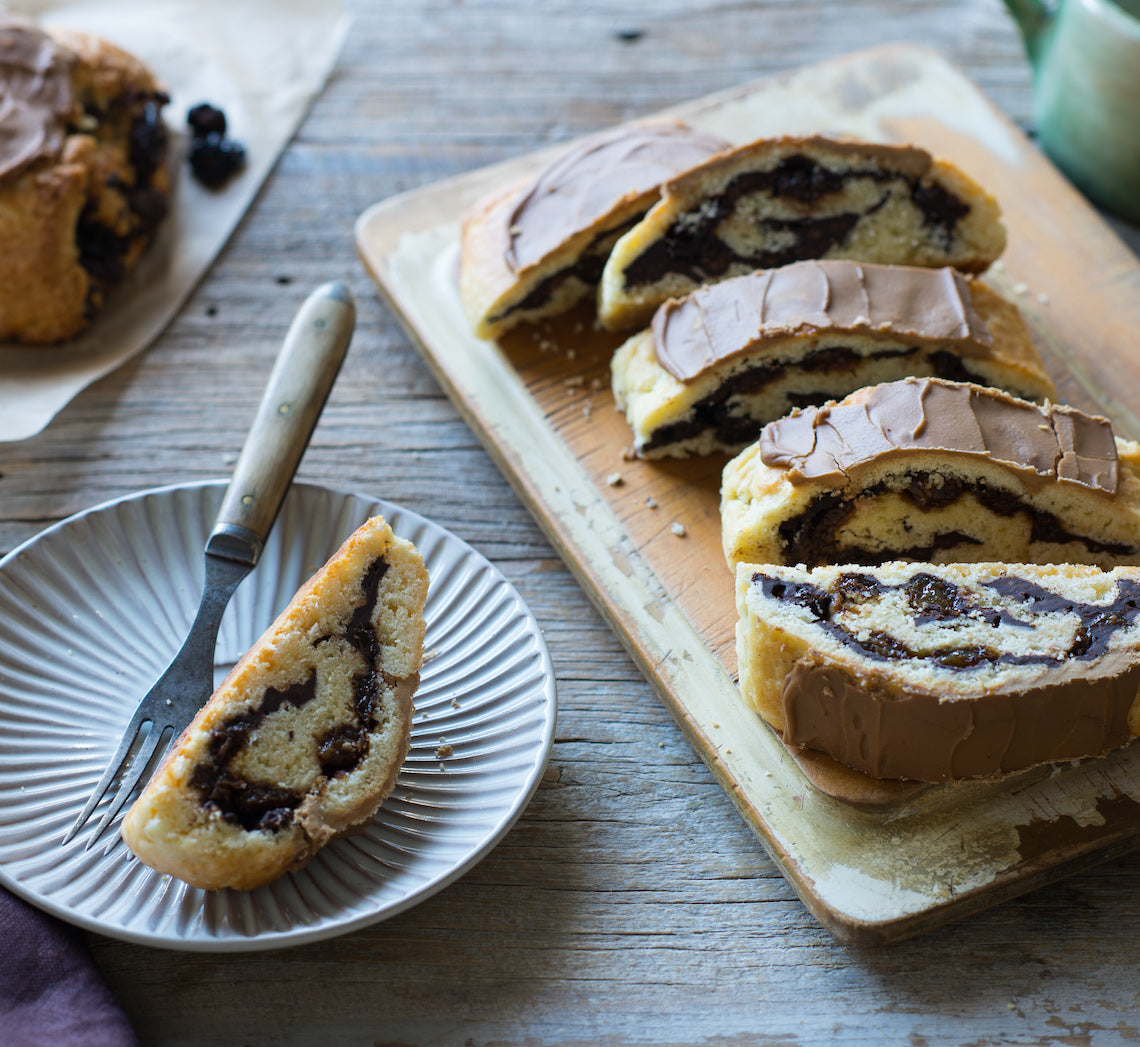
Even though these rolls are based on a scone dough, they resemble more a cakey biscuit. Confused? Just go ahead and bake them, you won't be disappointed… And you'll probably find yourself sneaking an extra slice!
Ingredients
170g (1 cup) seedless raisins
60ml (¼ cup) freshly brewed strong coffee
225g (1½ cups) self–raising flour
75g (½ cup) plain flour
Pinch of salt
80g butter, softened slightly, cubed
2 tablespoons caster sugar
125ml (½ cup) pure (pouring/thin) cream
80ml (⅓ cup) milk, plus extra for glazing
150g good-quality dark chocolate, chopped
Coffee icing
125g (1 cup) pure icing sugar
1 tablespoon freshly brewed strong coffee
Method
- Preheat the oven to 180°C (160°C fan-forced). Line a large baking tray with non–stick baking paper.
- Put the raisins and coffee in a small saucepan and bring to a simmer over medium heat. Remove from the heat and set aside for 15 minutes or until almost all the liquid has been absorbed. Drain the raisins and set aside.
- Sift both the flours and salt together into a medium bowl. Use your fingertips to rub in the butter until the mixture resembles fine breadcrumbs and the butter is evenly incorporated. Stir in the sugar and make a well in the centre. Combine the milk and cream, add to the flour mixture and use a flat-bladed knife to mix with a cutting action until the dough comes together in clumps.
- Use lightly floured hands to bring the dough together – it will be soft, but not sticky. Place on a lightly floured surface and knead lightly and briefly (only about 6 times) to bring it together in a smooth ball. Use a lightly floured rolling pin to roll the dough into a rectangle about 32 x 28cm. Sprinkle the dough with the chocolate and then the soaked raisins, leaving a 1cm border. Starting from a long side, roll up the dough to form a log. Cut in half and then place both logs on the lined oven tray, leaving enough room between each for spreading. Brush the surface of the logs with the extra milk to glaze.
- Bake in preheated oven for 40 minutes or until golden and cooked through and the logs sound hollow when tapped on the base. Remove from the oven and transfer the logs to a wire rack to cool.
- To make the Coffee Icing, put the icing sugar in a medium bowl and stir in the coffee to make a smooth pouring consistency. Drizzle over the cooled logs. Set aside for 15 minutes or until the icing sets before slicing.
Baker's Tips
- These rolls will keep in an airtight container at room temperature for up to 4 days.
This recipe is from Anneka's SBS Food column, Bakeproof: Scones.
CLICK HERE for more Bakeproof recipes.
Photography by Alan Benson.
Prep 10minBake 35-40 minMakes 8-10 serves
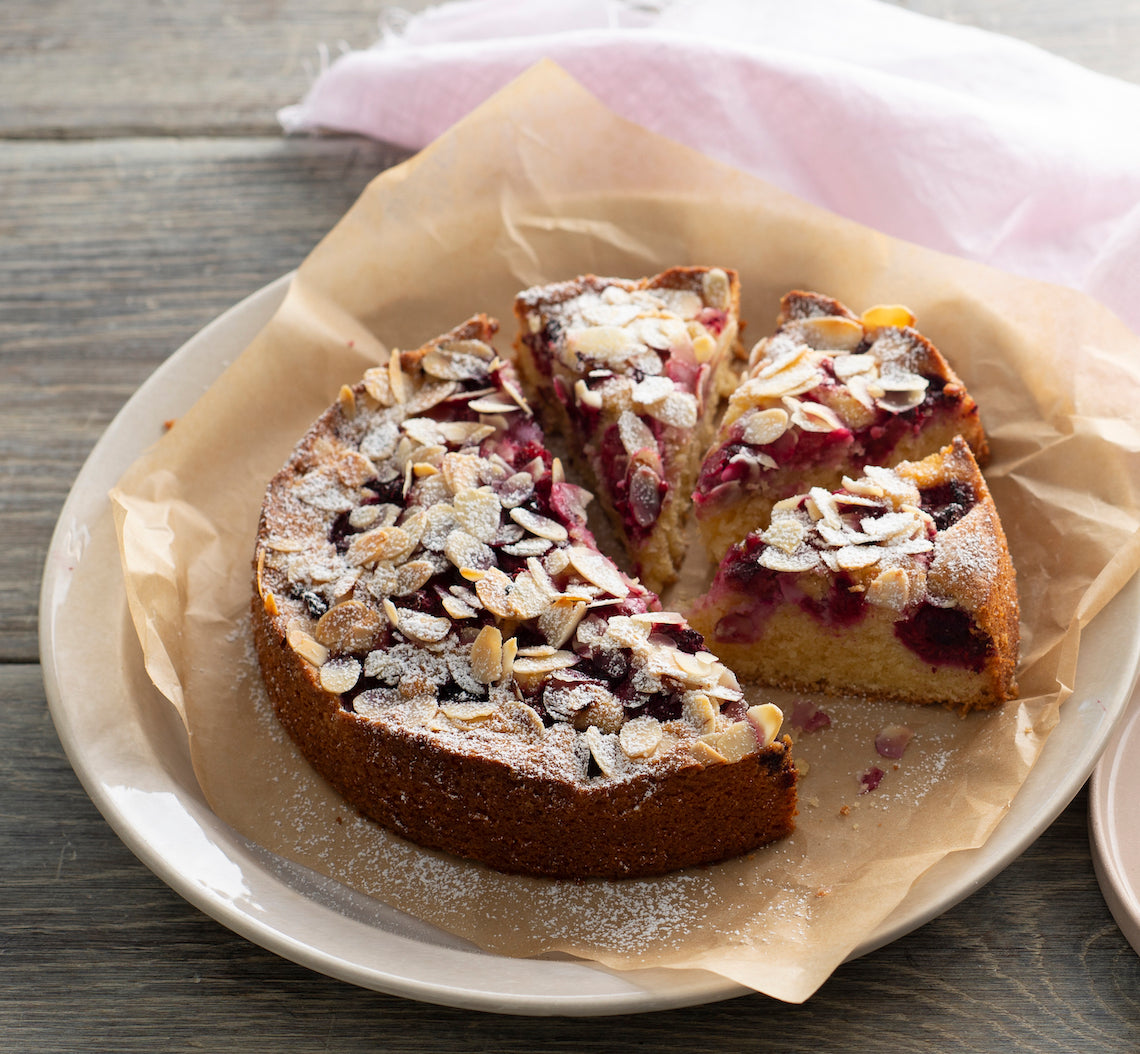
If you are looking for a quick, easy, impressive, and not to mention delicious, cake, this is the one. Lots of clever shortcuts (like using your food processor to make it) means that this cake will be in the oven in less than 10 minutes!
Ingredients
- Melted butter, to grease
- 100g (3½oz) chilled unsalted butter, cubed
- 110g (½ cup/4oz) caster sugar
- 75g (¾ cup/2¾oz) almond meal
- 75g (½ cup/2¾oz) plain flour
- 1 teaspoon baking powder
- 2 eggs, at room temperature
- 1 teaspoon natural vanilla essence or extract
- 150g (5¼oz) fresh or frozen raspberries
- 25g (¼ cup/¾oz) flaked almonds
- Icing sugar, to dust
Method
- Preheat oven to 180°C/350°F (160°C/315°F fan-forced). Grease a 20cm/8in springform (base measurement) with the melted butter and then line the base with a piece of baking paper.
- Put the butter, sugar, almond meal, flour and baking powder in the bowl of a food processor. Process until well evenly combined and the mixture resembles fine breadcrumbs. Add the eggs and vanilla use the pulse button to process until smooth and just combined.
- Spoon the mixture into the prepared pan and smooth the surface with the back of a spoon. Sprinkle evenly with the raspberries and then use the back of a clean spoon to press the raspberries into the cake mixture. Sprinkle with the almonds.
- Bake in preheated oven for 35-40 minutes or until golden and cooked in the centre when tested with a skewer.
- Stand the cake in the pan for 5 minutes before removing the side of the pan and placing the cake (still on the base) on a wire rack. Serve warm or at room temperature dusted with icing sugar.
Baker's Tips
- The raspberries can be replaced with 150g (5¼oz) blueberries or quartered strawberries.
- For a nut-free version, the almond meal can be replaced with 75g (2¾oz) desiccated coconut and sprinkle with 25g (¼ cup/¾oz) flaked coconut.
- This cake will keep in an airtight container in a cool spot (but not in the fridge) for up to 3 days.


