
- home
- BAKERECIPES
BakeRecipes
Bringing real baking into your home with deliciously simple recipes.
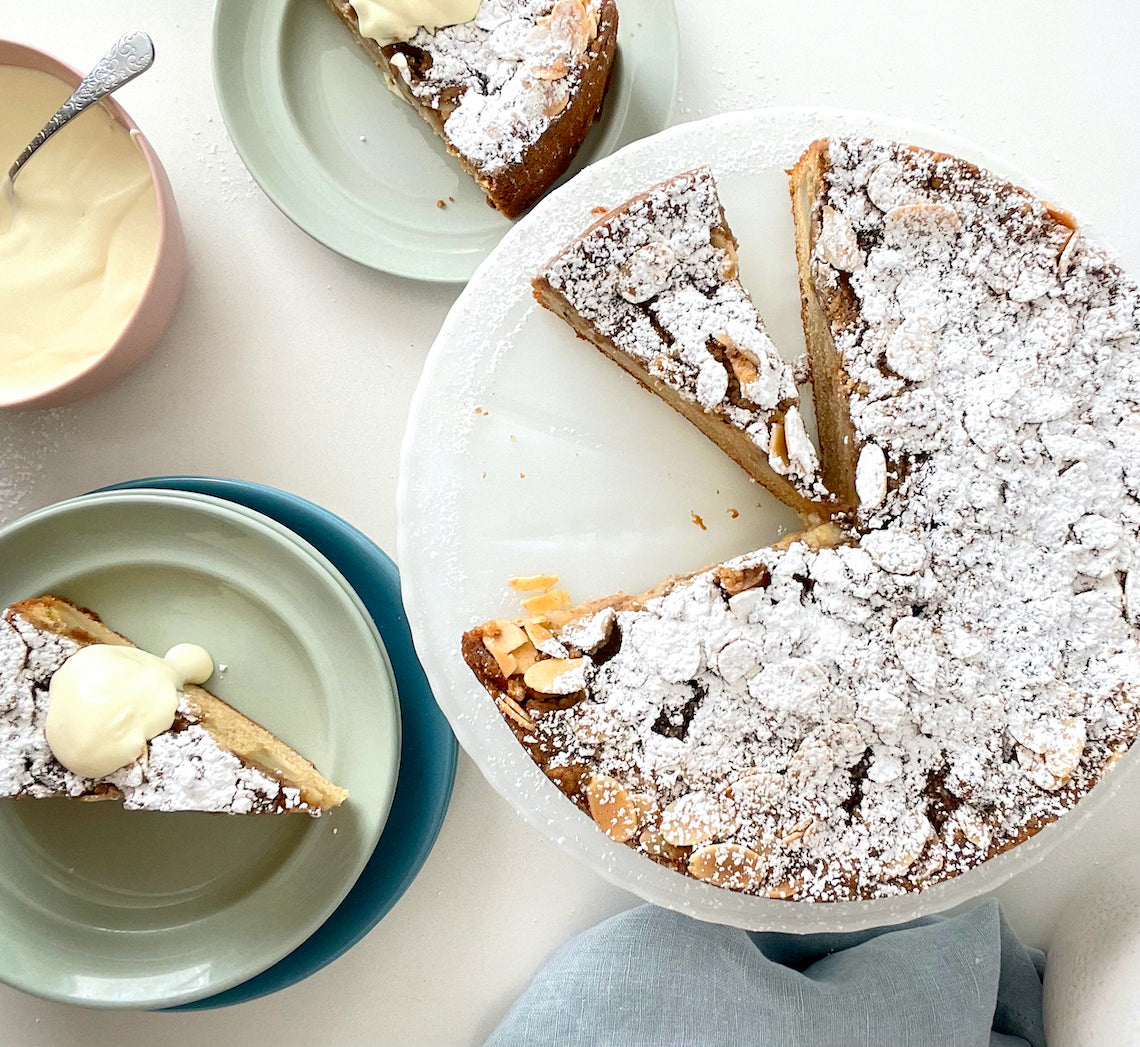
Prep 30min (+5min standing time)Bake 1hr 5min-1hr 15minMakes 10-12 serves
This is one of my favourite cakes – ever! Not only is it super easy to whip up and can be made with a whole variety of different fruits (you can replace the pears with the same quantity of plums, firm ripe nectarines or peaches for example), but it is also incredibly versatile when it comes to serving it. It not only makes for the perfect morning or afternoon tea cake but it is also wonderful served warm with lashings of cream or ice cream for dessert. I’ve also been known to eat the leftovers for breakfast (which I would also highly recommend!)
Ingredients
Melted butter, to grease
185g (1¼ cups/6½oz) self-raising flour
165g (⅔ cup, firmly packed/5¾oz) brown or raw caster sugar, plus 1 tablespoon extra
125g (4½oz) salted butter, at room temperature
85g (⅓ cup/3oz) sour cream
2 eggs, at room temperature
1½ teaspoons natural vanilla extract or essence
2 (about 200g/7oz each) firm but ripe Williams pears, cored and each cut into 12 wedges
Icing sugar, to dust
Cream or ice cream, to serve (optional)
Crumble Topping
50g (⅓ cup/1¾oz) plain flour
55g (¼ cup, firmly packed/2oz) brown or raw caster sugar
1 teaspoon ground cinnamon
60g (2oz) salted butter, chilled, diced
50g (½ cup/1¾oz) flaked almonds
Method
- Preheat oven to 170°C/340°F (150°C/300°F fan-forced). Grease a 21cm (81⁄4in), base measurement, springform tin with melted butter and line the base with non-stick baking paper.
- To make the Crumble Topping, combine the flour, sugar, and cinnamon in a medium bowl. Use your fingertips to quickly rub in the butter just until the mixture resembles coarse breadcrumbs (it will be quite moist). Stir in the almonds. Cover and put in the fridge while making the cake.
- To make the cake, place the flour, sugar, butter, sour cream, eggs and vanilla in a large mixing bowl. Use an electric mixer fitted with a paddle attachment to beat on low speed until combined. Increase the speed to high and beat for 3 minutes or until the mixture is well combined, very pale in colour and silky smooth in texture. Spoon the mixture into the prepared tin and smooth the surface with the back of a spoon.
- Toss the pear wedges with the extra 1 tablespoon sugar. Arrange the pears evenly over the top of the cake and then press gently into the batter. Sprinkle with the prepared Crumble Topping to cover.
- Bake in preheated oven for 65-75 minutes (the baking time will depend on how juicy the pears are) or until a skewer inserted into the centre comes out clean. Stand the cake in the tin for 5 minutes before transferring, still on the base of the tin, to a wire rack. Serve warm or at room temperature on its own or accompanied by cream or ice cream, if desired.
Variation
Brown Butter Pear Crumble Cake: Replace the butter in the cake with 125g (4½oz) brown butter, solidified but softened. Replace the butter in the crumble with 60g (2oz) browned butter, chilled and diced.
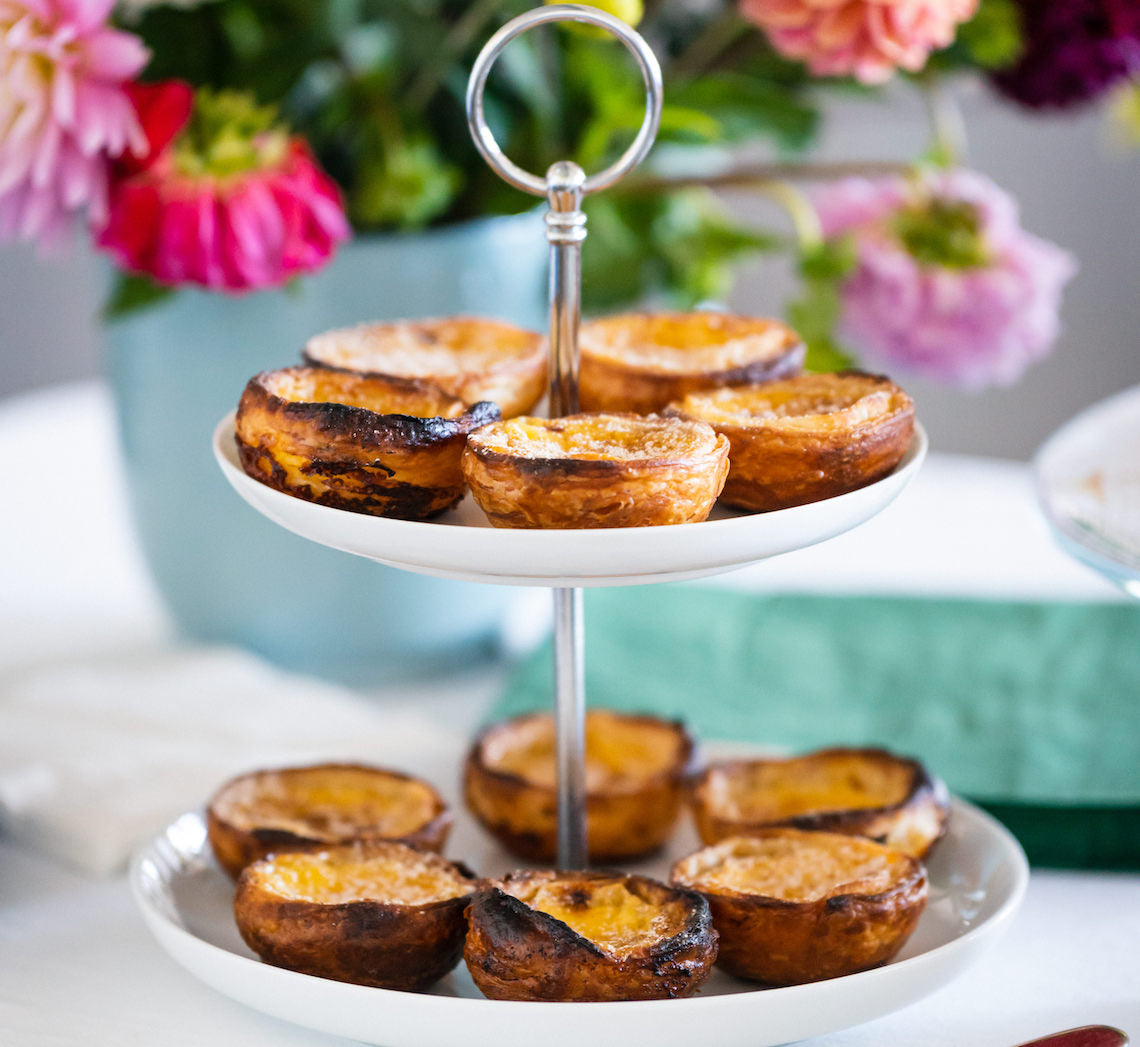
Prep 1hr (+20min resting, 2hr chilling and 30min cooling time)Bake 12-15min (per batch)Makes 24
Made by Make Me a Baker student Theresa Ling these Portuguese Custard Tarts will be some of the best you will try. The main trick with these tarts is to bake them at a very high heat (often as hot as your oven will go) for a short period of time to make sure the pastry is lovely and crisp while not over cooking the luscious creamy custard filling, creating a wonderful contrast between the two.
If you've never made portuguese custard tarts before or haven't got the results you wanted from a previous attempt CLICK HERE for my top tips when making them
at home before you start.
Ingredients
Icing sugar and ground cinnamon (optional), to sprinkle
Rough Puff Pastry
225g (1½ cups) plain flour
½ teaspoon salt
140g water
225g unsalted butter, softened
Custard
2 tablespoons plain flour300ml milk
220g (1 cup) caster sugar
160ml (⅔ cup) water
2 cinnamon sticks
½ teaspoon natural vanilla essence or extract
6 egg yolks, lightly whisked
Method
-
To make the Rough Puff Pastry, place the flour and salt in the bowl of a stand mixer. Add the water and mix with a paddle beater on low speed until well combined and a dough forms. Transfer the dough to a clean bench top and knead until smooth. Shape into a square about 1cm thick, wrap in plastic wrap and set aside to rest for 20 minutes.
- Use a lightly floured rolling pin to roll the pastry out on a well floured surface to a 35cm square, keeping the edges as neat as possible. Use your fingers to dot small pieces of 75g of the softened butter over the left two-thirds of the pastry, leaving about a 1cm border, and then spread it with your fingers so it covers the pastry roughly. Fold over the unbuttered right hand third of pastry, brush away any excess flour, then fold over the left hand third to cover. Starting from the top, use the rolling pin to tap the pastry widthways to release any air pockets and then press the open edges with your fingertips to seal and enclose the butter. Turn the pastry a quarter turn anticlockwise and then fold in the right hand third of pastry then fold over the left hand third to cover. Again, tap it gently widthways with the rolling pin.
- Reroll the pastry to a 35cm square and, with the folded edge closest to you repeat step 2 one more time, dotting and spreading the left hand two thirds with 75g of the remaining softened butter, folding, turning anti-clockwise and folding again.
- Reroll the pastry to a 35cm x 40cm rectangle. With a short edge closest to you, dot and spread the 75g of remaining softened butter over the whole surface, leaving a 1cm border. Starting from the short edge, roll into a tight log. Use a sharp knife to trim the ends and then cut the log in half. Wrap the logs separately in plastic wrap and place in the fridge to chill for at least 2 hours before using (see Baker’s Tips).
- Place two pizza stones in the oven, one in the top third and one in the bottom third. Place an oven rack in between them. Preheat oven to 300°C (280°C fan-forced) for at least 1 hour.
- To make the Custard, place the flour in a medium bowl and use a balloon whisk to gradually stir in 60ml (¼ cup) of the milk until smooth and well combined. Place the remaining milk in a small saucepan and bring just to a simmer over a medium heat. Use the balloon whisk to gradually stir the hot milk into the flour mixture and stir until smooth and well combined. Combine the sugar, water and cinnamon sticks in a medium saucepan and stir over medium heat until the sugar dissolves. Bring to the boil and simmer until it reaches 100°C on a thermometer. Remove the cinnamon sticks from the sugar syrup and gradually stir into the milk mixture. Add the vanilla and stir until cooled slightly. Stir in the egg yolks until evenly combined. Cover the surface of the custard with plastic wrap and place in the fridge to cool, stirring occasionally, this will take about 30 minutes (see Baker’s Tips).
- Cut one of the pastry logs into twelve 1.5cm lengths (each portion will be about 25g) and place each portion, with a cut side facing up, into an ungreased 50ml capacity (3cm base measurement and 6.5cm top measurement) round-based tartlet tin (see Baker’s Tips). Using your thumb, gently press into the centre of a pastry portion towards the base until about 5mm thick, and then, using your thumbs and working around the tart case, gently ease the pastry up the sides thinning it to about 5mm thick and so it extends about 2mm above the tart tin and forms a thicker lip at the top. Repeat with the remaining pastry portions.
- Place the tart tins on a heavy oven tray. Divide half the cooled custard among the pastry cases, filling each to no more than 5mm from the top edge of the pastry. Bake the tarts between the pizza stones in the preheated oven for 12-15 minutes or until the pastry is crisp and baked through, and the custard is just set and partially charred on the top.
- Remove the tarts from the oven and set aside to cool slightly for 2-3 minutes before removing from the tins. Repeat with the remaining pastry log and custard mixture to make 12 more tarts.
- Sprinkle the tarts with icing sugar and/or cinnamon if desired and serve warm or at room temperature (see Baker’s Tips).
Baker's Tips
- The pastry can be made up to 3 days ahead of using. Keep wrapped in the fridge.
- The custard can be made up to 3 days ahead of baking. Store in an airtight container or jar in the fridge. Stir well before pouring into the tart cases.
- Once cut into portions and before pressing into the tins, you may have to let the pastry stand at room temperature until it softens slightly and becomes pliable enough to be able to be pressed into the tins easily and without force.
- These tarts are best eaten warm or at room temperature the day they are made. However, they will keep in an airtight container in the fridge for up to 2 days. To refresh, place the chilled tarts back in the tart tins on an oven tray and place in an oven preheated to 180°C (160°C fan-forced) for 10 minutes or until the pastry is crisp and the custard is just warmed through (there is no need to use the pizza stones when reheating). Stand the tarts in the tins for at least 5 minutes before removing and serving warm or at room temperature.
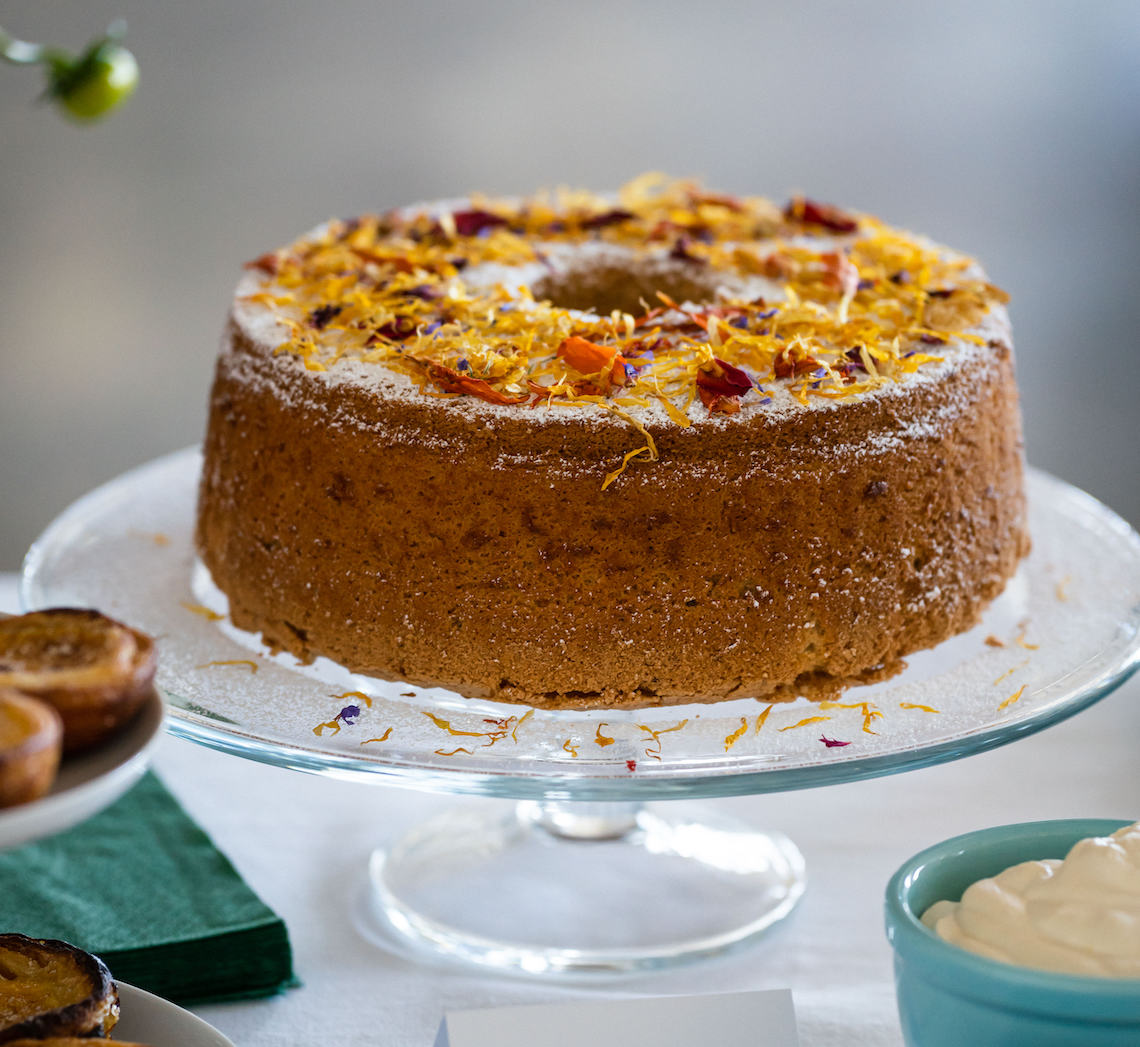
Prep 30min (+2hr cooling and overnight chilling time)Bake 45-50minMakes 8-10 serves
Created by Make Me a Baker student Jenny Wong for her graduation, this gorgeous cake is 'tea time' in a cake bringing together orange-scented chiffon cake and the subtle floral notes of French Earl Grey tea. And to make it complete, it's served with an Earl Grey tea-infused whipped cream and, of course a cup of freshly brewed French Earl Grey tea.
You will need a 21cm (base measurement) specialty angel food cake tin (basically a deep ring tin with a removable base and small 'feet' around the top rim) to make this recipe and they are available from specialty kitchenware stores. The key to achieving the classic feather-like texture of a chiffon cake is to make sure you leave it suspended in the inverted tin until cooled completely so that it doesn’t compress as it cools.
Ingredients
- 6 x T2 French Earl Grey tea bags
- 160ml ( ⅔ cup) boiling water
- 185g (1¼ cups) self-raising flour
- 30g (¼ cup) cornflour
- 1 teaspoon cream of tartar
- ½ teaspoon salt
- 6 x 59g eggs, at room temperature, separated
- 200g caster sugar, plus 110g (½ cup) extra
- 2 teaspoons finely grated orange zest
- 1 teaspoon natural vanilla essence or extract
- 100ml vegetable oil
- Icing sugar, to dust
- Dried edible flowers, to decorate (optional) (see Baker's Tips)
Earl Grey Whipped Cream
- 125ml (½ cup) full-cream milk
- 4 x T2 French Earl Grey tea bags
- 300ml thickened cream
- 1 ½ teaspoons finely grated orange zest
- 1 ½ teaspoons natural vanilla essence or extract
Method
- To make the Earl Grey Whipped Cream, place the milk and tea bags in a small saucepan and heat over medium heat until hot but not boiling. Remove form the heat and allow to cool. Transfer to a container or bowl, cover and place in the fridge to chill (preferably overnight).
- Preheat oven to 180°C (160°C fan-forced). Place an ungreased 21cm (base measurement) angel food cake tin on an oven tray.
- Place the tea bags in a jug, pour the boiling water over and set aside to infuse until the water is warm.
- Sift the flour, cornflour, cream of tartar and salt onto a piece of baking paper twice.
- Use an electric mixer with a whisk attachment to whisk the egg yolks and 200g caster sugar on high speed until thick and pale. Whisk in the orange zest and vanilla.
- Squeeze the tea bags to extract as much flavour as possible into the warm tea-infused water and measure 125ml ( ½ cup) - it should be dark in colour and very fragrant.
- Combine the warm tea and oil. Add the oil mixture to the egg mixture and whisk on low speed until well combined, scraping the side and the base of the bowl if necessary. With the motor running on low speed, add the flour mixture all at once and whisk gently until just combined. Transfer the mixture to a separate large bowl and set aside. Clean and dry the whisk and mixing bowl.
- Use the electric mixer with the whisk attachment to whisk the egg whites on medium-high speed until soft peaks form. Add the remaining 110g caster sugar and whisk until thick and glossy and the sugar has dissolved. Add about a third of the egg whites to the yolk mixture and use a large metal spoon or spatula to fold through until well combined. Add the remaining egg white mixture and fold until just combined.
- Spoon the mixture into the ungreased tin and gently smooth the surface with the back of a metal spoon. Bake in the lower third of the preheated oven for 45-50 minutes or until well risen, golden, and a skewer inserted into the cake comes out clean.
- Immediately turn the cake upside down on a wire rack and set aside, still in the tin so it is suspended, for 2 hours or until it is completely cool – don’t be tempted to remove it while still warm (see Baker's Tips).
- To finish the Earl Grey Whipped Cream, squeeze the tea bags to extract as much flavour as possible and then measure 60ml (1/4 cup) of the milk – it should be a pale Masala Chai colour and very fragrant. Use a balloon whisk the cream in a medium bowl until soft peaks form. Add the orange zest and vanilla and then whisk in the chilled Earl Grey-infused milk until soft peaks form again. Cover and chill until serving.
- Carefully run a small palette knife around the side of the tin to release the cake. Invert the cake onto a serving plate or cake stand, and gently shake the tin to release the cake. Then use the palette knife to release the cake from the base of the tin and remove (see Baker's Tips). Serve dusted liberally with icing sugar and edible flowers (if using), and accompanied by the Earl Grey Whipped Cream.
Baker's Tips
- The key to the classic light-as-air texture of a chiffon cake is to suspend the baked cake in an inverted tin until it cools completely so that the crumb texture doesn’t compress as it cools. That is why it is so important that the tin isn't greased or lined so that the cake sticks to the tin and that it doesn't fall out of the tin during cooling. However, because of this, once cooled you will need to carefully release it by running a small palette knife between the cake and the tin. You won’t get a perfect looking crust, but this will be overlooked as the result will be a beautifully airy crumb texture that can’t be achieved without using this technique.
- This cake is best cut with a sharp knife using a sawing action.
- This cake will keep for up to 2 days in an airtight container at room temperature but is best eaten on the day it is made.
- Jenny used sun-dried organic edible flowers from Percaya Farm
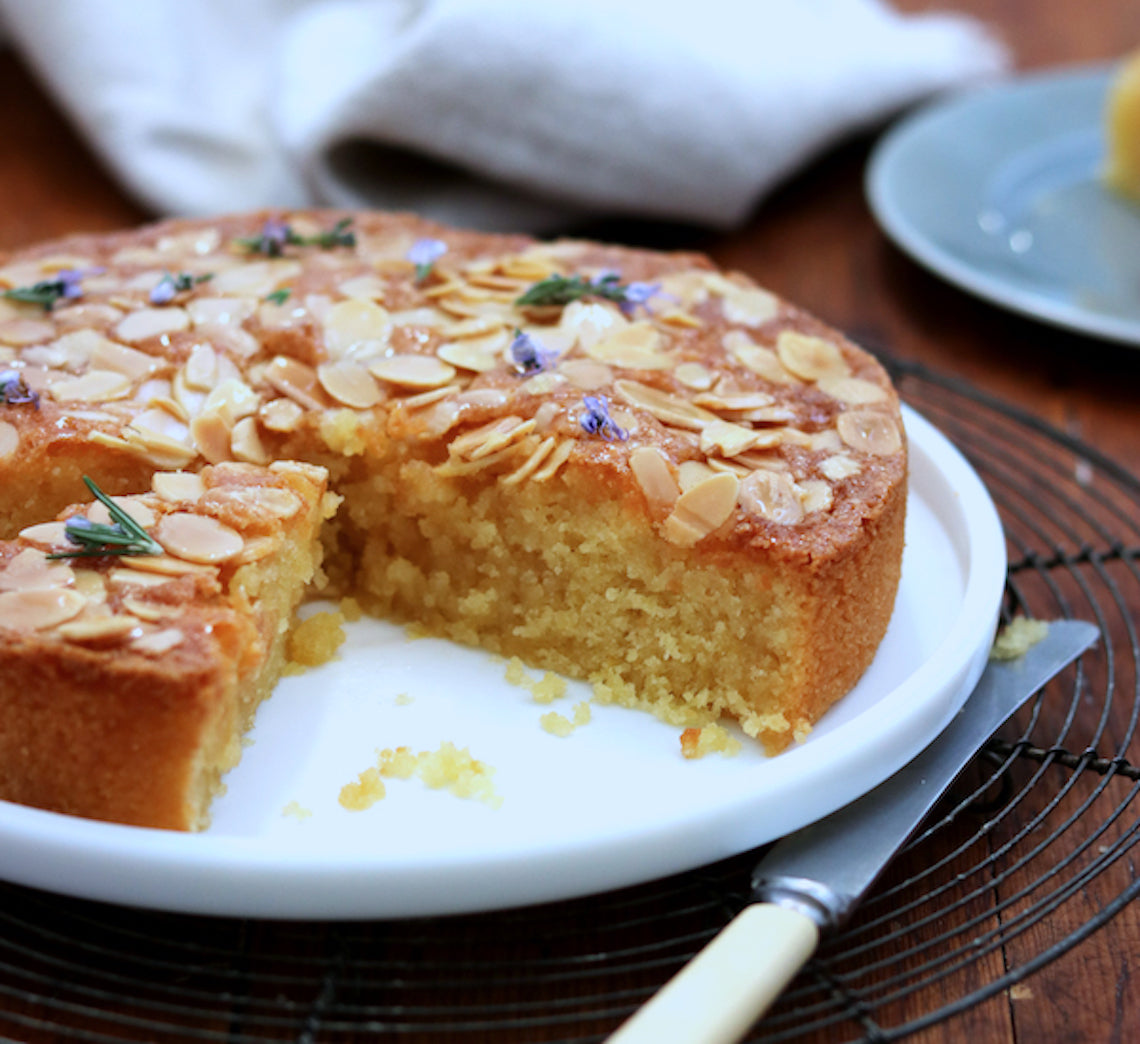
Prep 20min(+ 1hr cooling time)Bake 35-40minMakes 10 serves
Inspired by the wild rosemary found growing on the Gallipoli peninsula and the symbolic wearing of sprigs as a sign of remembrance for those who have made the ultimate sacrifice, this cake is the perfect way to pay your respects through your baking on Anzac Day. It's a simple cake, made special by the rosemary-infused syrup and is equally good accompanied by a cup of tea or lashings of cream or vanilla ice-cream for dessert (particularly when served while still warm)!
Ingredients
Olive oil, to grease
150g (5¼oz) caster sugar
125g (4½oz) almond meal
75g (½ cup/2¾oz) self-raising flour
180ml (¾ cup/6fl oz) olive oil
3 eggs, at room temperature
2 lemons, rind finely grated
40g (1½oz) flaked almonds
Fresh rosemary flowers (optional), to decorate
Lemon & Rosemary Syrup
60ml (¼ cup/2fl oz) strained fresh lemon juice
60ml (¼ cup/2fl oz) water
110g (½ cup/4oz) caster sugar
4 x 10cm sprigs fresh rosemary
Method
- Preheat oven to 180°C/350°F (160°C/315°F fan-forced). Brush a 20cm/8in spring form tin with olive oil and line the base with non-stick baking paper.
- Combine the sugar, almond meal and flour in a large bowl. Whisk together the olive oil, eggs and lemon rind until well combined. Add to the almond meal mixture and use a balloon whisk or spatula to stir until just evenly combined.
- Pour into the prepared tin and spread with the back of a spoon. Sprinkle evenly with the flaked almonds. Bake in preheated oven for 35-40 minutes or until a skewer inserted in the centre comes out clean. Stand the cake in the tin for 5 minutes before turning transferring to a wire rack sitting over a tray.
- Meanwhile, to make the Lemon & Rosemary Syrup, combine the lemon juice, water and sugar in a small saucepan and stir over medium heat until the sugar dissolves. Add the rosemary sprigs, bring to a simmer and simmer for 5 minutes or until reduced by about half.
- Slowly pour the hot syrup over the warm cake, allowing it to soak in as much as possible. Cool to room temperature (this will take about 1 hour). Decorate with the rosemary flowers (if using) and serve in slices.
Baker's Tip
- This cake will keep in an airtight container at room temperature in a cool spot for up to 3 days.
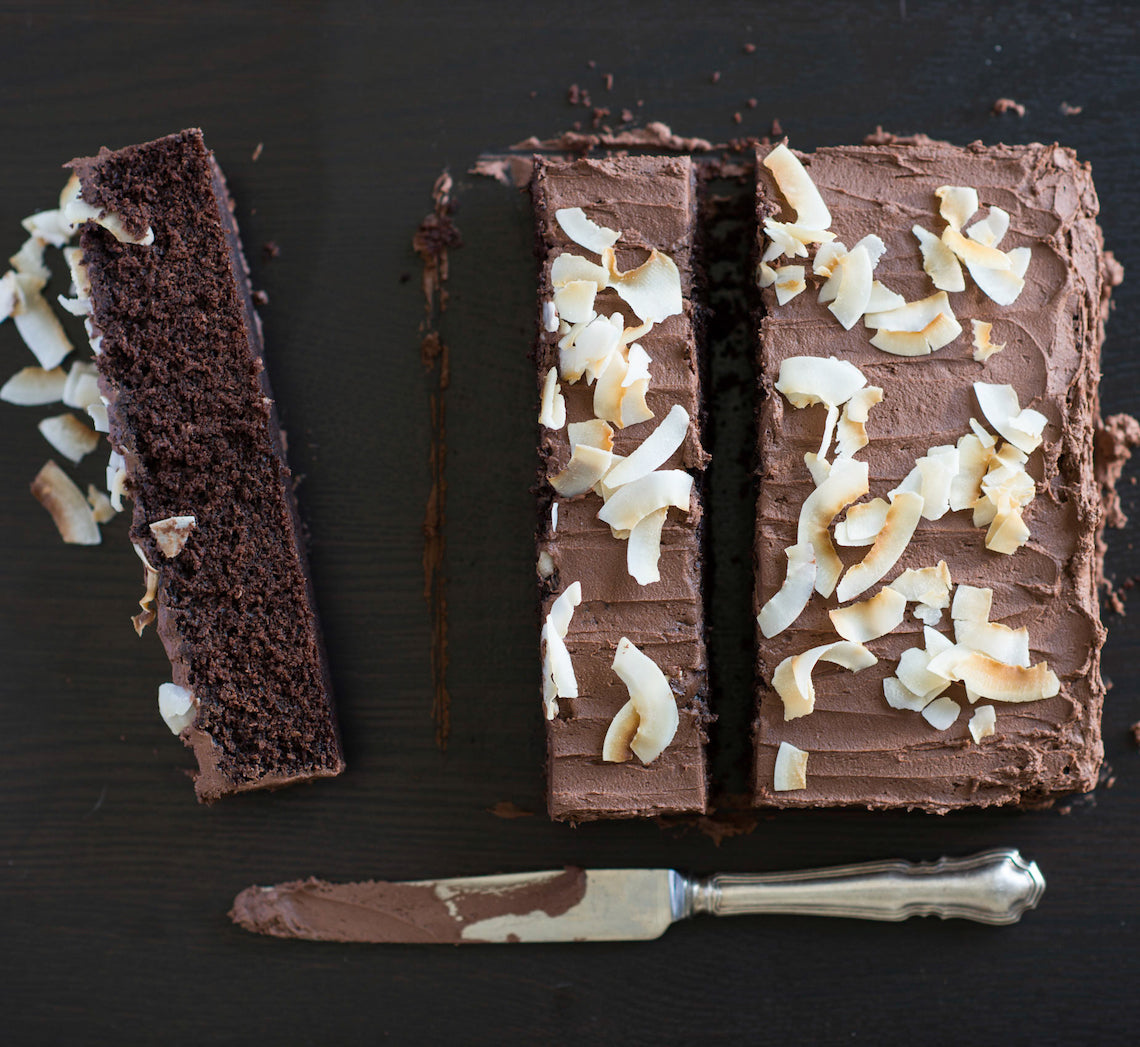
Prep 20min (+1hr 30min cooling time)Bake 30-35minMakes 10-12 serves
Everyone needs a good old-fashioned chocolate cake in their repertoire that is easy enough to whip up on a whim. Made with a simple melt-and-mix method this delicious cake is a real crowd-pleaser.
Ingredients
Melted butter, to grease
125g salted butter, diced, at room temperature
220g (1 cup) caster sugar
185ml (¾ cup) milk
2 eggs, at room temperature, lightly whisked
2 teaspoons natural vanilla essence or extract
150g (1 cup) self-raising flour
55g (½ cup) cocoa powder
1 teaspoon baking powder
45g (½ cup) desiccated coconut
Chocolate buttercream
125g salted butter, at room temperature
185g (1½ cups) icing sugar mixture, sifted
2 tablespoons cocoa powder, sifted
Method
- Preheat oven to 180°C (160°C fan-forced). Grease a square 20cm cake tin with melted butter and line the base with non-stick baking paper.
- Combine the butter, sugar and milk in a medium saucepan. Stir over medium heat until butter melts, sugar dissolves and mixture is combined (see Baker's Tips). Remove from heat and use a fork to whisk in the eggs and vanilla.
- Sift together the flour, cocoa powder and baking powder into a large bowl. Stir in the coconut. Add the butter mixture and use a balloon whisk to stir until just combined.
- Spoon the mixture into the prepared tin and use the back of a metal spoon to smooth the surface. Bake in preheated oven for 30-35 minutes or until a skewer inserted into the centre of the cake comes out clean. Stand in the tin for 5 minutes before turning onto a wire rack to cool (this will take about 1½ hours).
- To make the Chocolate buttercream, use an electric mixer to beat the butter, icing sugar and cocoa powder in a medium bowl until pale and creamy and it is a smooth spreadable consistency. Spread the cooled cake with the buttercream and cut into portions to serve.
Baker's Tips
- Don’t overheat the butter mixture – as soon as the butter melts and the sugar has dissolved, remove it from the heat.
- This cake will keep in an airtight container at room temperature in a cool spot for up to 3 days.
This recipe is from Anneka's SBS Food online column, Bakeproof: Easy Chocolate Cakes. CLICK HERE for more Bakeproof recipes.
Photography by Alan Benson.

Prep 20minBake 30-35minMakes 12
Dense with fruit, studded with macadamias and finished with a thin lemon glaze, these muffins are wholesome yet slightly naughty. Enjoy them at morning or afternoon tea or even for brunch.
Ingredients
150g (1 cup/5¼oz) plain flour
150g (1 cup/5¼oz) wholemeal plain flour
1 tablespoon baking powder
1 teaspoon ground cinnamon
55g (¾ cup/2oz) shredded coconut
75g (½ cup/2¾oz) raw, unsalted macadamia nuts, toasted and coarsely chopped
200g (¾ cup/7¾oz) Greek-style natural yoghurt
80ml (⅓ cup/2½fl oz) light olive oil or sunflower oil
2 eggs, at room temperature
1½ teaspoons natural vanilla extract or essence
Lemon glaze
125g (1 cup/4½oz) pure icing sugar, sifted
1½ tablespoons (30ml/1fl oz) fresh lemon juice
Method
- Preheat the oven to 190°C/375°F (170°C/340°F fan-forced). Line a 12-hole 80ml (⅓ cup/2½fl oz) muffin tray with muffin paper cases.
- Sift together both the flours, the baking powder and cinnamon into a large mixing bowl, returning any husks to the bowl. Stir in the sugar, coconut and macadamias.
- Halve the peaches and remove the stones. Cut each half into 8 wedges. Add to the flour mixture and gently toss to combine evenly.
- Use a fork to whisk together the yoghurt, oil, eggs and vanilla in a bowl or jug. Add to the flour mixture and use a spatula or large metal spoon to fold together until just combined. (Don’t overmix – the batter should still be a little lumpy.)
- Spoon the mixture into the paper cases, dividing evenly. Bake in preheated oven for 30-35 minutes or until the muffins are golden and cooked when tested with a skewer.
- Meanwhile, to make the Lemon glaze, combine the icing sugar and lemon juice in a medium bowl and mix until smooth. Cover and set aside while the muffins finish baking.
- Remove the muffins from the oven and stand for a few minutes in the tin before transferring to a wire rack. Drizzle a little of the lemon glaze over each warm muffin. Serve warm or at room temperature.
Baker's Tips
- The peaches can be replaced with 400g (14oz) of nectarines, plums, apricots, pitted and cut into 8 wedges, or cherries, pitted and halved.
- The wholemeal plain flour can be replaced by 150g (1 cup/5¼oz) wholemeal spelt flour.
- These muffins are best eaten the day they are baked, though they freeze well. Wrap individually in plastic wrap and then seal in a plastic bag or airtight container. Freeze for up to 3 months. Thaw at room temperature.


