- home
- BAKERECIPES
BakeRecipes
Bringing real baking into your home with deliciously simple recipes.
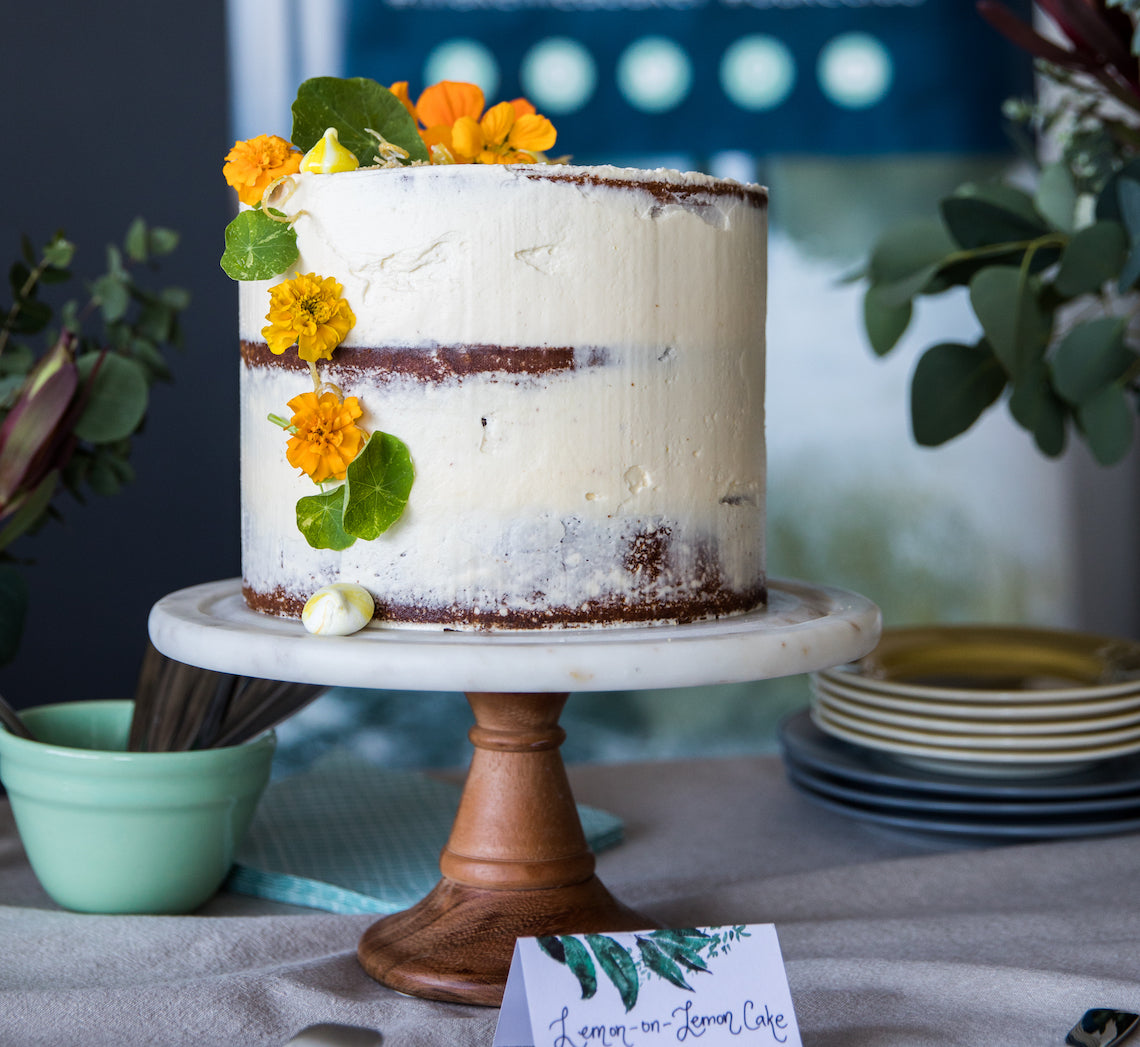
Prep 1hr45min (+ preparation time for Lemon Drizzle Pound Cakes, Swiss Meringue Buttercream and Striped Meringue Kisses)Bake 20minMakes about 20 serves
Created by Make Me a Baker student Janet Jackson for her graduation, this gorgeous cake brings together a selection of the techniques that she learnt during the 6-month program.
Janet said, "I love to bake cakes and have always admired decorated cakes but have never had the confidence to try one for myself. For my graduation bake, I wanted to bake and decorate a cake using produce from my garden at home and techniques I had learnt through the MMAB program. I trialled many different versions of lemon cake, some with poppy seeds and others with sour cream and Greek yoghurt, before settling on this delicious lemon drizzle cake which is lusciously moist and filled with the zing of freshly picked lemons."
Ingredients
Edible flowers, to decorate (optional)
3 Lemon Drizzle Pound Cakes
2 quantities Swiss Meringue Buttercream
5-15 yellow Striped Meringue Kisses
Lemon Curd
2 eggs, at room temperature
2 egg yolks, at room temperature
165g (¾ cup) caster sugar
80g unsalted butter, diced
2 tablespoons strained freshly squeezed lemon juice
Finely grated zest of 2 lemons
Lemon Crumb
60g unsalted butter, chilled, diced
80g plain flour
50g caster sugar
1 tablespoon strained fresh lemon juice
1 teaspoon finely grated lemon zest
Candied Lemon Curls
220g (1 cup) caster sugar
250ml (1 cup) water
½ lemon
Method
- To make the Lemon Curd, use a balloon whisk to whisk the whole egg, egg yolk and sugar in a medium saucepan until smooth. Add the butter, juice and zest and stir continuously with a wooden spoon until the mixture thickens enough to coat the back of a spoon (if you run your finger across the back of the spoon through the curd a line should remain when ready and the mixture should be 70°C on a sugar thermometer). Do not boil. Stain through a sieve into a bowl (see Baker’s Tips). Cover the surface of the curd with plastic wrap and place in the fridge for at least 2 hours before using.
- To make the Lemon Crumb, preheat oven to 180°C (160°C fan-forced) and line a baking tray with baking paper. Place all ingredients into the bowl of a food processor and process until the mixture just comes together in a dough. Use your fingers to press the dough onto the lined baking tray until about 3mm thick and bake in preheated oven for 10-12 minutes or until pale golden. Remove from oven and set aside to cool completely on the tray. Once cooled, break up the biscuit and process in the food processor again using the pulse button until a coarse crumb forms. Transfer the crumbs back to the lined tray and bake for a further 8 minutes or until golden. Set aside to cool on the tray (see Baker’s Tips).
- To make the Candied Lemon Curls, line a baking tray with baking paper. Use a vegetable peeler to remove the rind from the lemon in long strips. Use a small sharp knife to remove any white pitch from the rind and then cut the rind into long, thin strips. Combine the sugar and water in a small saucepan and stir over medium-low heat until the sugar dissolves completely. Add the lemon rind, bring to a simmer and simmer over medium-low heat for 20 minutes or until the rind is translucent. Remove the saucepan from the heat and use a skewer to remove the lemon strips, one at a time, from the syrup and twist around the round handle of a wooden spoon to make the curls. Allow to stand for about 5 seconds and then remove carefully from the wooden spoon by sliding off the end of the handle, using the skewer to help carefully release them if necessary. Set aside on the lined tray. Repeat with the remaining lemon rind strips.
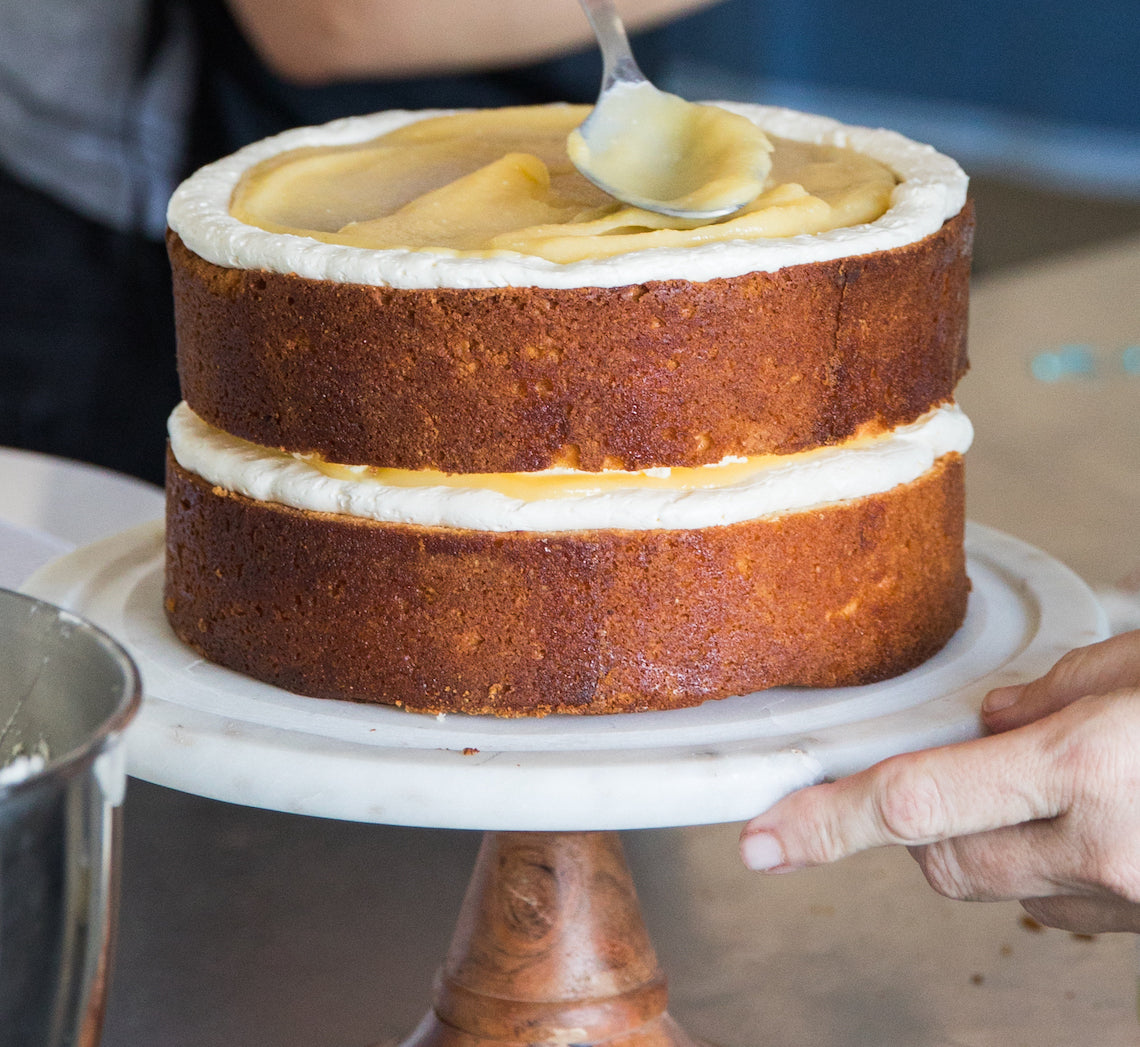
- To assemble the cake, use a large sharp serrated knife to level the tops of the Lemon Drizzle Pound Cakes if necessary. Place one of the cakes on a serving plate or cake stand. Spoon about a quarter of the Swiss Meringue Buttercream into a piping bag fitted with a #11 (1.1cm) round piping nozzle and pipe a border of buttercream around the top outside edge of the cake. Spoon about ⅓ cup of the chilled lemon curd into the centre of the cake and spread evenly to the buttercream. Spoon about ⅓ cup of the remaining buttercream in small dollops over the lemon curd and use a small palette knife or the back of a metal spoon to spread gently to cover the curd. Continue to layer the cake, curd and buttercream finishing with a cake layer.
- Spread the top and sides of the cake with the remaining buttercream creating a semi-naked look. Decorate with the Striped Meringue Kisses, Lemon Crumb and Candied Lemon Curls and embellish with fresh flowers if desired.
Baker's Tips
- This recipe will make about 1½ cups of Lemon Curd, but you will only need about 1 cup of the lemon curd for this cake. The leftover curd will keep in a sealed sterilized jar in the fridge for up to 2 weeks.
- The Lemon Crumb will keep in an airtight container or jar at room temperature for up to 2 weeks.
- The Lemon Curls will keep in an airtight container at room temperature for up to 1 week.
-
Janet baked the cakes the day before and let them stand overnight allowing the lemon drizzle to soak in. The Lemon Curd was made a couple of days ahead of time and stored in the fridge to thicken and develop flavour. She also made the Candied Lemon Curls and Lemon Crumb well ahead of time so she could concentrate on the assembly and decoration of the cake on the day of Graduation.
Prep 20min (+ cooling time)Bake 50-55minMakes 10 serves
Simple yet sublime. This pound cake is infused with a tangy lemon syrup and is perfect to serve on its own with a cuppa or used as a base for a more elaborate celebration cake. This recipe was originally published in BakeClass.
Ingredients
- Melted butter, to grease
250g unsalted butter at room temperature, cubed
220g (1 cup) caster sugar
Finely grated lemon zest of 1 lemon
4 eggs, at room temperature
250g (1⅔ cups) plain flour
2½ teaspoons baking powder
2 tablespoons strained freshly squeezed lemon juice
Lemon Syrup
55g (¼ cup) caster sugar
2 tablespoons strained freshly squeezed lemon juice
Method
- Preheat oven to 180°C (160°C fan-forced). Grease a 20cm (base measurement) round cake tin or springform pan with melted butter and line the base with baking paper.
- Using an electric mixer beat the butter, sugar and lemon zest in a large bowl until pale and creamy.
- Add the eggs one at a time, beating well after each addition.
- Sift together the flour and baking powder. Use a spatula to fold half of the flour mixture through the batter mixture. Fold in the lemon juice and then the remaining flour mixture until just combined.
- Spoon the batter into the prepared tin and smooth the surface with the back of a spoon. Bake in preheated oven for 50-55 minutes or until a skewer inserted in the centre comes out clean.
- Meanwhile, to make the Lemon Syrup, combine the caster sugar and lemon juice in a small saucepan and stir over medium heat until the sugar dissolves. Remove from the heat and set aside until the cake is cooked.
- Immediately after removing the cake from the oven, brush the top with a little of the syrup. Leave the cake to stand in the tin for 5 minutes before turning out onto a wire rack. Brush the top of the cake with the remaining syrup and set aside to cool.
Baker's Tips
- This cake will keep in an airtight container at room temperature for up to 2 days.
Prep 1hr30min (+ cooling time)Bake 3hr20minMakes 10-12 serves
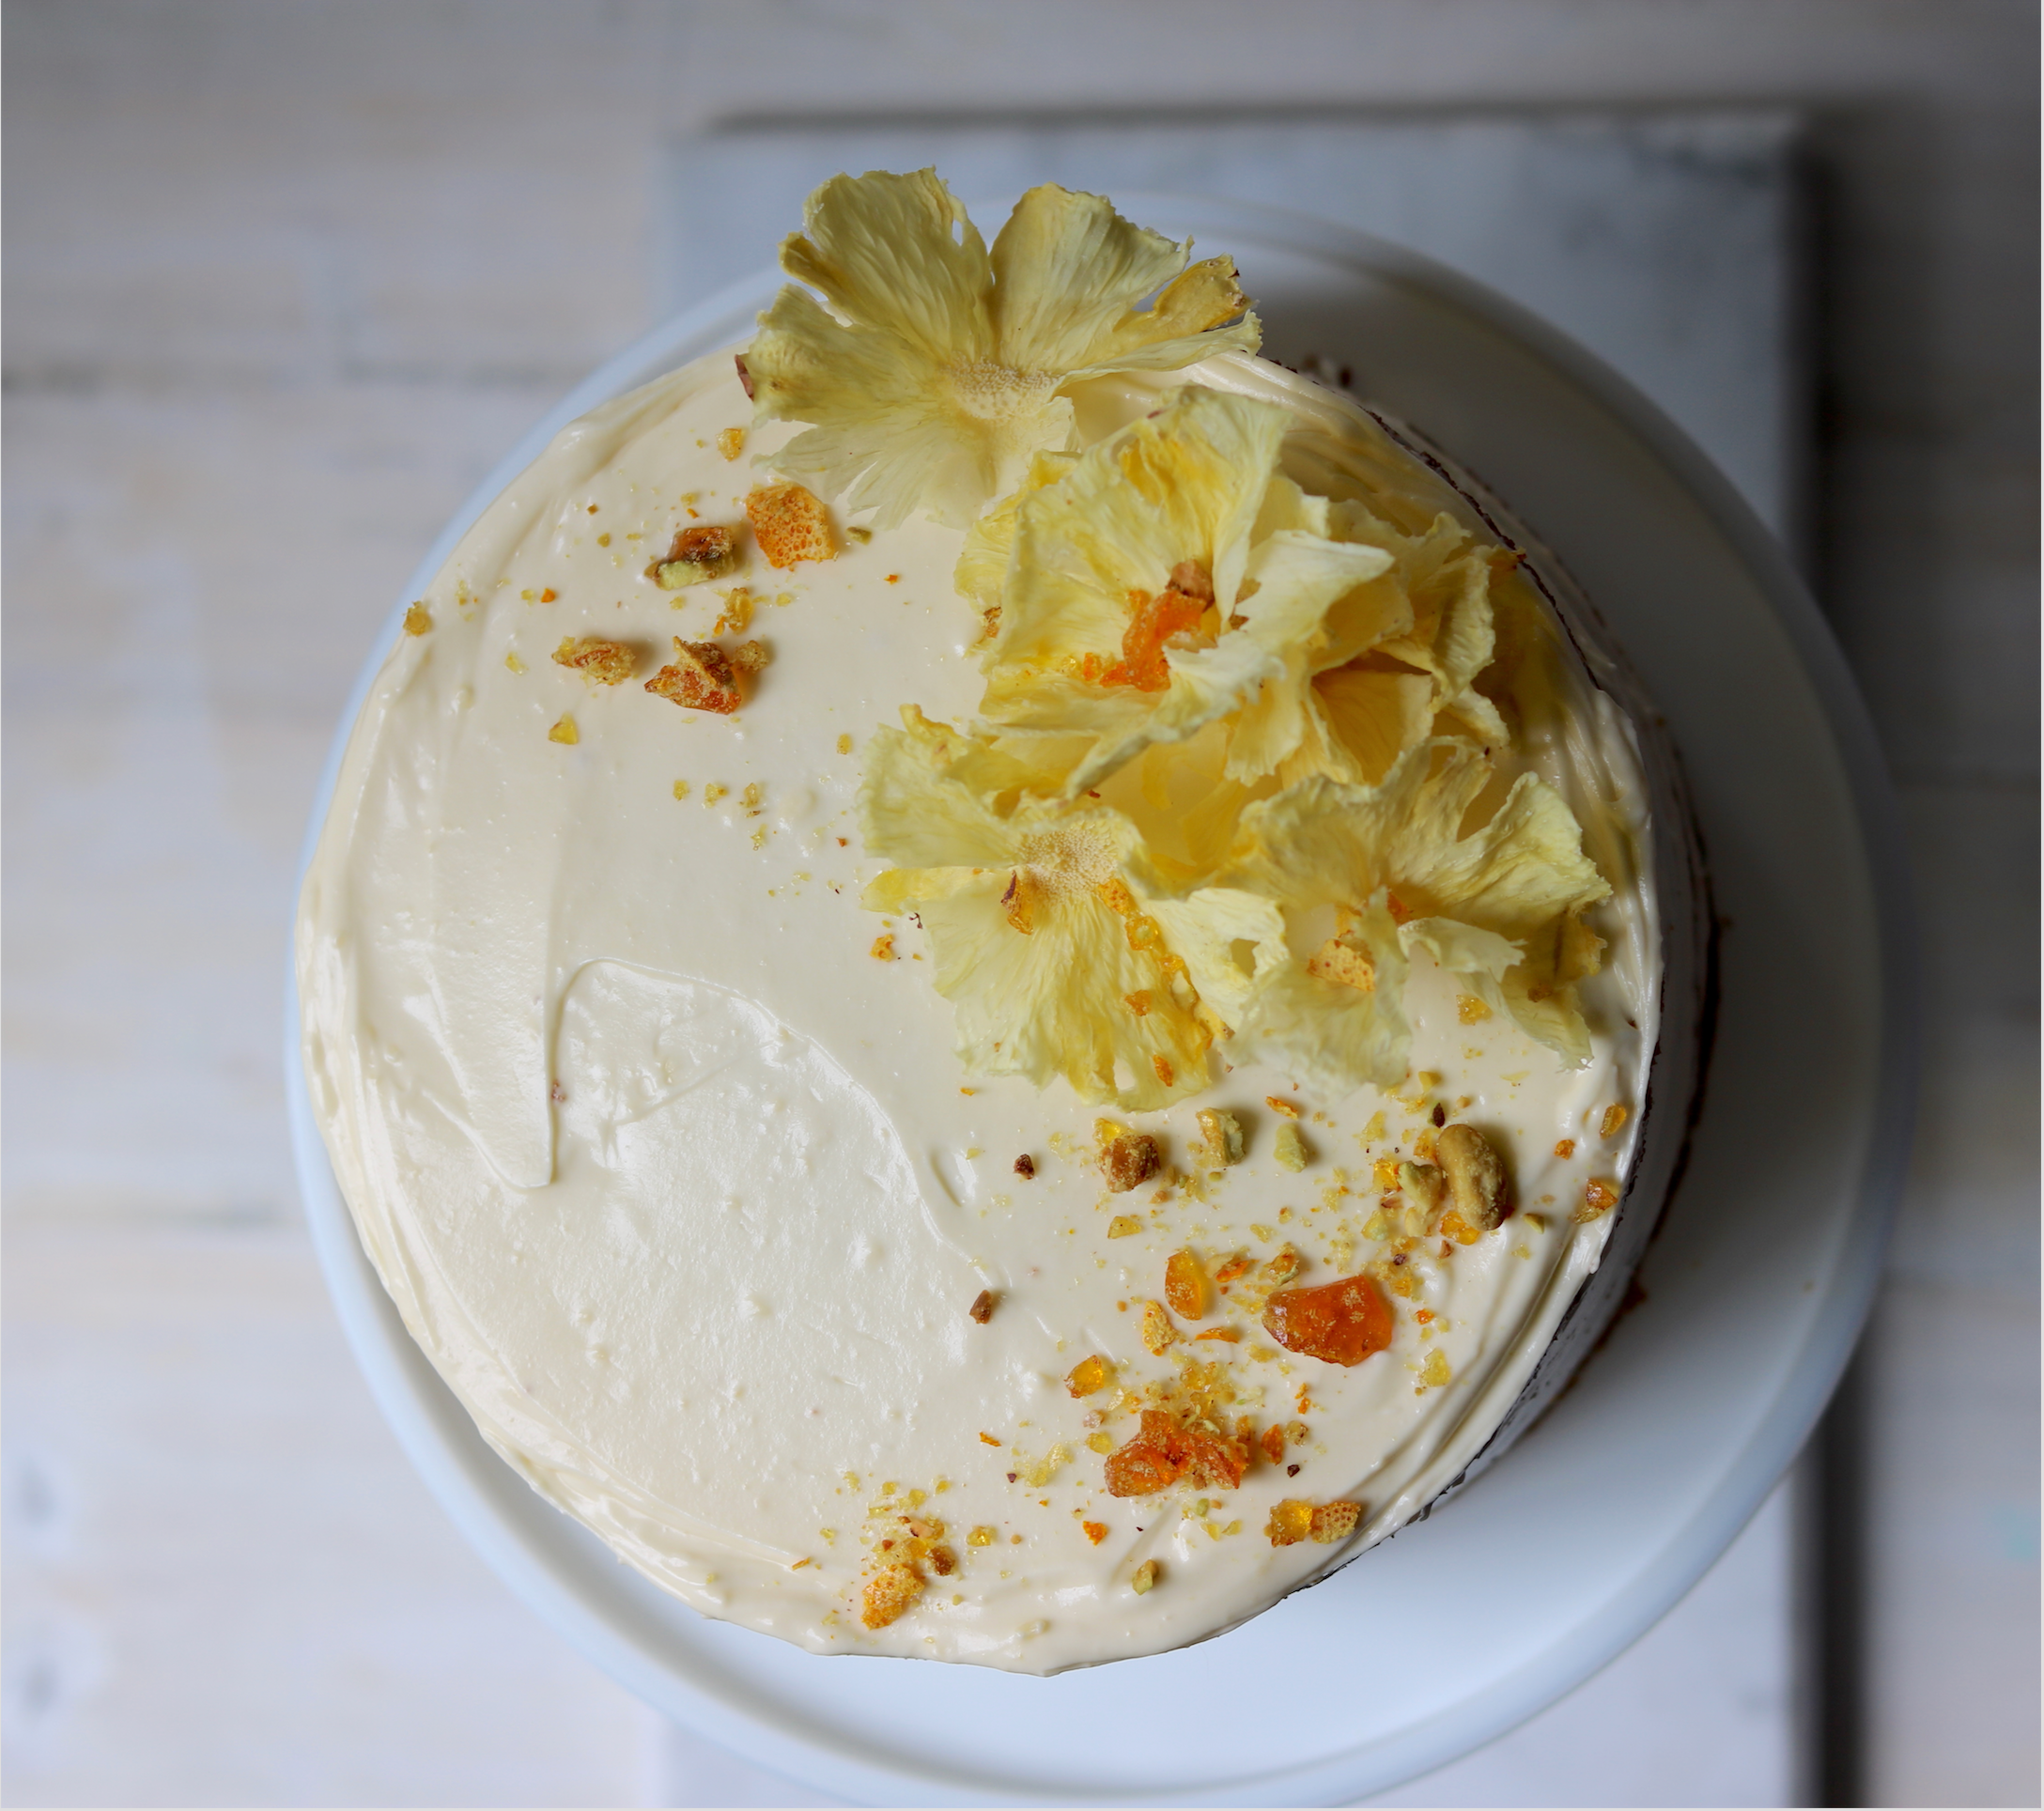
I often create unique cakes for friends to celebrate special occasion and milestones – cakes that reflect their personalities and our friendship. This one was for my close friend, Tina, to celebrate her 50th. It is based on a recipe by well-respected Australian cooking teacher Greta Anna Teplitzky (from her cookbook The Greta Anna Recipes, published by Angus & Robertson in the 1970s). Tina’s mum made it often while she was growing up and it became childhood favourite. I have zhooshed the original up with a dried orange and pistachio praline and some fun dried pineapple flowers to match Tina’s gorgeous, vibrant and creative personality – quite appropriate I think!
Ingredients
Orange and pistachio praline
1 orange
45g (⅓ cup/1½oz) pistachios, lightly toasted
55g (¼ cup/2oz) caster sugar
1½ tablespoons water
Dried pineapple flowers
½ firm, ripe pineapple
Cake layers
300g (2 cups/10½oz) plain flour
2 teaspoons baking powder
1 teaspoon bicarbonate of soda
2 teaspoons mixed spice
300g (10½oz) brown sugar
200ml (7fl oz) light olive oil, plus extra to grease
4 eggs, at room temperature, lightly whisked
2 teaspoons natural vanilla essence or extract
450g (15¾oz) tin pineapple slices in syrup, drained and finely chopped
300g (2 cups, firmly packed/10½oz) coarsely grated carrot
Cream Cheese Frosting
250g (9oz) cream cheese, at room temperature
75g (2¾oz) salted butter, at room temperature
1 teaspoon natural vanilla essence or extract
185g (1½ cups / 6½oz) icing sugar mixture, sifted
Method
- To make the Orange & Pistachio Praline, preheat the oven to 100°C/212°F (80°C/175°F fan-forced). Remove the rind from the orange with a vegetable peeler and then use a small sharp knife to remove any white pith from the rind. Place the rind on a wire rack over an oven tray and place in the preheated oven for 2 hours or until dry and crisp but still bright orange in colour (see Baker’s Tips). Remove from the oven and set aside (leave the oven on). Line an oven tray with non-stick baking paper. Spread the pistachios and dried orange rind close together on the lined tray. Combine the caster sugar and water in a small saucepan and use a wooden spoon to stir over low heat until the sugar dissolves. Increase the heat to medium and bring to the boil. Boil for 8-10 minutes without stirring, brushing down the side of the pan with a pastry brush dipped in water to dissolve any sugar crystals, until the mixture turns a deep caramel. Pour immediately onto the lined tray over the pistachios and rind. Set aside to cool completely (this will take about 30 minutes). When cool, use a mortar and pestle to grind the toffee into a coarse praline. Transfer to an airtight container and set aside (see Baker’s Tips).
- To make the Dried Pineapple Fowers, stand the half pineapple upright on a cutting board and use a large sharp knife to cut off the skin in strips. Use a mandoline slicer to cut the pineapple into very thin rounds (about 1-2mm thick). Use a small sharp knife to remove any remaining dark bits of rind from the slices and then pat both sides with paper towel to remove any excess moisture. Place the slices on a wire rack on an oven tray (see Baker’s Tips). Place in the oven for 2½ hours or until crisp around the edges but still slightly pliable. Remove from the oven and pinch each slice in the center while still warm to form a flower. Set aside to cool and then store immediately in an airtight container until needed (see Baker’s Tips)
- To make the Cake Layers, preheat oven to 180°C/350°F (160°C/315°F fan-forced). Brush two 18cm/7in round cake tins with extra olive oil to lightly grease and line the bases with non-stick baking paper.
- Sift together 150g (1 cup/5 ¼oz) plain flour, 1 teaspoon baking powder, ½ teaspoon bicarbonate of soda and 1 teaspoon mixed spice into a large bowl. Add 150g (5 ¼oz) brown sugar and stir to combine, breaking up any lumps.
- Combine 100ml (3 ½fl oz) of the olive oil, 2 of the eggs, 1 teaspoon vanilla, half the chopped pineapple and 150g (5 ¼oz) of the grated carrot and mix well. Add to the flour mixture and use a spatula or large metal spoon to gently mix until just combined.
- Divide the mixture evenly between the prepared tins and spread with the back of a metal spoon to smooth the surface making a shallow well in the center of each cake. Bake in preheated oven for 25 minutes or until cooked when tested with a skewer.
- Stand the cakes in the tins for 5 minutes before turning onto wire racks to cool (this will take about 1 hour). Repeat with the remaining cake ingredients to make 2 more cake layers.
- To make the Cream Cheese Frosting, use an electric mixer to beat the cream cheese, butter and vanilla until very smooth. Gradually add the icing sugar, beating well after each addition and beat until well combined and very creamy.
- To assemble the cake, first trim the tops of the cake layers if necessary (if the well you made in the mixture before baking was deep enough you won’t have to do this). Place one cooled cake layer, top side up on a cake stand or serving plate. Spread with ½ cup of the Cream Cheese Frosting and then sprinkle with about 1½ tablespoons of the Orange & Pistachio Praline. Continue to layer with the remaining cake layers, spreading each with ½ cup of frosting and sprinkling with about 1½ tablespoons of praline, and finishing with a cake layer, top side down. Spread a thick layer of frosting over the top of the cake, evening the surface with a large palette knife. Spread any remaining icing around the side of the cake to create a ‘naked’ look. Decorate with the Dried Pineapple Flowers and sprinkle with a little of the remaining praline just before serving.
Baker's Tips
- You can dry the orange rind for the praline (in step 1) and the pineapple for the flowers (in step 2) at the same time if you like.
- The praline will keep in an airtight container for up to 2 weeks.
- You will only need 5-6 slices of pineapple to make the dried pineapple flowers for this cake but if you would like to make more, place the slices on an extra wire rack on top of the first one and separate the racks with balls of foil at the corners between them.
- The Dried Pineapple Flowers will keep in an airtight container in a cool spot for up to 4 days. If they soften and lose their shape, return to an oven preheated to 100°C/212°F (80°C/175°F fan-forced) for 20-30 minutes or until crisp around the edges again. Reshape as in step 2.
- This cake will keep in an airtight container in the fridge for up to 3 days. Stand at room temperature for at least 30 minutes before serving.
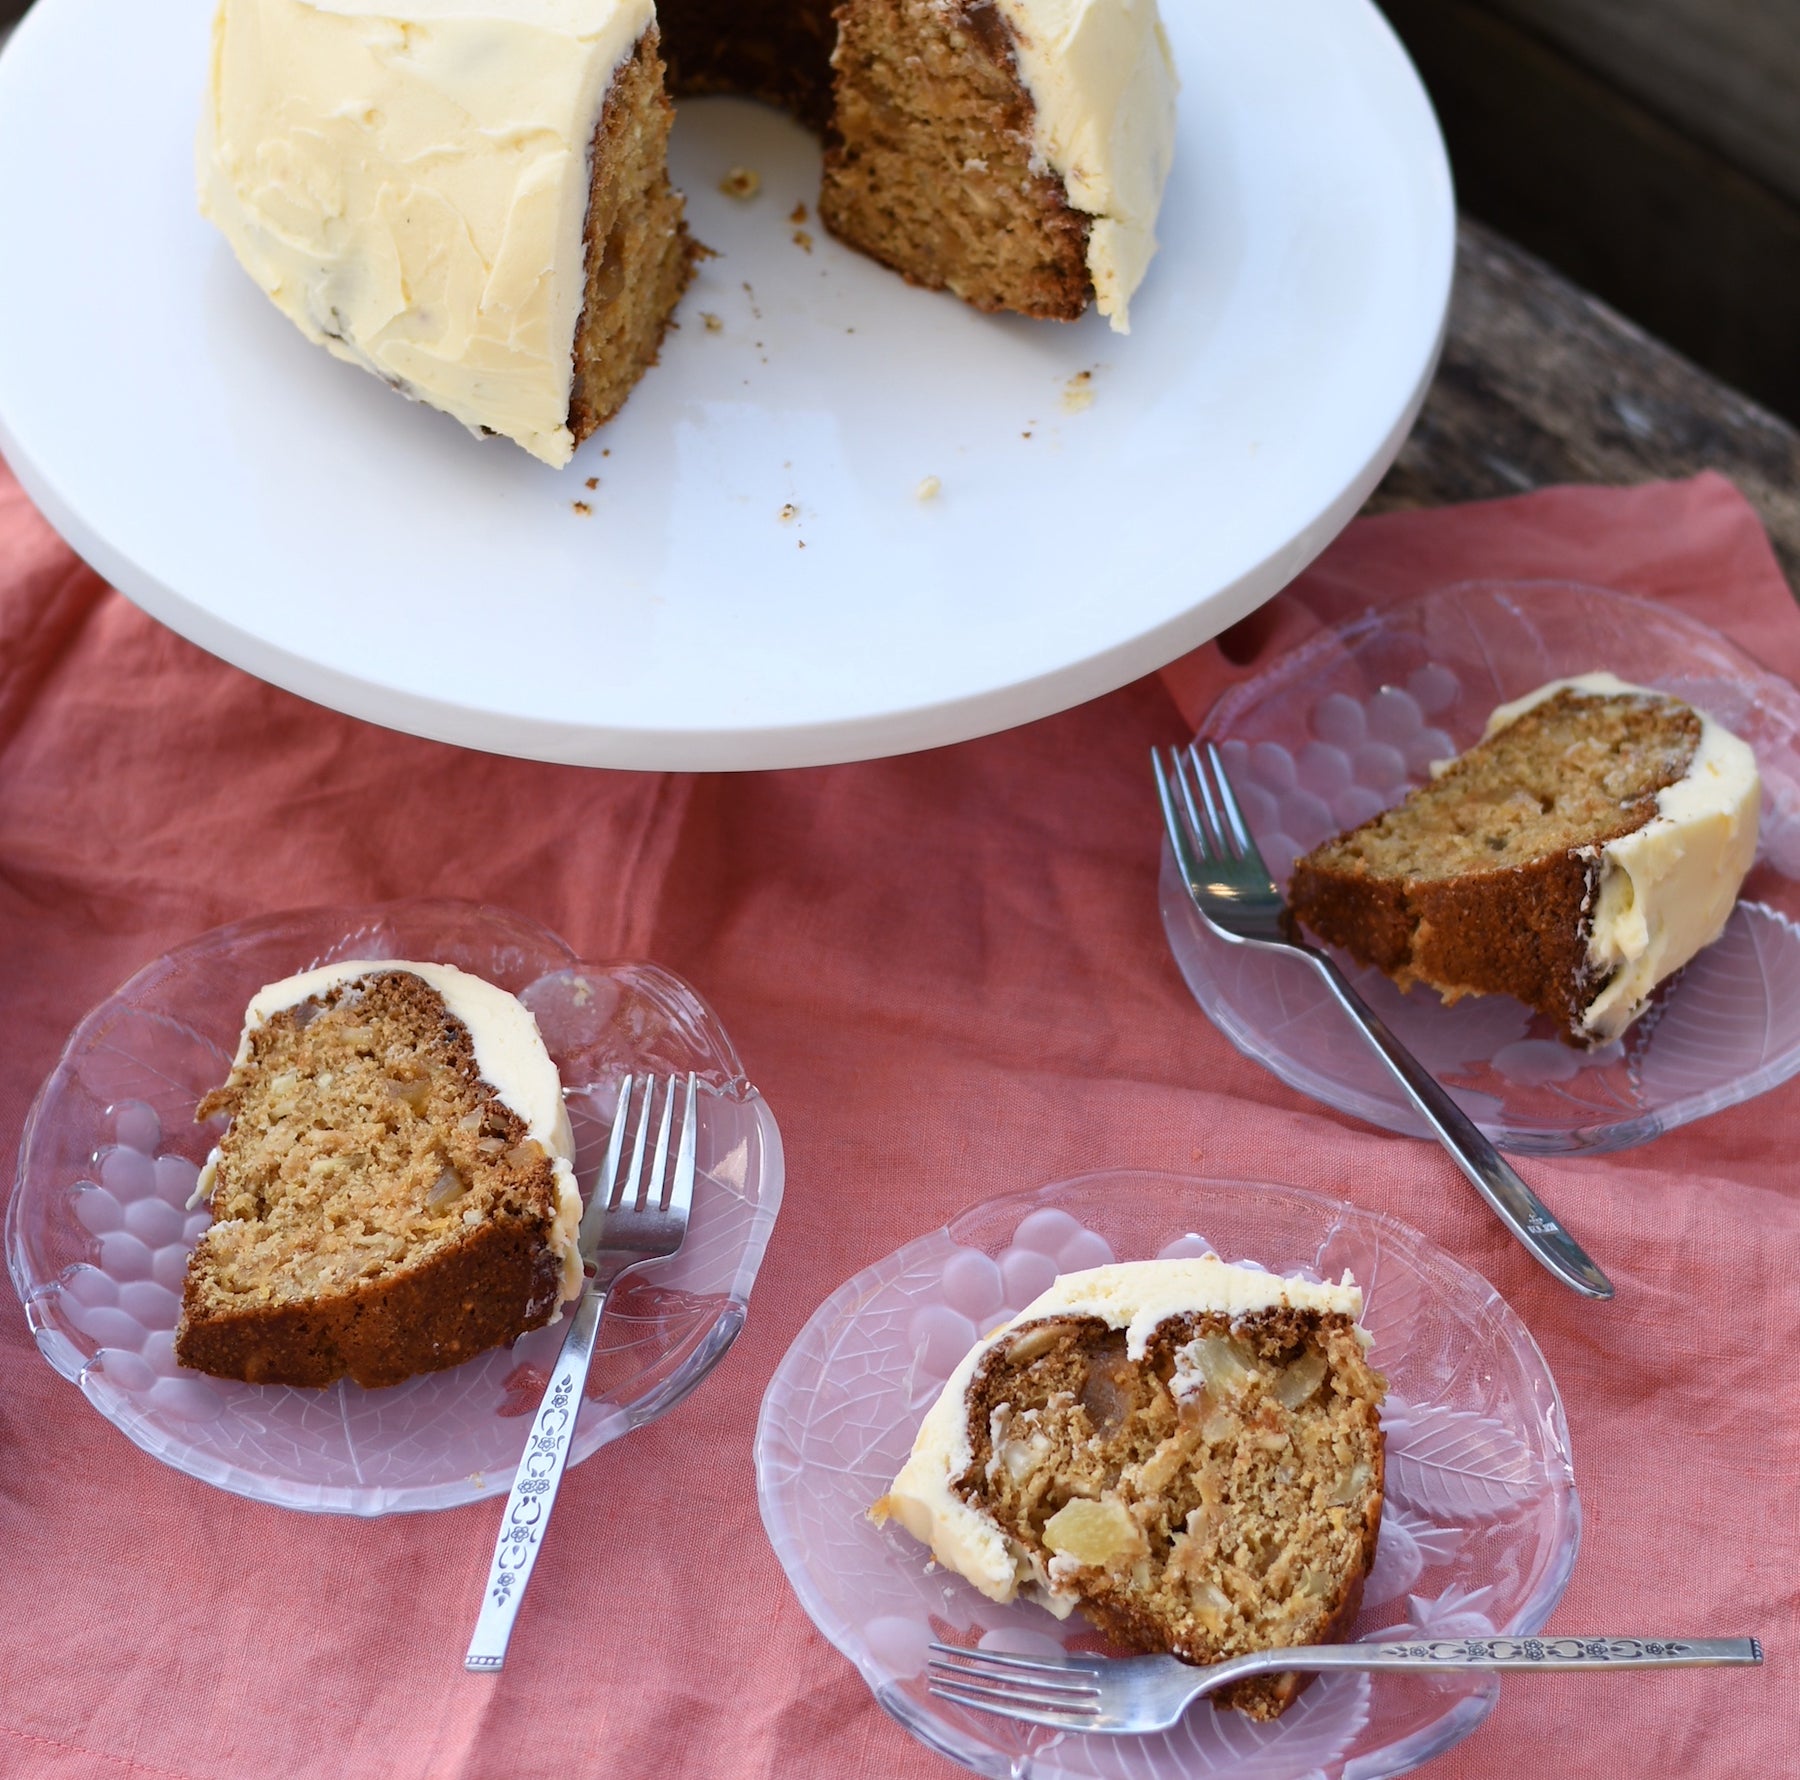
Prep 15 mins (+1 hour cooling)Bake 40minMakes 10 serves
This cake was shared by Hannah Scott as part of her Make Me a Baker program homework for Module 5.
"This sturdy but moist cake is a real crowd pleaser and a favourite in my family. To be honest, I’m not exactly sure why it’s called a Mexican Wedding Cake as I don’t think it’s traditionally served at weddings, but since my family usually make it for family gatherings and celebrations, the name has stuck. It’s super easy to make using the measure and beat method."
Ingredients
- 15g melted butter mixed with 1 teaspoon plain flour
- 310g plain wholemeal flour (unsifted)
- 2 teaspoons bicarbonate of soda
- 165g brown sugar
- 2 eggs, at room temperature, lightly whisked
- 85g slivered almonds
- 100g coarsely chopped glace ginger
- 450g tin crushed pineapple in natural juice, (with its juice)
Icing
- 75g butter, at room temperature
- 250g cream cheese, at room temperature
- 125g icing sugar, sifted
- 2 teaspoons natural vanilla extract or essence
Method
- Preheat oven to 180°C (160°C fan-forced). Brush a 2 litre (8 cup) fluted ring or bundt tin with the melted butter and flour mixture to grease.
- Place the flour, bicarbonate of soda, brown sugar, eggs, almonds, glace ginger and crushed pineapple into a mixing bowl and use an electric mixer to beat on low speed until well combined.
- Pour the cake batter into the prepared tin. Bake in preheated oven for 40 minutes or until a skewer inserted into the cake comes out clean.
- Stand the cake in the tin for 5 minutes before turning onto a wire rack to cool (this will take about an hour).
- Meanwhile, to make the Icing, use an electric mixer to beat the butter, cream cheese, icing sugar and vanilla until pale and creamy.
- Once cake has cooled completely, use the back of a metal spoon to gently spread the icing all over the cake. Serve in slices.
Baker's Tips
- This cake will keep in an airtight container in the fridge for up to 3 days. Serve at room temperature.
Hannah Scott (aka @thefoodstoryteller) won a scholarship to BakeClub's Make Me a Baker program thanks to SBS Food. Her rustic approach to baking is partly to thank for winning her the top spot in the competition. Stay tuned to Instagram and the blog to follow her Make Me a Baker journey over the next 6 months! In the meantime, click here to get to know a little more about her.
To find out more about how you can be part of a future Make Me a Baker program, click here.
Photography by Hannah Scott.
Prep 2hrBake 40-45minMakes 12-15 serves
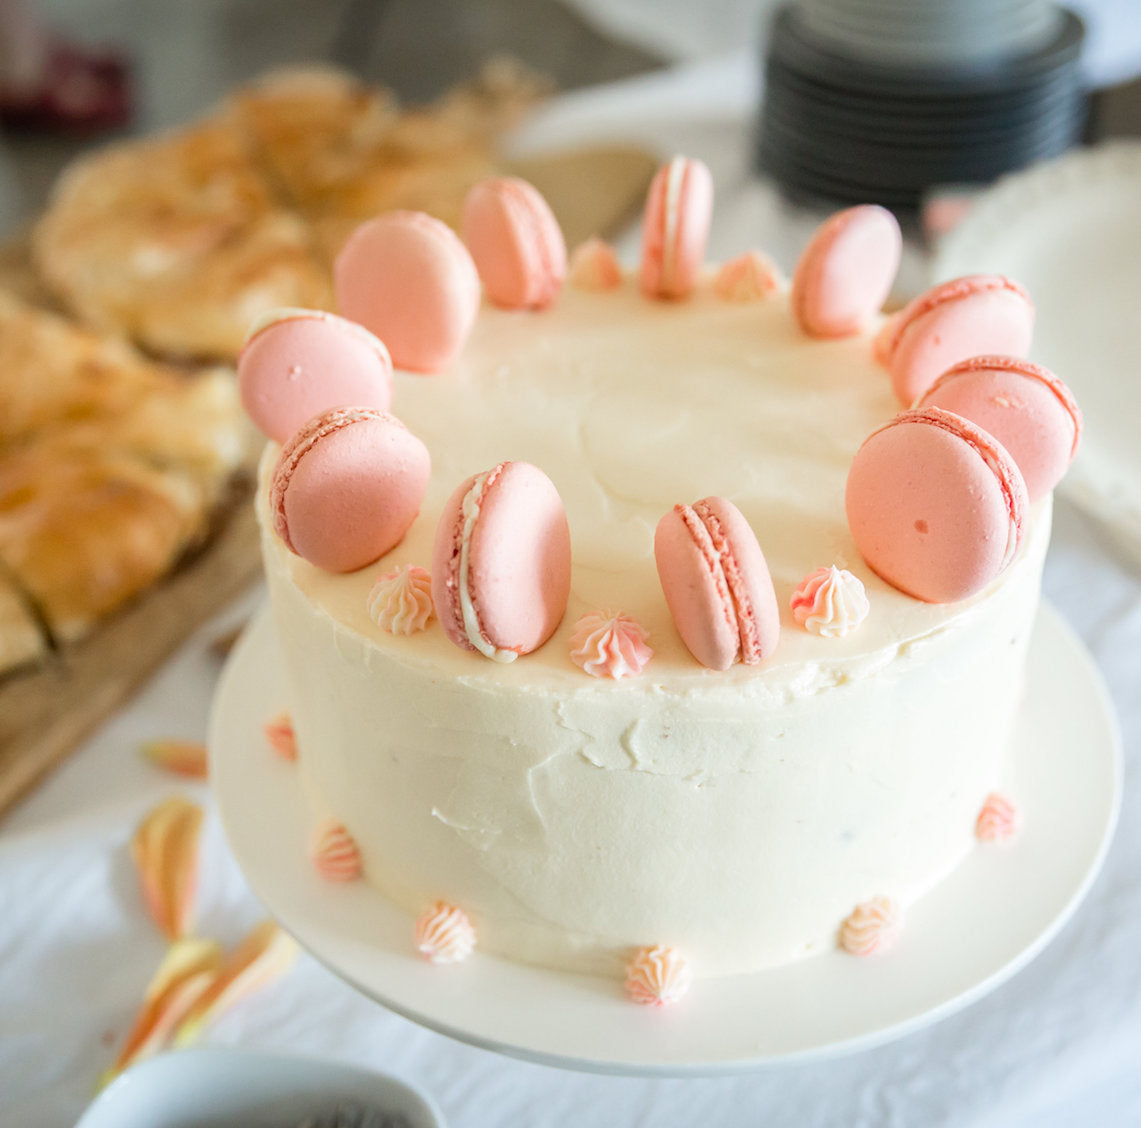
This impressive cake was created by Débora Bueno Leite, one of our Make Me a Baker students, for her graduation. It marries two gems from the state of Minas Gerais in her native Brazil, guava paste and cheese – when served together they are known as ‘Romeo & Juliet'.
Ingredients
- 250ml (1 cup) milk combined with 2 tablespoons sweetened condensed milk
- 11 guava macarons, to decorate
Cake layers
- Melted butter, to grease
- 375g (2½ cups) plain flour
- 2½ teaspoons baking powder
- ½ teaspoon table salt
- 250g butter, at room temperature
- 440g (2 cups) caster sugar
- 1 teaspoon natural vanilla extract or essence
- 4 eggs, at room temperature
- 250ml (1 cup) full-cream milk
Guava Filling
- 200g good-quality guava paste (available from good delicatessens and specialty food stores)
- 125ml (½ cup) water
Cream Cheese Filling
- 300g cream cheese, at room temperature
- 200ml cold thickened cream
- 160ml (2/3 cup) sweetened condensed milk
Cream Cheese Frosting
- 680g cream cheese, at room temperature
- 115g unsalted butter, at room temperature
- 240g icing sugar, sifted
- 2 teaspoons natural vanilla extract or essence
- Queen red food colour gel, to tint
Method
- Preheat oven to 180°C (160°C fan-forced). Grease two deep 20cm round cake tins with melted butter and line the bases with non-stick baking paper.
- Sift together the flour, baking powder and salt into a medium bowl. Set aside.
- Use an electric stand mixer fitted with a paddle attachment to beat the butter, sugar, and vanilla for about 8 minutes, scraping down the side of the bowl when necessary, or until pale and creamy.
- Add the eggs, one at a time, beating well after each addition and scraping down the side of the bowl when necessary, until well combined.
- Add the flour mixture in four equal portions, alternating with the milk in three portions, mixing on lowest possible speed until just incorporated before adding the next; do not overmix.
- Divide the batter into the prepared tins and use the back of a metal spoon to smooth the surface. Bake in preheated oven, swapping the tins around halfway through baking, for 40-45 minutes or until a skewer inserted into the centre of the cakes comes out clean.
- Transfer the cake tins to a wire rack and allow the cakes to cool completely in the tins. Once cool, cover each tin tightly with plastic wrap and refrigerate overnight.
- To make the Guava Filling, combine with guava paste and water in a small saucepan and stir over medium heat until the paste is creamy. Set aside to cool completely.
- To make the Cream Cheese Filling, use an electric mixer with a paddle attachment to beat the cream cheese for about 3 minutes or until soft and creamy; set aside. Whisk the cream with a balloon whisk or electric mixer with a whisk attachment in a clean bowl until soft peaks form. Add the cream cheese with the condensed milk and whisk until just combined and smooth. Set aside.
- To make the Cream Cheese Frosting, use an electric mixer fitted with a paddle attachment to beat the cream cheese for about 3 minutes or until smooth and creamy; transfer to another bowl and set aside. Beat the butter about 3 minutes or until pale and creamy. Add the cream cheese, icing sugar and vanilla and beat until well combined and frosting is creamy.
- Remove the cakes form the tins. Cut each cake layer in half horizontally and then brush with the milk and sweetened condensed milk mixture to moisten. Place one layer on a serving plate or cake stand and spread with some of the Cream Cheese Filling and then one third of the Guava Filling. Continue layering with the remaining cake layers, Cream Cheese Filling and Guava Filling, finishing with a cake layer, top side down.
- Spread the side and top with Cream Cheese Frosting to cover, using a spatula or cake scraper to smooth evenly.
- Add a little red gel colour to the remaining Cream Cheese Frosting and swirl so that it is marbled. Place in a piping bag fitted with a small star nozzle (Débora used a Wilton #18 star) and pipe small rosettes around the side and top of the cake (as shown in the image). Place the macarons between the rosette on the top to decorate.
Baker's Tips
- This cake will keep in an airtight container in the fridge for up to 3 days. Serve at room temperature.
This recipe was created by Débora for her Make Me a Baker graduation using inspiration from a number of different recipes including those from www.howtocakeit.com, Gretchen’s Bakery YouTube channel, Karen Munhoz YouTube channel and a class she took with MakMak Macarons.
Photography by Amy Piddington.
Prep 40min (+1hr cooling and 2hr standing time)Bake 30minMakes 10-12 serves
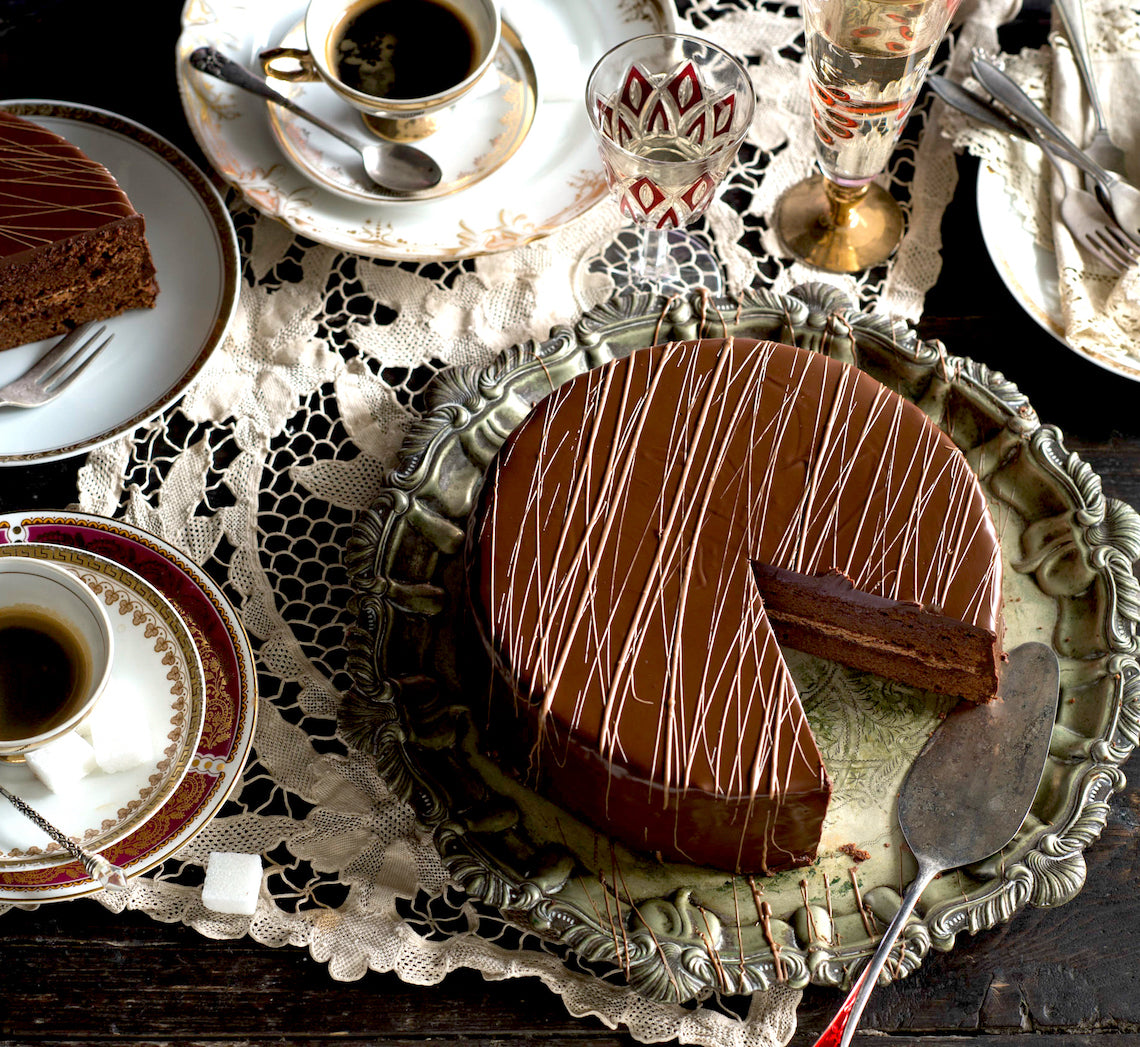
Possibly the most famous cake in the world, and certainly the pride of Austria, Sacher Torte was created by Franz Sacher, a 16-year-old apprentice stepping in for an ill head chef, to impress the guests of Prince Wenzel von Metternich. And as they say, the rest is now cuisine history. This elegant, rich and enticing cake is now loved the world over.
Ingredients
Melted butter, to grease
125g unsalted butter, softened
125g (1 cup) icing sugar, sifted
1½ teaspoons natural vanilla essence or extract
6 eggs, at room temperature, separated
175g good-quality dark chocolate (54% cocoa), chopped, melted and cooled to room temperature
110g (¾ cup) plain flour
110g (½ cup) caster sugar
85g (¼ cup) apricot jam, warmed and sieved
40g good-quality milk chocolate, melted, to decorate
Thick or whipped cream, to serve
Chocolate Glaze
300g good-quality dark chocolate (54% cocoa)
60g butter, cubed
Method
- Preheat oven to 180°C (160°C fan-forced). Brush 2 x shallow 20cm round cake tins with melted butter to grease and line the bases with rounds of non-stick baking paper.
- Use an electric mixer to beat the butter, icing sugar and vanilla until pale and creamy. Add the egg yolks and beat until well combined and creamy. Beat in the cooled melted chocolate until well combined. Use a large metal spoon or spatula to fold in the flour until just combined.
- Use an electric mixer with a whisk attachment to whisk the egg whites in a large clean, dry bowl until soft peaks form. Add the caster sugar and whisk on medium-high speed until thick and glossy and all the sugar has dissolved (see Baker’s tip). Add half the egg white mixture to the chocolate mixture and use a large metal spoon or spatula to fold in to ‘loosen’ the mixture. Add the remaining egg white mixture and fold until just evenly combined.
- Divide the mixture evenly between the tins and use the back of a spoon to smooth the surface. Bake in preheated oven for 30 minutes or until a skewer inserted into the centre of the cakes comes out clean. Stand in the tins for 10 minutes before turning onto a wire rack to cool (this will take about 1 hour).
- Once cool, spread one cake layer with the warmed sieved jam and then top with the second layer, bottom side up. Place the cake on a wire rack over a tray and set aside while making the chocolate glaze.
- To make the chocolate glaze, combine the chocolate and butter in a heatproof bowl and place over a saucepan of barely simmering water (make sure the base of the bowl doesn’t touch the water). Stir occasionally until just melted and combined. Use a plate knife to spread a little of the glaze over the outside of the cake to form a ‘crumb coat’ and to even the surface. Place in the fridge for 20 minutes or until set. Remove from the fridge and carefully pour over the rest of the glaze, allowing it to run down the sides of the cake to coat evenly. Tap the cake, still on the rack, gently on the tray to remove any air bubbles and to settle the glaze. Use a fork to drizzle the milk chocolate over the top of the cake to decorate. Set aside for 2 hours or until the glaze sets. Serve cut into small wedges with cream.
Baker’s Tips
- To test if all the sugar has dissolved, rub a little of the egg white and sugar between two fingers – you will be able to feel if there is still undissolved sugar. Whisk for another minute if not completely dissolved before testing again.
- This cake will keep in an airtight container at room temperature for up to 4 days.
This recipe is from Anneka's SBS Food online column, Bakeproof: Austrian Baking.
CLICK HERE for more Bakeproof columns and recipes.
Photography by Alan Benson.
Prep 45min (+30min cooling time per batch)Bake 45minMakes 12-14 serves
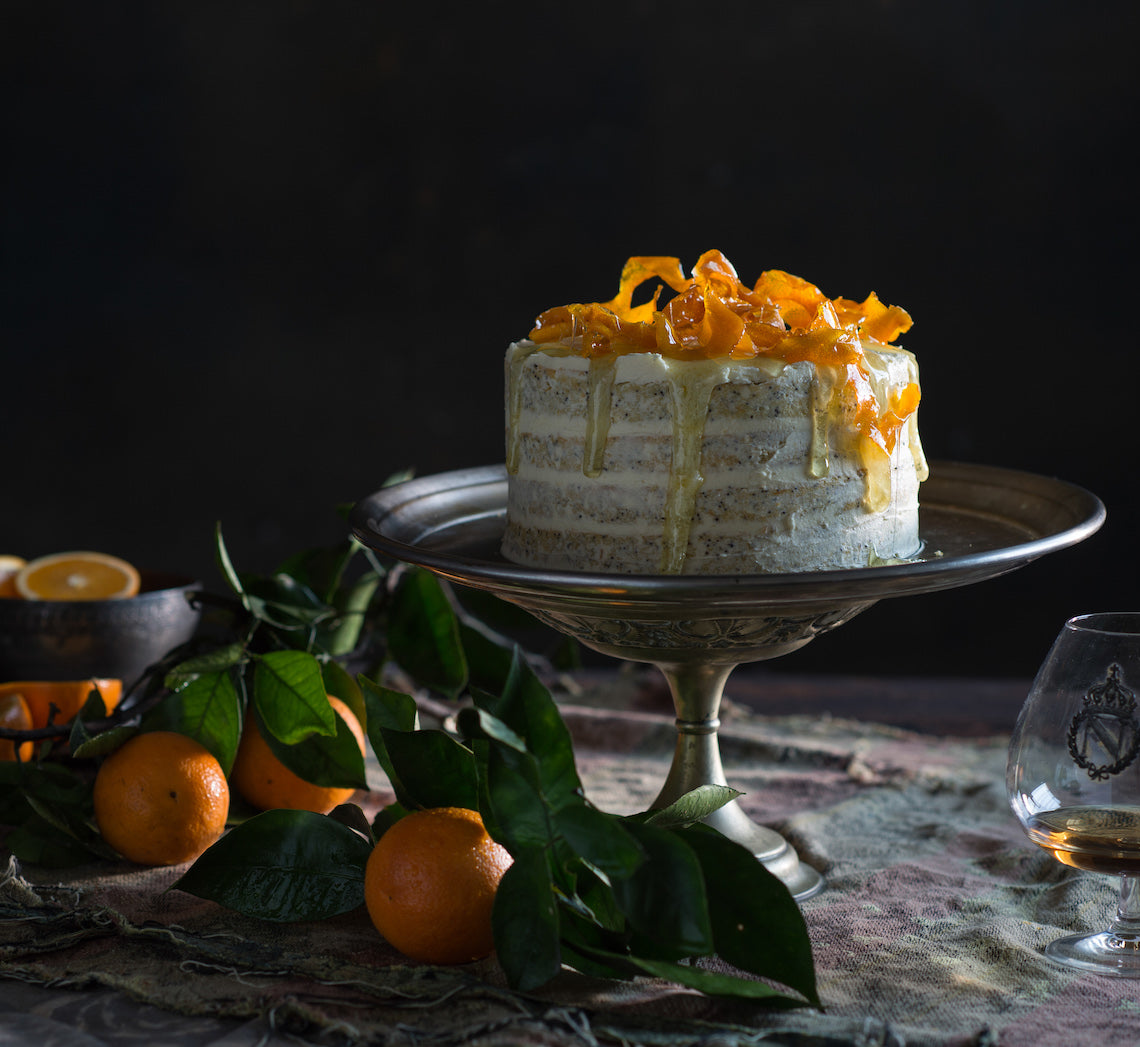
This pretty cake, with its heavenly orange blossom-scented frosting, is currently one of my favourite 'special occasion' cakes – particularly for birthday celebrations. The cake layers are baked in two batches but if you are lucky enough to have four cake pans that can fit in your oven all at once, feel free to make the mixture in one lot and bake them all together.
Ingredients
Melted butter, to grease
Orange poppy seed cake layers
3 oranges
3 tablespoons poppy seeds
125g (½ cup) sour cream
250g butter, cubed, at room temperature
300g (1⅓ cups) caster sugar
4 eggs
350g (2⅓ cups) plain flour
3 teaspoons baking powder
Candied orange rind
3 oranges
220g (1 cup) caster sugar
250ml (1 cup) water
Orange blossom water buttercream
250g butter, at room temperature
375g (3 cups) icing sugar, sifted
3-4 teaspoons orange blossom water (or to taste)
Method
- To make the cake layers, preheat the oven to 180°C. Grease two shallow 20cm (base measurement) round cake tins with melted butter and line the bases with rounds of non-stick baking paper.
- Finely grate the rind from the oranges and set aside. Juice the fruit and measure 125ml (½ cup), reserving the rest for another use. Divide the juice evenly between two medium bowls. Add half the poppy seeds and half the sour cream to each. Set aside.
- Use an electric mixer to beat 125g of the butter, 150g of the sugar and half the orange rind until pale and creamy. Add 2 of the eggs, one at a time and beating well after each addition. Sift together 175g of the flour and 1½ teaspoon of the baking powder. Fold half the flour mixture through the butter mixture until just combined. Fold through one quantity of the poppy seed mixture and then the remaining flour mixture until just combined.
- Divide the cake mixture evenly between the prepared cake tins and use the back of a metal spoon to smooth the surfaces. Bake in the preheated oven for 20-25 minutes or until a skewer inserted into the centre of the cakes come out clean. Stand in the tins for 5 minutes before turning onto wire racks, topside down, to cool (this will take about 30 minutes).
- Repeat with the remaining poppy seed mixture and ingredients to make two more cake layers.
- Meanwhile, to make the candied orange rind, use a vegetable peeler to remove the rind from the oranges in wide strips. Use a small sharp knife to remove any white pith from the rind. Combine the sugar and water in a small saucepan and stir over low heat until the sugar dissolves. Add the orange rind strips and bring to a simmer. Simmer, without stirring, for 10-15 minutes or until the rind is translucent. Use a fork to transfer the rind from the syrup to a wire rack. Set aside. Reserve the syrup.
- To make the orange blossom water buttercream, use an electric mixer to beat the butter, icing sugar and orange blossom water in a medium bowl until very pale and creamy. Cover and set aside at room temperature.
- To assemble the cake, place a cake layer, topside down, on a serving plate or cake stand. Spread with a little of the buttercream and then top with another layer of cake. Continue to layer with some of the remaining buttercream and cake layers, finishing with a cake layer. Spread a thin layer of buttercream around the outside of the cake so that the cake layers show through. Spread the remaining buttercream on top, swirling as desired. Decorate with the candied orange rind and drizzle with some of the remaining syrup just before serving.
Baker's Tips
- This cake will keep in an airtight container at room temperature for up to 3 days.
This recipe is from Anneka's SBS Food online column, Bakeproof: Citrus.
CLICK HERE for more Bakeproof recipes.
Photography by Alan Benson.


