
- home
- BAKERECIPES
BakeRecipes
Bringing real baking into your home with deliciously simple recipes.
Prep 30min (+1hr30min cooling time)Bake 1hr 10minMakes 1 loaf
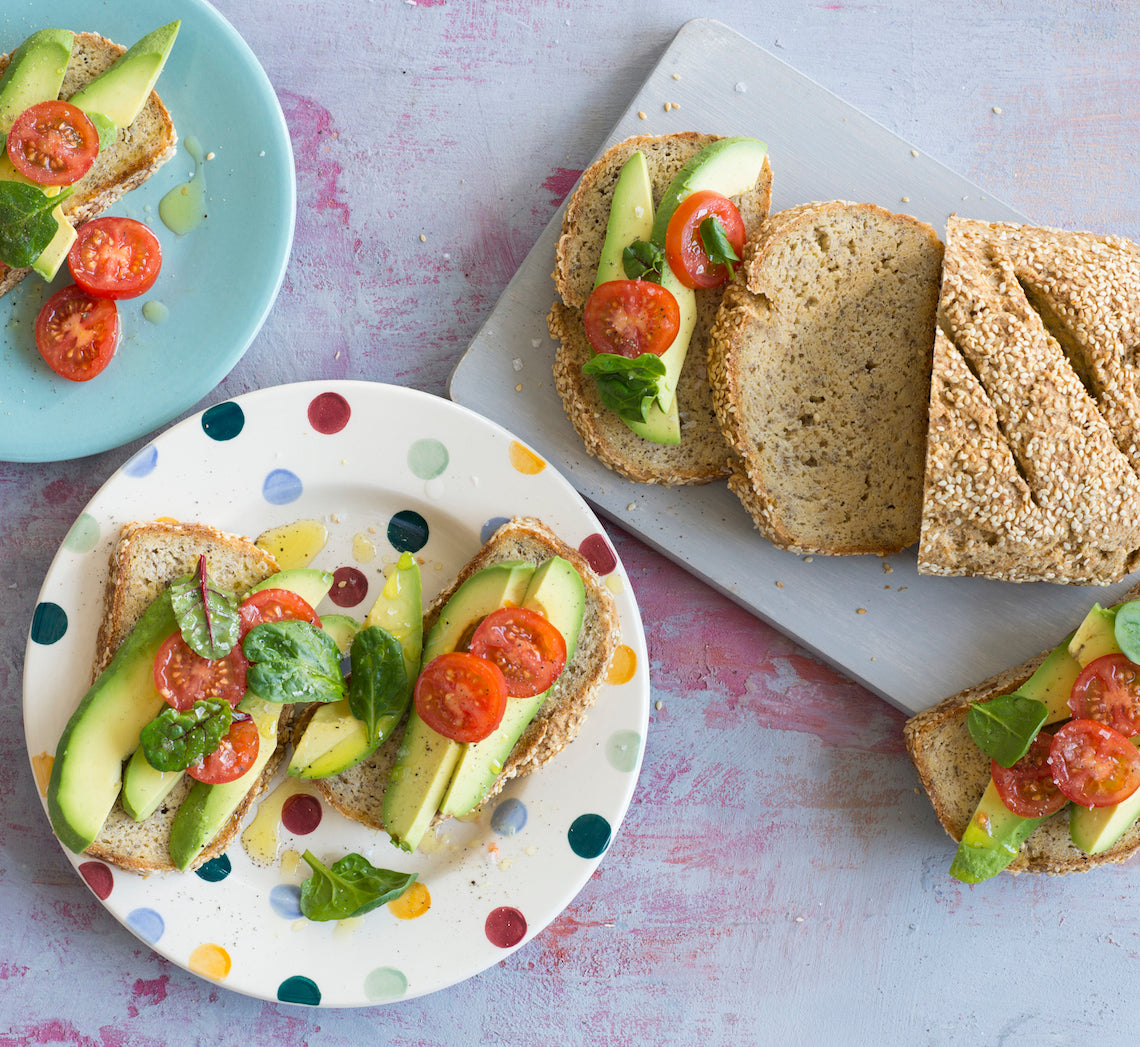
This bread is almost the complete opposite of most commercially made gluten-free breads - wonderfully substantial (it won’t ‘dissolve’ in your mouth), moist and flavoursome without containing any gums. The key is the inclusion of psyllium husks and chia seeds to give the dough flexibility and structure in the absence of gluten. It’s great fresh, but toasting really brings out the nuttiness of the flours used.
Ingredients
150g (1 cup) sorghum flour
75g (½ cup) millet flour
70g (½ cup) brown rice flour
65g (½ cup) sweet (glutinous) rice flour
90g (½ cup) fine polenta
1½ teaspoons fine sea salt
625ml (2½ cups) lukewarm water
7g (1 sachet) instant dried yeast
2 tablespoons honey
2 tablespoons light olive oil, plus extra to grease
25g (⅓ cup) psyllium husks
50g (¼ cup) chia seeds
2 tablespoons sesame seeds, to coat and sprinkle
Method
- Combine the sorghum, millet, brown rice and sweet rice flours, polenta and salt in a large bowl.
- Combine 60ml (¼ cup) of the lukewarm water, yeast and 1 teaspoon of the honey in a small dish and whisk to combine with a fork. Set aside in a warm, draught-free place for 5 minutes or until frothy.
- Meanwhile, use a balloon whisk to whisk together the remaining 560ml (2¼ cups) lukewarm water, remaining honey, olive oil, psyllium husks and chia seeds until evenly combined. Set aside for 3 minutes or until the mixture thickens slightly.
- Whisk the yeast mixture into the psyllium husk mixture. Add to the dry ingredients and use a wooden spoon to mix to a soft, slightly sticky dough.
- Cover the bowl with plastic wrap and set aside in a warm, draught-free place for 1½ hours or until risen slightly and is spongy in texture.
- Grease a 11.5cm x 21cm (base measurement) loaf tin with a little extra oil and sprinkle with 1½ tablespoons of the sesame seeds to coat lightly. Turn the dough onto a benchtop, shape into a 20cm log and place in the greased tin. Brush the top with a little water and sprinkle with the remaining sesame seeds. Cover with plastic wrap and set aside and place in a warm, draught-free place for 1 hour or until well risen.
- Preheat the oven to 200°C (180°C fan-forced).
- Use a sharp knife to cut 4 diagonal slits across the top of the loaf. Bake 1 hour and 10 minutes or until golden, cooked through and sounds hollow when tapped on the top.
- Turn the loaf out onto a wire rack and set aside to cool completely - this will take about 1½ hours) before slicing.
Baker's Tips
- This bread is best kept in a cloth or paper bag at room temperature in a cool spot where it will keep for up to 5 days.
- To freeze, place whole or sliced in a sealed freezer bag or airtight container and freeze for up to 3 months. Thaw at room temperature or toast slices straight from the freezer.
This recipe is from Anneka's SBS Food online column Bakeproof: Gluten-free baking. Click here for more Bakeproof columns and recipes.
Photography by Alan Benson.
Prep 5 days
A practical, step-by-step guide with tips, tricks and timelines to making your own sourdough starter and baking with it.
This method is logical and simplified for beginner bakers to follow (and expert bakers to hone). While the process of making this starter is a little lengthy (at least 5 days) it isn’t difficult, if you follow the steps and take note of my tips.
The detailed steps are below, but here is a nifty quick reference to keep you on track:
Day 0
125g flour + 125g water, stand for 48 hours
↓ ↓
Day 2
1st feeding: 125g starter + 125g flour + 125g water, stand for 24 hours
↓ ↓
Day 3
2nd feeding: 125g starter + 125g flour + 125g water, stand for 24 hours
↓ ↓
Day 4
3rd feeding: 125g starter + 125g flour + 125g water, stand until doubled in size (8—24 hours)
↓ ↓
Day 5
If not doubled in size, feed every 12 hours until doubled in 8 hours or less
↓ ↓
Use 'active' starter OR store at room temperature or in fridge.
Sourdough starter method - Day 0
A young starter is quite sensitive so when establishing your sourdough starter it is important to follow the process (measuring the flour and water accurately, feeding at the suggested times, etc.) But once mature and strong, it will have more flexibility and will be more resilient to changes so don’t worry too much if you occasionally miss a feeding by a day or so or if your quantities are slightly out - just get back on track as soon as you can and your starter will bounce back.
Ingredients
Starter
125g organic wholemeal flour (see Baker’s Tips #1 and Variations)
125g bottled water, at room temperature (see Baker’s Tips #2 and #3)
To feed the starter
unbleached organic plain flour (see Baker’s Tips #1)
bottled water, at room temperature
Method
Day 0
- Place the wholemeal flour and water in a medium bowl and stir until well combined.
- Weigh a clean, dry jar with a lid that you are going to store your sourdough starter in and note the weight down (see Baker’s Tips #4).
- Transfer the flour mixture to the jar, seal and set aside in a warm draught-free place (see Baker’s Tips #5) for 48 hours (see Baker’s Tips #6).
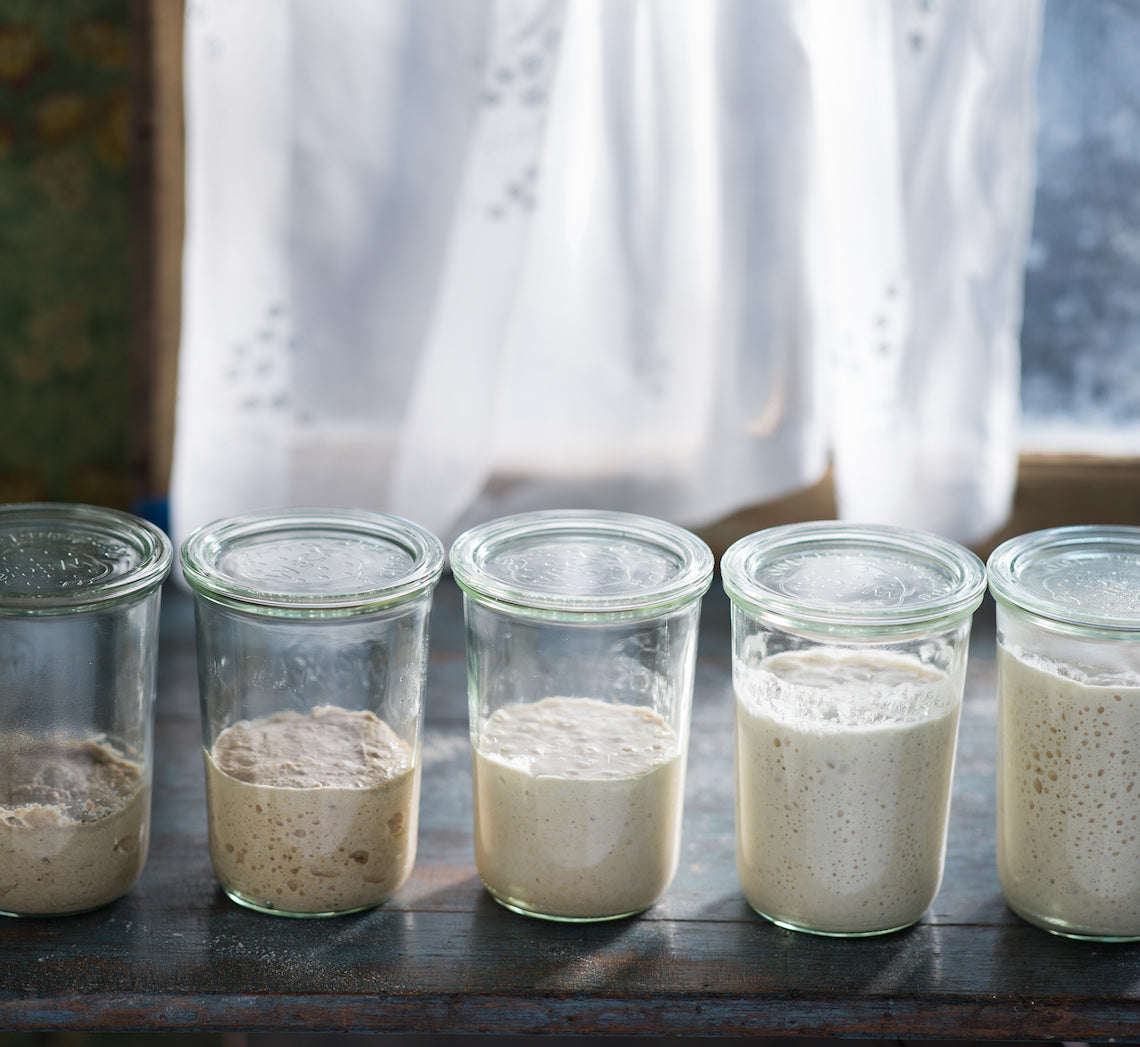
After 12 hours (see images, jar 1, from left), there won’t be much change in your mixture although a few bubbles may start to appear through the side of the jar.
After 48 hours (see images, jar 2, from left), the starter may have risen just a little and a dark skin would have formed. There may be a few bubbles on the surface and also noticeable through the side of the jar – but not always. Proceed to the first feeding.
If you don't see these signs, set aside for another 24 hours – if there are no signs of activity by then, just continue with the first feeding. The aroma will be quite unpleasant.
Variations
Rye sourdough starter: replace the wholemeal flour with 100g rye flour (and feed with unbleached organic plain flour).White sourdough starter: replace the wholemeal flour with 125g unbleached plain flour (and feed with unbleached organic plain flour).
Baker's Tips
#1. In my experience, I’ve had the best results with starting a sourdough starter with organic wholemeal flour and then switching to unbleached organic plain flour for feeding until it is established. Once mature, you can then just switch to regular plain flour or bread flour for feeding, or even occasionally feed it with wholemeal flour again to add a little ‘nuttiness’ to its flavour.
#2. Use bottled water (or water that is filtered and has been allowed to stand uncovered for at least 4 hours for the chlorine to dissipate) to give your sourdough starter the best possible chance of success.
#3. It’s a good idea to embrace measuring both your flour and water in grams when making and maintaining your sourdough starter. It is the most accurate way of measuring and will give you the best possible chance of success.
#4. A sourdough starter can be mixed and kept in a non-reactive container such as a glass jar. Look for one that has straight sides and a reasonable sized mouth to make mixing easy. This starter recipe will need a jar that has a capacity of at least 1 litre (4 cups) and, before making your starter, ensure that it is very clean and dry. It’s a good idea to note the weight of your jar so that it is easy to calculate how much sourdough starter you need to remove and discard every time you feed it.
#5. The ideal temperature for proving sourdough starter is between 21°C-23.5°C (70ºF-74ºF). Don’t be tempted to keep the starter at higher temperatures to accelerate the process as it won’t necessarily mean you will get a better result. Higher temperatures can encourage more ‘bad’ bacteria to grow than the ‘good’ ones, which will ultimately ruin the starter. If your kitchen is cold, I find placing it under the stove rangehood with the light on or on top of the fridge gives a warm (but not too warm), consistent temperature.
#6. After each feeding, it’s a good idea to mark the side of the jar with tape (or an elastic band) so you can see how much it grows in the specified time.
Sourdough starter method - Day 2
First feeding after 48 hours
- Remove and discard all but 125g of the sourdough starter from the jar.
- Add 125g plain flour and 125g water to the jar and stir well to combine.
- Use a clean spatula to scrape the sides of the jar down to clean (see Baker’s Tips #7).
- Seal the jar and set aside in a warm, draught-free place for 24 hours.
After the first feeding and rise, the starter would have risen slightly (up to 50%) (see images, jar 3, from left) and random bubbles will be visible on the surface as well as through the side of the jar indicating the wild yeast is active and starting the multiply.
Baker's Tips
#7. Make sure you scrape down the side of the jar after every feed – this will make it easier to see how much the starter has risen each time.
Sourdough starter method - Day 3
Second feeding after 24 hours
- Remove and discard all but 125g of the sourdough starter from the jar.
- Add 125g plain flour and 125g water to the jar and stir well to combine.
- Use a clean spatula to scrape the sides of the jar down to clean.
- Seal the jar and set aside in a warm, draught-free place for 24 hours.
After the second feeding and rise there will be more visible bubbles but they will be smaller and more uniform (see images, jar 4, from left). The aroma will be less pungent and a little sweeter.
Sourdough starter method - Day 4
Third feeding after 24 hours
- Remove and discard all but 125g of the sourdough starter from the jar.
- Add 125 g plain flour and 125g water to the jar and stir well to combine.
- Use a clean spatula to scrape the sides of the jar down to clean.
- Seal the jar and set aside in a warm, draught-free place until doubled in size (8-24 hours, depending on the strength of your sourdough).
Sourdough starter method - Day 5
Depending on the strength of your sourdough and how quickly it ferments it may double in size in less than 24 hours. You may also notice that once it doubles it starts to lose volume and falls back on itself indicating that it needs regular feeding from this point.
If your starter has not doubled in 24 hours or less, continue the discarding and feeding process every 12 hours until it has the ability to double in size in 8 hours or less. When it does, it is now "active" and ready to use, or store in the fridge to be used at a later date (see Baker’s Tips #8).
Baker's Tips
#8. A young starter is quite sensitive so when establishing your sourdough starter it is important to follow the process (measuring the flour and water accurately, feeding at the suggested times, etc.) But once mature and strong, it will have more flexibility and will be more resilient to changes so don’t worry too much if you occasionally miss a feeding by a day or so or if your quantities are slightly out - just get back on track as soon as you can and your starter will bounce back.
What's that smell? Aroma changes in sourdough starter
When making and establishing a sourdough starter you will notice that the aromas it gives off change quite considerably from one day to the next. This is because the bacteria present is changing and ‘settling’.
To start, in the first day or so, it can smell quite foul but will mellow with subsequent feedings and over time the smell will become slightly tangy and sweet and then more sour. You will also notice once the sourdough starter has matured and is more stable, the aroma will become more consistent too.
The aroma will also change depending on where it is in the feeding cycle once established, mature and healthy; it will have a slightly sweet scent when first fed, and will become more sour as it stands and ripens ready for use.
Sourdough starters can be unpredictable
Remember all sourdough starters are different. There are so many things that can vary while making a sourdough starter (including the type of wild yeast and bacteria present, the temperature the starter is held at, etc.) and ultimately this will affect how long it takes for your starter to become mature.
Sometimes, a starter may seem to be on the right track and then, for whatever reason, it doesn’t progress at all. If yours doesn’t reflect the exact description above, don’t lose heart, be patient and keep repeating the feeding process every 12 hours until your starter reflects the Day 5 description before you move onto maintaining, storing and using it.
How to use your sourdough starter in your baking
To make sure your sourdough starter is strong and 'active' enough to use in baking, you will need to feed, maintain and store it. Click here to find out how.
Once your starter is ready to use, this Basic sourdough bread recipe is a well-tested recipe to begin your sourdough baking.
This recipe is part of Anneka's SBS Food Bakeproof: Sourdough online column. For more Bakeproof columns and recipes, click here.
Photography by Alan Benson.
Prep 1hr (+12-14hrs / overnight + 30min standing, 8.5-10hrs proving and 1hr cooling time)Bake 45-50minMakes 2 standard loaves
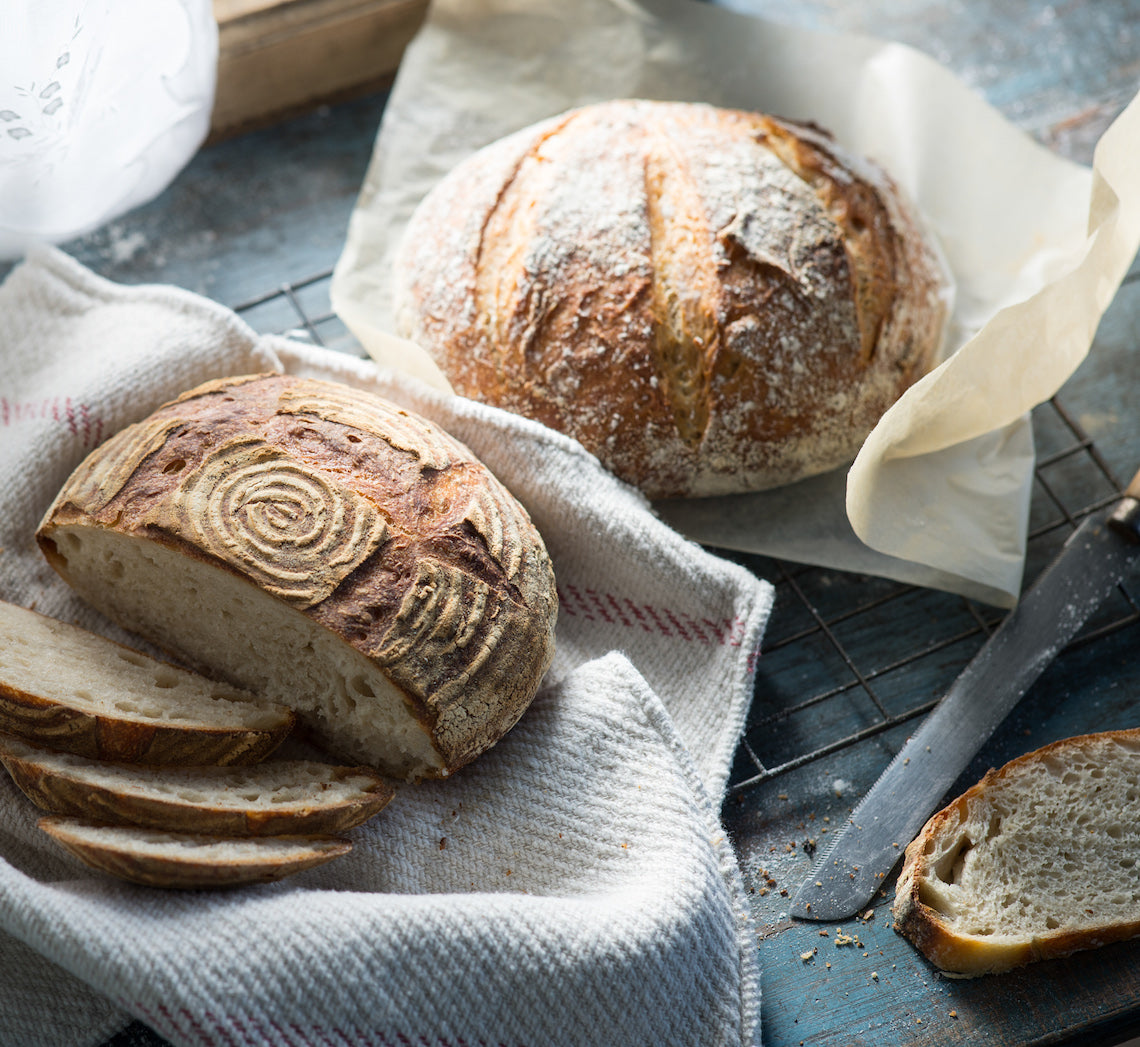
This is a well-tested recipe to begin your sourdough baking. It's made with white flour but you can use spelt instead.
This recipe is one I have made many times with great results. Before you get started, read over my tips and tricks for making and baking sourdough bread.
It does take at least 24 hours from start to finish but time is what helps create a great loaf of sourdough. I have included some time variations throughout to allow the making of this sourdough fit more easily into your day. This dough is folded six times (not kneaded) with rests in between. Below is a timeline to help you map out your day of baking:
Feed your sourdough starter to get it active, 4–8 hours
↓ ↓
Make levain, stand 12 hours (overnight)
↓ ↓
Mix levain + dough, stand 1 hour
↓ ↓
1st folding, prove 30 minutes
↓ ↓
2nd folding, prove 30 minutes
↓ ↓
3rd folding, prove 30 minutes
↓ ↓
4th folding, prove 30 minutes
↓ ↓
5th folding, prove 30 minutes
↓ ↓
6th folding, prove 1 hour (or up to 4 hours)
↓ ↓
Cut into loaves, prove 1—2 hours
↓ ↓
Shape loaves, prove 2—3 hours
(OR prove 1 hour, then transfer to fridge for 12-14 hours)
↓ ↓
Bake at 240ºC for 20 minutes, then 220ºC for 20-25 minutes
↓ ↓
Cool (1 hour), slice, eat!
Ingredients
Strong bread or pizza flour (12-15% protein content), for dusting
Rice flour, for preparing proving baskets (optional)
Levain
50g active sourdough starter80g (80ml/⅓ cup) lukewarm water
75g (½ cup) strong bread or pizza flour (12-15% protein content)
Dough
500g (500ml/2 cups) lukewarm water700g (4⅔ cups) strong bread or pizza flour (12-15% protein content), plus extra for dusting
2½ teaspoons fine sea salt
Method
- To make the levain, combine the sourdough starter, water and flour (see image 2) in a medium bowl and mix until well combined. Cover with plastic wrap and stand in a warm, draught-free place (approx. 24.5- 28°C) overnight (12-14 hours). The levain should have expanded and be very bubbly and may even double (see image 3) when it is ready to use (see Baker’s Tips #1).
- To make the dough, transfer the levain to a large bowl. Add half the water and use a balloon whisk or spatula to break up the levain until almost smooth. Stir in the remaining water. Add the flour to the levain mixture, sprinkle over the salt, and stir with a wooden spoon until combined and a very shaggy dough forms (see image 4). Cover the bowl with plastic wrap and set aside in a warm, draught-free place (approx. 24.5-28°C) for 1 hour.
- Instead of kneading, you are going to stretch and fold the dough (see Baker’s Tip #2). Leave the dough in the bowl and use your fingertips to pick up the top side of the dough (furthest away from you), lift it up as you stretch it, and then fold it back on itself (see image 5). Turn the bowl a quarter turn and repeat this stretching and folding process three more times, turning the bowl after each fold. Cover with plastic wrap and set aside in a warm, draught-free place (approx. 24.5-28°C) for 30 minutes. Repeat this folding process five more times (which will be 6 foldings in total), resting the dough for 30 minutes between each time you fold (see Baker’s Tip #3). When you begin this process the dough will be unevenly textured and shaggy in appearance but will become less so as you continue to stretch, fold and rest/prove. Once all six folding, stretching and resting processes have been completed, the dough will be very smooth, spongy and elastic (see image 6).
- Once you have stretched and folded the dough a total of 6 times, cover and place in a warm draught-free place (approx. 24.5-28°C) for 1 hour or until well puffed (see Baker’s Tips #4).
- Gently turn the dough out of the bowl onto a well- floured surface, being careful not to deflate it. Use a sharp knife or a pastry scraper to cut the dough in half (see image 7). Use well-floured hands or a pastry scraper to shape each dough portion into a loose round. Cover each dough round with an upturned bowl (large enough so the dough has room to rise) (see image 8) and leave to rest for 1 1⁄2-2 hours or until well puffed.
- Dust 2 clean, loosely woven cloths or tea towels generously with flour and then use your fingers to rub the flour into the cloth (see images 9). Line two 19-22cm (top measurement) round dough proving baskets or colanders with the cloths. If using traditional proving baskets, you don’t need to line them with a cloth (particularly if you want the bread to take on the lovely pattern of the basket), just dust and rub the insides of the baskets generously with rice flour and/or bread flour.
- Dust the top of one of the dough portions with flour. Turn it over and then use a similar folding action in Step 3 to shape into a round loaf, pulling the edges of the dough into the centre so that the dough surface underneath is tight to help shape it, only folding 6 times to help retain as much air as possible (see images 10-11). Gently turn the loaf over again (so that the smooth surface is on top) and use the palms of your hands to shape and even the round, stretching the top surface of the dough towards its base (see image 12). Be firm yet gentle when shaping the dough – you want to form the dough so it holds its shape but not be too forceful that you lose the valuable air bubbles (your technique will improve with practise). Repeat with the remaining dough portion. Dust the top of the loaves with a little more flour and use the palm of your hand to gently spread it over the top and sides to coat. Carefully turn each loaf over and lift into a proving basket or colander, top side down (see Baker’s Tip #5). If using cloths, loosely fold the overhanging edges over the dough.
- Place each of the loaves in their baskets or colanders in sealed plastic bags (see Baker’s Tip #6). Set aside in a warm draught-free place for 2-3 hours to prove or until well risen (see Baker’s Tip #7) (see image 13).
- Preheat the oven to 240ºC (220ºC fan-forced) (read tips here). Line two heavy baking trays with non-stick baking paper (see Baker’s Tips #8).
- Very gently turn a loaf onto a lined tray so that you retain as much air as possible, leaving the second loaf in the proving basket (see Baker’s Tip #9). Use a bread lame or very sharp knife to score the surface of the loaf, about 1.5cm deep, in a pattern of your choice (see image 14). Dip your hand in water and flick it onto the top of the loaf to sprinkle three times. Place the loaf in the oven, thrown a small bowlful of ice cubes into the bottom of the oven and immediately close the door (see Baker’s Tip #10). Bake for 25 minutes.
- Reduce the oven temperature to 220°C (200°C fan-forced) and bake for another 20-25 minutes or until the crust is deeply coloured and the loaves sound hollow when tapped on the base. Transfer the loaves to a wire rack and set aside to cool completely before slicing.
Baking in a Covered Pot
If baking your dough in a covered pot preheat it with the oven. Turn the dough out of the proving basket onto a piece of non-stick baking paper large enough to line the base and sides of the pot. Sprinkle the dough with water as in Step 10. Carefully lift the bread dough into the heated pot and score the top as desired. Cover with the lid and bake in the preheated oven for 25 minutes. Remove the lid and bake, without reducing the oven temperature, for a further 25 minutes or until a deep golden and the loaf sounds hollow when tapped on the base.
If wanting to brown the base crust further, remove the bread from the pot and place directly on the oven rack, without the baking paper, and bake for a further 5-10 minutes.
Spelt sourdough variation
Replace the strong bread or pizza flour with wholemeal spelt flour. Note, because of the lower gluten content of spelt wholemeal flour the resulting bread will be heavier and less ‘holey’ than the basic sourdough loaf. However, it will have a wonderful pleasant earthy flavour.
Baker's Tips
#1. When the levain is ready to use, a small teaspoon of it dropped into a glass of water should rise to the surface. This indicates that the levain is active and strong enough to produce enough carbon dioxide for it to be light enough to float.
#2. Stretching and folding the dough, along with the multiple resting/proving times in this recipe, replaces the kneading process to strengthen the gluten network in the dough, and produces a bread with quite large, uneven
air pockets and a great texture. The dough will be quite sticky and rubbing your fingers with a little water before stretching the dough will help stop it from sticking to them.
#3. It is particularly easy to lose track of how many times you have folded your dough. To make sure you don’t lose track, use a permanent pen to put a mark on the plastic wrap covering your dough, or write on a sticky note attached to the bowl, each time you finish a folding. Always remember to reset your timer too.
#4. In Step 4, you may need to stand/prove the dough for up to 4 hours depending on the proving temperature.
#5. Before adding the dough to the proving baskets or colanders make sure the surface of the dough is well floured – if it isn’t, it is likely to stick and the dough can lose valuable volume when you go to remove it which can result in a densely textured bread.
#6. Recycled plastic shopping bags or large snaplock bags work well to seal the dough in the basket or colander for the last proving stage. Sealing them in the bags means that the surface of the dough won’t dry out during proving. It will also help retain some of the heat generated by the yeast fermenting, helping to create a warm environment for your dough to prove in.
#7. When ready to bake, the dough will have risen by at least 50% and when poked with a finger a small indent will be left which will spring back slightly.
In Step 8, you can prove the loaves for 1-2 hours, or until risen slightly, in a warm draught-free place and then place them in the fridge overnight for 12-14 hours, if you wish. Stand the dough at room temperature in the baskets for 2-4 hours before turning out and baking.
#8. You can also bake the bread in a covered pot. See 'Baking in a Covered Pot' above.
#9. If you don’t have a large oven, it’s a good idea to bake the loaves separately. Leave the second loaf in the proving basket in the fridge while the first one bakes.
#10. If not baking your bread in a covered pot you can create steamy heat either by adding a tray with 1cm of water in the bottom of the oven before preheating it (as mentioned in Step 9) or by quickly throwing a bowlful of ice cubes into the bottom of your oven after adding your loaf and then immediately shutting the door. This will help give your bread the best possible ‘oven spring’ or rise when baking as well as contributing to a thick, crunchy crust (read tips here under 'Baking your Bread' to discover why).
This recipe is part of Anneka's SBS Food Bakeproof: Sourdough online column. For more Bakeproof columns and recipes, click here.
Photography by Alan Benson.
Prep 40min (+1.5hr proving and 20min standing time)Bake 25minMakes about 12
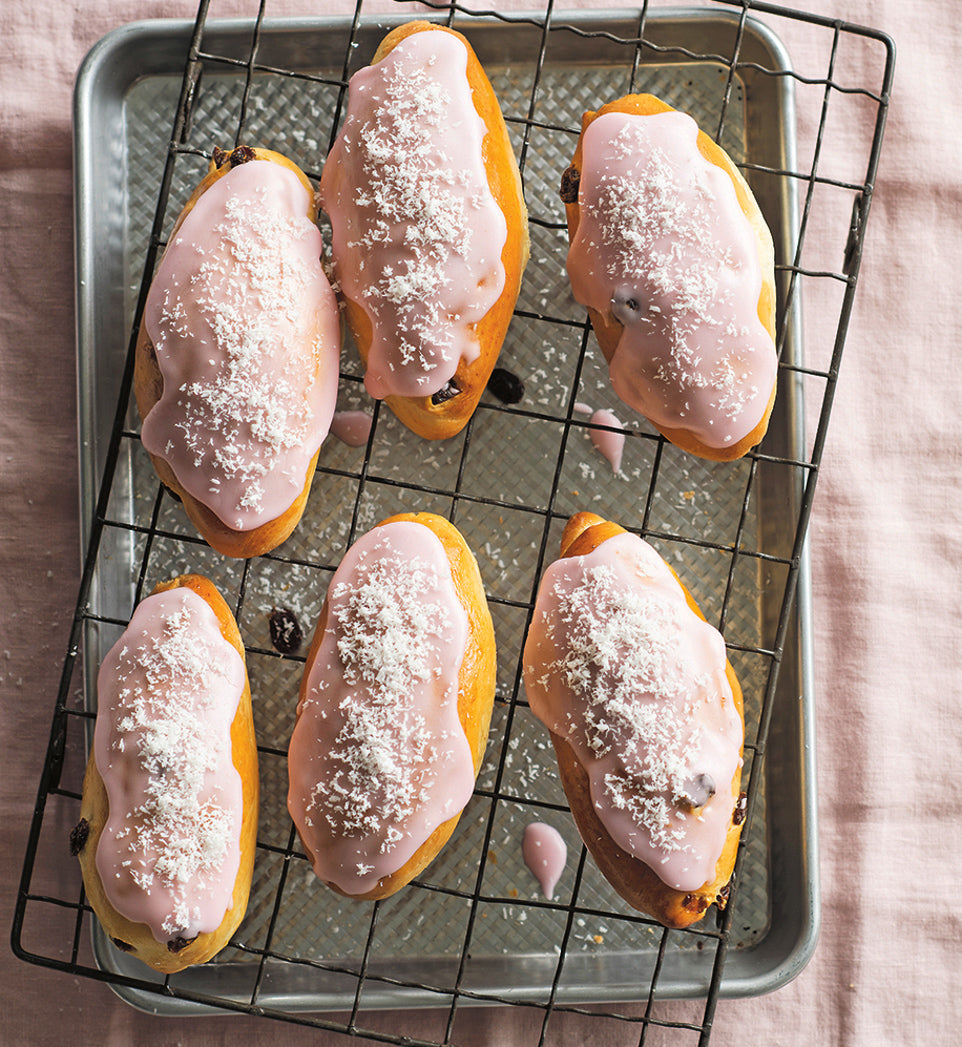
Just milk bread studded with sultanas, topped with pink icing and finished with coconut – it's the simplicity that gives the finger bun its appeal!
Ingredients
375g (2½ cups) strong bread or pizza flour, plus extra, to dust
2 tablespoons caster (superfine) sugar
60g (⅓ cup) sultanas (golden raisins)
7g (1 sachet) dried yeast
½ teaspoon salt
200ml milk
40g butter, cubed
2 eggs, at room temperature
1 teaspoon natural vanilla extract or essence
Melted butter, to grease
185g (1½ cups) pure icing (confectioners') sugar
5 teaspoons water
Pink food colouring (about 3 drops)
2 tablespoons desiccated coconut, to sprinkle
Method
- To make the dough, combine the flour, sugar, sultanas, yeast and salt in a large bowl and make a well in the centre. Combine the milk and butter in a small saucepan and heat over low heat for 2–3 minutes, or until the butter has melted and the milk is lukewarm. Remove from the heat. Whisk one of the eggs with the vanilla and add to the butter and milk mixture. Whisk to combine. Add to the flour mixture. Use a wooden spoon and then your hands to mix to a soft dough.
- Turn the dough onto a lightly floured bench top and knead for 8–10 minutes or until it is smooth and elastic and springs back when you push your finger into it.
- Brush a large bowl with melted butter, to grease. Add the dough, turning it to coat lightly with the butter. Cover with plastic wrap and place in a warm, draught-free place for 1 hour or until doubled in size.
- Preheat the oven to 180°C (160°C fan-forced). Line two baking trays with baking paper.
- When the dough has doubled in size, knock it back by punching it in the centre with your fist. Turn onto a lightly floured bench top and knead for 2–3 minutes or until smooth and elastic. Divide the dough into 12 equal portions. Shape each portion into a long oval shape about 12cm long and 3cm wide in the centre, and place on the lined trays, leaving about 5cm between them. Cover with a slightly damp tea towel (dish towel) and set aside in a warm, draught-free place for 30 minutes or until well risen.
- Whisk the second egg and brush the rolls with it to glaze. Bake in the preheated oven for 25 minutes, swapping the trays halfway through baking, or until the buns are golden and sound hollow when tapped on the base. Transfer to a wire rack to cool.
- To make the Topping, sift the icing sugar into a medium bowl. Use a wooden spoon to stir in the water and mix to a very thick pouring consistency. Add 2–3 drops of pink food colouring to tint the icing. Spread the cooled finger buns with the icing, allowing it to drizzle down the sides. Sprinkle with the coconut and set aside for 20 minutes for the icing to set before serving. These finger buns are best eaten on the day they are made.
Prep 30min (+40min proving)
Bake 15minMakes 4serves
Similar to Indian Naan, just lighter and flakier (and in my opinion yummier), taftan is a hearth-baked flatbread from Persia and Pakistan. It is often flavoured with saffron – as this one is – which gives it a striking golden hue and alluring flavour perfect to serve alongside curries and soups (although don’t discount just nibbling it on its own).
Ingredients
- 260g (1¾ cups) bread or pizza flour
- 2 teaspoons sugar
- 1 teaspoon salt
- ½ teaspoon instant dried yeast
- 70g (3½ tbsp) ghee, melted
- 2 tablespoon Greek-style natural yoghurt
- 80ml (⅓ cup) milk
- 1 tablespoon vegetable oil, plus extra to grease
- 2 teaspoons nigella seeds
- 1 good pinch saffron, soaked in 1 tbsp hot water
Method
- Combine the flour, sugar, salt and yeast in a large bowl and make a well in the centre. Combine the milk, yoghurt and 40g (2 tablespoons) of the melted ghee, add to the dry ingredients and use a wooden spoon and then your hands to mix to a soft dough. Turn onto a lightly floured bench top and knead for 8-10 minutes or until smooth and elastic and springs back when you push your finger into it.
- Brush a medium bowl with extra oil to grease, add the dough and turn to coat. Cover with plastic wrap and set aside in a warm, draught-free place for 40 minutes or until risen slightly.
- Preheat the oven to 200°C (180°C fan-forced). Line two large heavy baking trays with baking paper.
- Knock back the dough by punching it in the centre with your fist. Turn onto a lightly floured bench top and knead for 2-3 minutes or until smooth and elastic and the dough has returned to its original size. Divide the dough evenly into 2 portions and brush each with the oil to coat.
- Use a rolling pin to roll out a portion into a rough circle about 22cm in diameter and 5mm thick. Then use your hands to pull one end to shape into a teardrop, about 17cm x 24cm, pressing the centre to create a thicker edge. Transfer to a baking tray and then use your fingertips to make indents all over the surface of the flatbread. Repeat with the remaining dough portion. Brush the flatbreads with the saffron liquid and then sprinkle with the nigella.
- Bake for 10 minutes. Brush the surface of the flatbreads with the remaining melted ghee. Swap the trays around and then bake for a further 5-10 minutes or until the flatbreads are golden and cooked through.
- Serve warm or at room temperature along side a soup or curry.
Baker's Tips
This flatbread will keep in an airtight container at room temperature for up to 2 days but it is best eaten the day it is baked.This recipe is from Anneka's SBS Food online column, Bakeproof: Yeast-leavened Flatbreads.
CLICK HERE for more Bakeproof recipes.
Photography by Alan Benson.
Prep 30min (+2hr proving)
Bake 40-50minMakes 4 serves
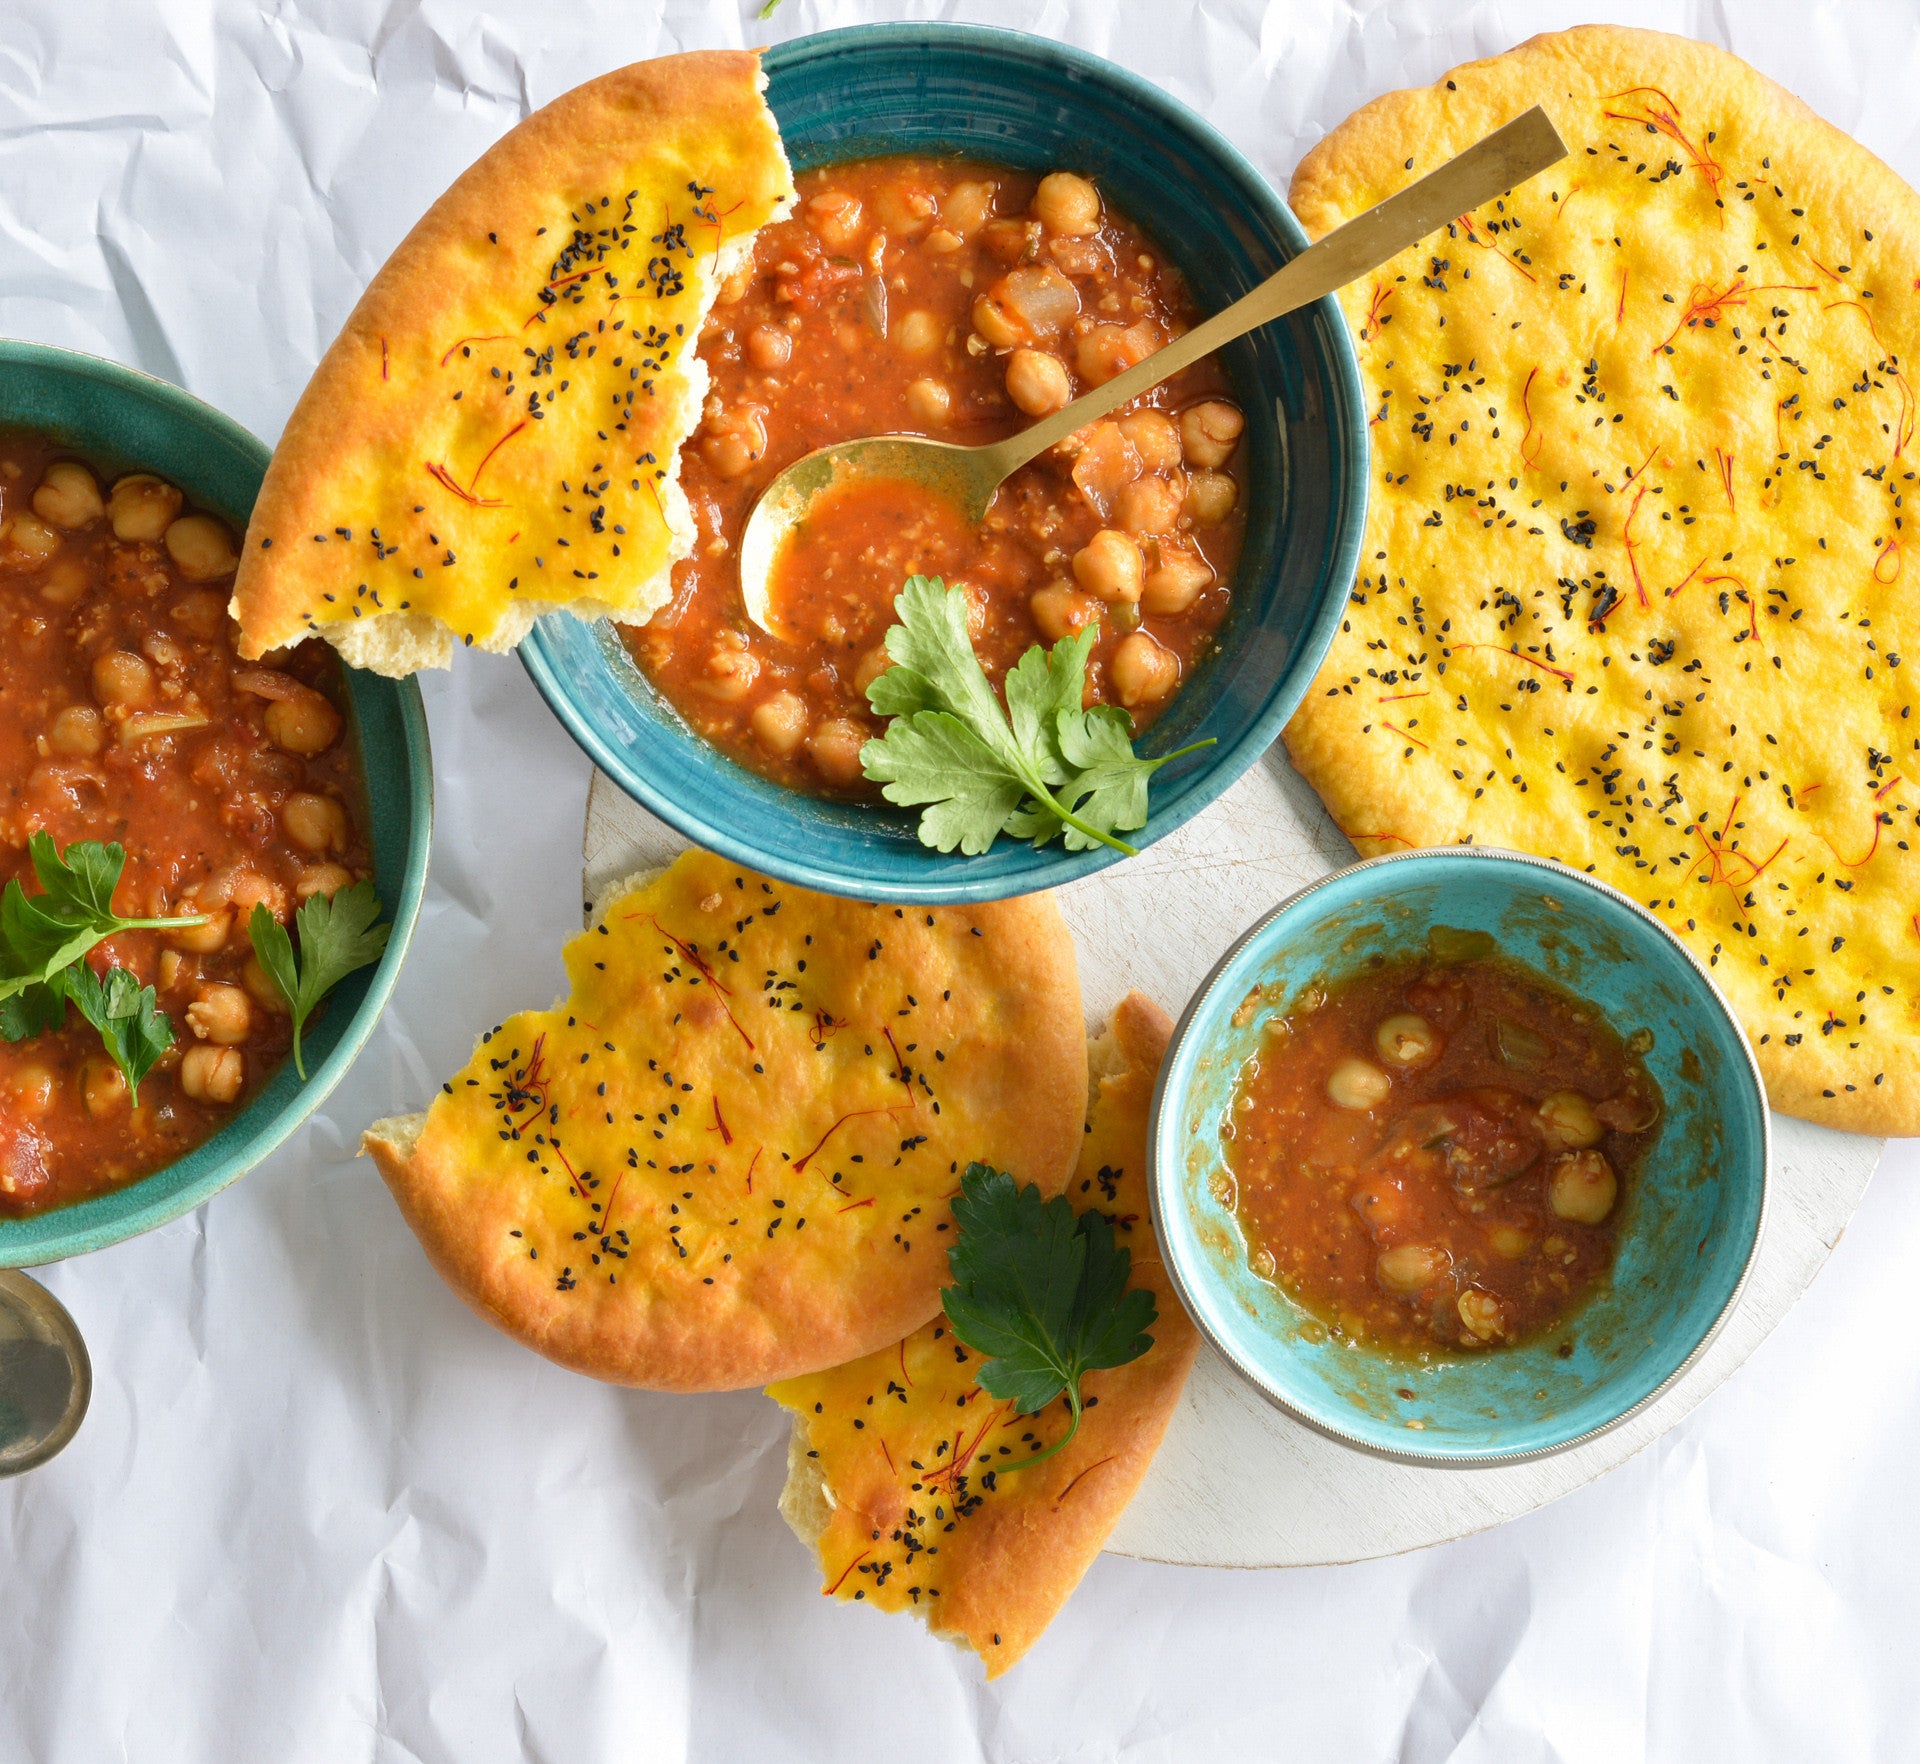
This mor-ish flatbread has a long fermentation time that gives its distinctive well-developed and slightly sour flavour. It’s perfect for dipping into and sopping up fragrant Middle Eastern stews and dips.
Ingredients
- 600 g (4 cups) plain flour
- 1 sachet (7 g) instant dried yeast
- 2 tsp sugar
- 1½ tsp salt
- 375 ml (1½ cups) warm water
- 130 g (½ cup) Greek-style natural yoghurt, at room temperature
- 1 tbsp olive oil
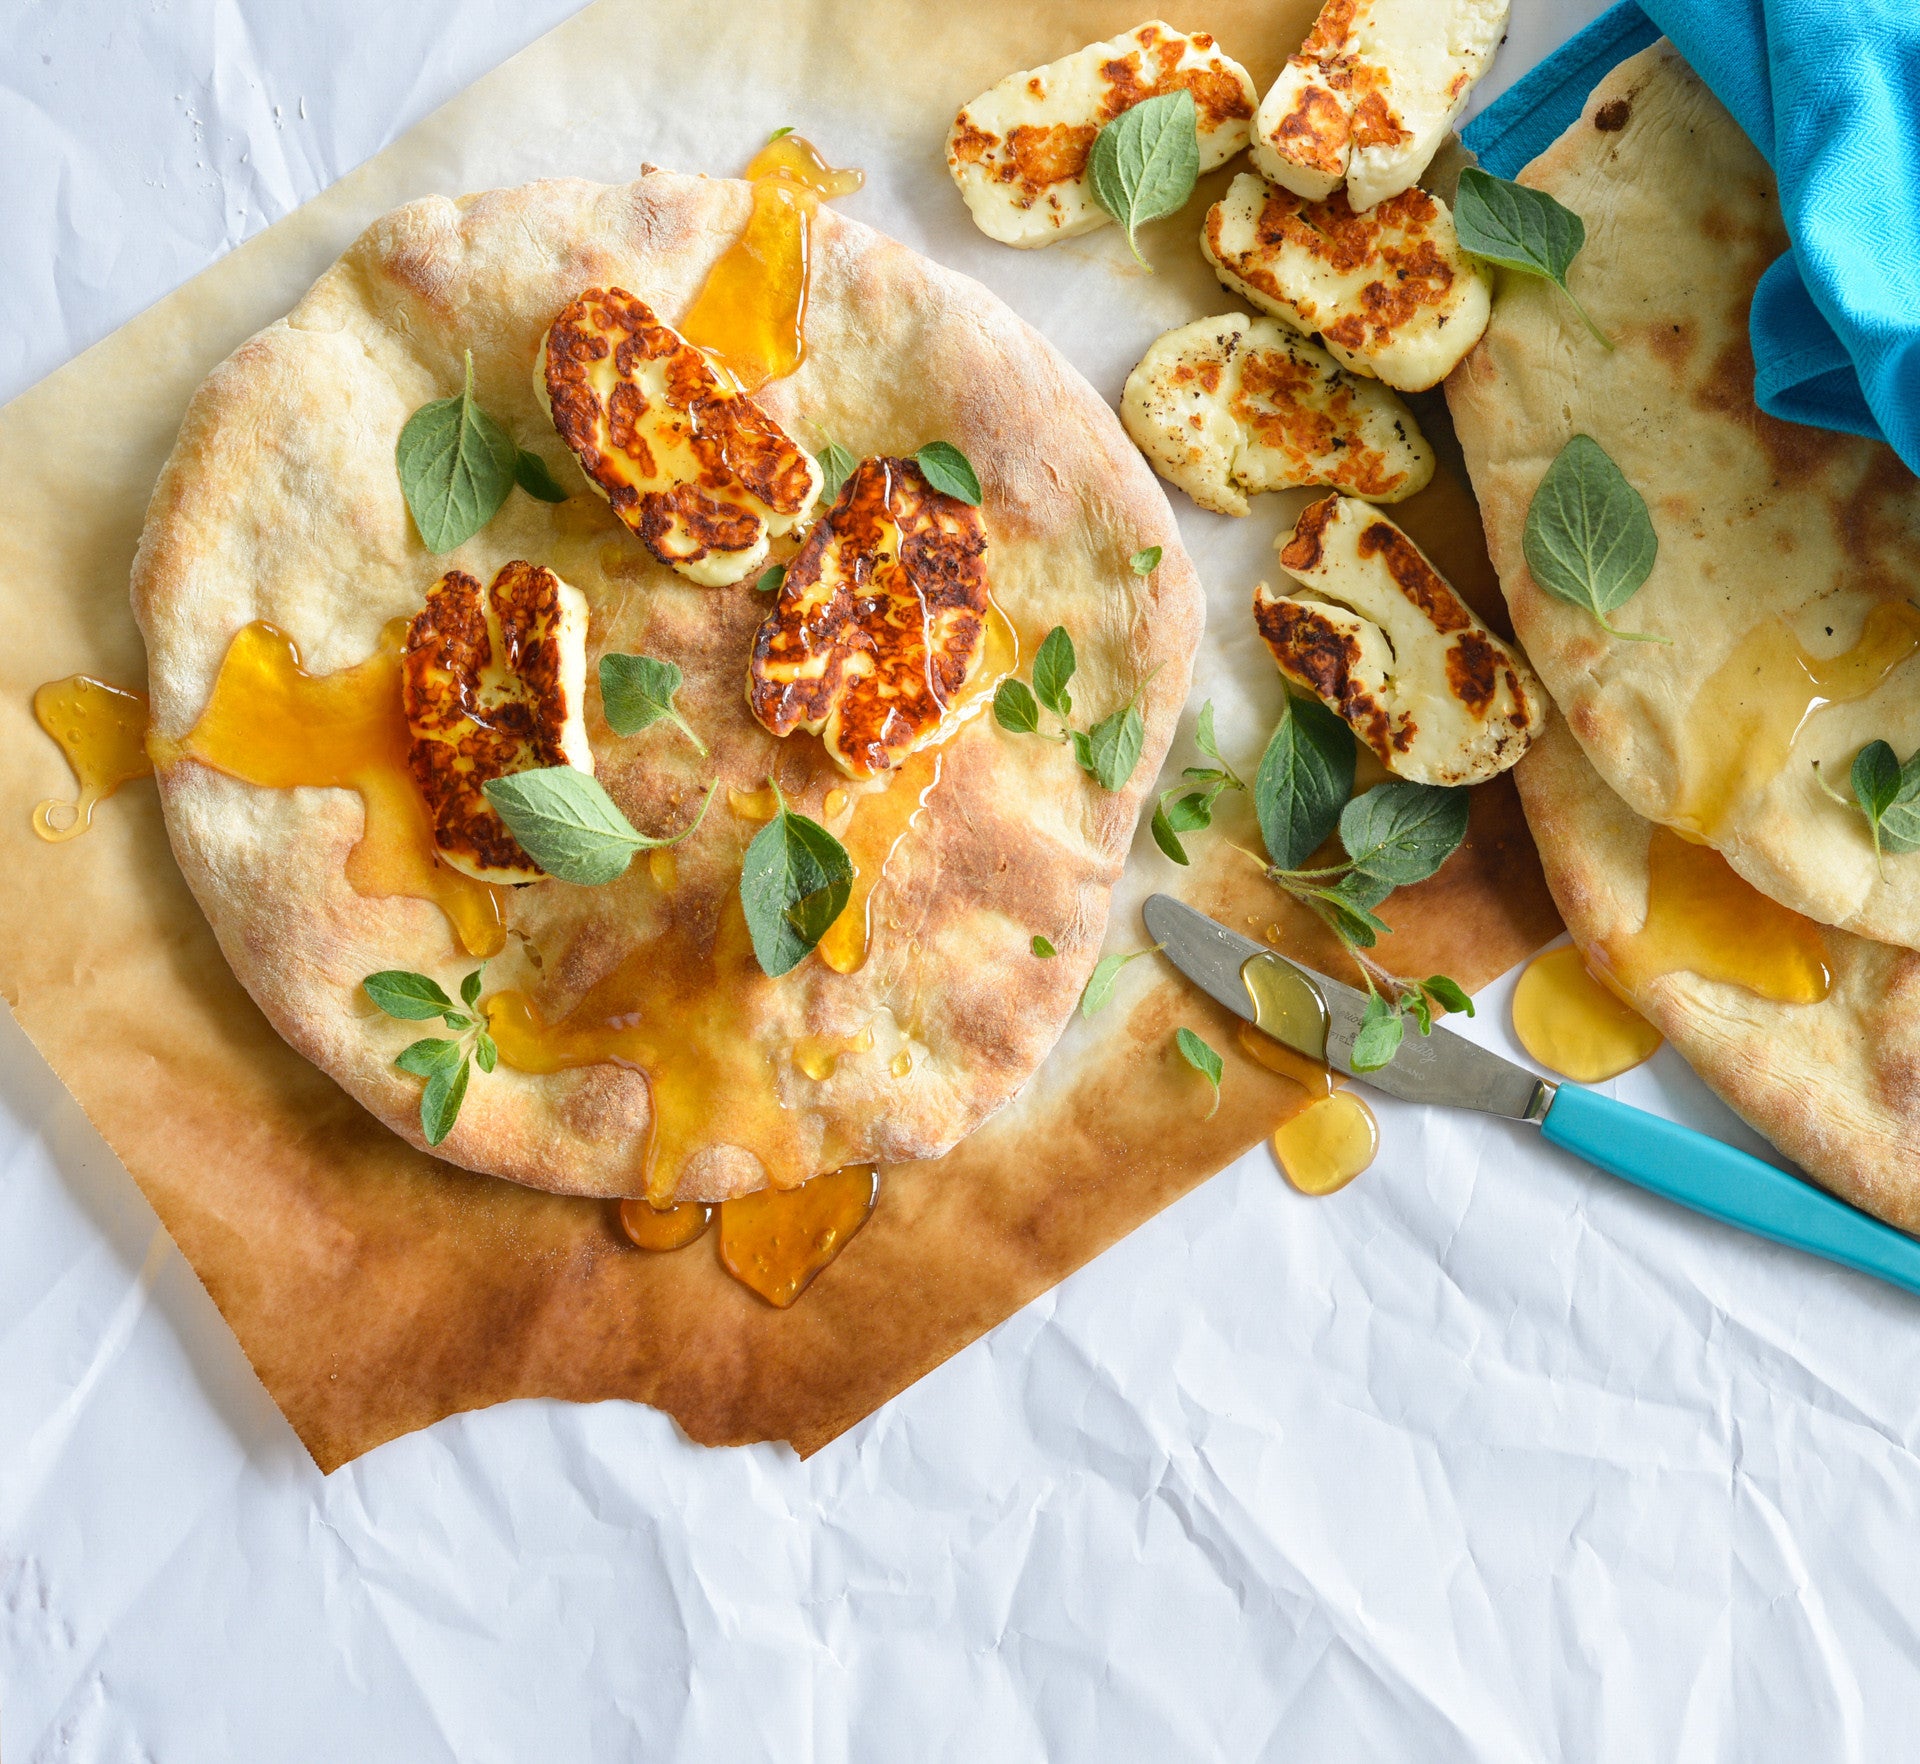
- Honey, good-quality pan-fried or grilled haloumi and fresh oregano leaves, to serve
Method
- Combine the flour, yeast, sugar and salt in a large bowl. Combine the water, yoghurt and oil, add to the flour mixture and use a wooden spoon and then your hands to mix to a soft dough (the dough will be quite sticky at this stage). Cover the bowl with a damp tea towel and set aside in a warm, draught-free place for 2-3 hours or until well risen.
- Place a pizza stone in the oven on the centre and preheat to 250°C (230°C fan-forced).
- Divide the dough into 4 portions. Use your hands to flatten each portion into a round on a floured bench top to about 26 cm in diameter and 6-7 mm thick. Place on a piece of baking paper on a tray and cover with a damp tea towel. Set aside in a warm, draft-free place for 15 minutes to rise slightly. Repeat with the remaining 3 dough portions.
- Use the baking paper to lift a bread round onto the pizza stone in the oven and bake for 10-13 minutes or until golden and baked though. Remove from the oven and wrap in a clean tea towel to keep warm while baking the remaining flatbreads in the same way (the flatbread will be crusty on the outside to start with and then will soften as it stands wrapped in the tea towel).
- Serve warm topped with honey, haloumi and oregano leaves.
Baker's Tips
You can also bake these flatbreads on baking paper-lined oven trays for 15 minutes.These flatbreads are best eaten the day they are baked.
This recipe is from Anneka's SBS Food online column, Bakeproof: Yeast-leavened Flatbreads.
CLICK HERE for more Bakeproof recipes.
Photography by Alan Benson.
Prep 25min (+ 1hr 30min proving time)Bake 25minMakes 8-10 serves
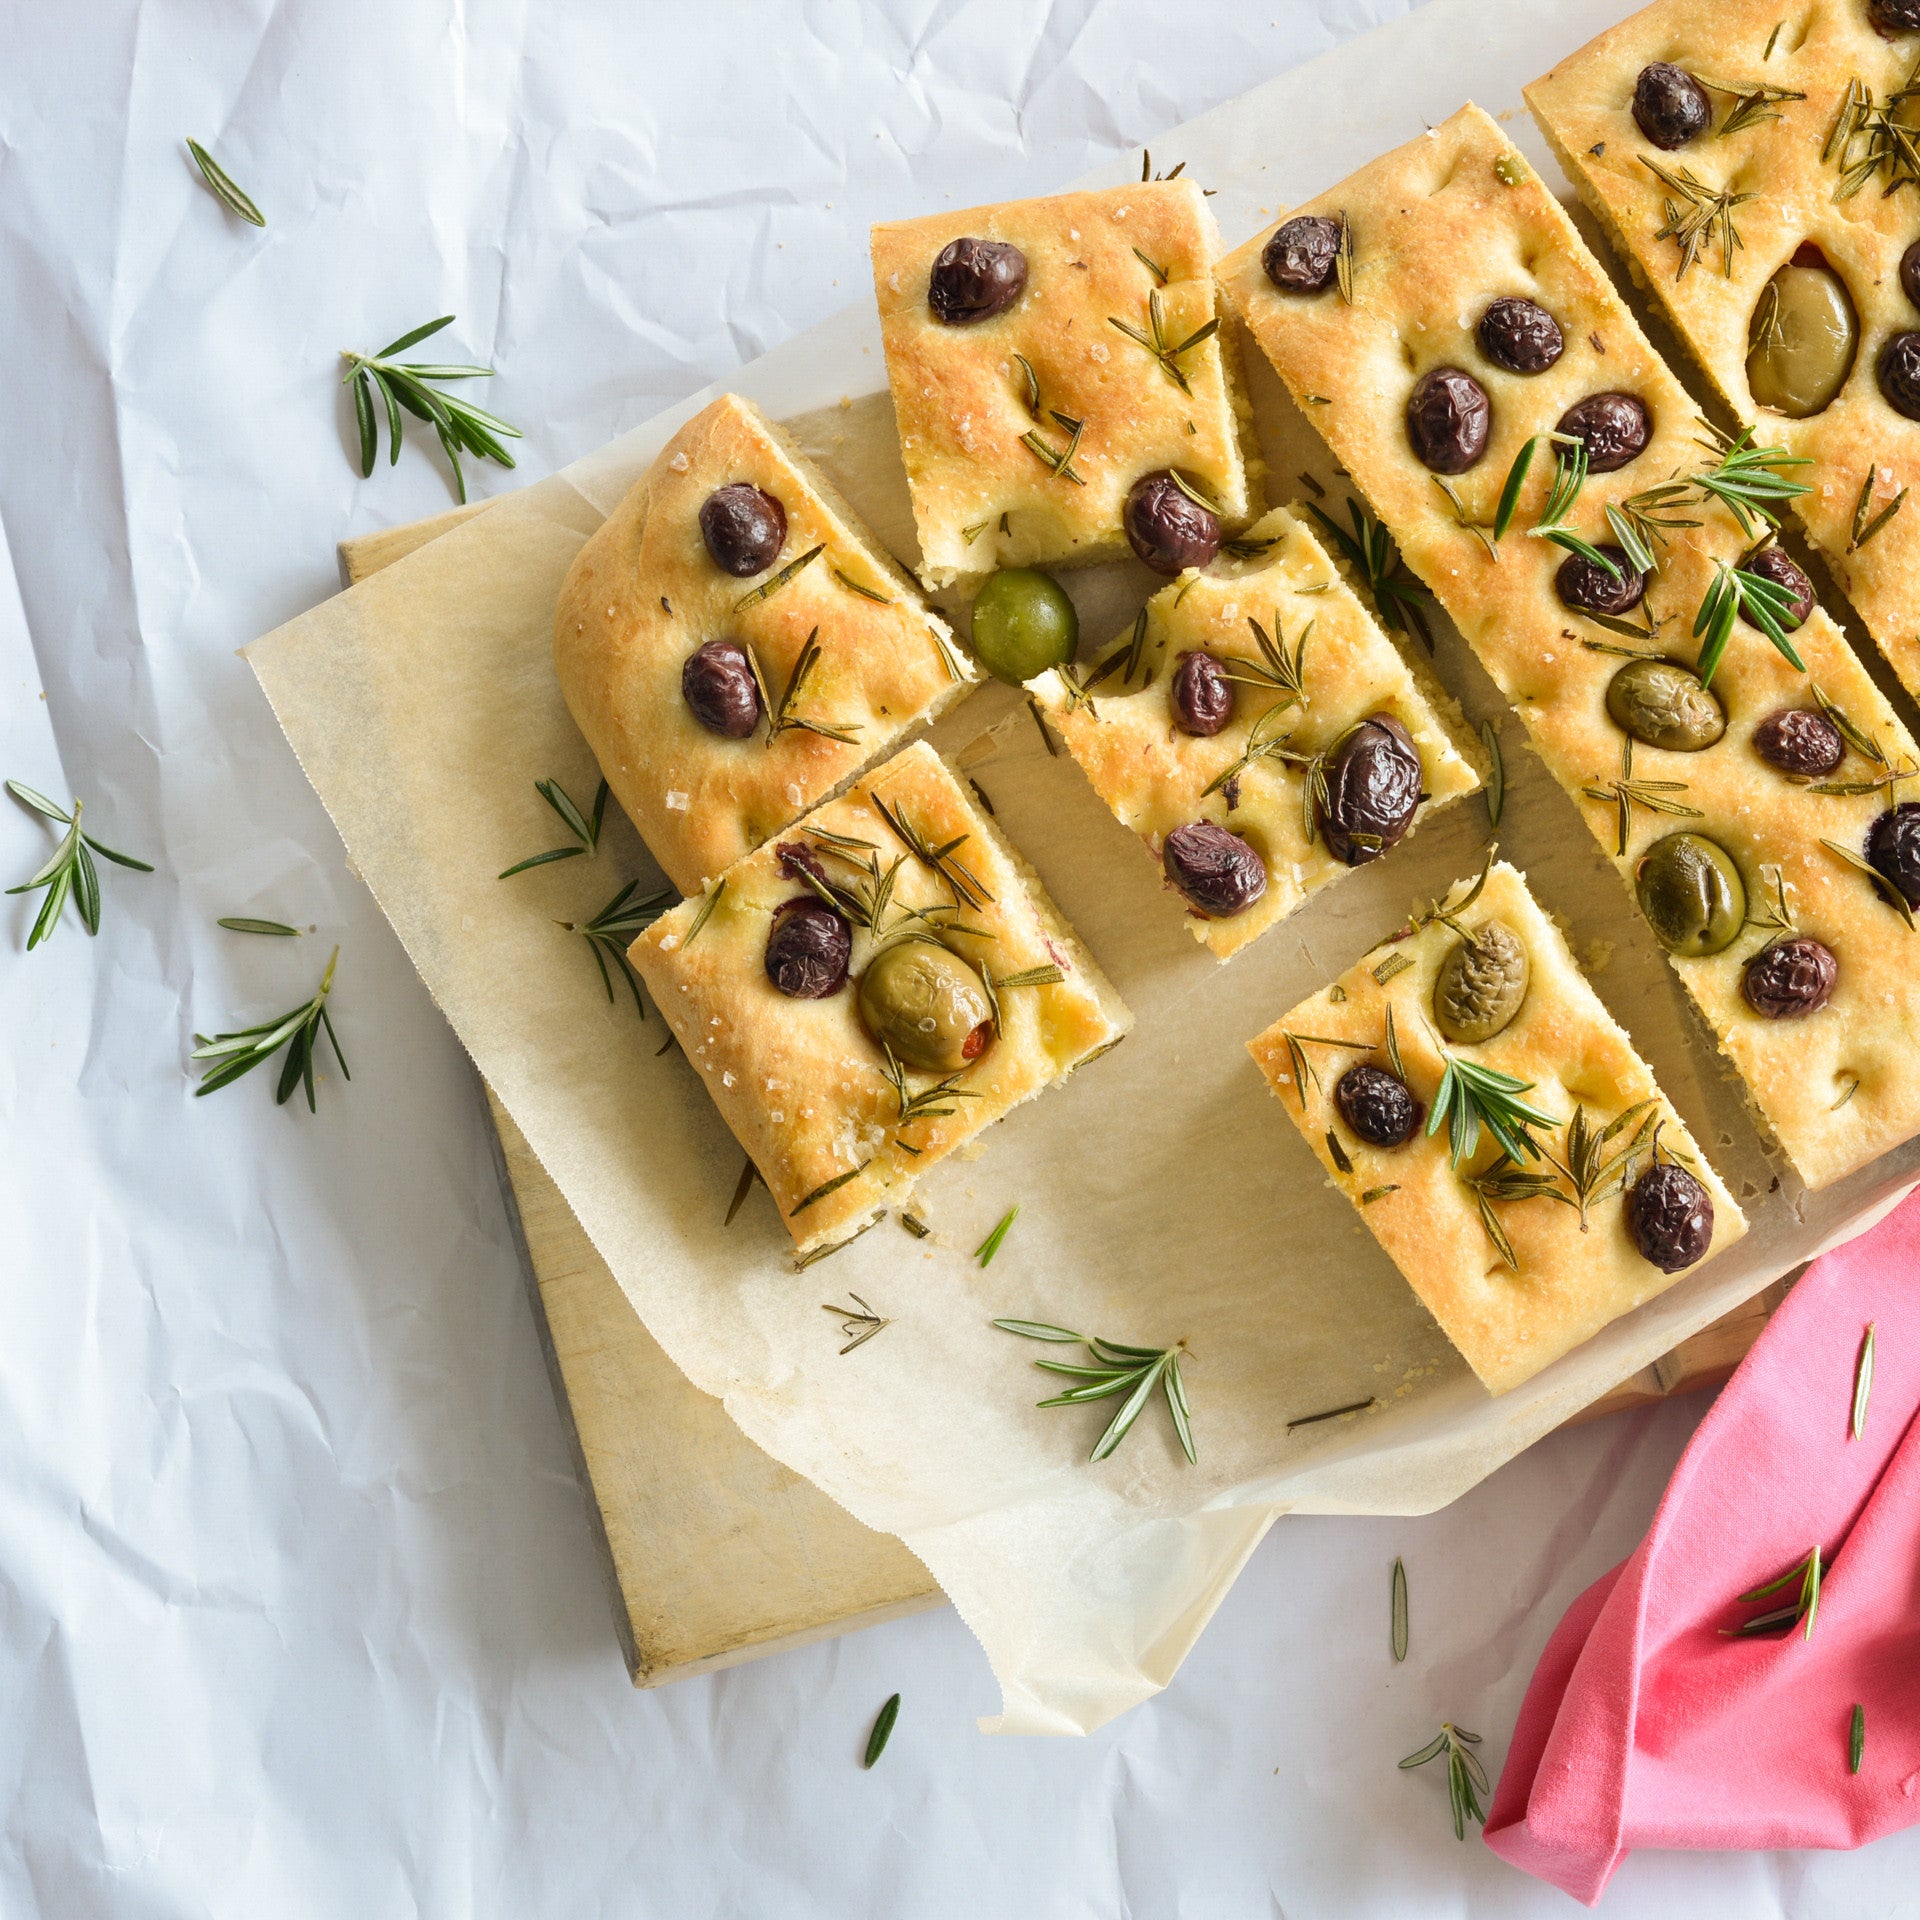
Predecessor to the modern pizza, focaccia is a simple Italian flatbread that was associated with Christmas Eve and Epiphany for many centuries. This savoury version, studded with fragrant rosemary and mixed olives, makes a fabulous accompaniment to a cheese board, picnic spread or soup.
Ingredients
- 600g (4 cups) strong bread or pizza flour, plus extra to dust
- 3 teaspoons instant dried yeast
- 2 teaspoons salt
- 330ml (1⅓ cups) luke warm water
- 2 tablespoons olive oil, plus extra to grease and 2 tbsp to drizzle
- 150g mixed olives
- 2 tablespoons fresh rosemary leaves
- sea salt flakes, to sprinkle
Method
- To make the dough, combine the flour, yeast and salt in a large bowl and make a well in the centre. Combine the water and oil, add to the flour mixture and use a wooden spoon and then your hands to mix to a soft dough.
- Turn the dough onto a lightly floured surface and knead for 5-8 minutes or until it is smooth and elastic and springs back when you push your finger into it. Place the dough in an oiled bowl, turning it to coat lightly with the oil. Cover with plastic wrap and place in a warm, draught-free place for 1 hour or until doubled in size.
- Line a large baking tray with baking paper.
- Knock back the dough by punching it in the centre with your fist. Turn the dough onto the lined tray and use your hands to press down on it, and to pull and stretch it to form a rough rectangle about 20 cm x 30 cm and 1.5 cm thick. Use your fingertips to press into the surface of the dough to form dimples.
- Press the olives and rosemary into the surface flatbread. Drizzle with the extra olive oil and then sprinkle with the salt.
- Set aside in a warm draught-free place for 30 minutes or until risen slightly.
- Preheat the oven to 220°C (200°C fan-forced).
- Bake in the centre of the preheated oven for 25 minutes or until golden and cooked through. Serve warm or at room temperature.
Baker's Tips
- This focaccia is best eaten the day it is baked.
This recipe is from Anneka's SBS Food online column, Bakeproof: Yeast-leavened Flatbreads. CLICK HERE for more Bakeproof recipes.
Photography by Alan Benson.
Prep 15minBake 50minMakes 12 serves
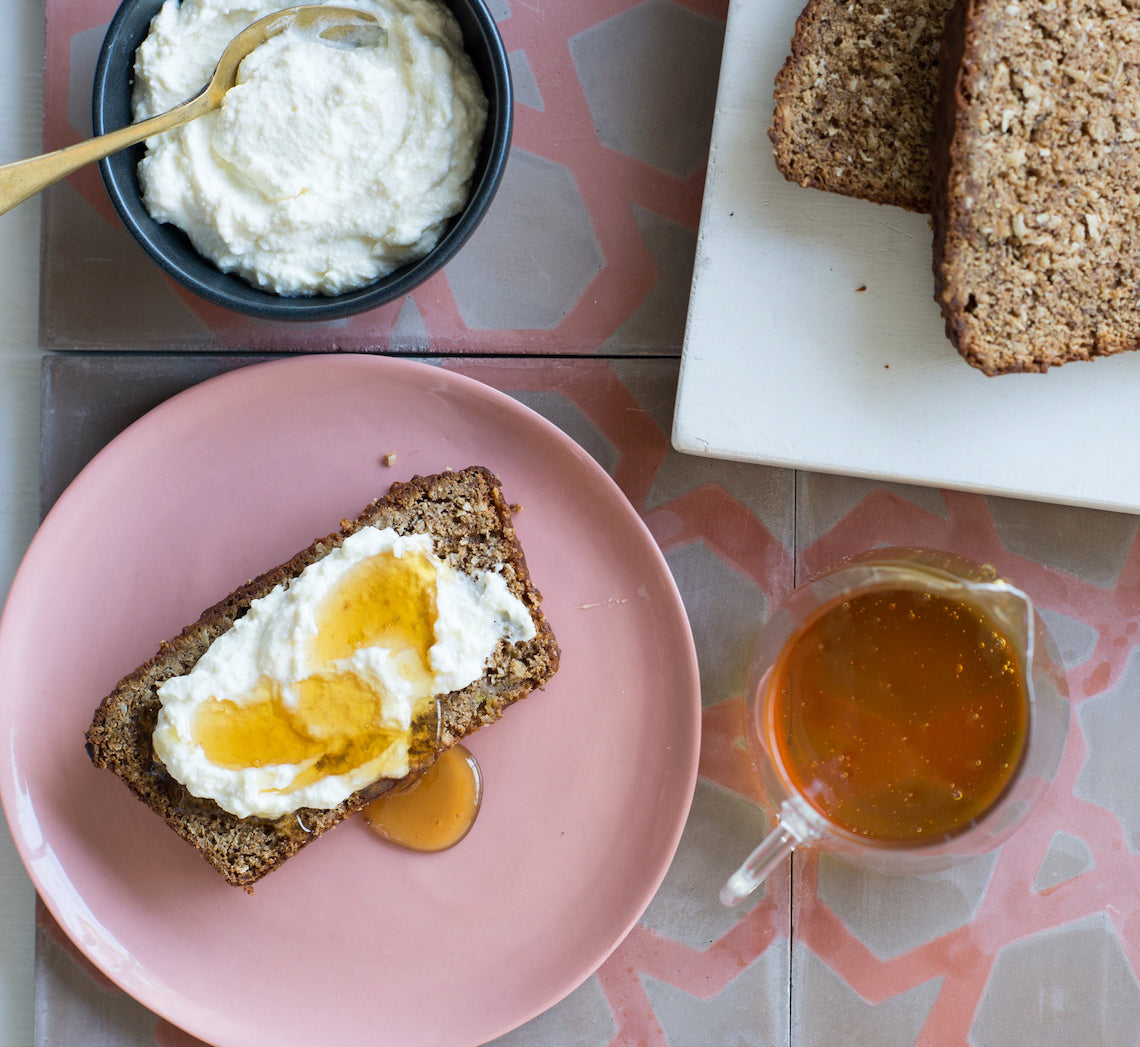
This banana bread is heaven. The addition of coconut oil adds a wonderful richness and heavenly aroma that you won’t be able to resist. This loaf also keeps well and becomes more moist and flavoursome with time, so try not to eat it all at once! It's wonderful served on its own or toasted and spread with butter or ricotta and drizzled with honey.
Ingredients
Melted coconut oil, to grease240g (1½ cups) wholemeal spelt flour
1 teaspoon baking powder
1 teaspoon bicarbonate of soda
70g (1 cup) shredded coconut
100g (½ cup) coconut oil, at room temperature
180g (1 cup) coconut palm sugar
1 egg
2 large (about 200g each) very ripe bananas
130g (½ cup) Greek-style natural yoghurt
Method
- Preheat oven to 180°C (160°C fan-forced). Grease a 21 x 10.5cm (base measurement) loaf pan with the melted coconut oil and line the base and two long sides with one piece of non-stick baking paper.
- Sift together the flour, baking powder and bicarbonate of soda into a large bowl, returning any husks to the flour mixture. Stir in the coconut.
- Use an electric mixer to beat the coconut oil and sugar in a mixing bowl until well combined (it will look like wet sand). Add the egg and beat well, scraping down the sides of the bowl if necessary. Mash the bananas, add to the coconut mixture with the yoghurt and beat until well combined. Add the dry ingredients and beat on low speed until just combined.
- Pour the mixture into the prepared tin. Use the back of a spoon to smooth the surface and then tap the tin lightly on the benchtop to settle the mixture. Bake in preheated oven for 45-50 minutes or until golden brown and a skewer inserted into the centre comes out clean. Stand in the tin for 5 minutes before turning onto a wire rack to cool. Serve in slices.
Baker's Tips
- This banana bread will keep in an airtight container at room temperature for up to 4 days.
This recipe is from Anneka's SBS Food online column, Bakeproof: Coconut.
CLICK HERE for more Bakeproof recipes.
Photography by Alan Benson.
Prep 50min (+10min cooling, 15min chilling and 2hrs proving time)Bake 30minMakes 12 serves
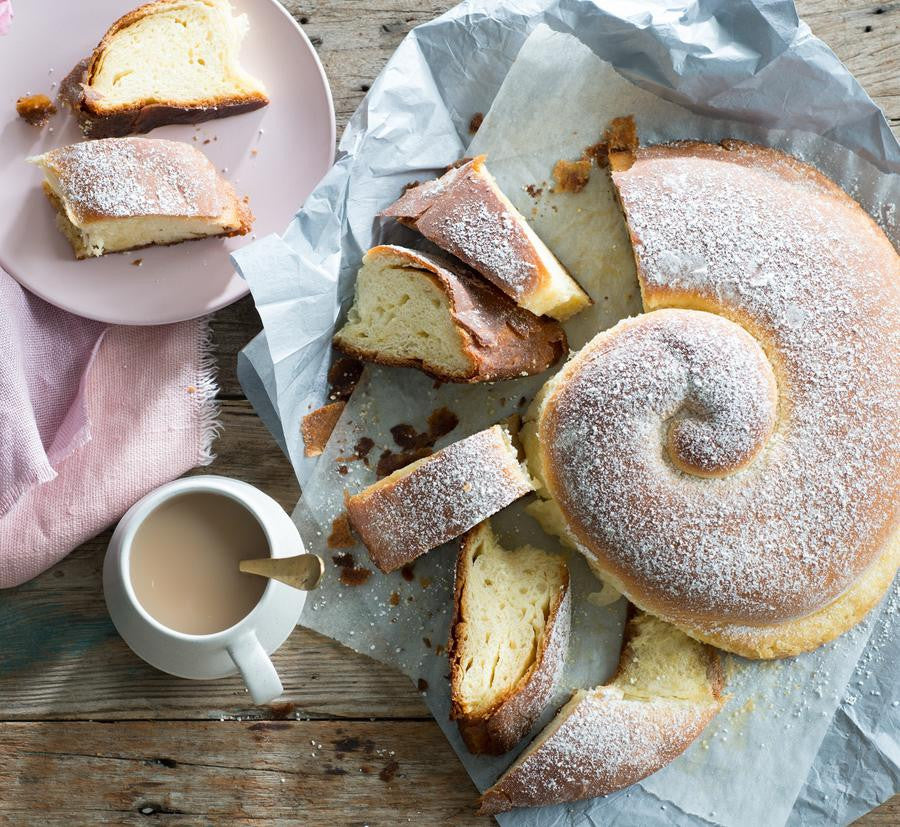
This amazing Spanish bread is reminiscent of the croissant from neighbouring France – traditionally layered with lard (although I make mine with butter) this brioche-like bread has a wonderful flakiness and rich buttery flavour that is simply too hard to resist. Originally from the Isle of Mallorca it is traditionally served at festivals and celebrations such as Easter however, these days, it is often found on the breakfast table – trust me, it really is too good to keep for special occasions!
Ingredients
200ml (7fl oz) lukewarm milk
1 x 7g sachet (2 teaspoons) instant dried yeast
110g (½ cup/4oz) caster sugar
2 eggs, at room temperature
450g (3 cups/15¾oz) strong bread or pizza (high-protein) flour, plus extra to dust (see Baker's Tips)
¼ teaspoon fine salt
Melted butter, to grease
200g (7oz) salted butter, cubed, softened (see Baker’s Tips)
Icing sugar, to dust
Method
- Combine the milk, yeast and 1 teaspoon of the sugar in a jug. Stir to combine and set aside in a warm draught-free place for 5 minutes or until frothy. Add the eggs and use a fork to whisk to combine.
- Combine the flour, remaining sugar and salt in the bowl of a stand mixer. On low speed gradually add the milk mixture and knead with a dough hook. Continue to knead on low speed for 6-8 minutes or until the dough is smooth and elastic.
- Brush a medium bowl with melted butter to grease. Place the dough in the bowl, turning it to coat lightly with the butter. Cover with plastic wrap and place in a warm, draught-free place for 1 hour or until doubled in volume.
- Line a large oven tray with non-stick baking paper.
- When the dough has doubled in size knock it back by punching it in the centre with your fist. Turn onto a lightly floured surface and knead for 1-2 minutes or until it returns to its original volume.
- Use a lightly floured rolling pin to roll out the dough on a lightly floured surface to a 45cm/18in square. Working quickly, use a palette knife to carefully spread the butter all over the dough to cover evenly, leaving a 2cm/¾in border. Roll up the dough into a roll to enclose the butter and then press the ends to seal. With an end closest to you, gently roll out the dough again to a rectangle about 60cm/24in long and 15cm/6in wide, dusting the dough with a little flour if the butter breaks through. Starting from a long end, roll up the dough again to form a long roll.
- Loosely coil the roll onto the lined baking tray. Cover with a slightly damp tea towel and chill for 15 minutes. Remove form the fridge and set aside in a warm draught-free place for 1 hour or until well risen.
- Preheat oven to 180°C/350°F (160°C/315°F fan-forced).
- Bake the Ensaïmada in preheated oven for 30 minutes or until cooked through and golden. Place the baking tray on a wire rack and set aside on the tray for at least 10 minutes to cool slightly before serving warm or cool completely. Serve dusted liberally with icing sugar.
Baker's Tips
- The butter for this recipe needs to be soft enough to spread but not so soft that is starts melting when you spread it.
- This bread is best eaten on the day it is made but will keep in an airtight container for up to 2 days.
This recipe is from Anneka's SBS Food online column Bakeproof: Easter Treats. Click here for more Bakeproof columns and recipes.
Photography by Alan Benson.


