- home
- BAKERECIPES
BakeRecipes
Bringing real baking into your home with deliciously simple recipes.
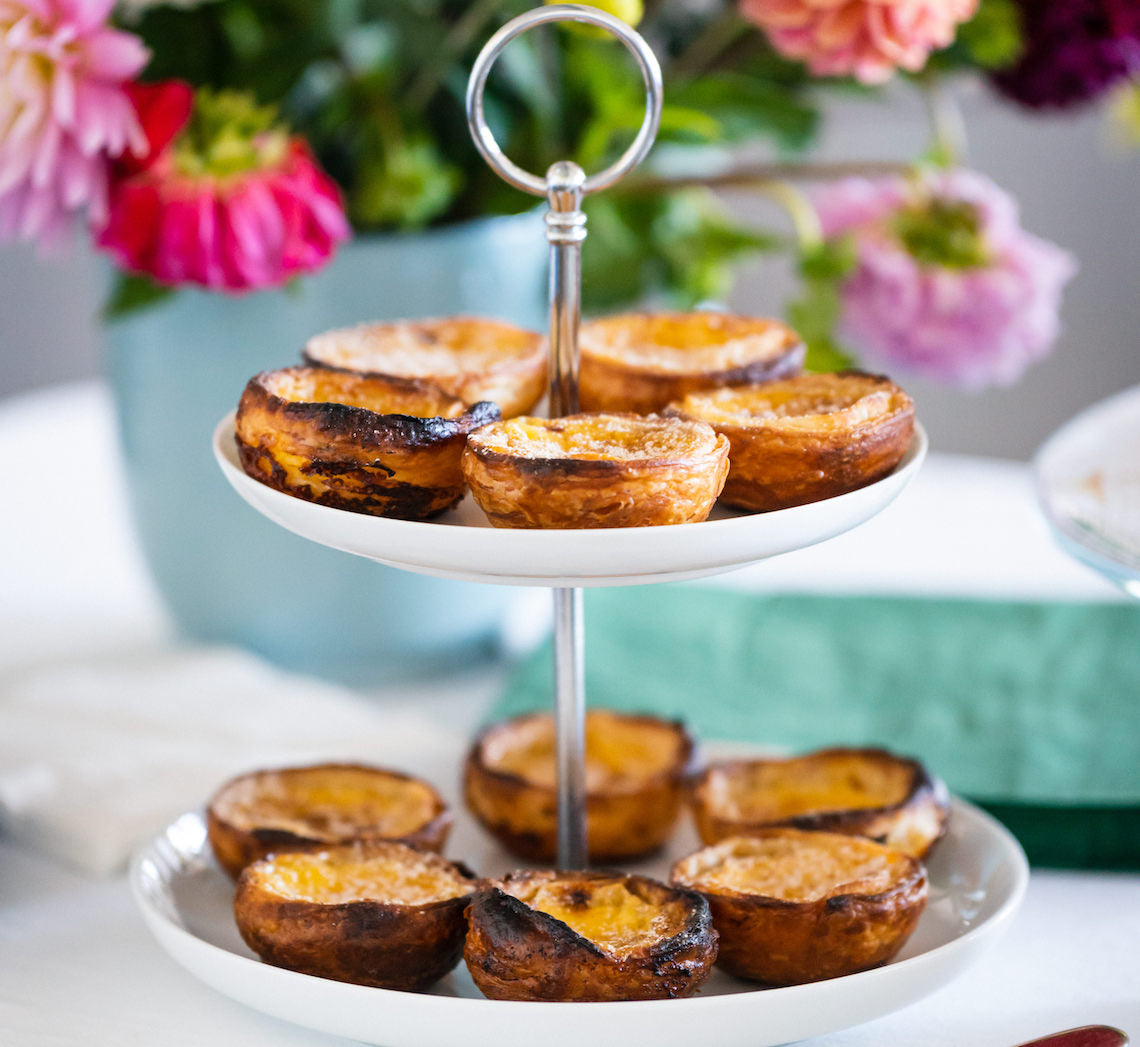
Prep 1hr (+20min resting, 2hr chilling and 30min cooling time)Bake 12-15min (per batch)Makes 24
Made by Make Me a Baker student Theresa Ling these Portuguese Custard Tarts will be some of the best you will try. The main trick with these tarts is to bake them at a very high heat (often as hot as your oven will go) for a short period of time to make sure the pastry is lovely and crisp while not over cooking the luscious creamy custard filling, creating a wonderful contrast between the two.
If you've never made portuguese custard tarts before or haven't got the results you wanted from a previous attempt CLICK HERE for my top tips when making them
at home before you start.
Ingredients
Icing sugar and ground cinnamon (optional), to sprinkle
Rough Puff Pastry
225g (1½ cups) plain flour
½ teaspoon salt
140g water
225g unsalted butter, softened
Custard
2 tablespoons plain flour300ml milk
220g (1 cup) caster sugar
160ml (⅔ cup) water
2 cinnamon sticks
½ teaspoon natural vanilla essence or extract
6 egg yolks, lightly whisked
Method
-
To make the Rough Puff Pastry, place the flour and salt in the bowl of a stand mixer. Add the water and mix with a paddle beater on low speed until well combined and a dough forms. Transfer the dough to a clean bench top and knead until smooth. Shape into a square about 1cm thick, wrap in plastic wrap and set aside to rest for 20 minutes.
- Use a lightly floured rolling pin to roll the pastry out on a well floured surface to a 35cm square, keeping the edges as neat as possible. Use your fingers to dot small pieces of 75g of the softened butter over the left two-thirds of the pastry, leaving about a 1cm border, and then spread it with your fingers so it covers the pastry roughly. Fold over the unbuttered right hand third of pastry, brush away any excess flour, then fold over the left hand third to cover. Starting from the top, use the rolling pin to tap the pastry widthways to release any air pockets and then press the open edges with your fingertips to seal and enclose the butter. Turn the pastry a quarter turn anticlockwise and then fold in the right hand third of pastry then fold over the left hand third to cover. Again, tap it gently widthways with the rolling pin.
- Reroll the pastry to a 35cm square and, with the folded edge closest to you repeat step 2 one more time, dotting and spreading the left hand two thirds with 75g of the remaining softened butter, folding, turning anti-clockwise and folding again.
- Reroll the pastry to a 35cm x 40cm rectangle. With a short edge closest to you, dot and spread the 75g of remaining softened butter over the whole surface, leaving a 1cm border. Starting from the short edge, roll into a tight log. Use a sharp knife to trim the ends and then cut the log in half. Wrap the logs separately in plastic wrap and place in the fridge to chill for at least 2 hours before using (see Baker’s Tips).
- Place two pizza stones in the oven, one in the top third and one in the bottom third. Place an oven rack in between them. Preheat oven to 300°C (280°C fan-forced) for at least 1 hour.
- To make the Custard, place the flour in a medium bowl and use a balloon whisk to gradually stir in 60ml (¼ cup) of the milk until smooth and well combined. Place the remaining milk in a small saucepan and bring just to a simmer over a medium heat. Use the balloon whisk to gradually stir the hot milk into the flour mixture and stir until smooth and well combined. Combine the sugar, water and cinnamon sticks in a medium saucepan and stir over medium heat until the sugar dissolves. Bring to the boil and simmer until it reaches 100°C on a thermometer. Remove the cinnamon sticks from the sugar syrup and gradually stir into the milk mixture. Add the vanilla and stir until cooled slightly. Stir in the egg yolks until evenly combined. Cover the surface of the custard with plastic wrap and place in the fridge to cool, stirring occasionally, this will take about 30 minutes (see Baker’s Tips).
- Cut one of the pastry logs into twelve 1.5cm lengths (each portion will be about 25g) and place each portion, with a cut side facing up, into an ungreased 50ml capacity (3cm base measurement and 6.5cm top measurement) round-based tartlet tin (see Baker’s Tips). Using your thumb, gently press into the centre of a pastry portion towards the base until about 5mm thick, and then, using your thumbs and working around the tart case, gently ease the pastry up the sides thinning it to about 5mm thick and so it extends about 2mm above the tart tin and forms a thicker lip at the top. Repeat with the remaining pastry portions.
- Place the tart tins on a heavy oven tray. Divide half the cooled custard among the pastry cases, filling each to no more than 5mm from the top edge of the pastry. Bake the tarts between the pizza stones in the preheated oven for 12-15 minutes or until the pastry is crisp and baked through, and the custard is just set and partially charred on the top.
- Remove the tarts from the oven and set aside to cool slightly for 2-3 minutes before removing from the tins. Repeat with the remaining pastry log and custard mixture to make 12 more tarts.
- Sprinkle the tarts with icing sugar and/or cinnamon if desired and serve warm or at room temperature (see Baker’s Tips).
Baker's Tips
- The pastry can be made up to 3 days ahead of using. Keep wrapped in the fridge.
- The custard can be made up to 3 days ahead of baking. Store in an airtight container or jar in the fridge. Stir well before pouring into the tart cases.
- Once cut into portions and before pressing into the tins, you may have to let the pastry stand at room temperature until it softens slightly and becomes pliable enough to be able to be pressed into the tins easily and without force.
- These tarts are best eaten warm or at room temperature the day they are made. However, they will keep in an airtight container in the fridge for up to 2 days. To refresh, place the chilled tarts back in the tart tins on an oven tray and place in an oven preheated to 180°C (160°C fan-forced) for 10 minutes or until the pastry is crisp and the custard is just warmed through (there is no need to use the pizza stones when reheating). Stand the tarts in the tins for at least 5 minutes before removing and serving warm or at room temperature.
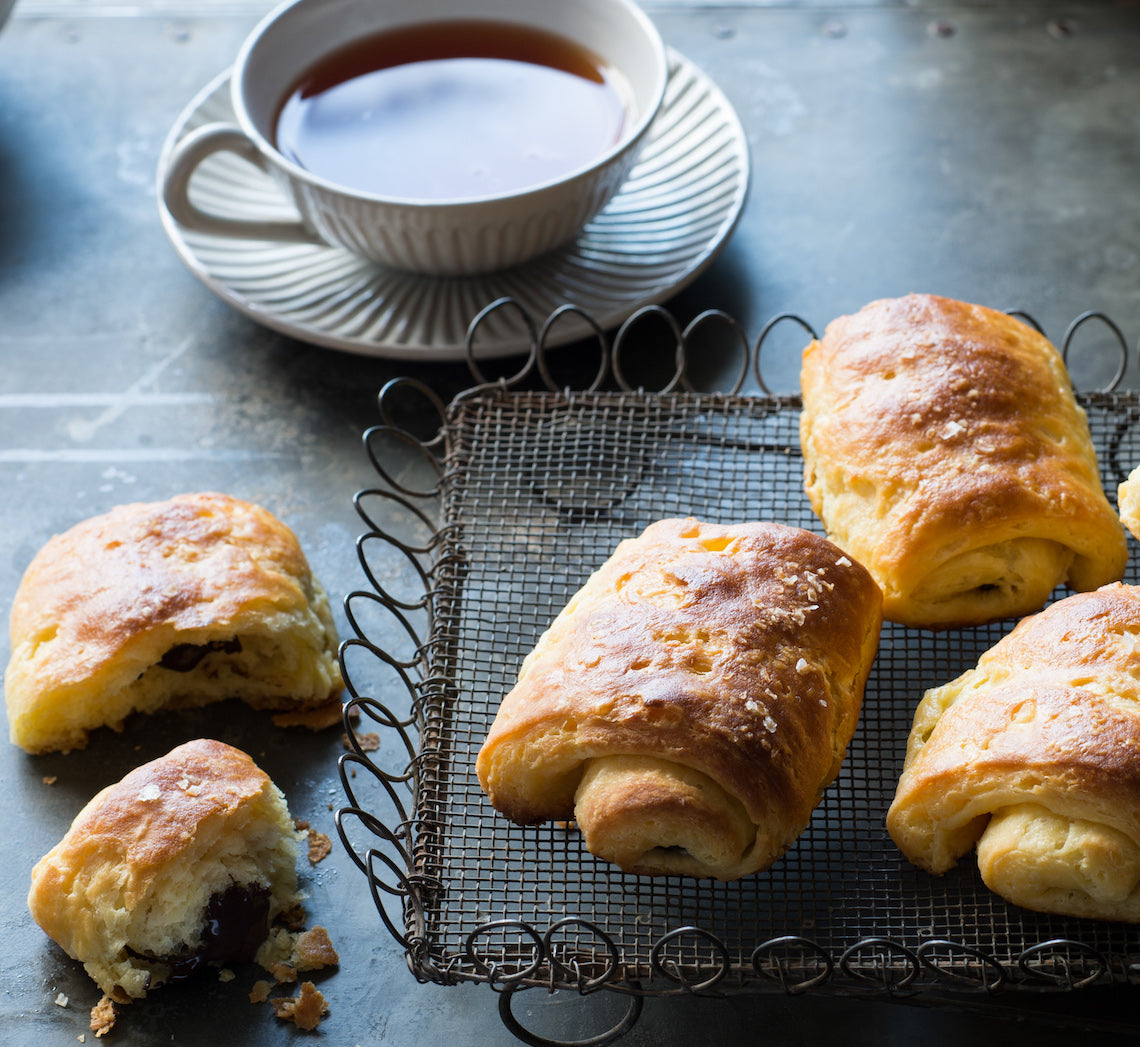
Prep 40min (+ overnight proving and 30min chilling time)Bake 25minMakes 8
At their best warm from the oven, these classic French pastries are based on the same pastry as a croissant, known as a leavened puff pastry (basically a puff pastry with yeast). These pain au chocolat uses a cheat’s pastry of sorts and gives a similar, less refined, result as the traditionally-made pastry, without the hassle of having to interleave the butter with the pastry dough as you fold it. The light sprinkling of sea salt flakes adds a surprising yet pleasant contrast to the sweetness of the chocolate centre.
Ingredients
125ml (½ cup/4fl oz) lukewarm milk
2 teaspoons (7g/¼oz 1 sachet) instant dried yeast
250g (1⅔ cups/9oz) bread flour (see Baker's Tips), plus extra to dust
185g (6½oz) chilled butter, cut into 2cm cubes
1 egg, at room temperature, lightly whisked,
2 tablespoons caster sugar
125g 4½oz) good-quality dark chocolate, chopped
1 extra egg, lightly whisked with 2 teaspoons milk, to glaze
Sea salt flakes (optional), to sprinkle
Icing sugar (optional), to dust
Method
- Put the milk in a medium bowl, sprinkle the yeast over the top and stir with a fork. Set aside for 5 minutes.
- Put the flour and butter into the bowl of a food processor and use the pulse button to process until the butter is cut into rough 1cm/½in pieces (make sure you don’t process any further). Transfer to a large bowl.
- Add the egg and sugar to the milk mixture and stir to combine. Add to the flour and butter mixture and use a wooden spoon and then your hands to mix until it is just combined and a soft dough forms. Cover the bowl with plastic wrap and place in the fridge overnight.
- Turn the dough onto a lightly floured surface and bring together with your hands. Knead briefly or until just smooth but the butter pieces are still visible. Shape into a rectangle and then use a lightly floured rolling pin to roll out until about 25cmx40cm/10inx16in, keeping the edges as straight as possible. With a long side nearest to you, fold the right third of the dough in to cover the centre third and then fold the left side in also. Turn the dough clockwise a quarter turn. Fold the dough into thirds as before to make a small rectangle.
- Flip the dough over on the bench so that the open edge is now underneath and repeat the rolling and folding process again as in step 4. You will finish with a small rectangle. Wrap well in plastic wrap and chill for 30 minutes.
- Preheat the oven to 190°C/375°F (170°C/340°F fan forced). Line a large baking tray with non-stick baking paper.
- Roll out the pastry with a lightly floured rolling pin on a lightly floured surface to a 30cm/12in square, about 5mm/¼in thick. Cut in half to make two 15cmx30cm/6inx12in rectangles, and then cut each into quarters so you end up with eight 7.5cmx15cm/3inx6in rectangles. Divide the chocolate evenly between the rectangles, placing it across the shorter end of each. Starting from the short end with the chocolate, roll the dough around the chocolate to form a roll. Place on the lined tray, seam-side down, and flatten slightly with the palm of your hand. Cover loosely with a slightly damp tea towel and set aside in a warm, draught-free place for 15 minutes or until the pastry has risen slightly and is ‘puffy’.
- Brush the pastries lightly with the egg and milk glaze and sprinkle with a little sea salt flakes, if desired. Bake in preheated oven for 25 minutes or until the pastry is golden, crisp and cooked through. Serve warm or at room temperature sprinkled with icing sugar, if desired.
CLICK HERE for more Bakeproof recipes.
Photography by Alan Benson.
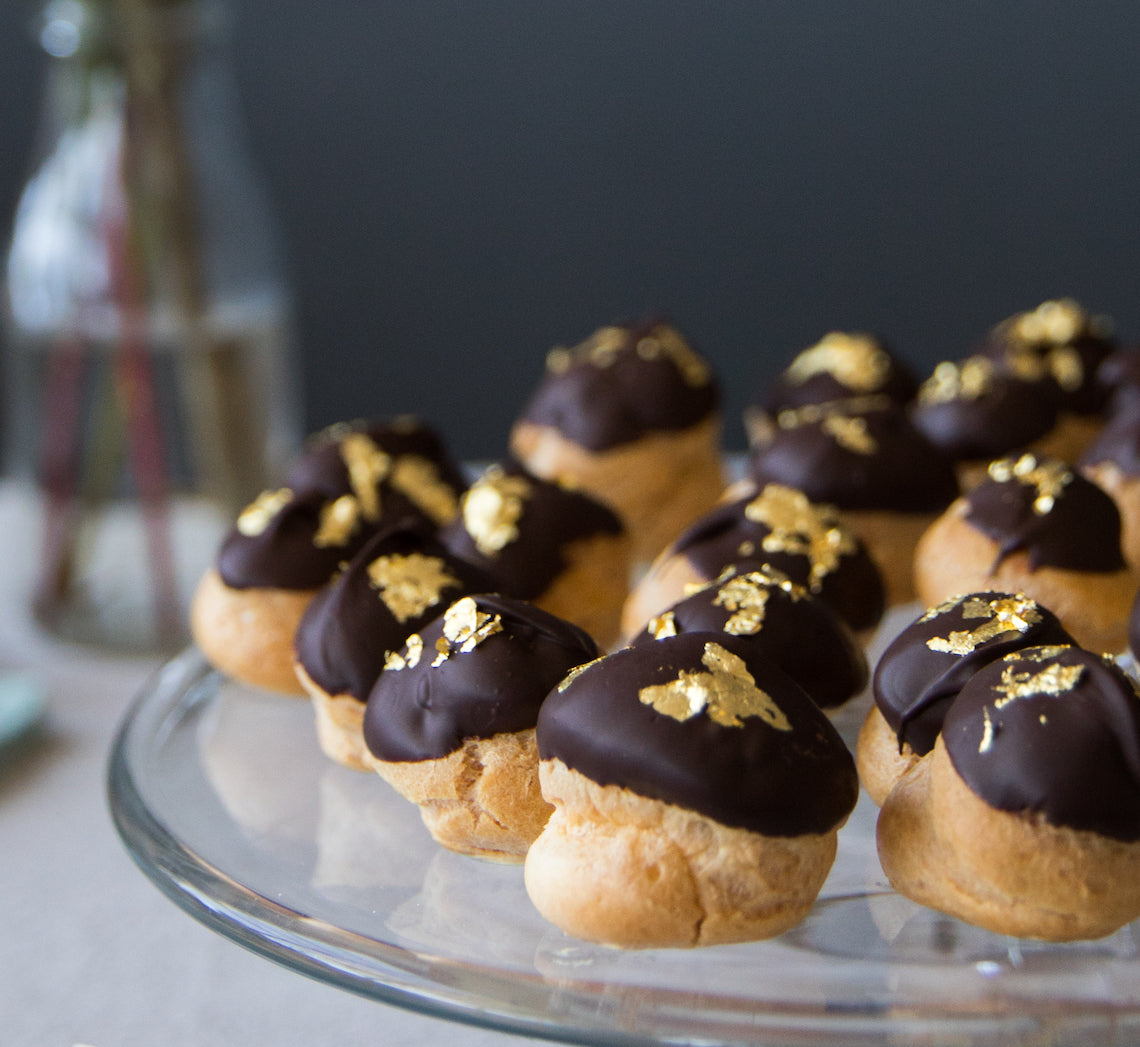
Prep 50minBake 35-40minMakes about 40
When the French profiteroles arrived in Brazil, a bakery in Sao Paulo created its own version – the Carolinas. Instead of filling the profiteroles with vanilla custard, they used pure dulce de leche then it became one of the staples in Sao Paulo bakeries.
This version, created by Make Me a Baker student Ana Moreno for her graduation, includes cream to make them less sweet than the ones you find in Sao Paulo, but still with plenty of dulce de leche to give the authentic taste.
Ingredients
1 quantity Basic Choux Pastry
150g good-quality dark chocolate (45-54% cocoa), chopped into small pieces
Edible gold leaf flakes, to decorate
Dulce de Leche Cream
250ml (1 cup) thickened cream
30g (¼ cup) icing sugar, sifted
1 teaspoon vanilla bean paste
320g (1 cup) dulce de leche
Method
- To make the profiteroles, preheat oven to 200°C (180°C fan-forced). Line 2 large oven trays with non-stick baking paper.
- Spoon the choux pastry into a large piping bag fitted with a 0.9cm (#9) round piping tip. Pipe 3cm rounds onto the lined trays, about 2cm apart. Use a damp fingertip to smooth any peaks on each of the rounds. Sprinkle the lined tray with a little water.
- Bake in preheated oven for 20 minutes or until well puffed and golden. Reduce the oven to 180°C (160°C fan-forced) and bake for a further 15-20 minutes or until golden and crisp on the outside. Remove from the oven and use a 0.7cm (#7) star piping tip to make a hole in the base of each of the hot profiteroles for the steam to escape. Place hole side up on a wire rack and allow to cool completely
- To make the Dulce de Leche Cream, combine the cream, icing sugar and vanilla bean paste in a mixing bowl and use a balloon whisk or hand held beaters with a whisk attachment to whisk on medium-high speed until soft peaks form.
- Spoon dulce de leche into a medium bowl. Add a third of the whipped cream mixture and use a large metal spoon or spatula to fold gently through the dulce de leche to retain as much air as possible until just combined evenly. Add the remaining cream in two more batches folding gently until just combined.
- Place the Dulce de Leche Cream into a pastry bag fitted with a 0.7cm (#7) star or round piping tip. Insert the tip into the hole in the base of a profiterole and fill with the Dulce de Leche Cream.
- To decorate the profiteroles, place the chocolate in a heatproof bowl and set over a saucepan of simmering water (make sure the water doesn’t touch the base of the bowl). Stir occasionally until the chocolate melts and is smooth.
- Dip the tops of each of the filled profiteroles in the melted chocolate to coat and set aside on a wire rack to stand for 10 minutes. Carefully decorate each profiterole with a little edible gold leaf before the chocolate is fully set.
Baker's Tip
- The unfilled profiteroles will keep in an airtight container at room temperature for up to 1 day. They are best eaten the day they are filled with the Dulce de Leche Cream.
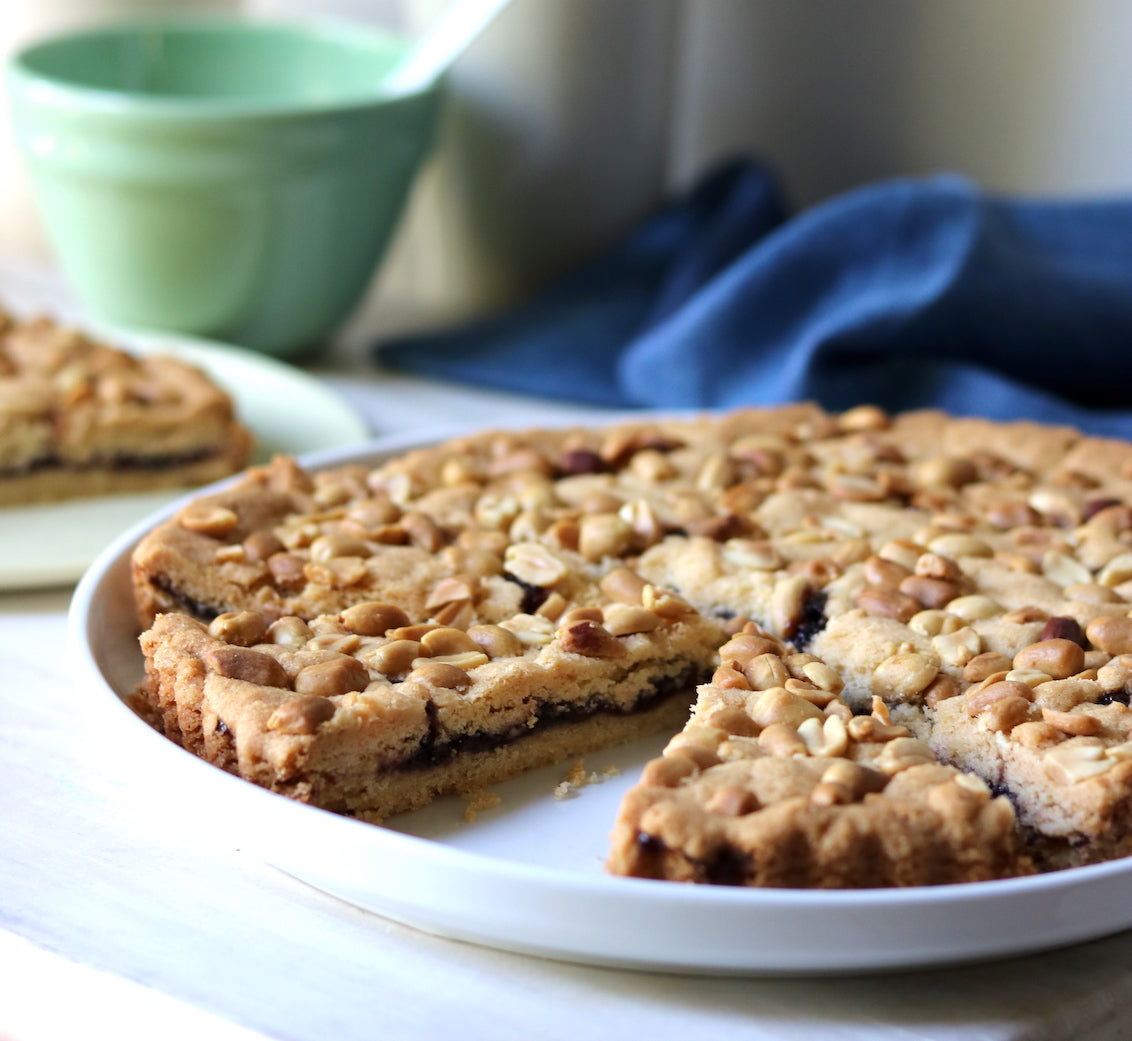
Prep 20min (+cooling time)Bake 35-40minMakes 8-10 serves
I love this tart – a no-fuss, slice-like affair of buttery shortbread layers filled with jam and nuts. Research has revealed no reason why this tart is Belgian, but it brings back vivid childhood memories of my mum, Jocelyn, making it in two enamel plates, throwing them in the oven and then, once cool, covering them with foil to take to a picnic or tennis day. I remember it so clearly when I make the tart now (with a few small alterations) in my own kitchen.
Ingredients
185g (6½oz) salted butter, softened slightly
150g (5¼oz) caster sugar
1 egg yolk
1 teaspoon natural vanilla essence or extract
260g (9¼) plain flour
1 teaspoon baking powder
165g (5¾oz) mixed berry jam (see Baker’s Tips)
70g (½ cup/6oz) unsalted raw peanuts (or nuts of your choice)
Method
- Preheat the oven to 160°C/315°F (140°C/285°F fan-forced).
- Put the butter and sugar in the bowl of a food processor and process until well combined. Add the egg yolk and vanilla and process to combine, scraping down the side of the bowl if necessary. Sift together the flour and baking powder. Add to the butter mixture and use the pulse butter to process until just combined and a soft dough forms.
- Press half of the mixture evenly over the base of an ungreased 23cm/9in tart tin with removable base. Spread evenly with the jam, leaving a 2cm/¾in border. Press portions of the remaining dough between your hands to flatten and press over the jam to cover, patching where necessary. Sprinkle with the peanuts and press into the dough.
- Place the tart tin on a baking tray and bake in preheated oven for 35-40 minutes or until golden and cooked through. Leave the tart to cool in the tin and then serve in wedges.
Baker's Tips
- Mum used to make this tart with apricot jam instead of the mixed berry I have used in this recipe but any jam variety works well – fig, blackberry, raspberry - just pick your favourite.
- This tart will keep in an airtight container at room temperature for up to 4 days.
Prep 15min (+chilling time)
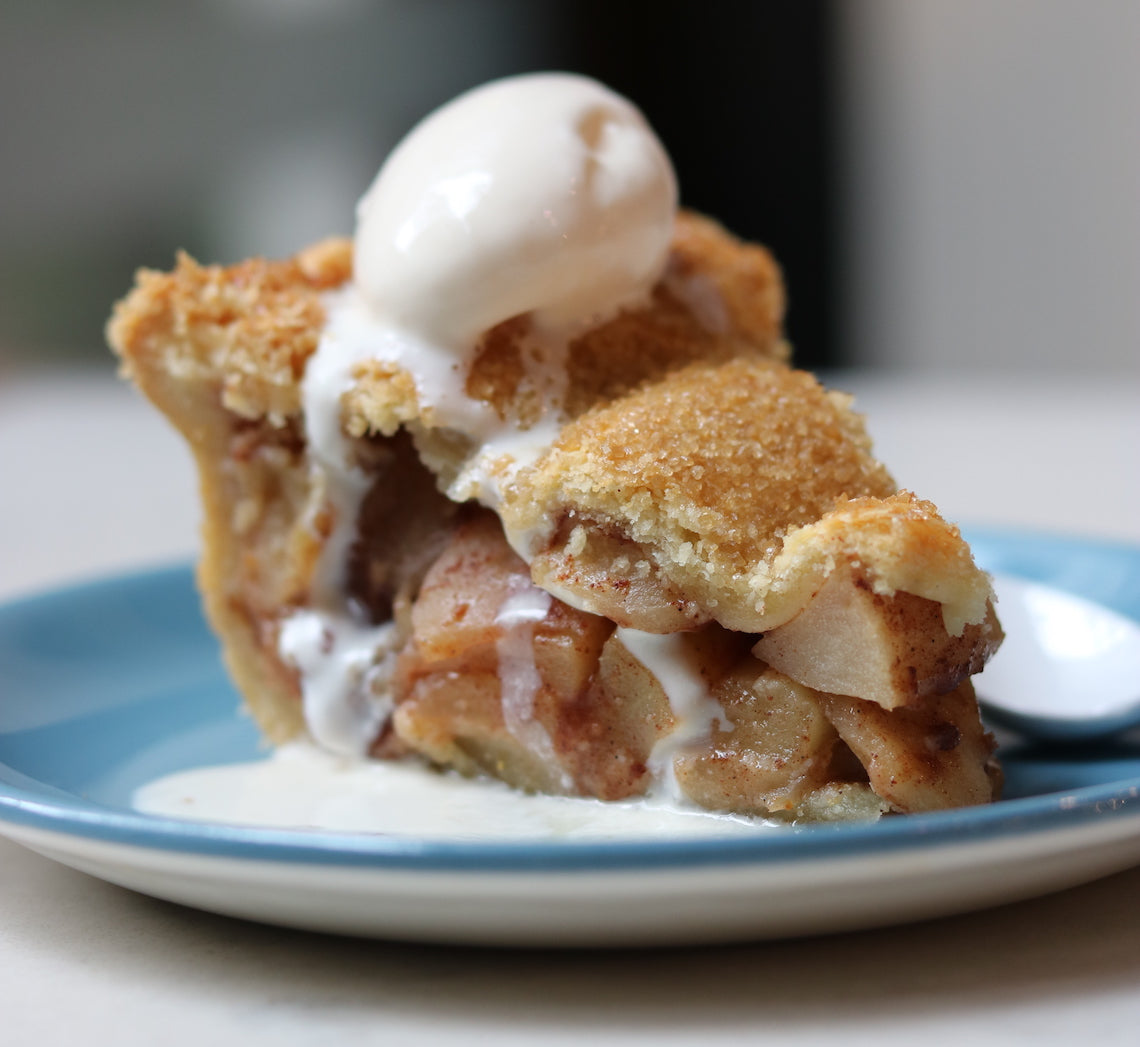
Shortcrust pastry, when you have a good recipe, is one of the simplest and quickest pastries to make. This sweet vanilla variety is great with a Classic Apple Pie.
Ingredients
200g (1⅓ cups) plain flour
2 tablespoons almond meal
2 tablespoons caster sugar
150g chilled salted butter, cubed
3 tablespoons iced water
1 teaspoon vanilla bean paste
Method
- Combine the flour, almond meal and caster sugar in the bowl of a food processor. Add the butter and use the pulse button to pulse until the mixture resembles fine breadcrumbs.
- Remove the lid of the food processor and sprinkle the water over the flour mixture and then add the vanilla bean paste. Continue to process using the pulse button until the mixture is evenly combined and just starts to come together (but hasn’t as yet formed a ball). The pastry should be soft but not sticky.
- Turn the pastry out onto a lightly floured, cool bench top. Knead lightly with your fingertips for about 10 seconds or until it comes together but isn’t completely smooth. Shape the pastry into a disc, wrap well in plastic wrap, and chill and use as directed.
Prep 30min (+pastry making time)Bake 1hr15minMakes 8-10 serves
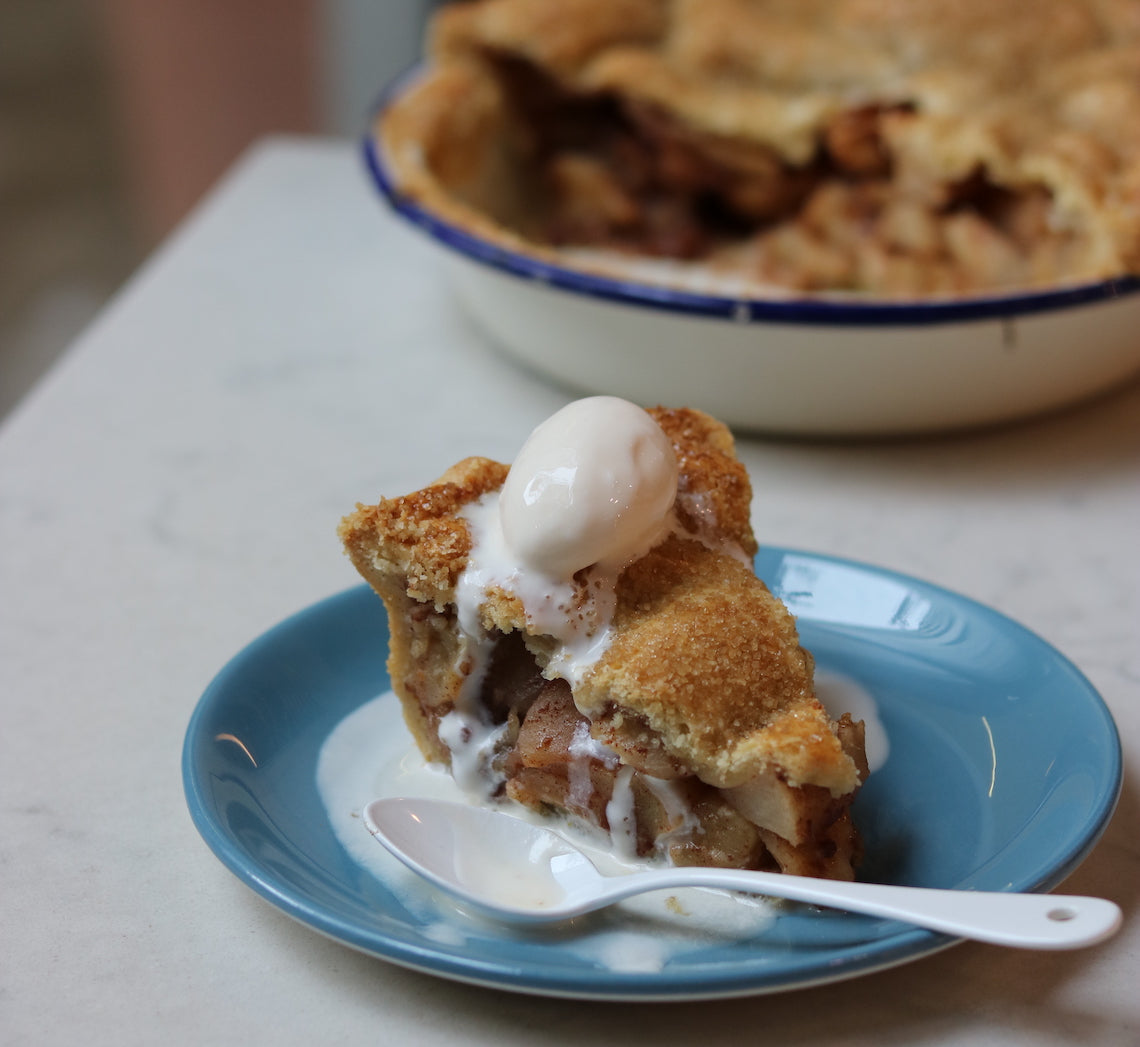
Everyone loves a classic apple pie – it is the ultimate comfort food... Especially when teamed with some good vanilla ice cream!
Ingredients
2 quantities Sweet Vanilla Shortcrust Pastry (combine ¼ of one pastry quantity with the other, and then shape each into a separate disc before wrapping and chilling for 30 minutes)
1 egg yolk
2 teaspoons milk
1 tablespoon demerara sugar
Vanilla ice-cream, to serve
Apple Filling
2½ tablespoons caster sugar
1½ tablespoons plain flour
1½ teaspoons ground cinnamon
6 medium (about 140g each) pink lady or granny smith apples
1 orange, rind finely grated and juiced
1 teaspoon vanilla bean paste
25g (¼ cup) almond meal
20g salted butter, finely diced
Method
- Preheat the oven to 200°C (180°C fan-forced).
- Unwrap the larger portion of pastry and place on a lightly floured, cool benchtop. Use a lightly floured rolling pin to roll the pastry into a round, about 5mm thick and about 35cm in diameter.
- Carefully drape the pastry loosely around the rolling pin, place it over an ungreased 20cm (top measurement) metal or ceramic pie dish (see Baker’s Tips) then unroll the pastry being careful not to stretch it. Gently lift the edges of the pastry and ease it into the pie dish to line the base and the sides and settle it into the corners without stretching it, allowing the excess pastry to overhang the edges. Place the lined pie dish on an oven tray and then place in the fridge to rest for while making the filling.
- To make the apple filling, combine the sugar, flour and cinnamon in a small bowl. Peel, core and quarter each apple. Cut each apple quarter into 4 wedges and place in a separate large bowl with the orange rind, 1 tablespoon of the orange juice and the vanilla bean paste. Use your hands or spatula to toss gently to evenly coat the apple slices. Add the sugar mixture and toss gently to combine evenly.
- Sprinkle the almond meal over the base of the chilled pastry case, spoon the apple mixture over the top and dot with the diced butter. Whisk together the egg yolk and milk. Brush the edge of the pastry with the egg wash. Roll out the remaining smaller disc of pastry into a round, about 5mm thick and about 25cm in diameter. Use a 2cm fluted or plain round cutter to cut out a circle from the centre of the pastry. Carefully drape the pastry loosely around the rolling pin and roll over the top of the pie. Use your fingertips to press the pie pastry top and bottom together around the edge of the pie to seal. Use a small sharp knife to trim the excess pastry from around the edge. Use your fingertips to pinch the edge of the pastry to decorate. Brush the top of the pie with some of the remaining egg wash and then sprinkle with demerara sugar.
- Bake in preheated oven for 30 minutes. Reduce the oven temperature to 160°C (140°C fan-forced) and bake for a further 40 minutes or until the pastry is golden and cooked through and the apples are tender (see Baker’s Tips). Remove the pie from the oven and stand for 5 minutes before serving warm with ice cream.
Baker's Tips
- For this recipe you will need a ceramic or metal pie dish measuring about 20cm across the top, 17cm across the base and 4.5cm deep.
- To check if the apples are tender, insert a skewer into the centre of the pie.
Prep 15min (+20min chilling time)Makes 8-10 serves
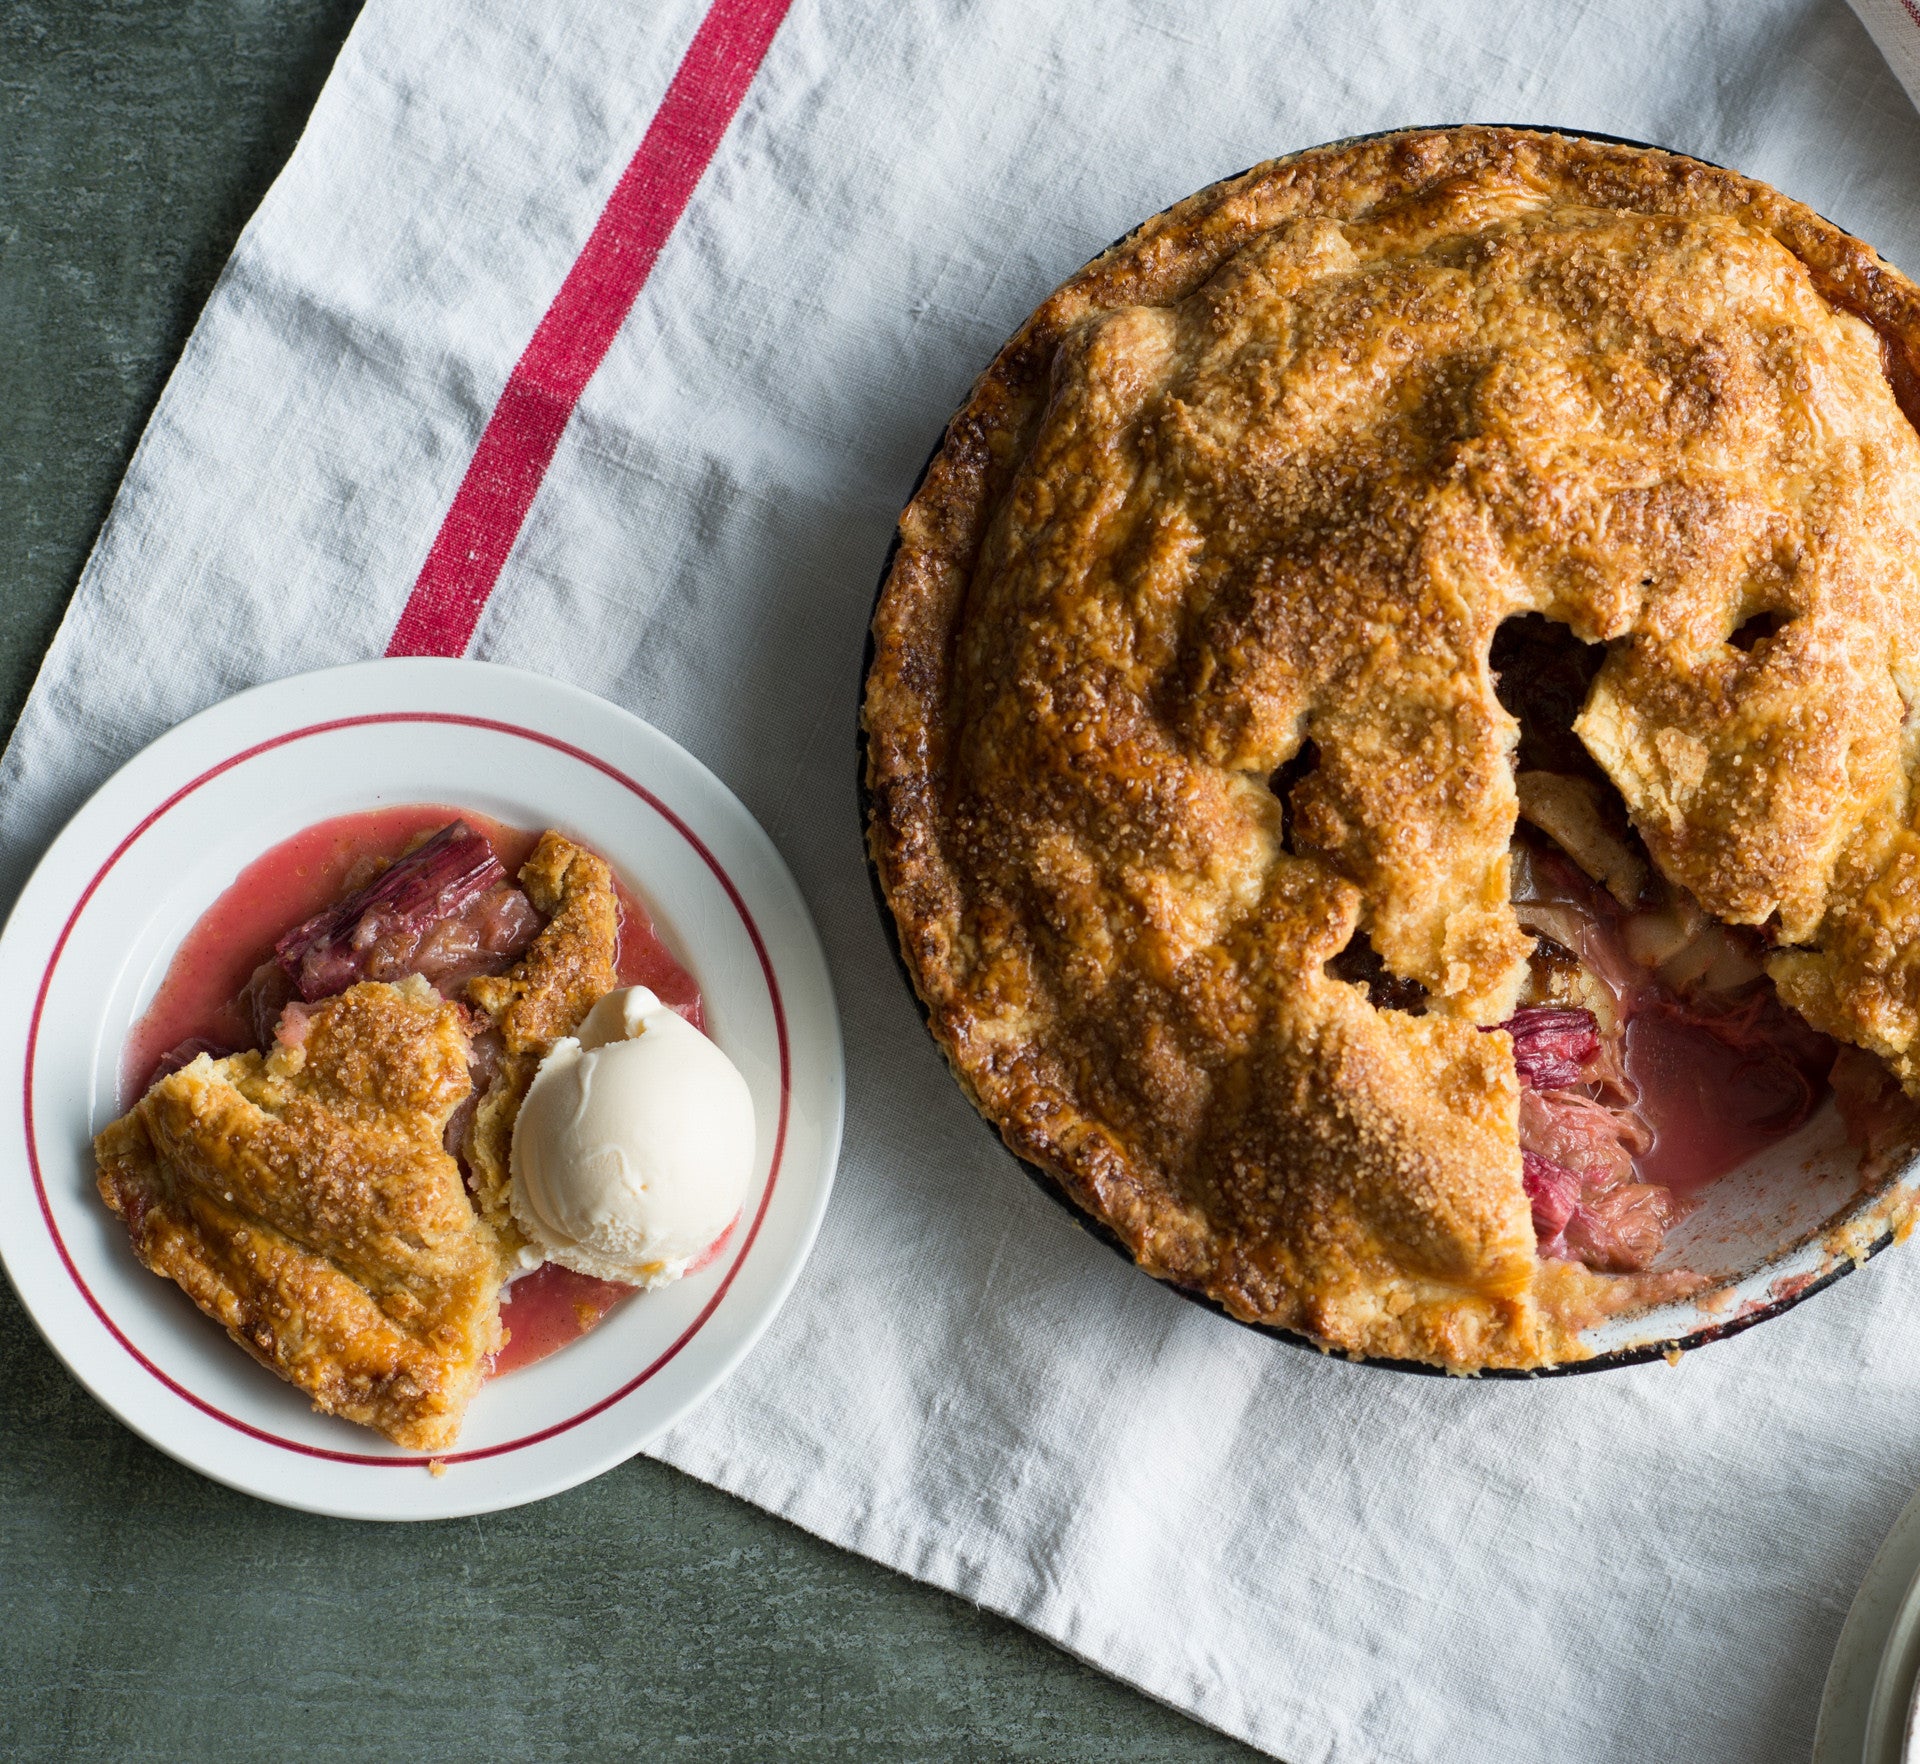
This pastry is rich, flavoursome and dead easy to make. It has a tender, melt-in-the-mouth texture, adding a beautiful richness to fruit-based pies. Avoid using with custard-based pies, as it will be too rich, and it's too fragile to use in free-form pies.
Ingredients
250g (1⅔ cups) plain flour
2 tablespoons caster sugar
good pinch of salt
180g cold unsalted butter, cubed
125g (125ml/½ cup) sour cream
2 teaspoons vanilla bean paste
Method
- Place the flour, sugar, salt and butter in the bowl of a food processor and process until the mixture resembles fine breadcrumbs.
- Add the sour cream and vanilla bean paste and use the pulse button to process briefly until the mixture just forms a ball.
- Turn the dough onto a lightly floured, cool benchtop and shape into a disc. Wrap in plastic wrap and chill in the fridge for 20 minutes to rest. Use as directed in this Rhubarb and Apple Pie.
Baker's Tips
- This pastry will keep wrapped well in plastic wrap in the fridge for up to 3 days. Stand at room temperature for about 1 hour (depending on the weather) until softened slightly and pliable enough to roll easily.
This recipe is from Anneka's SBS Food online column, Bakeproof: Pies.
CLICK HERE for more Bakeproof recipes.
Photography by Alan Benson.
Prep 1hr (+2hr cooling and 5min standing time)Bake 2hr 30minMakes 6 serves
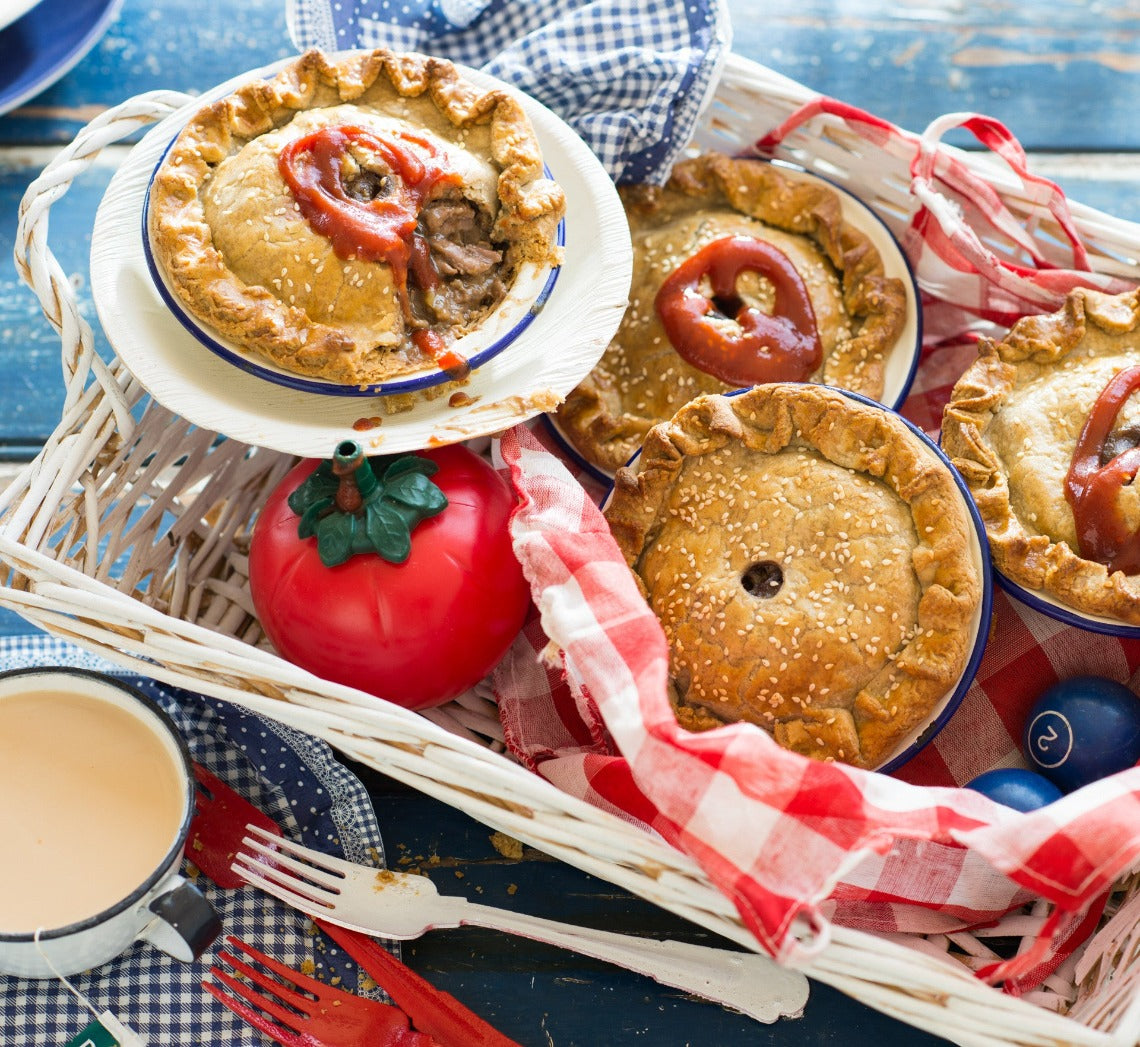
The addition of allspice, shiitake mushrooms, ginger and oyster sauce give these good old Aussie pies a subtle, but truly delicious, Chinese twist.
Ingredients
3 quantities shortcrust pastry (each with the addition of 1 teaspoon ground allspice added with the flour), each made separately and shaped into a disc before wrapping and chilling (see Baker's Tips)
1 egg, lightly whisked
sesame seeds, to sprinkle
Filling
1kg trimmed chuck steak, cut into 2cm chunks
35g (¼ cup) plain flour
60ml (¼ cup) peanut oil
2 small brown onions, chopped
200g shiitake mushrooms, sliced
2 garlic cloves, finely chopped
3 teaspoons finely grated ginger
250ml (1 cup) good-quality beef stock
500ml (2 cups) water
2 tablespoons oyster sauce, or to taste
Method
- Place the chuck steak in a large bowl, sprinkle with the flour and toss to coat.
- Heat 1 tablespoon of the oil in a large heavy-based saucepan over a high heat and cook half the steak chunks, stirring occasionally, for about 5 minutes or until sealed. Remove from the pan, scraping any cooked-on bits from the base, and set aside. Repeat with another tablespoon oil and the remaining steak.
- Clean the pan if necessary. Add the remaining 1 tablespoon oil, onion and shiitake mushrooms and cook over a medium-high heat, stirring occasionally, for 5 minutes or until the onion and mushrooms start to soften. Reduce the heat to medium, add the garlic and ginger and cook for a further 1 minute, stirring occasionally, or until aromatic. Return the steak to the pan with the stock, water and 1 tablespoon of the oyster sauce and bring to a simmer.
- Reduce heat to low and simmer, covered, for 30 minutes, stirring occasionally. Uncover and then simmer for a further 30 minutes to 1 hour, stirring frequently or until the meat is tender and the liquid has reduced and thickened to a thick sauce consistency. Stir in the remaining oyster sauce, taste and adjust seasoning by adding a little more oyster sauce if necessary. Transfer the mixture to a heatproof bowl, cover and place in the fridge, stirring occasionally, until cooled to room temperature (this will take about 2 hours).
- When ready to assemble the pies, preheat oven to 220°C (200°C fan-forced). Brush 6 x 10.5cm (base measurement) x 14cm (top measurement) metal or foil pie dishes. Unwrap the pastry discs and divide each into quarters. Shape a quarter into a disc and use a lightly floured rolling pin to roll the pastry on a lightly floured bench top into a round until about 3mm thick and about 15cm in diameter. Repeat with the remaining discs. Use an upturned pie dish to cut out pie lids from 6 of the rolled pastry rounds. Use the end of a 1cm piping nozzle or a small sharp knife to cut a small steam hole in the centre of each pie lid.
- Gently ease the the uncut pastry discs into the pie dishes and use your fingertips to press the pastry gently into the corners without stretching it — it will overhang the dishes slightly. Divide the steak mixture between the pastry cases to fill. Place a lid over the mixture to cover each pie, brush the edge of each lid with the whisked egg and then fold the excess pastry from the bases over the top of the lids, crimping with your fingertips or pressing with a fork together to seal. Brush the top of each pie lightly with some of the remaining egg wash and sprinkle with sesame seeds.
- Reduce the oven to 200°C (180°C fan-forced) and bake the pies in preheated oven for 45-50 minutes or until the pastry is cooked through and a deep golden. Stand the pies in the dishes for 5 minutes before turning out and serving.
Baker's Tips
- Don't be tempted to make the 3 quantities of pastry all at once. Making them separately makes the pastry easier to handle and will give you a better final result.
Photography by Alan Benson.Save

Prep 20minBake 17-20minMakes about 24
Ingredients
1 quantity Shortcrust Pastry, divided into 2 portions before wrapping and chilling
Filling
1½ rashers bacon, trimmed and finely choppedMethod
- With a lightly floured rolling pin, roll out one portion of pastry on a lightly floured surface until about 2mm thick. Use a 7cm round cutter to out 12 circles and then carefully ease them into an ungreased 12-hole mini (1½ tablespoon capacity) muffin tray, pleating the pastry 4-5 times to help shape it. Repeat with the remaining pastry and another 12-hole mini muffin tray to make 24 tartlet cases in total. Use a fork to prick the base of each tartlet case twice. Place the muffin trays in the freezer for at least 30 minutes or until ready to bake.
- Preheat oven to 200°C (180°C fan-forced).
- Meanwhile, to make the filling, cook the bacon in a non-stick frying pan over medium heat for 5 minutes, stirring occasionally, or until starting to crispen. Transfer the bacon to a medium bowl and add the cheese and parsley. Whisk together the egg and cream, add to the bacon mixture and stir with a fork to combine. Season with pepper.
- Bake the unfilled frozen tartlet cases straight from the freezer in preheated oven for 12 minutes or until golden.
- Use a teaspoon to fill each pre-baked tartlet case with a small amount of the the filling, making sure you get a good amount of the bacon, cheese and egg mixture in each. Return to the oven and bake for 5-8 minutes or until the filling is just set.
- Serve warm or at room temperature garnished with a tomato slice, if desired.
Baker's Tips
- You can make these tartlets up to 2 days ahead of serving. Cool and then store in an airtight container in the fridge. Place the tartlets back in the tins before reheating in an oven preheated to 160°C (140°C fan-forced) for 10 minutes or until heated through.
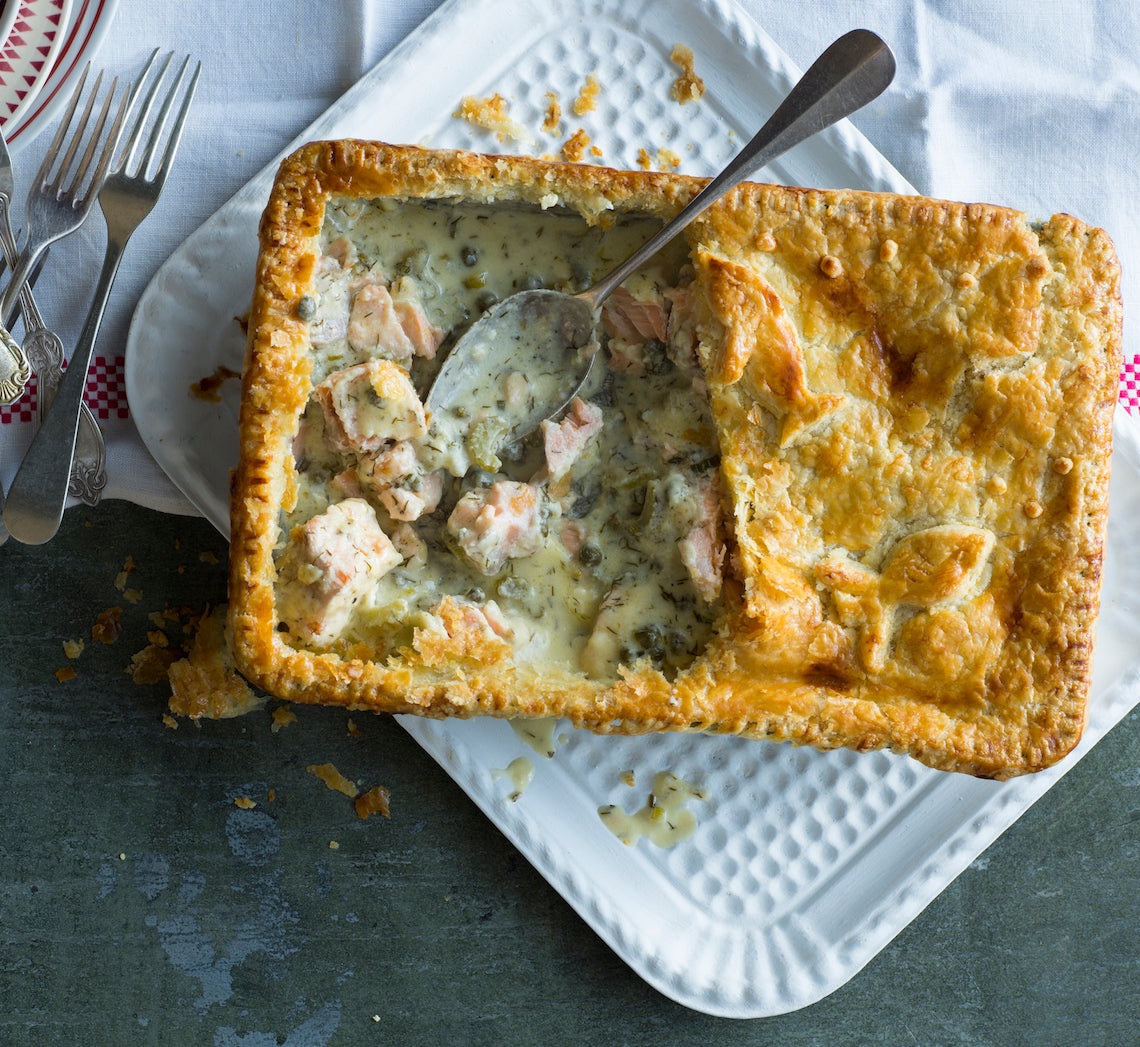
Prep 30min (+ 1hr cooling and pastry making time)Bake 45minMakes 4 serves
On a trip to Finland a few years ago it only took me a couple of meals to realise how much dill and salmon feature in the country’s wonderful cuisine. This pie is a little ode to the Fin’s favourite ingredients, all topped off with a deliciously buttery, flaky pastry.
Ingredients
40g (1½oz) salted butter2 celery stalks, trimmed and sliced
35g (¼ cup/1¼oz) plain flour
250ml (1½ cup/9fl oz) milk
125ml (½ cup/4fl oz) pouring (thin) cream
50g (½ cup/1¾oz) coarsely grated vintage cheddar
3 spring onions, trimmed and sliced
1½ tablespoons (6 teaspoons) baby capers, rinsed and drained
2 tablespoons chopped dill
1 teaspoon Dijon mustard
Salt and freshly ground black pepper, to taste
700g (1lb 8oz) skinless salmon fillets, pin-boned and cut into 3cm pieces
1 quantity Cheat's Rough Puff Pastry
1 egg yolk, lightly whisked with 2 teaspoons milk, to glaze
Method
- Melt the butter in a medium saucepan over medium heat. Add the celery and cook, stirring occasionally, for 5 minutes or until starting to soften. Add the flour and stir with a balloon whisk for about 1 minute until the mixture is bubbling and leaves the sides of the pan.
- Remove the pan from the heat and gradually stir in half the milk, stirring constantly, until smooth. Gradually add the remaining milk and cream, stirring until smooth. Return the pan to medium heat and stir constantly until the sauce thickens and starts to simmer. Reduce the heat to low and simmer, stirring frequently, for 2 minutes.
- Transfer the sauce immediately to a large heatproof bowl and stir in the cheddar, spring onions, capers, dill and mustard. Taste and season well with salt and pepper.
- Place in the fridge for about 1 hour or until cooled to room temperature.
- Preheat the oven to 200˚C/400°F (180°C/350°F fan-forced). You will need a 1.5 litre (6 cup/2pt 10fl oz) capacity ovenproof dish to cook the pie.
- When the sauce has cooled, add the salmon and stir gently to combine evenly.
- Use a lightly floured rolling pin to roll out the pastry on a lightly floured surface to the shape of the dish until about 4mm/⅛in thick. Spoon the cooled salmon mixture into the dish, then brush the edge of the dish with a little of the egg wash. Place the pastry over the filling to cover, then use a small sharp knife to run around the edge of the pie dish on a slight angle to trim the excess pastry. Use a fork to press around the edge of the dish to seal. Cut a cross in the top of the pie and then brush the pastry with a little egg wash to glaze. Decorate the top with the off-cuts of pastry, if desired, and then glaze again with the little of the egg wash.
- Place the pie on a baking tray and bake for 45 minutes or until the pastry is dark golden, crisp and cooked through. Serve straight from the oven.
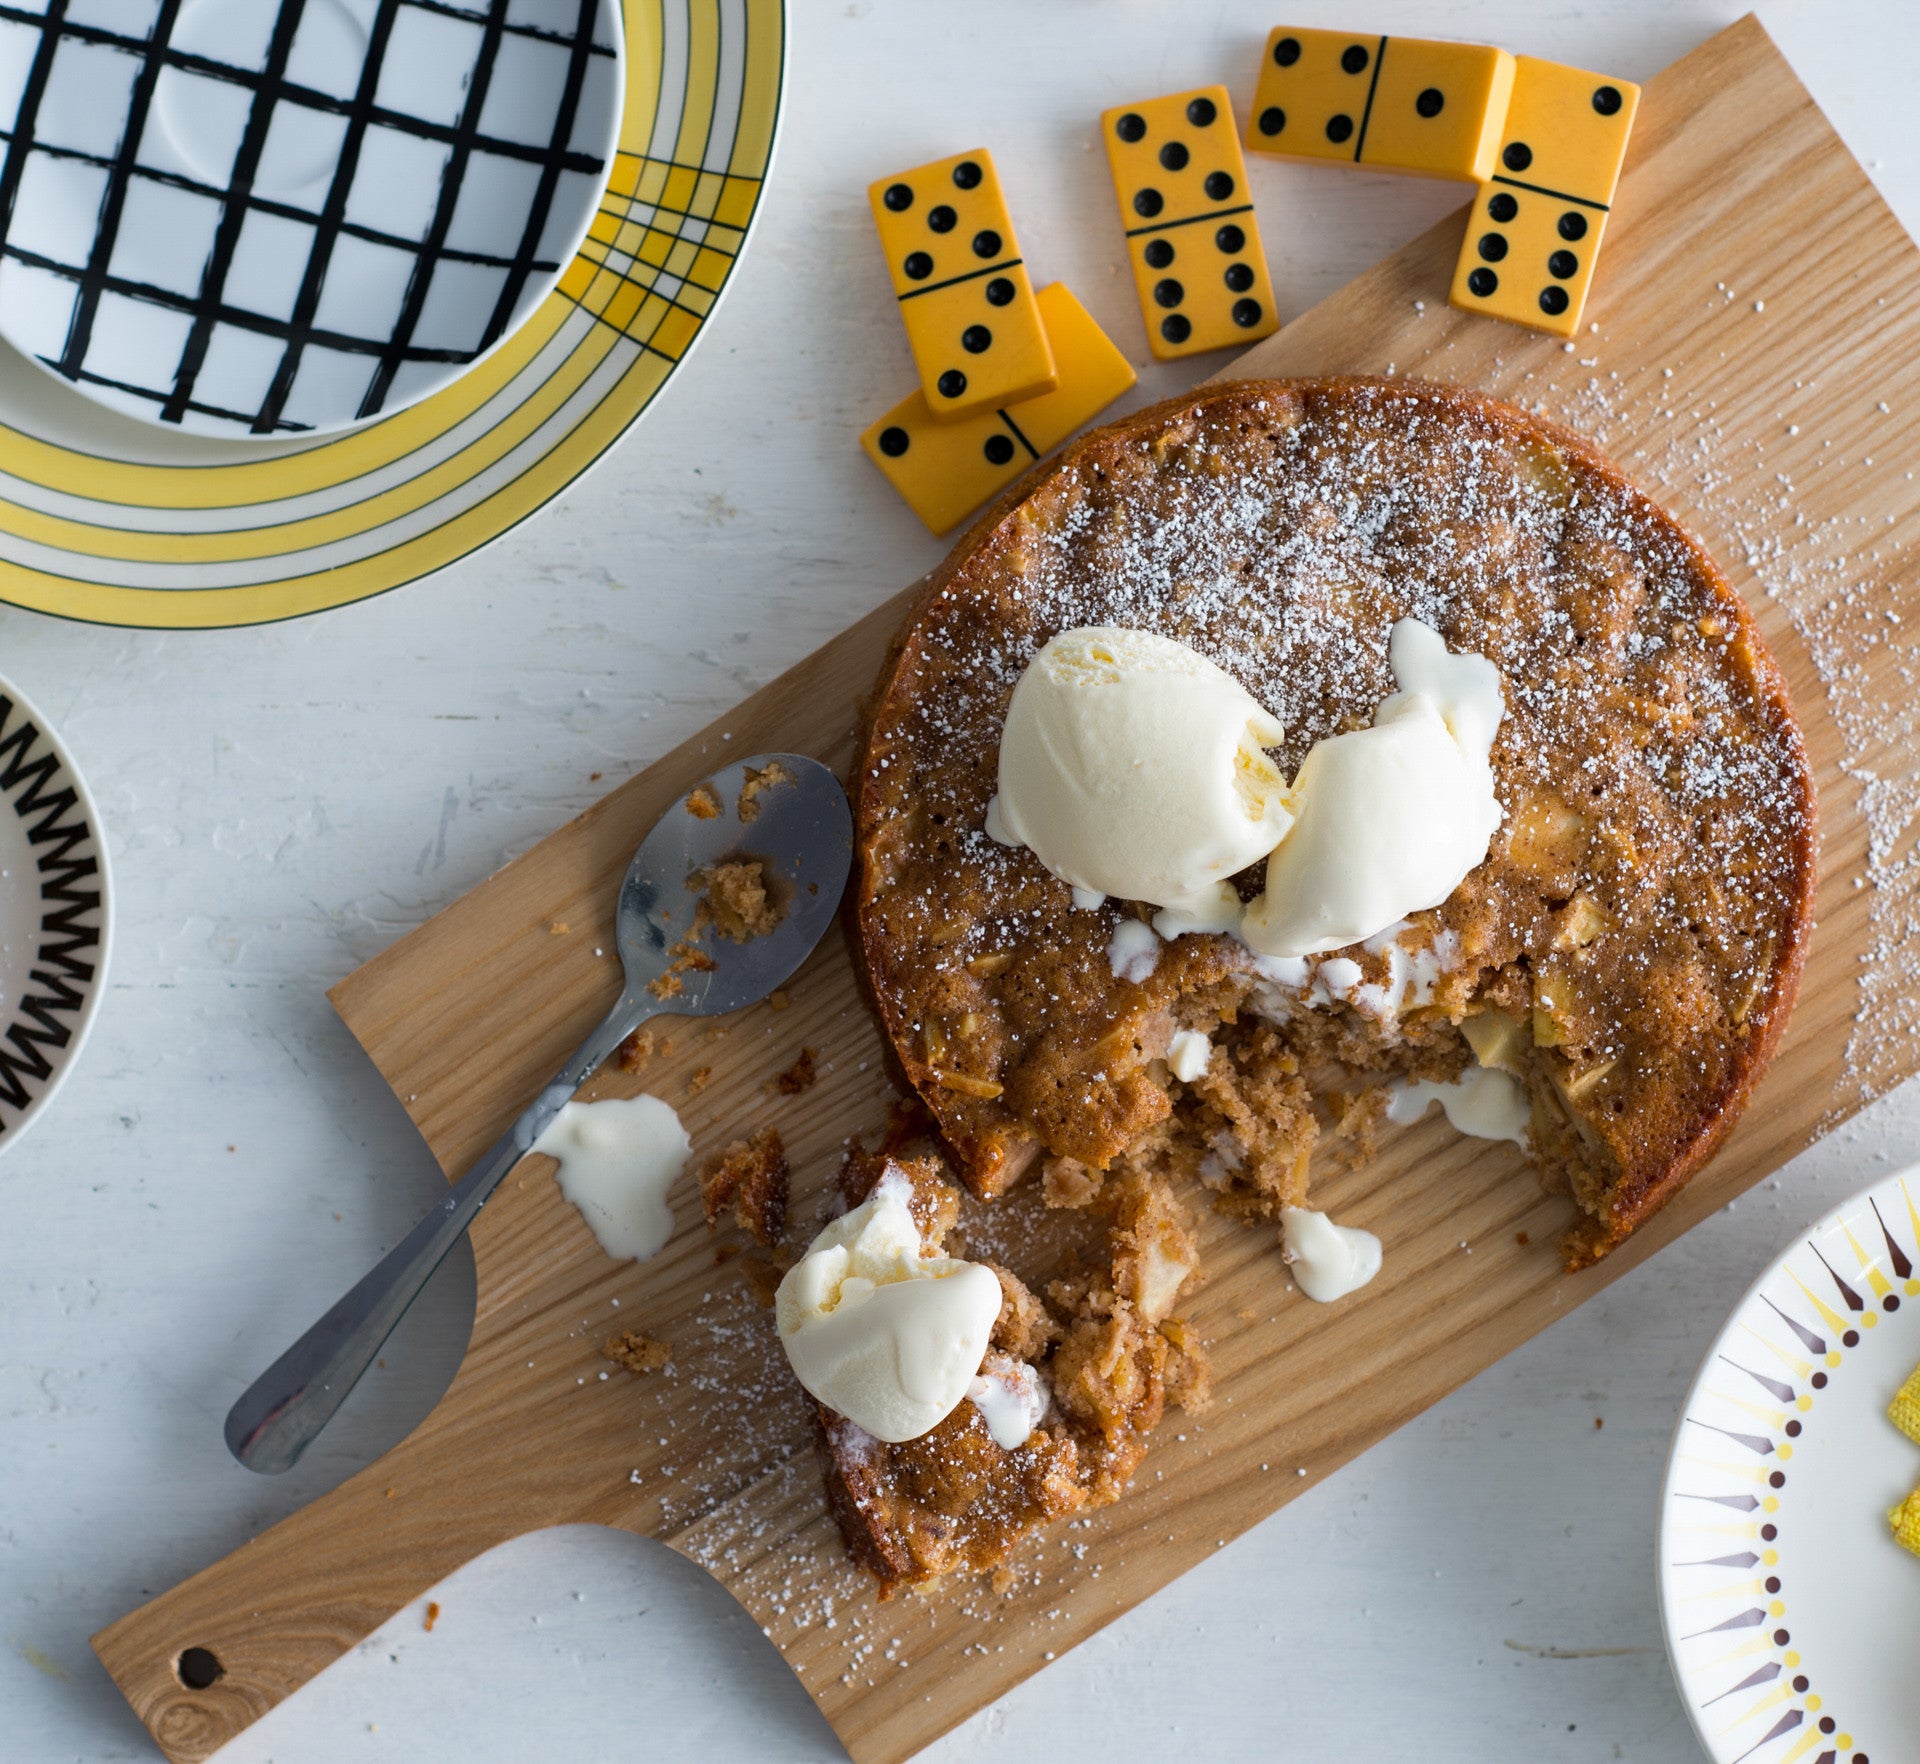
Prep 20minBake 35minMakes 8-10 serves
Much more like a cake than a pie, this apple-dense traditional Norwegian dessert is comforting, homely and can warm the soul with just one mouthful – especially when served straight from the oven in generous scoops and topped with ice-cream or a large dollop of thick cream. Don’t overlook the fact that it is also pretty good served like any other cake, cooled and in wedges. The trick to this recipe is not to over-mix – only mix until the wet and dry ingredients are evenly combined.
Ingredients
- Melted butter, to grease
- 110g (¾ cup) plain flour
- 1 teaspoon baking powder
- 1 teaspoon ground cinnamon
- ½ teaspoon ground cardamom
- 110g (½ cup) caster sugar
- 3 medium (about 150g each) apples (such as golden delicious, royal gala or pink lady), peeled, cored and cut into 2 cm pieces
- 80g slivered almonds, toasted
- 100g butter, melted and cooled
- 1 egg
- 2 tablespoons milk
- 1½ teaspoons natural vanilla essence or extract
- Vanilla ice-cream or thick cream, to serve
Method
- Preheat the oven to 180°C (160°C fan-forced). Grease a 20cm springform tin with melted butter and line the base with baking paper.
- Sift together the flour, baking powder, cinnamon and cardamom into a large bowl. Stir in the sugar, apple and almonds. Use a fork to whisk together the butter, egg, milk and vanilla. Add to the flour mixture and use a spatula to mix until just combined.
- Spoon the mixture into the prepared tin and spread evenly with the back of a spoon. Bake in the preheated oven for 35 minutes or until golden and a skewer inserted into the centre comes out clean.
- Stand the pie in the tin for 5–10 minutes before removing the sides of the tin. Serve warm in scoops or at room temperature in wedges with ice-cream or cream.
Baker's Tips
- This pudding/cake will keep in an airtight container at room temperaturein a cool spot for up to 3 days.
This recipe is from Anneka's SBS Food online column, Bakeproof: Scandi Baking. CLICK HERE for more Bakeproof recipes.
Photography by Alan Benson.
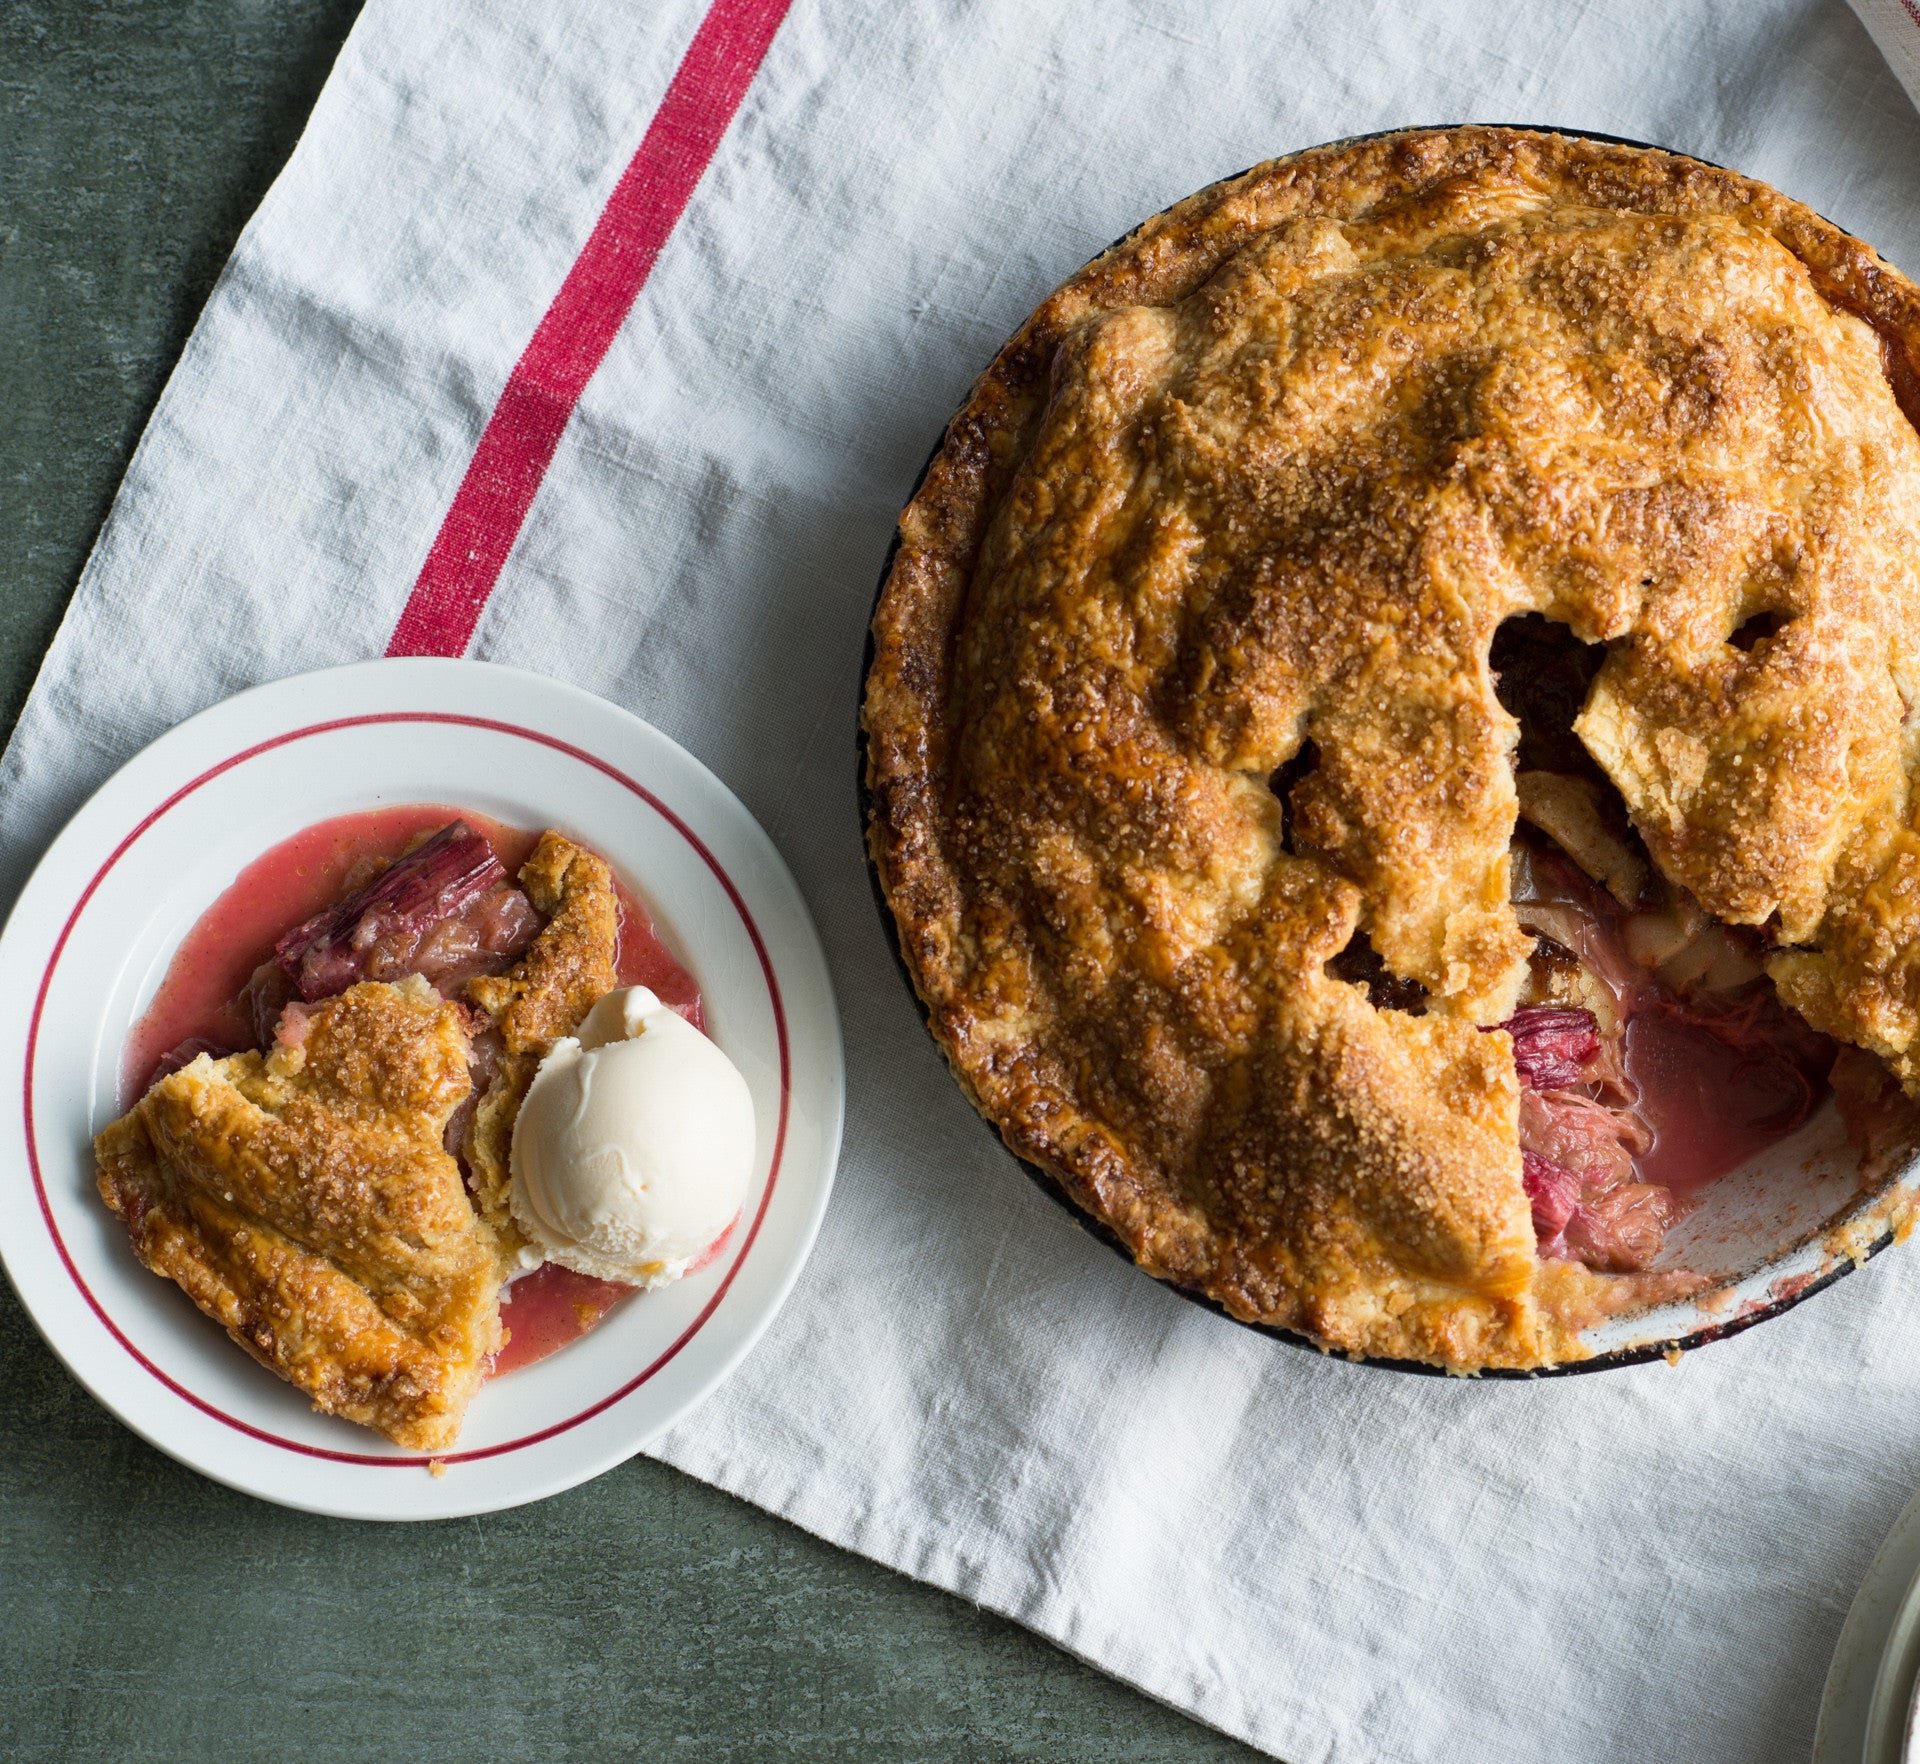
Prep 30min (+35min pastry making time)Bake 1hr 15minMakes 8-10 serves
Classic apple pie (served with a overly-generous scoop of vanilla ice-cream, of course) is one of the perennial delights of winter and can only be improved by the addition of rhubarb and a deliciously rich vanilla sour cream pastry. This pie just may be a little hard to beat.
Ingredients
1 egg, whisked, for brushing1 quantity vanilla sour cream pastry, shaped into a disc before wrapping and chilling as directed
2 teaspoons demerara sugar, to sprinkle
pouring cream, vanilla ice-cream or custard, to serve
Apple and rhubarb filling
1 teaspoon ground cinnamon1 teaspoon vanilla bean paste
1 orange, rind finely grated
110g (½ cup) demerara sugar
1½ tablespoons plain flour
1kg (about 6 medium) Granny Smith apples
750g trimmed rhubarb, cut into 4 cm lengths (see Baker’s Tips)
30g unsalted butter, finely diced
Method
- Preheat the oven to 200°C (180°C fan-forced).
- To make the apple and rhubarb filling, use your fingertips to rub the cinnamon, vanilla bean paste and orange rind through the sugar in a medium bowl. Stir in the flour. Peel, core and cut the apples into thin (about 3 mm) slices and place in a separate large bowl, along with the rhubarb and the sugar mixture. Use your hands to toss gently to combine evenly.
- Spoon the apple and rhubarb filling into an ungreased 23cm diameter (top measurement) ceramic or metal pie dish (see Baker’s Tips) and then dot with the diced butter. Brush the edge of the pie dish with the whisked egg.
- Roll out the vanilla sour cream pastry to make a pie lid about 5 mm thick. Use a 2cm round cutter to cut out a circle form the centre of the pastry. Carefully drape the pastry loosely around the rolling pin and place on top of the pie. Use your thumb and index finger to press the pie pastry top onto the rim of the pie dish to seal. Use a small sharp knife to trim the excess pastry from around the edge. Brush the top of the pie with some of the remaining whisked egg and then sprinkle with demerara sugar.
- Bake for 30 minutes. Reduce the oven temperature to 160°C (140°C fan-forced) and bake for a further 40-45 minutes or until the pastry is golden and cooked through and the apples are tender (see Baker’s Tips). Remove the pie from the oven and stand for 5 minutes before serving warm with cream, ice cream or custard.
Baker's Tips
- For this recipe you will need a ceramic pie dish measuring 23cm across the top, 17cm across the base and 7cm deep.
- You will need about 1kg untrimmed rhubarb for this recipe.
- To check if the apples are tender, insert a skewer into the centre of the pie.
This recipe is from Anneka's SBS Food online column, Bakeproof: Pies.
CLICK HERE for more Bakeproof recipes.
Photography by Alan Benson.


