
- home
- BAKERECIPES
BakeRecipes
Bringing real baking into your home with deliciously simple recipes.
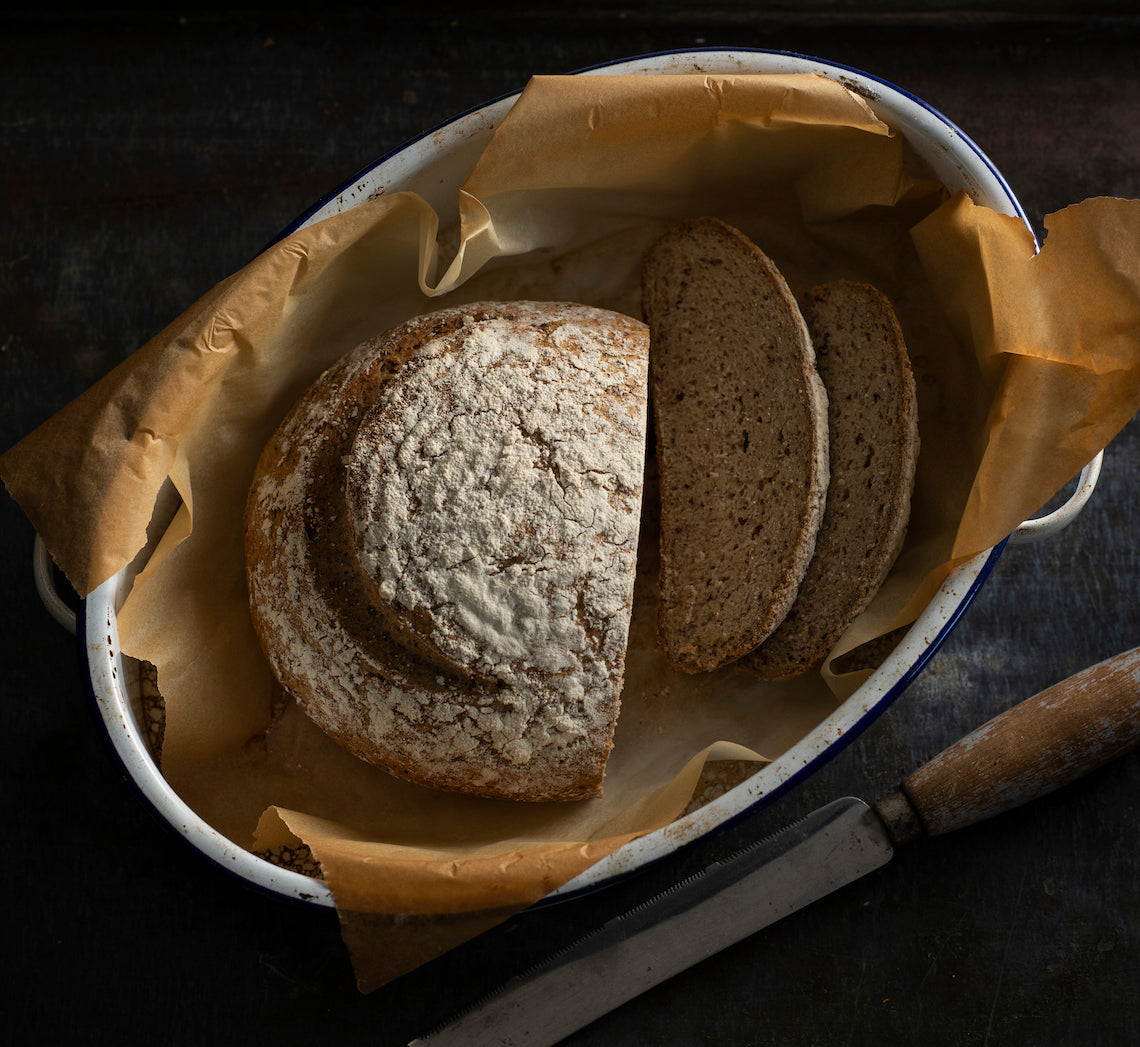
Prep 20min (+2-2.5hr proving and 3hr cooling time)Bake 1hr 10minMakes 1 loaf
This loaf has a beautifully soft crumb and a crisp crust all thanks to a clever combination of gluten-free flours and ingredients. It is great served fresh on the day of baking or toasted after that. This recipe uses a Dutch oven (cast iron pot) or covered enamel roaster which also contributes to the lovely crisp crust and good volume, but it can also be baked in a loaf tin if you wish (see instructions for this at the end of the recipe).
Ingredients
120g (4¼oz) fine brown rice flour, plus extra to dust
100g (3½oz) sorghum flour
60g (2¼oz) potato starch
60g (2¼oz) sweet (glutinous) rice flour
1 teaspoon fine salt
1 x 7g sachet (2 teaspoons/¼oz) instant dried yeast
550ml (18½fl oz) warm water
1 tablespoon honey
20g (¾oz) psyllium husks
20g (¾oz) ground linseeds (ground flaxseed)
Method
- Line a medium 1.5 litre (2⅓pt) capacity bowl with a cloth or clean tea towel and sprinkle the cloth with extra brown rice flour (see Baker’s Tips). Set aside.
- Sift together the brown rice flour, sorghum flour, potato starch, sweet (glutinous) rice flour and salt in a large bowl. Add the yeast and mix to combine. Combine the warm water and honey in a separate medium bowl. Add the psyllium husks and ground linseeds and stir immediately – it will form a gel-like mixture. Add the wet ingredients to the dry ingredients and use a wooden spoon to mix to a soft dough.
- Turn the dough out onto a lightly floured surface and knead for 1-2 minutes or until the dough becomes smooth and pliable. Transfer to a medium bowl, cover with plastic wrap and set aside in a warm, draught-free place for 1 hour or until doubled in size.
- Turn the dough onto a lightly floured surface and knead for about 1 minute or until the dough becomes smooth and pilable again. Shape into a ball and lightly coat the outside of the dough with rice flour. Transfer to the lined bowl, seam side up and cover the dough lightly with any overhanging cloth. Place the bowl in a plastic bag and seal the bag. Set aside in a warm, draught-free place for 1-1½ hours or until the dough has doubled in size.
- About 30 minutes before baking the bread preheat oven to 250°C/480°F (230°C/440°F fan-forced). If using a Dutch oven (cast iron pot) place this on the middle rack in your oven to preheat (if using an enamel roaster there is no need to preheat the roaster).
- Line an oven tray with a piece of non-stick baking paper. Uncover the dough in the bowl and then place the upturned lined oven tray on top and invert the dough
onto the tray. Use a small sharp knife or bread lame to score the top of the loaf with a 1cm (½in) deep cut. Use the baking paper to carefully transfer the dough to the preheated Dutch oven or enamel roaster. Add about 2 tablespoons of water to the pot or roaster under the baking paper. Cover with the lid immediately and place in the preheated oven. Bake for 30 minutes. Remove the lid, reduce the temperature to 230°C/440°F (210°C/410°F fan-forced) and bake for a further 40 minutes or until the loaf is baked through and sounds hollow when tapped on the top. (See Baker's Tips.) - Use the baking paper to remove the bread from the pot and transfer to a wire rack to cool completely before slicing (this will take about 3 hours).
Baker's Tips
- You can use a banneton (traditional bread proving basket) instead of the bowl to shape the loaf if you wish, lining it with a rice flour- dusted cloth.
- A soft, open-weave tea towel or cloth (preferably linen or muslin) is best to use to line the bowl or banneton.
- You will notice that the baking time for this bread is quite lengthy. This is because gluten-free breads, due to the flours they use, need a lot more moisture than their gluten-containing counterparts made with wheat flour. This extended baking will ensure that most of this moisture evaporates so the final crumb texture doesn't end up unpleasantly gummy. Also, as tempting as it may be, don’t slice the loaf until it has cooled completely – if you do, the crumb will compress and, again, it will give it a gummy texture.
- This bread will keep in a paper or cloth bag for up to 2 days.
- To freeze whole or in slices, seal in a plastic bag and freeze for up to 3 months. Thaw at room temperature or toast straight from the freezer.
Variation
Gluten-free Sandwich Bread
This dough can also be baked in a loaf tin. In Step 4 shape the dough into a log and place in a 9.5cm x 19.5cm (3¾in x 7¾in), base measurement, loaf tin that has been greased with olive oil and sprinkled with 1 tablespoon sesame seeds. Prove as in Step 4. Brush the top of the loaf with a little more olive oil and then sprinkle with more sesame seeds. Bake in preheated oven at 200°C/400°F (180°C/350°F fan-forced) for 1 hour and 20 minutes or until baked through and the loaf sounds hollow when tapped on the top. Remove from the oven and allow to stand for 5 minutes before transferring the loaf to a wire rack to cool completely.
Photography by Alan Benson.
This recipe is from our Gluten-free Baking Essentials online course, a no-fuss 'real' guide to the world of gluten-free baking.
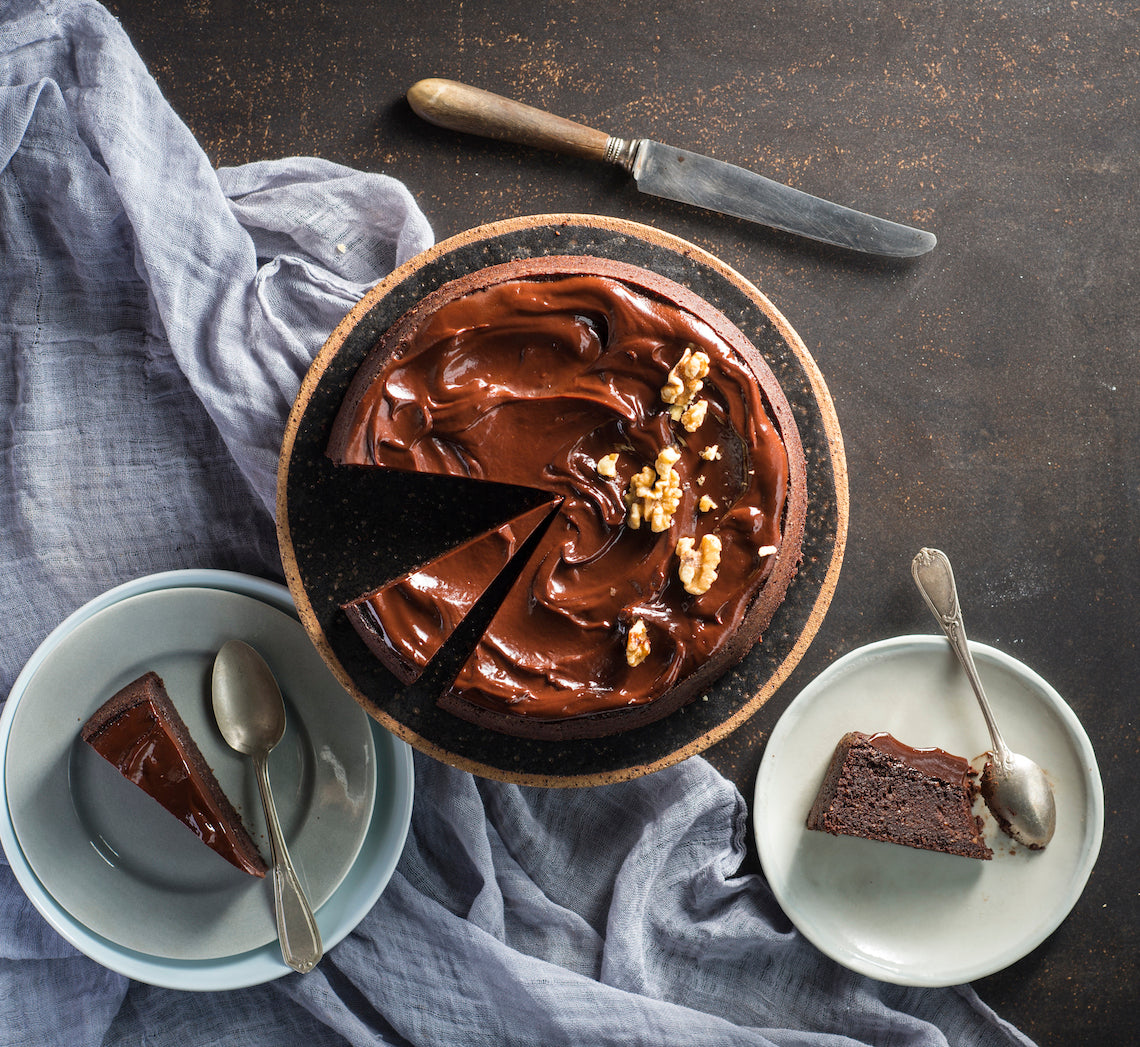
Prep 30min (+cooling and standing time)Bake 40-45minMakes 10-12 serves
With an underlying hint of orange and the warm nuttiness of roasted walnuts, this divine cake completely delivers when it comes to a rich, decadent and utterly satisfying chocolate cake.
Gluten-free chocolate cakes have been widely adapted as the Passover dessert of choice, and with the absence of dairy, this one is also appropriate to serve following a meat-based main course.
Ingredients
75g (⅔ cup) Dutch cocoa powder, sifted
165ml (⅔ cup) boiling water
200g walnuts, toasted
1 teaspoon gluten-free baking powder
4 x 59g eggs, at room temperature
220g (1 cup, firmly packed) brown sugar
200ml light olive oil, plus extra to grease
1 teaspoon natural vanilla essence or extract
1 tablespoon finely grated orange zest
Coconut Ganache
180g good-quality dairy-free dark chocolate, chopped
150ml tinned full-fat coconut milk
Method
- Preheat oven to 170°C (150°C fan-forced). Grease a 20cm springform tin with extra oil and line the base with non-stick baking paper.
- Place the cocoa in a medium heat-proof bowl and gradually stir in the boiling water until smooth. Set aside to cool.
- Process the walnuts in a food processor until finely ground. Transfer to a medium bowl and stir in the baking powder until evenly combined.
- Use an electric mixer with a whisk attachment to whisk the eggs, sugar, oil and vanilla on high speed for about 5 minutes or until thick and paler in colour. Add the cocoa mixture and whisk until just combined. Add the walnut mixture and orange zest to the chocolate mixture and whisk on low speed until just combined.
- Pour the mixture into the prepared tin and bake in preheated oven for 40-45 minutes or until wet crumbs cling to a skewer inserted into the centre of the cake. Cool the cake in the tin sitting on a wire rack (this will take about 2 hours).
- To make the Coconut Ganache, place the chocolate in a heatproof bowl. Heat the coconut milk in a small saucepan over medium heat, stirring occasionally, until it just comes to a simmer (do not boil). Pour over the chocolate and set aside for 1 minute. Stir until the chocolate melts and the mixture is smooth, well combined and glossy. Set aside at room temperature, stirring occasionally, until the ganache thickens to a thick spreadable consistency.
- Remove the cake from the tin and place on serving plate. Spoon the ganache over the cooled cake and use the back of a spoon to spread. Set aside for 30 minutes or until the ganache sets. Serve in wedges.
Baker's Tip
- This cake will keep in an airtight container at room temperature (in a cool spot) for up to 5 days.
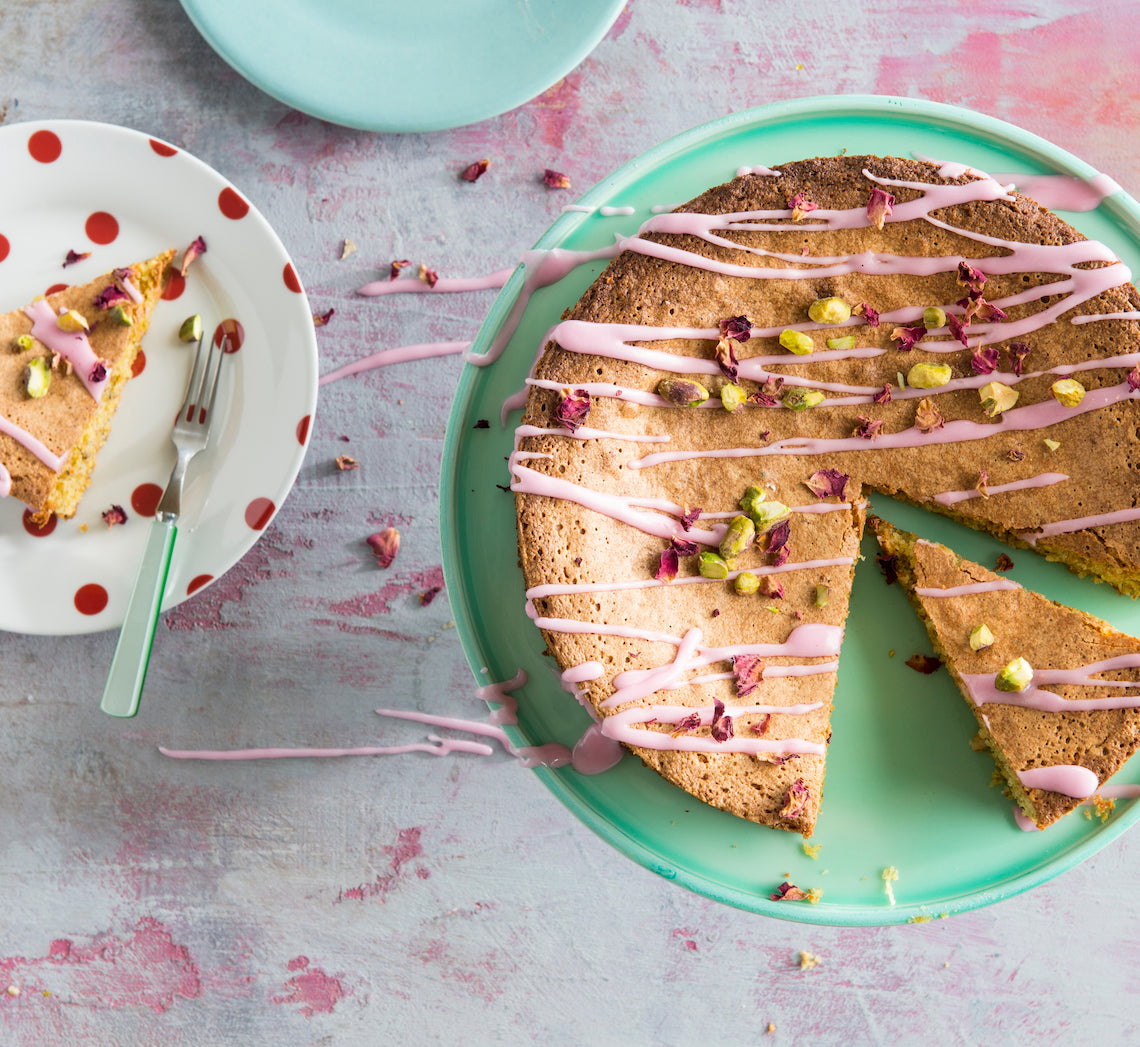
Prep 30min (+1hr cooling time)Bake 30minMakes 8-10 serves
This gluten-free and dairy-free recipe, with its subtle lemon flavour teamed with an aromatic rosewater icing and light nutty texture, is the perfect afternoon-tea cake. It will dip slightly in the centre due to its delicate nature but this is just a sign of how lovely and light it is.
Ingredients
Light olive oil, to grease
100g (1 cup) almond meal
100g (¾ cup) raw unsalted pistachios, toasted and finely ground
90g (½ cup) instant polenta or wholegrain corn flour
2 teaspoons gluten-free baking powder
3 eggs, at room temperature
165g (¾ cup) caster sugar
125ml (½ cup) light olive oil
1 lemon, rind finely shredded, juiced
extra raw unsalted pistachios, toasted and coarsely chopped, to decorate
dried rose petals (optional), to decorate
Lemon and rosewater icing
125g (1 cup) pure icing sugar
1 tablespoon (about) strained fresh lemon juice
1 teaspoon rosewater
gluten-free pink or rose food colouring, to tint
Method
- Preheat oven to 180°C (160°C fan-forced). Brush a 20cm springform cake tin with olive oil and line the base with non-stick baking paper.
- Place the almond meal, ground pistachios, polenta and baking powder in a medium bowl and use a whisk to stir to combine and remove any lumps. Set aside.
- Use an electric mixer with a whisk attachment to whisk the eggs and sugar on medium-high speed until thick and pale and a ribbon trail forms when the whisk is lifted. Whisk in the olive oil, 2 tablespoons of the lemon juice and the lemon rind.
- Add the dry ingredients to the egg mixture and use a spatula or large metal spoon to fold until evenly combined. Pour into the prepared cake tin and bake for 30 minutes or until a skewer inserted in the centre comes out clean. Stand the cake in the tin on a wire rack for 10 minutes before removing the sides of the tin. Set aside to cool completely.
- To make the lemon and rosewater icing, sift the icing sugar into a medium bowl. Gradually stir in the 1 tablespoon lemon juice and the rosewater until the mixture is smooth and has a thick coating consistency, adding a little more juice if needed. Cover with plastic wrap and set aside at room temperature until ready to use.
- Drizzle the cooled cake with the icing and then sprinkle with extra pistachio nuts and dried rose petals, if using. Set aside for 30 minutes or until the icing has set before serving in wedges.
Baker's Tips
- This cake will keep in an airtight container at room temperature for up to 4 days.
This recipe is from Anneka's SBS Food online column Bakeproof: Gluten-free baking. Click here for more Bakeproof columns and recipes.
Photography by Alan Benson.
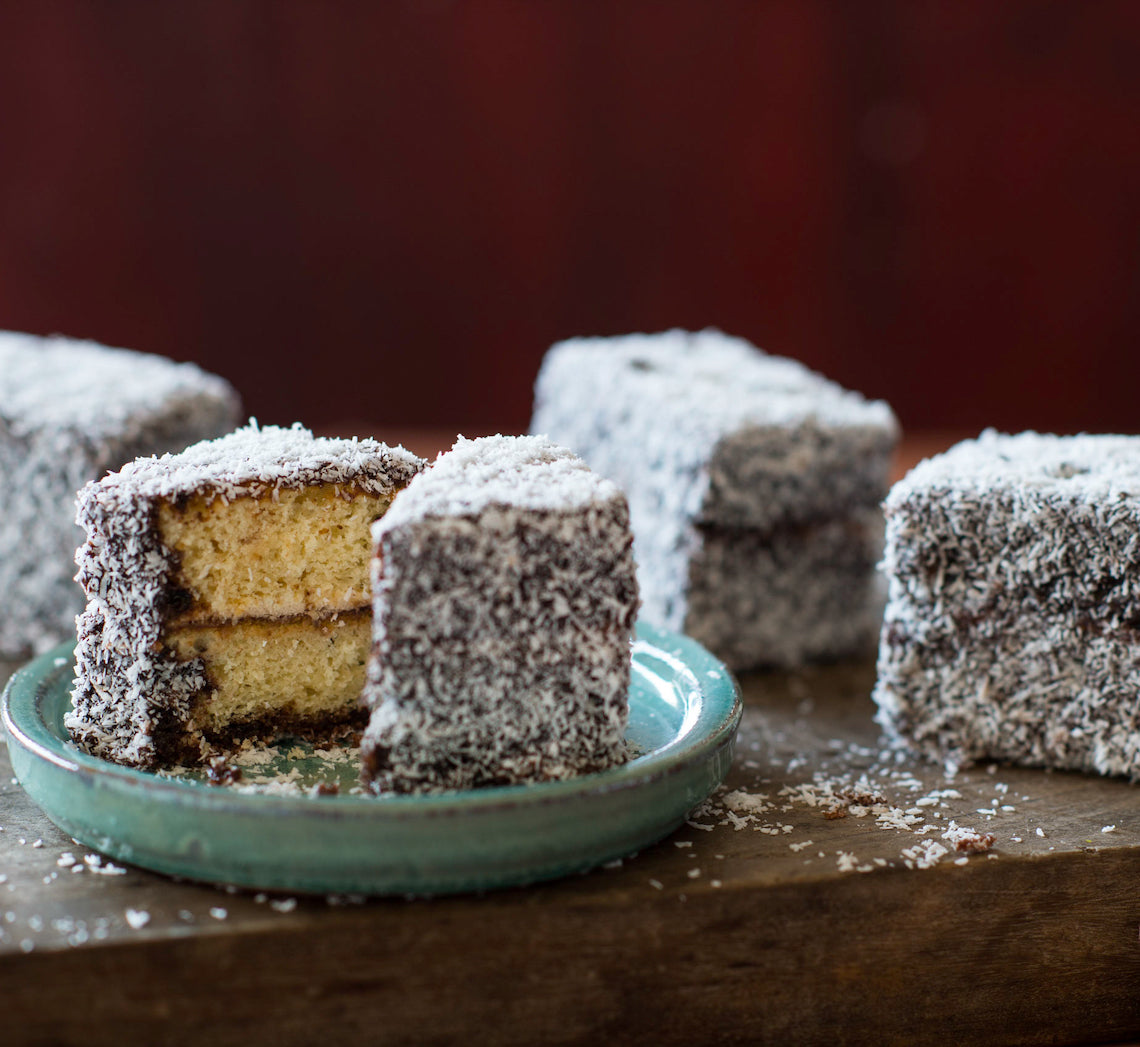
Prep 40min (+ 40min cooling and 20min chilling time)
Bake 20minMakes 9
Gluten-free cakes are sometimes hard to come by. Moist and flavoursome, these lamingtons won’t disappoint. Those with gluten or wheat intolerances and sensitivities won’t ever have to compromise if wanting to enjoy this Australian classic.
Ingredients
80ml (⅓ cup) thickened cream, whisked to firm peaks180g (2 cups) desiccated coconut, to coat
Gluten-free buttercake
175g (1¼ cups) purchased gluten-free plain flour mix2½ teaspoons gluten-free baking powder
165g (¾ cup) caster sugar
125g unsalted butter, cubed, softened
2 eggs, at room temperature
80ml (⅓ cup) milk
2 teaspoons natural vanilla extract or essence
Chocolate icing
465g (3¾ cups) pure icing sugar55g (½ cup) cocoa powder
150ml boiling water
1½ teaspoons vanilla essence
Method
- To make the gluten-free buttercake, preheat the oven to 180°C. Grease a 20 x 30cm (base measurement) shallow cake tin and line the base and two longs sides with one piece of baking paper.
- Put the flour, baking powder, sugar, butter, eggs, milk and vanilla in a large mixing bowl. Use an electric mixer to beat on low speed until combined. Increase the speed to medium and beat for 3 minutes or until the mixture is well combined and very pale in colour. Spoon the mixture into the lined tin and spread evenly using the back of a spoon. Lightly tap the tin on the bench 3 times to get rid of any excess air bubbles.
- Bake for 20 minutes or until cooked when tested with a skewer. Cool for 5 minutes in the tin, then turn onto a wire rack to cool completely (this will take about 40 minutes).
- To make the Chocolate Icing, sift the icing sugar and cocoa powder into a medium bowl. Add the boiling water and vanilla and stir until smooth (it should be the consistency of pouring cream).
- Trim the edges of the cooled cake and then cut in half to form two layers about 20 x 15cm. Spread one half of the cake with a little of the Chocolate Icing and then spread whipped cream. Top with the remaining cake half. Chill for 20 minutes or until the cream is firm enough to cut the cake.
- Use a sharp serrated knife to cut the layered cake into 9 portions (about 6.5 x 4.5cm each). Run a palette knife around the cut surface of each lamington to remove any excess cream.
- Spread the coconut on a tray or plate. Rest a cake portion on a fork, dip into the chocolate icing and then and spoon the icing over the top and sides to completely coat. Allow any extra icing to drip off. Roll the cake in the coconut to coat evenly. Place on a wire rack. Repeat with the remaining cake portions, icing and coconut.
Baker's Tips
- If the icing becomes too thick while you are coating the cake pieces, stir in enough extra boiling water, adding it a teaspoon at a time, to thin to the right consistency.
- These lamingtons will keep in an airtight container in the fridge for up to 2 days. Stand at room temperature for at least 30 minutes before serving.
This recipe is from Anneka's SBS Food online column Bakeproof: Lamingtons. CLICK HERE for more Bakeproof recipes.
Photography by Alan Benson.
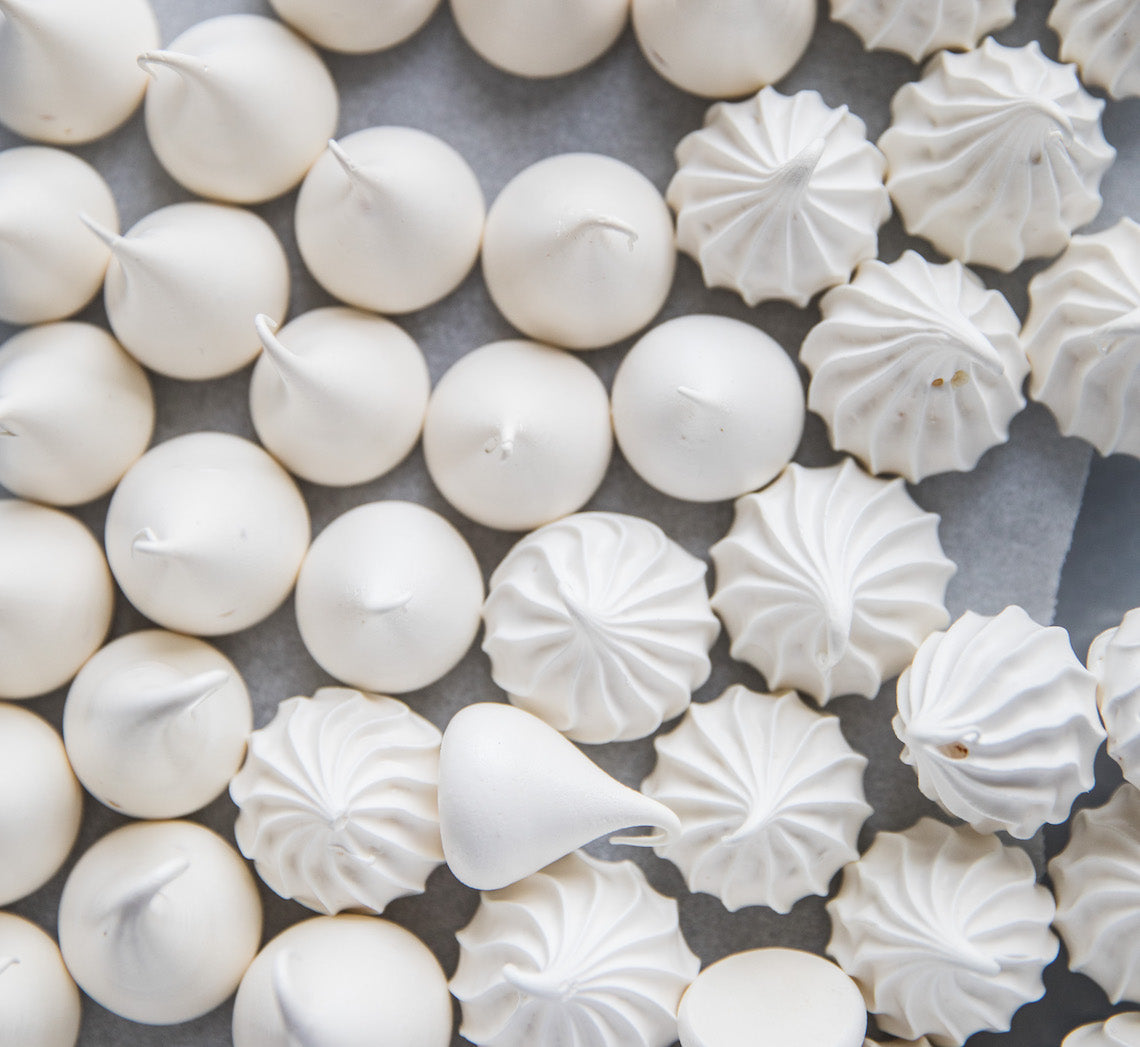
Prep 40min (+1-2hr cooling time)Bake 1hr-1hr10minMakes about 50
Ingredients
2 egg whites (from 60g/2oz eggs)
110g (½ cup/4oz) caster sugar
1 teaspoon natural vanilla essence or extract
2 teaspoons gluten-free cornflour, sifted
Method
- Preheat oven to 110°C/230°F (90°C/195°F fan-forced). Line an oven tray with non-stick baking paper.
- Combine the egg whites and sugar in a medium heatproof bowl (preferably metal) and place over a saucepan of simmering water, ensuring the bowl doesn’t touch the water. Stir with a spatula or small whisk until the sugar dissolves and the mixture is hot to touch (about 55-60°C on a sugar thermometer). Be careful not to allow the egg whites to cook.
- Transfer the egg white mixture to the bowl of an electric mixer (see Baker’s Tips). Whisk the egg white mixture with a whisk attachment on medium-high speed until very thick and glossy and the mixture has cooled to room temperature. Whisk in the vanilla and cornflour.
- Fill a large piping bag fitted with a 4B star (or #11/11mm/½in round) piping nozzle with the meringue mixture. Holding the piping nozzle about 1cm/½in above the tray, pipe small rosettes (or 'kisses') about 2.5cm/1in in diameter and 2cm apart on the lined tray.
- Bake in a preheated oven for 60-70 minutes or until the meringues are crisp, hard to touch and peel away from the tray easily, but are not coloured.
- Remove the meringues from the oven and place immediately in an airtight container lined with absorbent paper
Variations
- Striped Meringue Kisses: Use a paintbrush to lightly brush evenly spaced vertical lines of food colouring gel on the inside of the large piping bag before spooning the meringue mixture into the piping bag. Continue as per the recipe.
Baker's Tips
- The fan-forced setting is often too intense for baking meringues and will cause them to crack. If this is the case with your oven, opt for the conventional setting. However, if the meringues do crack when using the convention setting, your oven may be running a little hot and next time reduce the temperature by 5-10°C (41-50°F) as this will often help prevent them from cracking.
- If you don't have a small bowl for your mixer, first whisk the egg white mixture with a balloon whisk until it is foamy and doubled in volume before whisking with the stand mixer. This will make the whisking of the egg white mixture more efficient in a standard size bowl.
- Allowing the egg white mixture to come to room temperature before whisking will reduce the time it will take to whisk it to a meringue.
- These meringues will keep in an airtight container at room temperature for up to 1 week.
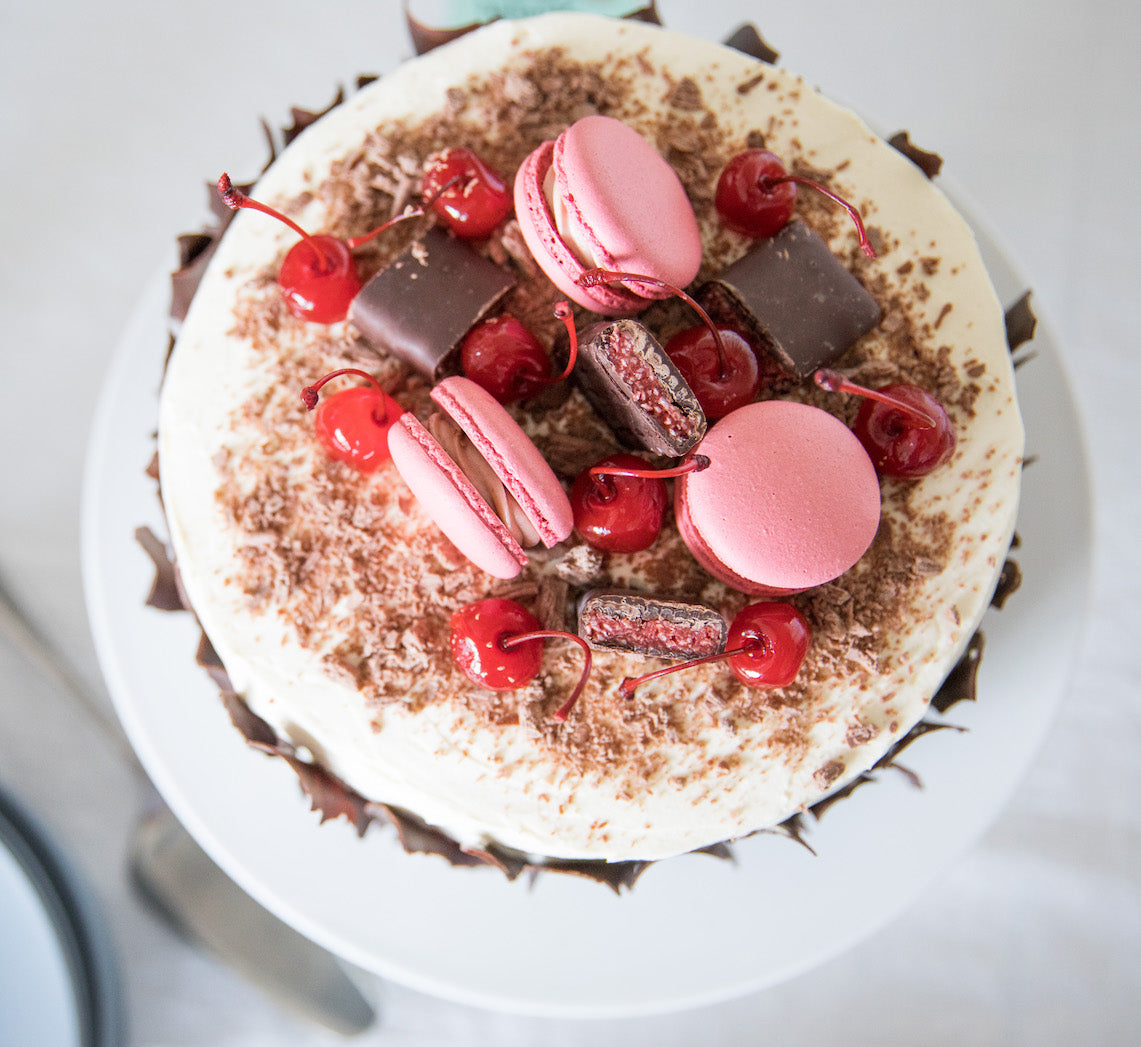
Prep 11/2hr (+ standing time) Bake 15min (per batch) Makes about 28
Pretty to look at, divine to eat, these macarons were created by Allen Au, one of our Make Me a Baker graduates, to use as part of his Graduation cake recipe.
Ingredients
125g almond meal
125g pure icing sugar
96g egg whites
125g caster sugar
30ml water
Gel colouring (see Baker's tip)
Filling
125g unsalted butter
125g pure icing sugar, sifted
1 tablespoon sieved cherry jam
Method
- Preheat oven to 165°C (145°C fan-forced). Line two large oven trays with non-stick baking paper or silicone baking mats.
- Sift together the almond meal and icing sugar into a large bowl. Add half the egg white and mix until a thick paste forms.
- Combine the caster sugar and water in a small saucepan and stir over medium heat until the sugar dissolves. Bring to a boil and simmer over medium heat, brushing down the sides of the saucepan with a wet pastry brush occasionally to prevent any sugar crystals forming. Do not stir. Once the sugar mixture has reached 115°C on a sugar thermometer, use an electric mixer with a whisk attachment to whisk the remaining egg white on medium-high speed until soft peaks form. Once the sugar mixture has reached 118°C, remove the saucepan from the heat and slowly whisk the hot sugar mixture into the egg whites. Continue to whisk on medium-high speed until the temperature cools to 30°C. The meringue should be thick and glossy. Add enough gel colour to the meringue to tint to the desired colour, whisking until evenly combined.
- Fold 2 large tablespoons of the meringue into the almond paste mixture until well incorporated. Fold in the remaining meringue until evenly combined. The consistency of the batter should look like molten lava. If you can draw a figure eight and the trail stays on the surface, then the mixture is ready to be piped.
- Spoon the mixture into a piping bag fitted with a 10mm round nozzle. Pipe the macarons onto the lined trays into 3.5cm rounds. Tap the tray to remove any air bubbles from the macarons. Leave the macarons out in the open until a skin forms on the surface of the macaron. (This can take from 20 minutes to an hour depending on the humidity). The skin should be dry enough that it does not stick to your finger when touched lightly.
- Bake one tray of macarons in the centre of the preheated oven for 15 minutes or until shells don't feel soft at the 'feet' when touched. Set aside to cool on the tray and repeat with the remaining tray of macarons.
- To make the Filling, use an electric mixer to beat the butter until it is pale and creamy. Beat in the icing sugar until well combined. Add the cherry jam and beat until well combined. Spoon the filling into a piping bag fitted with a 7mm star nozzle and pipe a small rosette onto the base of half the macarons. Sandwich with the remaining macarons.
- Store the macarons in the fridge overnight so the flavours from the filling are absorbed by the shells. Bring the macarons to room temperature before serving.
Baker's Tips
- Allen used Chefmaster Liqua-Gel colours to colour his macarons – he used 8 drops of Super Red with 0.5 drop of Black Diamond
- This recipe is based on a recipe from a course Allen did with Australian Patisserie Academy
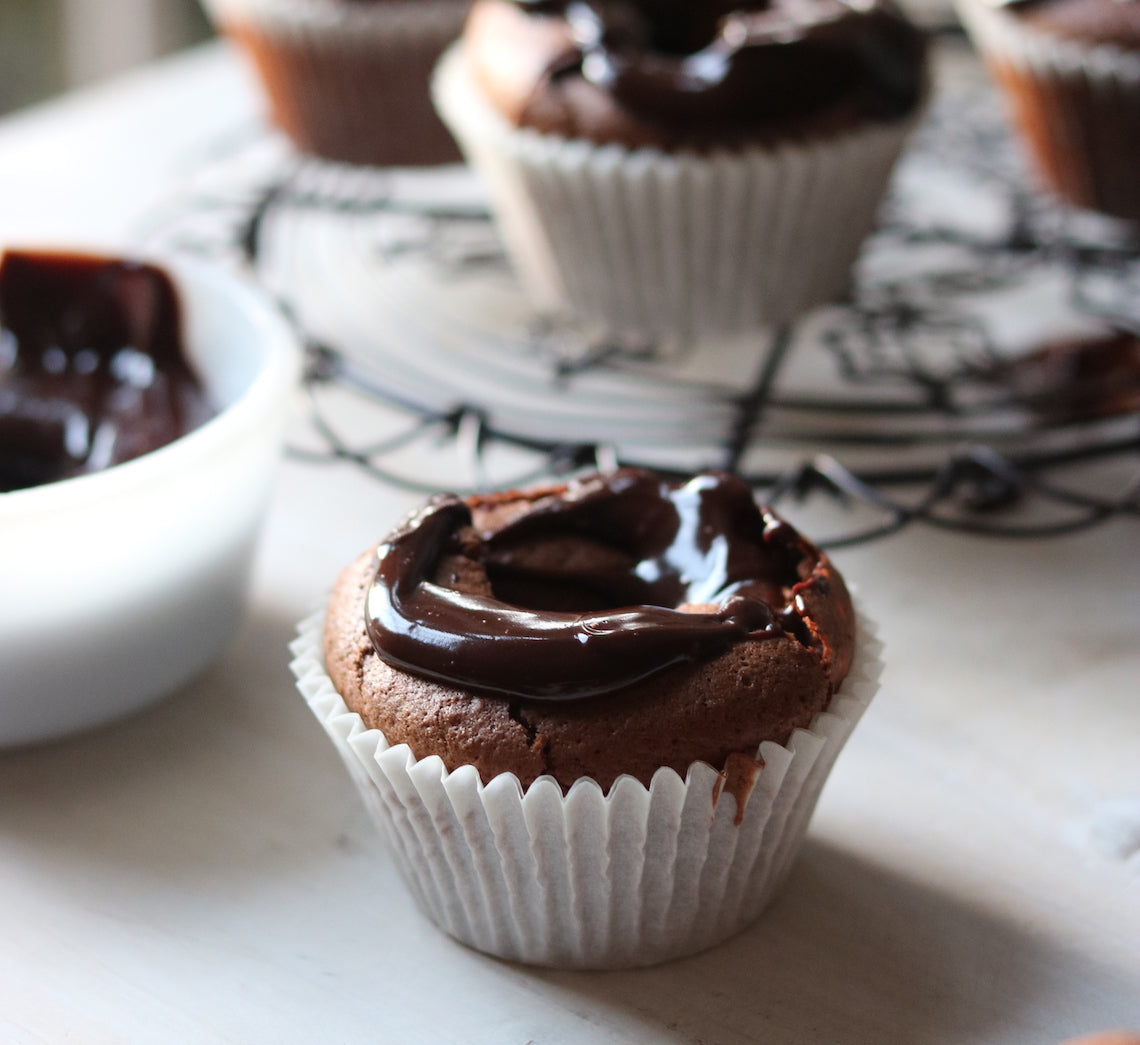
Prep 25minBake 30-35minMakes 12
Drizzled with an oozing chocolate ganache, these cupcakes are wickedly rich (but light in texture) and have a surprise of intense raspberry tartness hidden right in the middle!
Don't worry, you haven't done anything wrong – these cupcakes are meant to have a hole in the centre... Because the mixture is flourless, the raspberry jam sinks during baking creating a crater of sorts, giving them their name.
Ingredients
180g good-quality dark chocolate (45% or 70% cocoa), chopped (see Baker's Tips)
125g butter, cubed
60ml (1/4 cup) water
220g (1 cup) brown sugar, plus 2 tablespoons extra
85g (3/4 cup) hazelnut meal
25g (1/4 cup) desiccated coconut
3 eggs, at room temperature, separated
85g (1/4 cup) raspberry jam
Chocolate ganache
180g good-quality dark chocolate (45% cocoa), finely chopped
60ml (1/4 cup) pure (pouring) cream
Method
- Preheat the oven to 180°C (160°C fan-forced). Line a 12-hole 80ml (⅓ cup) muffin tin with paper cases.
- Combine the chocolate, butter and water in a medium saucepan and stir over a low heat until melted and smooth. Remove from heat, add the sugar, hazelnut meal, coconut and egg yolks and stir well with a wooden spoon until well combined and any lumps have broken up. Transfer the mixture to a large bowl.
- Place the egg whites in a clean, dry medium bowl and use electric beaters with a whisk attachment to whisk until soft peaks form. Add the extra 2 tablespoons of brown sugar and whisk until thick and glossy. Add a large spoonful of egg white mixture to the chocolate mixture and use a large metal spoon or spatula to fold in – this will ‘loosen’ the mixture. Add the remaining egg white mixture and fold in until just combined.
- Divide the mixture among the prepared muffin holes. Place a teaspoon of raspberry jam in the centre of each cupcake and press down gently until the jam is in line with the top the cupcake mixture. Bake in preheated oven for 30-35 minutes or until the top of the cupcakes feels set and crumbs cling to a skewer inserted into the side of a cupcake. Remove the cupcakes from the oven, and stand in the tray for at least 5 minutes before transferring to place a wire rack and cool completely.
- To make the Chocolate Ganache, place the chocolate in a heatproof bowl. Place the cream in a small saucepan and heat over medium heat, stirring occasionally, until the cream almost comes to a simmer. Pour the hot cream over the chocolate and set aside to stand for 3 minutes. Stir the chocolate and cream mixture until the chocolate melts and the mixture is smooth. Set aside, stirring occaiosnally until thickened to a thick pouring consistency (see Baker's Tips).
- Drizzle a generous spoonful of ganache on the tops of the cupcakes around the hole in the centre, allowing it to dribble over the sides and down into the hole. Set aside for about 30 minutes or until the ganache sets before serving.
Baker's Tips
- Using 70% cocoa chocolate in the cupcakes will give them a more intense chocolate flavour.
- The ganache will take between 15 minutes and about 11/2 hours to reach the right consistency for drizzling depending on the weather. If it is a really hot day you can put the ganache in the fridge to help it thicken - just make sure you stir it often so lumps don't form.
- These cupcakes will keep in an airtight container in a cool spot (but not in the fridge) for up to 3 days.
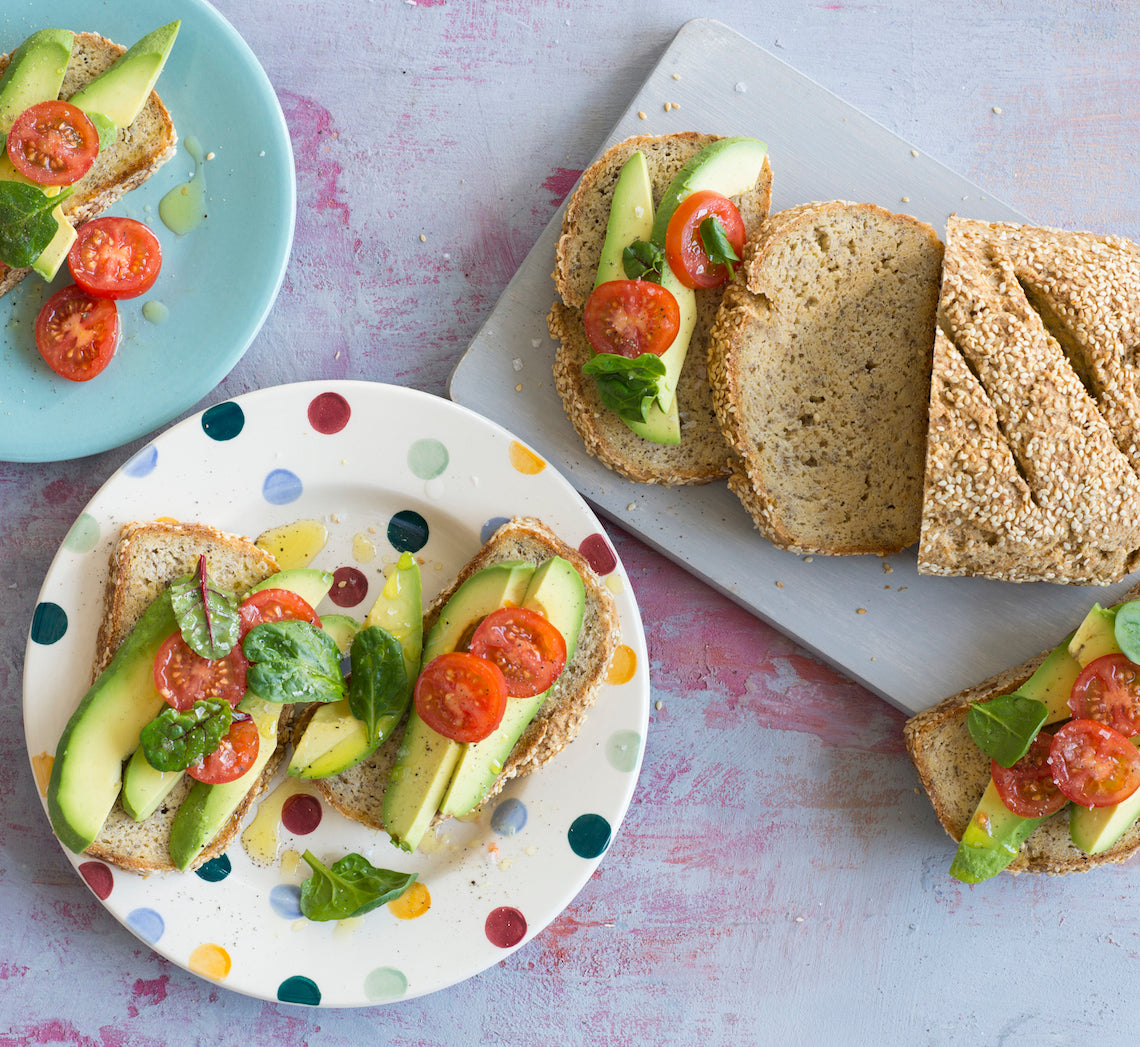
Prep 30min (+1hr30min cooling time)Bake 1hr 10minMakes 1 loaf
This bread is almost the complete opposite of most commercially made gluten-free breads - wonderfully substantial (it won’t ‘dissolve’ in your mouth), moist and flavoursome without containing any gums. The key is the inclusion of psyllium husks and chia seeds to give the dough flexibility and structure in the absence of gluten. It’s great fresh, but toasting really brings out the nuttiness of the flours used.
Ingredients
150g (1 cup) sorghum flour
75g (½ cup) millet flour
70g (½ cup) brown rice flour
65g (½ cup) sweet (glutinous) rice flour
90g (½ cup) fine polenta
1½ teaspoons fine sea salt
625ml (2½ cups) lukewarm water
7g (1 sachet) instant dried yeast
2 tablespoons honey
2 tablespoons light olive oil, plus extra to grease
25g (⅓ cup) psyllium husks
50g (¼ cup) chia seeds
2 tablespoons sesame seeds, to coat and sprinkle
Method
- Combine the sorghum, millet, brown rice and sweet rice flours, polenta and salt in a large bowl.
- Combine 60ml (¼ cup) of the lukewarm water, yeast and 1 teaspoon of the honey in a small dish and whisk to combine with a fork. Set aside in a warm, draught-free place for 5 minutes or until frothy.
- Meanwhile, use a balloon whisk to whisk together the remaining 560ml (2¼ cups) lukewarm water, remaining honey, olive oil, psyllium husks and chia seeds until evenly combined. Set aside for 3 minutes or until the mixture thickens slightly.
- Whisk the yeast mixture into the psyllium husk mixture. Add to the dry ingredients and use a wooden spoon to mix to a soft, slightly sticky dough.
- Cover the bowl with plastic wrap and set aside in a warm, draught-free place for 1½ hours or until risen slightly and is spongy in texture.
- Grease a 11.5cm x 21cm (base measurement) loaf tin with a little extra oil and sprinkle with 1½ tablespoons of the sesame seeds to coat lightly. Turn the dough onto a benchtop, shape into a 20cm log and place in the greased tin. Brush the top with a little water and sprinkle with the remaining sesame seeds. Cover with plastic wrap and set aside and place in a warm, draught-free place for 1 hour or until well risen.
- Preheat the oven to 200°C (180°C fan-forced).
- Use a sharp knife to cut 4 diagonal slits across the top of the loaf. Bake 1 hour and 10 minutes or until golden, cooked through and sounds hollow when tapped on the top.
- Turn the loaf out onto a wire rack and set aside to cool completely - this will take about 1½ hours) before slicing.
Baker's Tips
- This bread is best kept in a cloth or paper bag at room temperature in a cool spot where it will keep for up to 5 days.
- To freeze, place whole or sliced in a sealed freezer bag or airtight container and freeze for up to 3 months. Thaw at room temperature or toast slices straight from the freezer.
This recipe is from Anneka's SBS Food online column Bakeproof: Gluten-free baking. Click here for more Bakeproof columns and recipes.
Photography by Alan Benson.
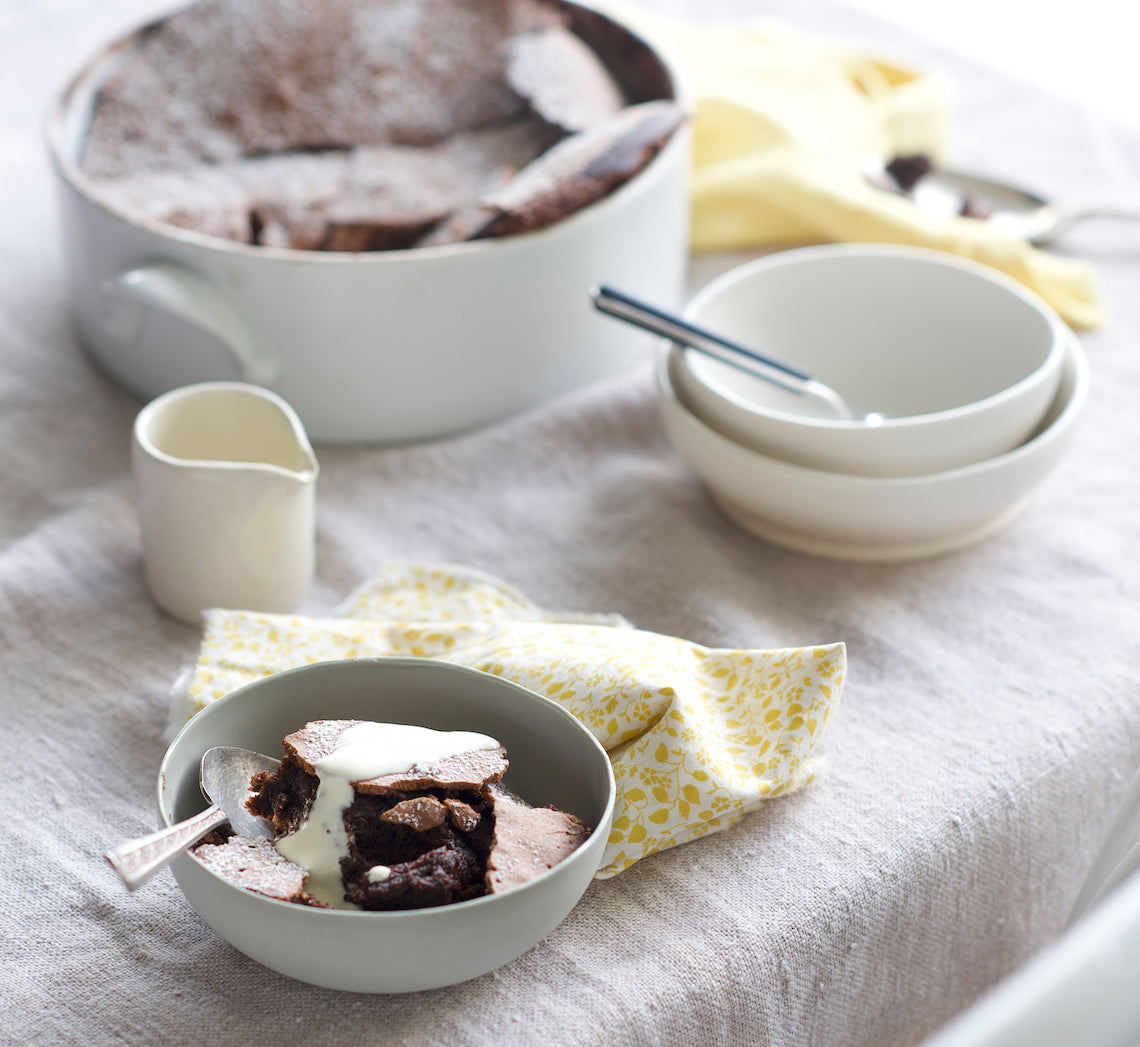
Prep 20min (+ 5min standing time)55-60minMakes 8 serves
I have been baking this gluten-free pudding for years. Not only is it completely heavenly, it is also very clever and can be baked as a cake when you want.
Ingredients
Melted butter, to grease
Cocoa powder, sifted, to dust
200g (1⅓ cups/7oz) chopped good-quality gluten-free dark chocolate (70 percent cocoa is good)
125g (4½oz) unsalted butter, cubed
2 tablespoons marsala wine or freshly brewed strong coffee
165g (¾ cup/5¾oz) caster sugar
5 eggs, at room temperature, separated
Gluten-free icing (confectioners’) sugar, to dust
Cream or gluten-free vanilla ice cream, to serve
Method
- Preheat the oven to 170°C/340°F (150°C/300°F fan-forced). Brush a 2 litre (8 cup/3½pt) capacity ovenproof dish (about 20cm/8in diameter) with melted butter to grease. Lightly dust with cocoa powder, tapping out any excess.
- Place the chocolate and butter in a medium heatproof bowl over a saucepan of simmering water, making sure the base of the bowl doesn't touch the water, and stir until melted and smooth. Transfer the mixture to a large bowl and stir in the marsala, 110g (½ cup/4oz) of the caster sugar and the egg yolks.
- Use an electric mixer with a whisk attachment to whisk the egg whites in a clean, dry large bowl on medium speed until soft peaks form. Add the remaining 55g (¼ cup/2oz) caster sugar and whisk until thick and glossy. Add one-third of the egg white mixture to the chocolate mixture and use a large metal spoon or spatula to fold together. Fold through the remaining egg white mixture until just combined.
- Pour the mixture into the prepared dish. Bake in the preheated oven for 55–60 minutes, or until crumbs cling to a skewer inserted in the centre.
- Remove the pudding from the oven and set aside for 5 minutes. Dust with icing sugar and serve in scoops with cream or ice cream.
Variation
Chocolate Soufflé Cake: Bake the mixture in a 22cm/8¾in (base measurement) springform cake tin that has been base-lined with baking paper, and then greased and dusted with cocoa powder. Bake at the same temperature for 55–60 minutes. Leave the cake to cool in the tin. Cut into wedges to serve.
Baker's Tips
- This pudding is also delicious served at room temperature. Leave to cool in the dish before serving.
- Any leftover pudding will keep covered in the fridge for up to 3 days. Leave to stand at room temperature for at least 30 minutes before serving.
Recipe and image from BakeClass by Anneka Manning (Murdoch Books).
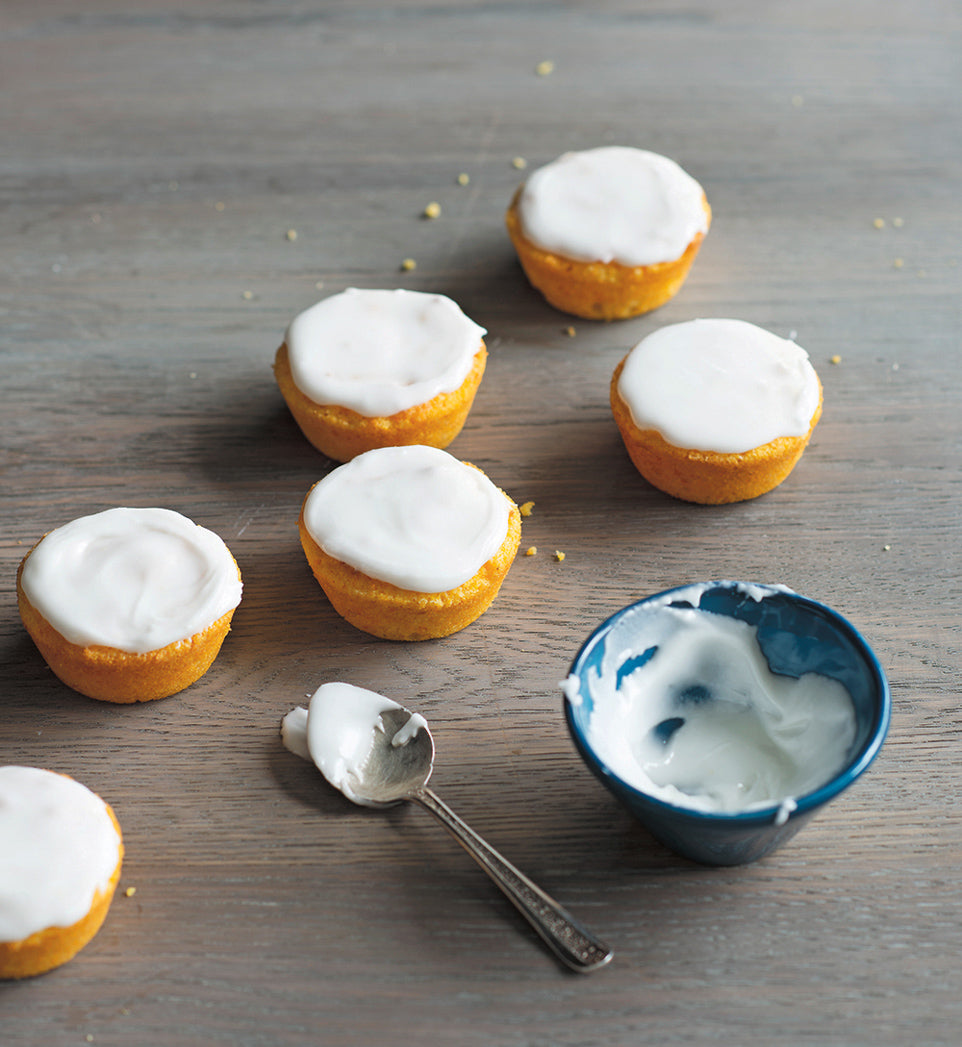
Prep 20min (+ 30-60min simmering, cooling and 20min standing time)Bake 15-18minMakes 12
These cakes are a play on the original (and wonderful) Middle Eastern Orange Cake from the one and only Elizabeth David. Making use of seasonal mandarins and with the addition of coconut and polenta, this version is also flourless and gluten-free.
Ingredients
2 large mandarins (about 110g)
Melted butter, to grease
100g (1 cup) almond meal
95g (½ cup) instant polenta
45g (½ cup) desiccated coconut
½ teaspoon gluten-free baking powder
3 eggs, at room temperature
165g (¾ cup) caster (superfine) sugar
1½ teaspoons natural vanilla extract or essence
250g (2 cups) pure icing (confectioners') sugar
1½–2 tablespoons mandarin juice
Method
- Put the whole mandarins in a small saucepan, cover with water and set over high heat. Bring to the boil, reduce the heat and simmer for 30–60 minutes, or until very soft when tested with a skewer. (You may need to place a small saucer over the mandarins to keep them submerged.) Remove the mandarins from the water and set aside to cool slightly.
- Meanwhile, preheat the oven to 180°C (160°C fan-forced). Brush a 12-hole 80ml (⅓ cup) capacity silicone or metal muffin tin with melted butter to grease. Quarter the mandarins and remove and discard the centre core and any seeds. Purée the skin and flesh in a small food processor or blender until smooth.
- Put the almond meal, polenta, coconut and baking powder in a medium bowl and mix well to combine.
- Put the eggs, sugar and vanilla in a medium bowl and use an electric mixer with a whisk attachment to whisk on high speed until very thick and pale and a ribbon trail forms when the whisk is lifted (about 3–4 minutes).
- Add the mandarin purée to the egg mixture and use a spatula or large metal spoon to fold in until just combined. Add the polenta mixture and fold together until combined. Divide the mixture evenly among the muffin holes (you can pour it from a jug or use a ladle).
- Bake in the preheated oven for 15–18 minutes, or until a skewer inserted in the cakes comes out clean. Cool the cakes in the tin for 5 minutes. Use a palette knife to ease the cakes out and transfer to a wire rack to cool.
- To make the Mandarin icing, sift the icing sugar into a medium bowl. Gradually stir in the juice until the mixture is smooth and has a thick coating consistency, adding a little more juice if too thick. Cover with plastic wrap and set aside at room temperature until ready to use.
- Spread the tops of the cooled cakes with the icing. Set aside for 20 minutes or until set.
Baker's Tips
- These cakes will keep in an airtight container in a cool place (but not in the fridge) for up to 2 days.
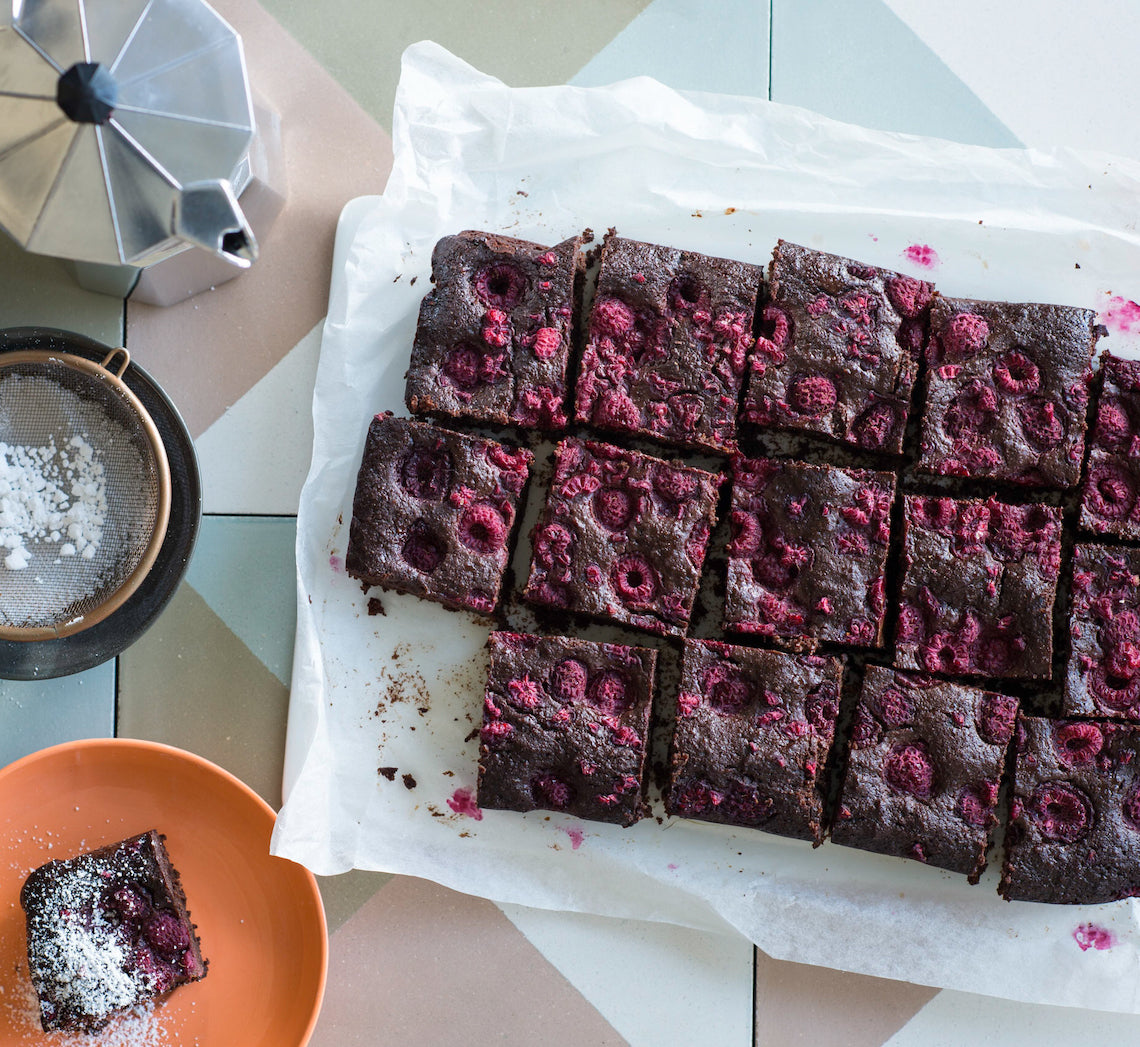
Prep 15minBake 35minMakes about 15
Wickedly rich, this gluten-free brownie can match it with the best of them. Fudgy, rich and studded with tart raspberries, you won't be able to stop at just one piece!
Ingredients
Coconut oil, to grease
150g (5¼oz) gluten-free, good-quality dark chocolate, chopped
100g (½ cup/3½oz) coconut oil
135g (¾ cup/4¾oz) coconut sugar
2 eggs, at room temperature, light whisked
60ml (¼ cup/2fl oz) coconut milk
1 teaspoon natural vanilla essence or extract
30g (¼ cup/1oz) cocoa powder
2 tablespoons coconut flour
¾ teaspoon gluten-free baking powder
50g (½ cup/1¾oz) almond meal
150g (5¼oz) frozen raspberries
Pure icing sugar, to dust (optional)
Method
- Preheat oven to 160°C/315°F (140°C/285°F fan-forced). Grease a 16cm x 26cm (6¼in x 10½in) shallow slice tin with coconut oil and line the base and long sides with one piece of baking paper.
- Place the dark chocolate and coconut oil in a medium heatproof bowl over a saucepan of simmering water (don't let the base of the bowl touch the water). Stir occasionally until chocolate and coconut oil melt and the mixture is smooth. Remove bowl from the saucepan.
- Add the sugar, eggs, coconut milk and vanilla to chocolate mixture and use a balloon whisk to stir until well combined. Sift together the cocoa powder, coconut flour and baking powder into a bowl, add the almond meal and stir to combine. Add to chocolate mixture and stir with a spatula until just combined. Add the frozen raspberries and fold gently until just combined.
- Pour mixture into prepared tin and use the back of a metal spoon to spread evenly. Bake in preheated oven for 35 minutes or until moist crumbs cling to a skewer inserted in the centre. Cool in tin and then chill for at least 1 hour (see Baker's Tips).
- Remove brownie from the tin using the baking paper to carefully lift it out. Cut into portions and serve dusted with icing sugar, if desired.
Baker's Tips
- These brownies are a little more fragile than normal fudge brownies and will be easier to cut if you chill them for at least an hour before removing from the tin to cut.
- These brownies will keep in an airtight container in the fridge for up to 5 days. Serve straight from the fridge or stand at room temperature for 30 minutes before serving.
This recipe was originally published in Anneka's SBS Food online column, Bakeproof: Coconut.
Click here for more Bakeproof recipes.
Photography by Alan Benson.
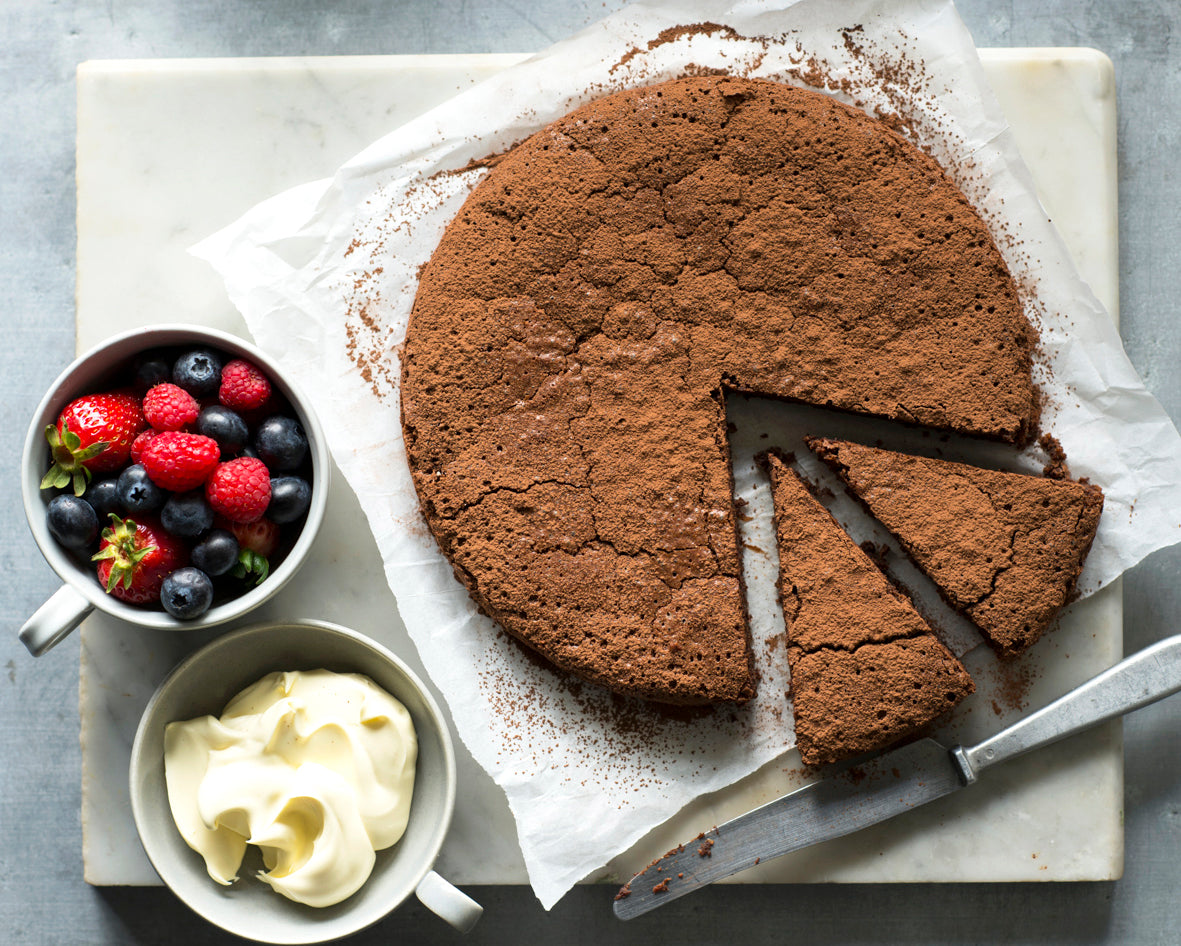
Prep 20minBake 55minMakes 8-10 serves
This cake is a favourite of mine – it is rich but light all at the same time. The chocolate, egg yolks and hazelnut meal provide the richness while the egg whites account for the light texture. It is indulgent without being overwhelmingly rich – my sort of chocolate cake. It makes a perfect dessert when served with thick cream or ice cream but don’t underestimate how blissfully suitable a slice with afternoon coffee can be.
Ingredients
Melted butter, to grease150g good-quality dark chocolate, chopped
100g butter, cubed
4 eggs, at room temperature, separated
110g (½ cup) caster sugar
110g (1 cup) hazelnut meal
2 tablespoons sherry, brandy or Frangelico
Cocoa powder or icing sugar, to dust
Method
- Preheat the oven to 150°C (130°C fan-forced). Grease a 22cm (base measurement) springform tin with the melted butter, then line the base and side with baking paper.
- Combine the chocolate and butter in a medium heatproof bowl over a saucepan of simmering water (don’t allow the bowl to touch the water). Stir occasionally until the chocolate and butter melt and the mixture is smooth. Remove the bowl from the pan.
- Add the egg yolks, sugar, hazelnut meal and sherry to the chocolate mixture and use a balloon whisk to stir until well combined. Transfer the mixture to a large bowl.
- Place the egg whites in a clean, dry medium bowl and use electric beaters with a whisk attachment to whisk until firm peaks form. Add a spoonful of egg white to the chocolate mixture and use a large metal spoon or spatula to fold in – this will ‘loosen’ the mixture. Add the remaining egg white and fold in until just combined.
- Pour the mixture into the prepared tin and use the back of a spoon to smooth the surface. Bake in preheated oven for 55 minutes or until the top of the cake feels set and crumbs cling to a skewer inserted into the centre. Remove the cake from the oven, place on a wire rack and cool completely in the tin.
- Remove the cake from the ti and serve dusted with cocoa powder or icing sugar.
Baker's Tips
- This cake will keep in an airtight container in the fridge for up to 4 days. Bring it to room temperature before serving.
Variations
- Flourless Chocolate & Almond Cake: Replace the hazelnut meal with almond meal.
- Flourless Chocolate & Orange Cake: Replace the hazelnut meal with almond meal. Replace the sherry with 2 tablespoons orange liqueur (such as Grand Marnier or Cointreau). Add 1 tablespoon finely grated orange zest with the egg yolks.
- Flourless Chocolate Coffee Cake: Replace the sherry with 2 teaspoons instant coffee granules dissolved in 2 tablespoons water.


