- home
- BAKERECIPES
BakeRecipes
Bringing real baking into your home with deliciously simple recipes.
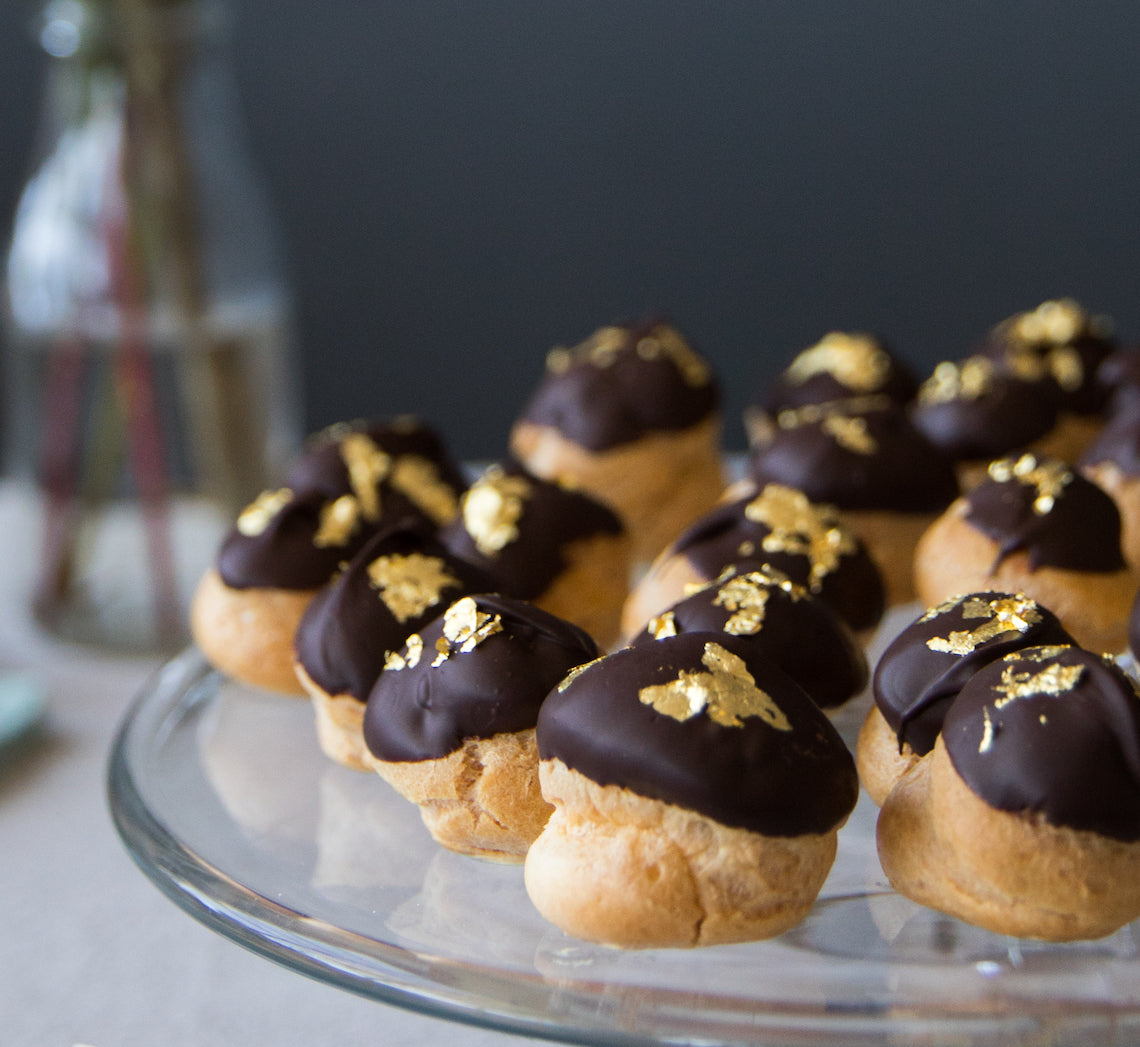
Prep 50minBake 35-40minMakes about 40
When the French profiteroles arrived in Brazil, a bakery in Sao Paulo created its own version – the Carolinas. Instead of filling the profiteroles with vanilla custard, they used pure dulce de leche then it became one of the staples in Sao Paulo bakeries.
This version, created by Make Me a Baker student Ana Moreno for her graduation, includes cream to make them less sweet than the ones you find in Sao Paulo, but still with plenty of dulce de leche to give the authentic taste.
Ingredients
1 quantity Basic Choux Pastry
150g good-quality dark chocolate (45-54% cocoa), chopped into small pieces
Edible gold leaf flakes, to decorate
Dulce de Leche Cream
250ml (1 cup) thickened cream
30g (¼ cup) icing sugar, sifted
1 teaspoon vanilla bean paste
320g (1 cup) dulce de leche
Method
- To make the profiteroles, preheat oven to 200°C (180°C fan-forced). Line 2 large oven trays with non-stick baking paper.
- Spoon the choux pastry into a large piping bag fitted with a 0.9cm (#9) round piping tip. Pipe 3cm rounds onto the lined trays, about 2cm apart. Use a damp fingertip to smooth any peaks on each of the rounds. Sprinkle the lined tray with a little water.
- Bake in preheated oven for 20 minutes or until well puffed and golden. Reduce the oven to 180°C (160°C fan-forced) and bake for a further 15-20 minutes or until golden and crisp on the outside. Remove from the oven and use a 0.7cm (#7) star piping tip to make a hole in the base of each of the hot profiteroles for the steam to escape. Place hole side up on a wire rack and allow to cool completely
- To make the Dulce de Leche Cream, combine the cream, icing sugar and vanilla bean paste in a mixing bowl and use a balloon whisk or hand held beaters with a whisk attachment to whisk on medium-high speed until soft peaks form.
- Spoon dulce de leche into a medium bowl. Add a third of the whipped cream mixture and use a large metal spoon or spatula to fold gently through the dulce de leche to retain as much air as possible until just combined evenly. Add the remaining cream in two more batches folding gently until just combined.
- Place the Dulce de Leche Cream into a pastry bag fitted with a 0.7cm (#7) star or round piping tip. Insert the tip into the hole in the base of a profiterole and fill with the Dulce de Leche Cream.
- To decorate the profiteroles, place the chocolate in a heatproof bowl and set over a saucepan of simmering water (make sure the water doesn’t touch the base of the bowl). Stir occasionally until the chocolate melts and is smooth.
- Dip the tops of each of the filled profiteroles in the melted chocolate to coat and set aside on a wire rack to stand for 10 minutes. Carefully decorate each profiterole with a little edible gold leaf before the chocolate is fully set.
Baker's Tip
- The unfilled profiteroles will keep in an airtight container at room temperature for up to 1 day. They are best eaten the day they are filled with the Dulce de Leche Cream.
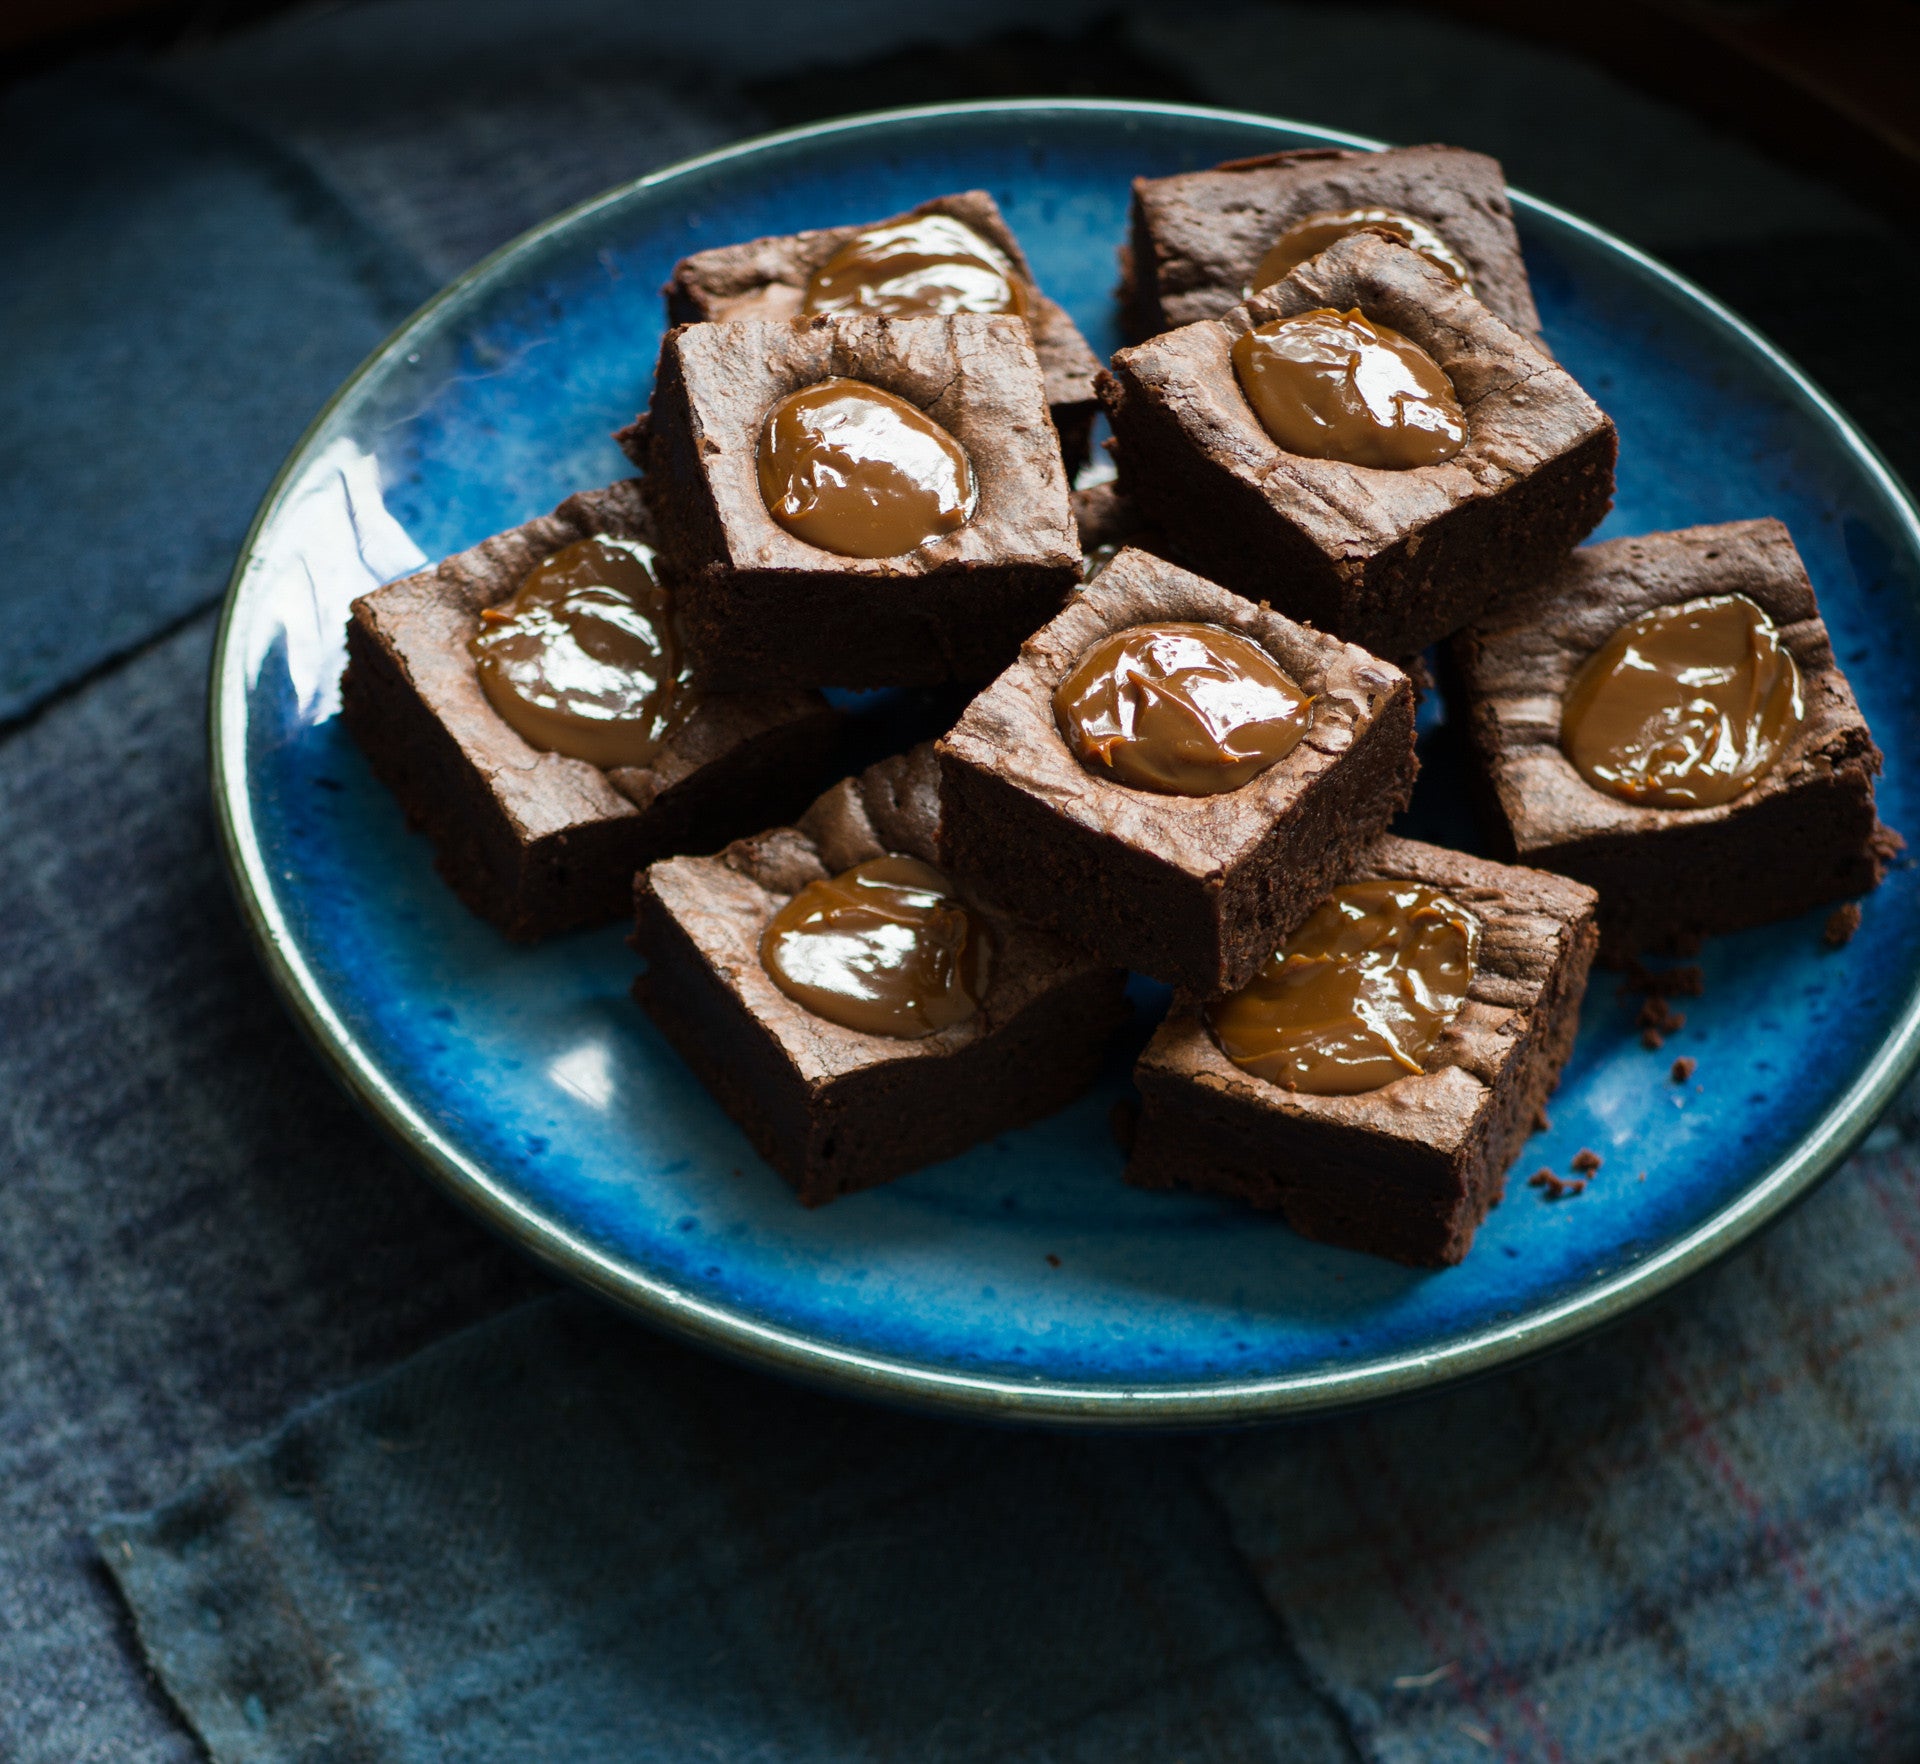
Prep 20min (+2hr cooling time)
Bake 30-35minMakes 15
Brownie lovers, take note: with every portion holding its very own generous dollop of dulce de leche, this is the brownie you have been searching for all your life! For a particularly wicked dessert, serve it drizzled with warmed extra dulce de leche and topped with a generous scoop of vanilla ice-cream.
Ingredients
Melted butter, to grease
250g (9oz) good-quality dark chocolate (45-54% cocoa), chopped
200g (7oz) salted butter, cubed
3 eggs, at room temperature, lightly whisked
165g (¾ cup, firmly packed/5¾oz) brown sugar
1½ teaspoons natural vanilla essence or extract
110g (¾ cup/4oz) plain flour
30g (¼ cup/1oz) cocoa powder
½ teaspoon baking powder
250g (9oz) jar dulce de leche
Cocoa powder or icing sugar (optional), to sprinkle
Method
- Preheat oven to 160°C/315°F (140°C/285°F fan-forced). Grease a 16cm x 26cm (6¼in x 10½in) shallow slice tin with melted butter and line the base and long sides with one piece of baking paper.
- Place the chocolate and butter in a medium heatproof bowl over a saucepan of gently simmering water (don't let the base of the bowl touch the water). Stir occasionally until chocolate and butter melt and the mixture is smooth. Remove bowl from saucepan and set aside.
- Use an electric mixer with a whisk attachment to whisk the eggs and sugar until thick and pale. Add the melted chocolate mixture and vanilla and whisk to combine.
- Sift together the flour, cocoa powder and baking powder. Add to chocolate mixture and whisk on low speed until just combined. Pour mixture into prepared tin and spread evenly with the back of a spoon.
- Dot the brownie mixture with spoonfuls of the dulche de leche, dividing evenly. Tap the tin on the benchtop to settle the mixture. Bake in preheated oven for 30-35 minutes or until moist crumbs cling to a skewer inserted in the brownie part. Remove from the oven and cool in tin on a wire rack (this will take about 2 hours).
- Remove brownie from the tin using the baking paper to lift it out. Cut into portions and sprinkle with cocoa powder or icing sugar to serve, if desired.
Baker's Tip
- These brownies will keep in an airtight container in the fridge, for up to 5 days. Serve at room temperature.
Photography by Alan Benson.
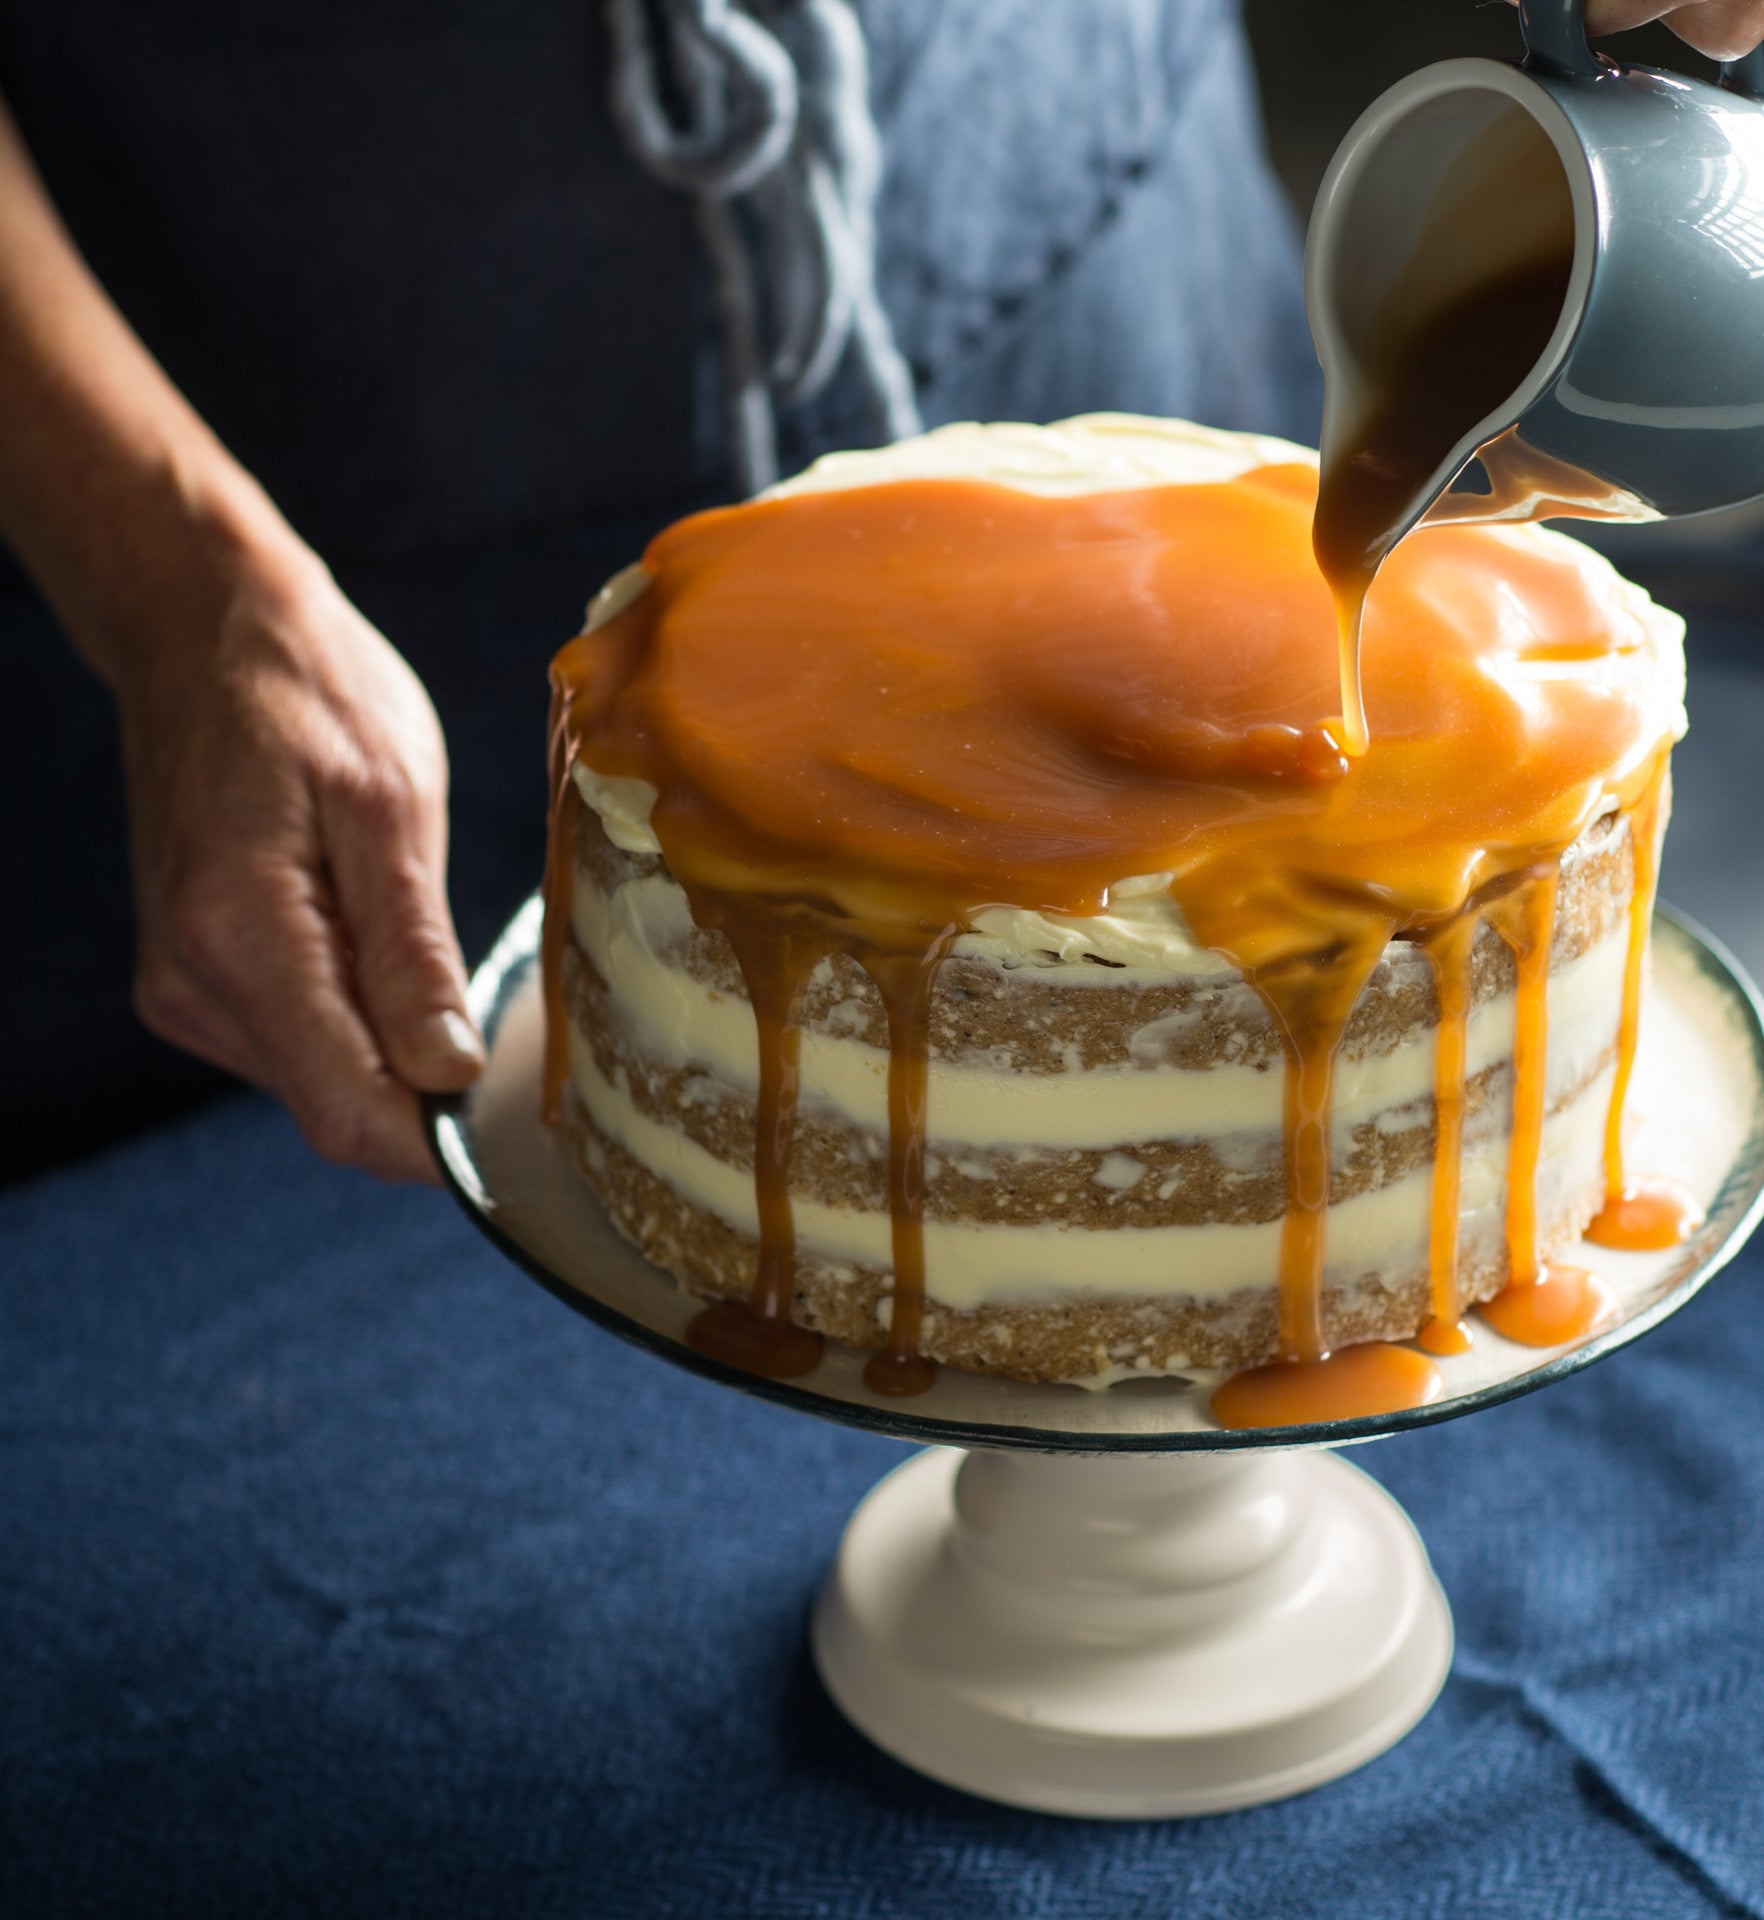
Prep 35min (+1hr cooling time)Bake 25minMakes 12 serves
Layer upon layer, this impressive cake is deceptively simple to make. What’s more, you could call it a hazelnut hummingbird cake with the added bonus of lashings of caramel. Now what’s not to love about that!
Ingredients
Banana and hazelnut cake layers
Melted butter, to grease
300g (2 cups/10½oz) plain flour
3½ teaspoons baking powder
2 teaspoons ground cinnamon
½ teaspoon ground cardamom
220g (1 cup, firmly packed/7¾oz) brown sugar
100g (3½oz) hazelnut meal
60g (⅔ cup/2oz) desiccated coconut
150g (5¼oz) salted butter, melted and cooled
3 eggs, at room temperature, lightly whisked
4 ripe medium bananas (about 200g/7oz each), mashed
2 teaspoons natural vanilla extract or essence
Caramel
165g (¾ cup/5¾oz) caster sugar
60ml (¼ cup/2fl oz) water
150ml (5fl oz) pouring cream
30g (1oz) salted butter, cubed
Cream cheese frosting
250g (9oz) cream cheese, cubed, at room temperature
80g (2¾oz) salted butter, cubed, at room temperature
1 teaspoon natural vanilla essence or extract
185g (1½ cups/6½oz) icing sugar
Method
- To make the cake layers, preheat the oven to 180°C/350°F (160°C/315°F fan-forced). Brush three shallow 20cm/8in round cake tins with the melted butter to grease and line the bases with non-stick baking paper.
- Sift together the flour, baking powder, cinnamon and cardamom into a large bowl. Stir in the brown sugar, hazelnut meal and coconut and stir with a wooden spoon to combine, breaking up any lumps. Make a well in the centre. Use a fork to whisk together the butter, eggs, banana and vanilla until well combined. Add to the dry ingredients and use a spatula or large metal spoon to fold together until just combined.
- Divide the cake mixture evenly among the prepared cake tins, smoothing the surface with the back of a spoon. Bake in preheated oven for 25 minutes, swapping the tins around halfway through baking, until pale golden and a skewer inserted into the centre of the cakes comes out clean. Stand the cakes in the tins for 5 minutes before transferring to wire racks to cool.
- Meanwhile, to make the Caramel, combine the caster sugar and water in a small saucepan and use a wooden spoon to stir over low heat until the sugar dissolves. Increase the heat to medium and bring to the boil. Boil without stirring for about 10 minutes, brushing down the side of the pan with a pastry brush dipped in water to dissolve any sugar crystals, until the mixture turns a deep caramel. Remove immediately from the heat and carefully add the cream and butter. Stir with a wooden spoon until well combined and the caramel is smooth. Return the saucepan to a medium heat if any lumps remain to dissolve them, stirring constantly. Brush a little of the hot caramel over the warm cakes.
- Pour the Caramel into a heatproof bowl or jug and set aside to cool, stirring occasionally this will take about 1 hour).
- Meanwhile to make the Cream Cheese Frosting, use an electric mixer to beat the cream cheese, butter and vanilla until well combined and creamy. With the mixer running, gradually beat in the icing sugar until well combined and smooth. Cover and set aside in a cool spot (but not in the fridge).
- To assemble the cake, spread about ½ cup of the cream cheese frosting over the top of one of the cake layers. Top with another cake layer, another ½ cup frosting and the remaining cake layer. Spread a thin layer of frosting around the outside of the cake so that the cake layers show through. Spread the remaining frosting on top. Pour a generous amount of the caramel over the top of the cake, allowing it to drizzle down the sides. Serve in wedges with the remaining caramel passed separately, if desired.
Baker's Tip
- This cake will keep in an airtight container in the fridge for up to 3 days. Stand at room temperature for 30 minutes before serving.
Photography by Alan Benson.
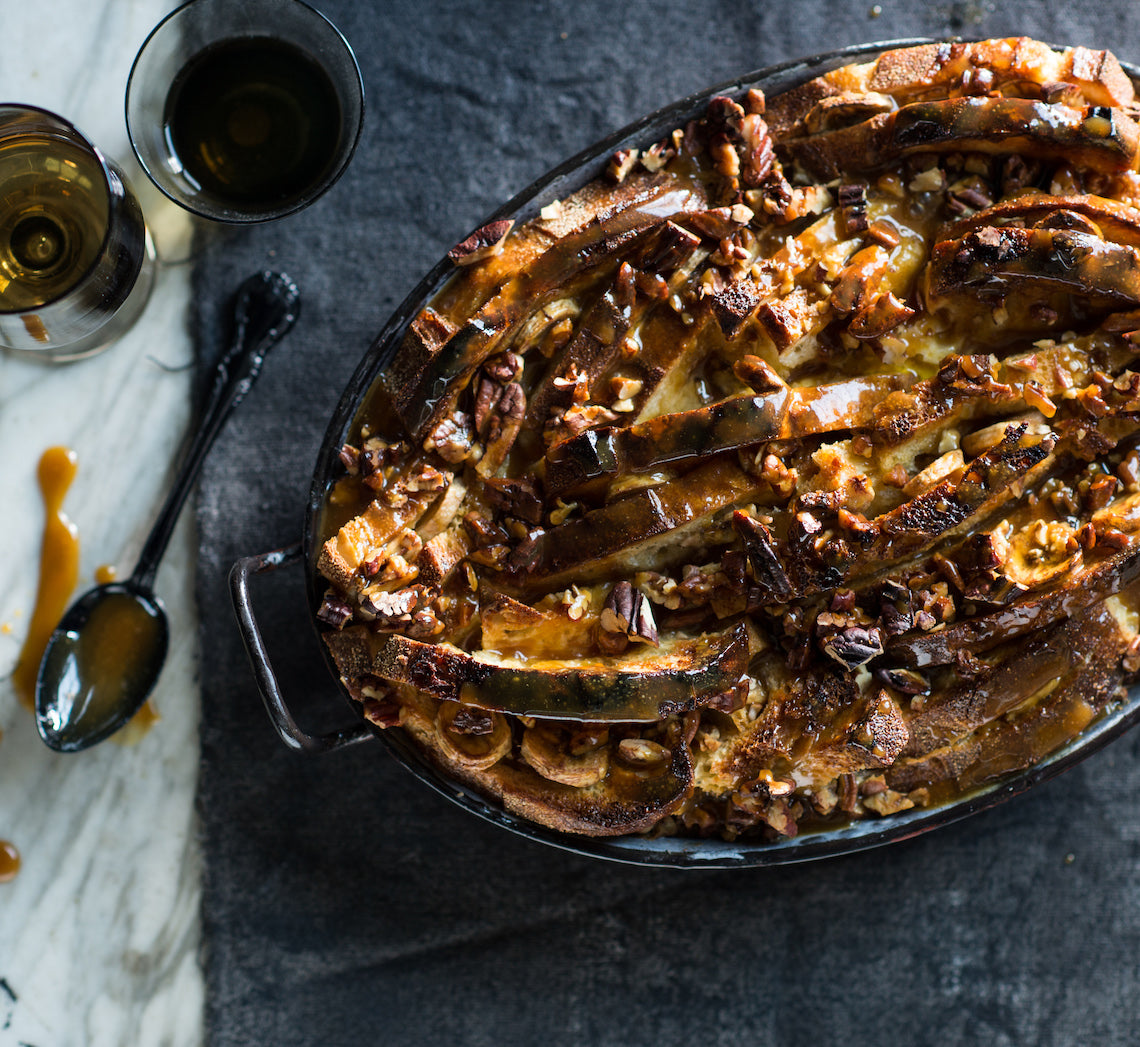
Prep 30min (+30-60min standing time)Bake 1hr 10minMakes 10-12 serves
Indulgent is the one word (and possibly the only) that comes to mind when describing this dessert. Custardy bread, pecans, bananas and a rich caramel sauce combine to make this one very decent over-the-top offering.
Ingredients
Melted butter, to grease
600g (1lb 5oz) day-old sourdough or crusty loaf, cut into 1cm-thick slices, crusts partially removed
60g (2oz) salted butter, softened
3 ripe medium bananas (about 200g/7oz each), thinly sliced
100g (3 ½oz) pecans, toasted and coarsely chopped
4 eggs, at room temperature
110g (½ cup/4oz) caster sugar
500ml (2 cups/17fl oz) milk
375ml (1½ cups/13fl oz) pouring cream
2 teaspoons natural vanilla essence or extract
Vanilla ice-cream, to serve
Caramel sauce
100g (½ cup, lightly packed/3 ½oz) brown sugar
115g (⅓ cup/4oz) golden syrup
40g (1 ½oz) salted butter
125ml (½ cup/4fl oz) pouring cream
Method
- Preheat oven to 170°C/340°F (150°C/300°F fan-forced). Brush a deep 2-litre (8-cup/3.5pt) ovenproof dish with melted butter to grease.
- Spread the bread slices with the butter. Top half of the slices with the banana and then cover with the remaining bread slices. Cut each ‘sandwich’ diagonally into half. Arrange the layered bread in the ovenproof dish, allowing it the stick up a little, and then sprinkle with the pecans.
- Use a balloon whisk to whisk together the eggs, sugar, milk, cream and vanilla until well combined. Pour evenly over the bread in the dish and set aside for 30-60 minutes or until the bread has absorbed all the custard.
- Meanwhile, to make the Caramel Sauce, combine the sugar, golden syrup and butter in a small saucepan. Stir over low heat until the sugar dissolves. Bring to a simmer and simmer for 2-3 minutes or until thickened slightly.
- Sprinkle the pudding with the remaining pecans, pour over half the caramel sauce (reserve the remaining sauce) and bake in preheated oven for 1 hour and 10 minutes or until the top is golden and the custard is set.
- Meanwhile, add the cream to the remaining Caramel Sauce and stir over medium heat until well combined and heated through.
- Remove the pudding from the oven and stand for 5 minutes before serving with the warm Caramel Sauce and ice cream.
Baker's Tip
- This bread and butter pudding will keep covered in the fridge for up to 2 days. Serve at room temperature or cover with foil and warm gently in an oven preheated to 150°C/300°F (130°C/265°F fan-forced) for 10-20 minutes (depending on the portion size).
This recipe is from Anneka's SBS Food online column, Bakeproof: Comforting Custard.
CLICK HERE for more Bakeproof recipes.
Photography by Alan Benson.
Prep 30min (+1hr cooling and 1hr chilling time)Bake 20minMakes 20 pieces
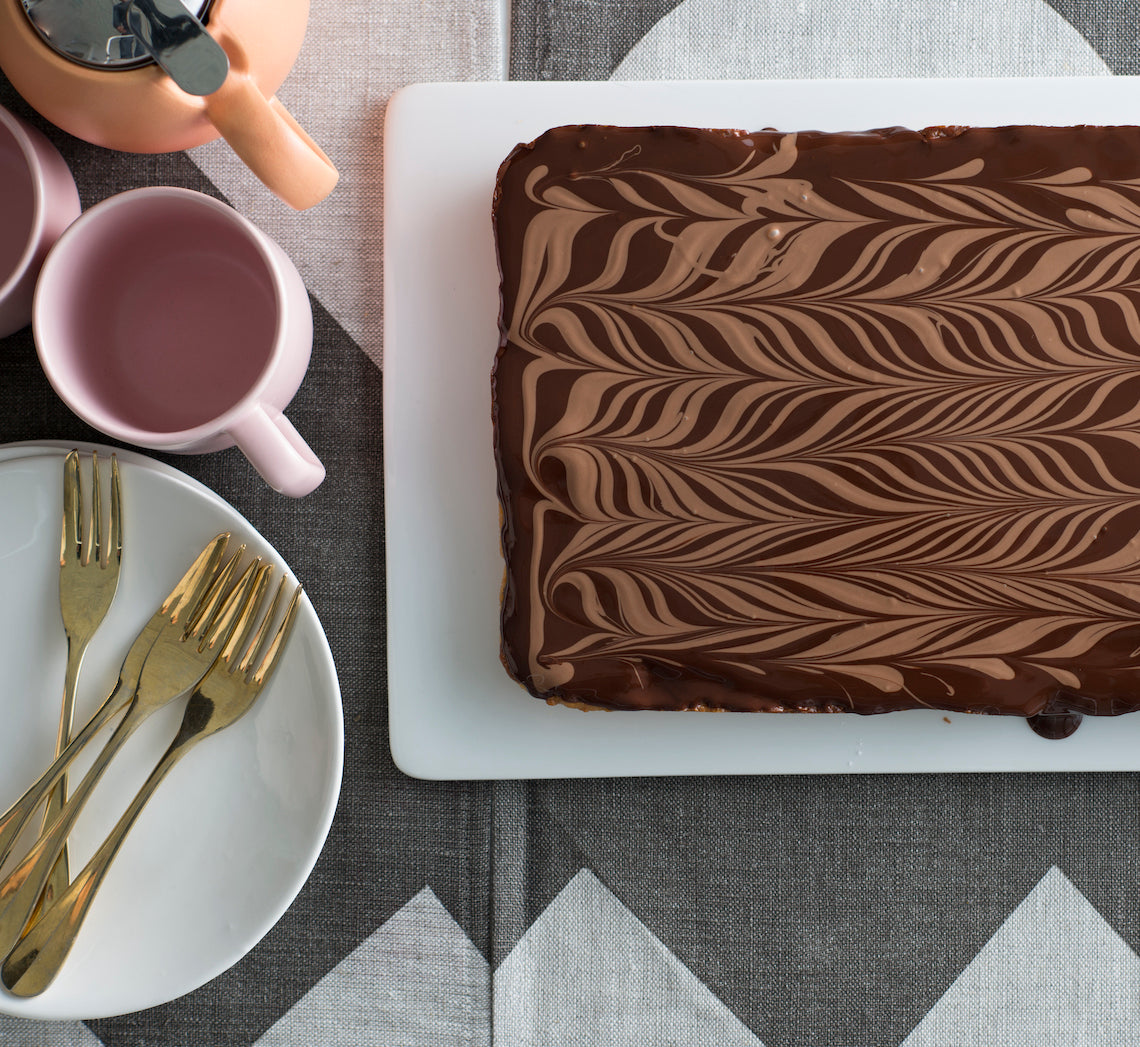
This has to be the perennial favourite... biscuit base, gooey caramel centre and chocolate topping is a combination made in heaven. This chocolate caramel slice has been given a little makeover with a feather-patterned topping.
Ingredients
110g (¾ cup/4oz) plain flour
½ teaspoon baking powder
30g (⅓ cup/1oz) desiccated coconut
75g (⅓ cup, firmly packed/2¾oz) brown sugar
80g (2¾oz) salted butter, melted
1 teaspoon natural vanilla essence or extract
Caramel filling
395g (13¼oz) tin sweetened condensed milk
110g (½ cup, firmly packed/4oz) brown sugar
1 tablespoon golden syrup
40g (1½oz) salted butter, cubed
Chocolate topping
200g (7oz) good-quality dark chocolate (70% cocoa), chopped
30g (1oz) salted butter, cubed
75g (2¾oz) good-quality milk chocolate
Method
- Preheat oven to 180°C/350°F (160°C/315°F fan-forced). Grease a 16cm x 26cm (6 ¼in x 10½in), base measurement, shallow slice tin and line the base and sides with one piece of non-stick baking paper, cutting into the corners to fit.
- To make the base, combine the flour, baking powder, desiccated coconut and brown sugar in a medium bowl. Add the butter and vanilla and mix well. Crumble evenly over the base of the lined tin and use your hands to press down firmly and cover evenly. Bake in preheated oven for 12-15 minutes or until cooked through and lightly golden. Remove from the oven.
- Meanwhile, to make the Caramel Filling, combine the sweetened condensed milk, brown sugar, golden syrup and butter in a small saucepan and cook over a low heat, stirring constantly, for 10 minutes, or until the sugar dissolves and the mixture thickens slightly (do not boil).
- Pour the hot caramel immediately over the base and use the back of a metal spoon to smooth the surface. Return the slice to the oven and bake for 10 minutes or until the caramel has darkened slightly and starts to bubble around the edges. Remove from the oven and set aside for 1 hour or until cooled completely.
- To make the Chocolate Topping, combine the dark chocolate and butter in a medium heatproof bowl over a saucepan of simmering water (don’t let the water touch the base of the bowl). Stir frequently until the chocolate melts and the mixture is smooth. Pour over the cooled slice and use the back of a metal spoon to cover evenly. Tap the tin on the bench to even the topping and to remove any air bubbles. Melt the milk chocolate in the same way as the dark chocolate and butter in a separate small heatproof bowl. Place the slice with a short side of the tin closest to you. Use a teaspoon to generously drizzle the milk chocolate widthways across the dark chocolate to form horizontal lines. Then use a skewer to run through both the dark and milk chocolate lengthways 5-6 times in alternate directions to form a feather pattern. Place in the fridge for 1 hour or until the chocolate sets.
- Use a warm large sharp knife to cut into pieces to serve.
Baker's Tip
- This slice will keep in an airtight container in the fridge for up to 1 week.
This recipe is from Anneka's SBS Food online column, Bakeproof: Childhood Favourites.
CLICK HERE for more Bakeproof recipes.
Photography by Alan Benson.


