- home
- BAKERECIPES
BakeRecipes
Bringing real baking into your home with deliciously simple recipes.
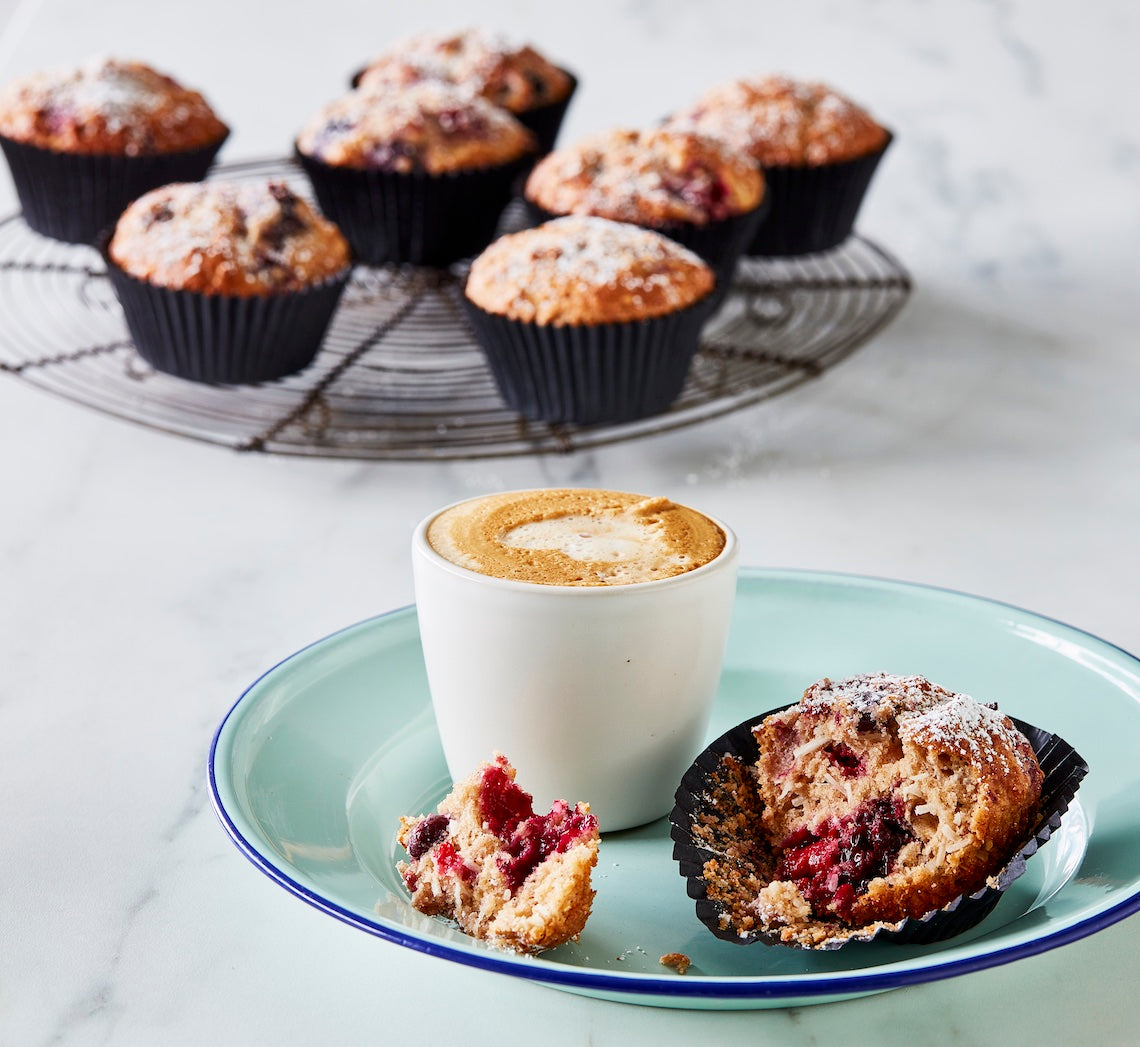
Prep 20minBake 25-28minMakes 12
Good muffins should have substance. They shouldn't be too light and airy, or overly sweet – they are muffins, after all, not a cake. My favourites are dense with fruit (like this one), include wholemeal flour to add texture (and a little wholesomeness) and are subtly spiced (cinnamon is always good). This recipe is particularly easy to whip up.
Ingredients
150g (1 cup/5¼oz) plain flour150g (1 cup/5¼oz) wholemeal plain flour
1 tablespoon baking powder
2 teaspoons ground cinnamon
185g (1 cup/6½oz) raw caster sugar
50g (⅔ cup/1¾oz) shredded coconut
300g frozen mixed berries (see Baker's Tips)
185ml (¾ cup/6½fl oz) buttermilk
80ml (⅓ cup/2½fl oz) light olive oil, safflower or sunflower oil
2 eggs, at room temperature
1½ teaspoons natural vanilla extract or essence
Method
- Preheat the oven to 190°C/375°F (170°C/340°F fan-forced). Line 12 x 80ml (⅓ cup/2½fl oz) muffin tray holes with muffin paper cases.
- Sift together both the flours, the baking powder and cinnamon into a large mixing bowl, returning any husks to the bowl. Stir in the sugar and coconut. Gently stir in the frozen berries. Make a well in the centre.
- Use a fork to whisk together the buttermilk, oil, eggs and vanilla in a bowl. Add to the flour mixture and use a spatula or large metal spoon to fold together until just combined. (Don’t overmix – the batter should still be a little lumpy.)
- Spoon the mixture into the paper cases, dividing evenly. Bake in preheated oven for 25-28 minutes or until the muffins are golden and cooked when tested with a skewer. Cool for 3 minutes in the tin, then turn out onto a wire rack. Serve warm or at room temperature.
Baker's Tips
- You can replace the raw caster sugar with 220g (1 cup, firmly packed) brown sugar if you like.
- You can replace the wholemeal plain flour with 150g (1 cup/5¼oz) wholemeal spelt plain flour.
- There’s no need to thaw the frozen berries before using them in this recipe.
- These muffins are best eaten the day they are baked, however they freeze well. Wrap individually in plastic wrap and then seal in a plastic bag or airtight container. Freeze for up to 3 months. Thaw at room temperature.
Photography by Steve Brown
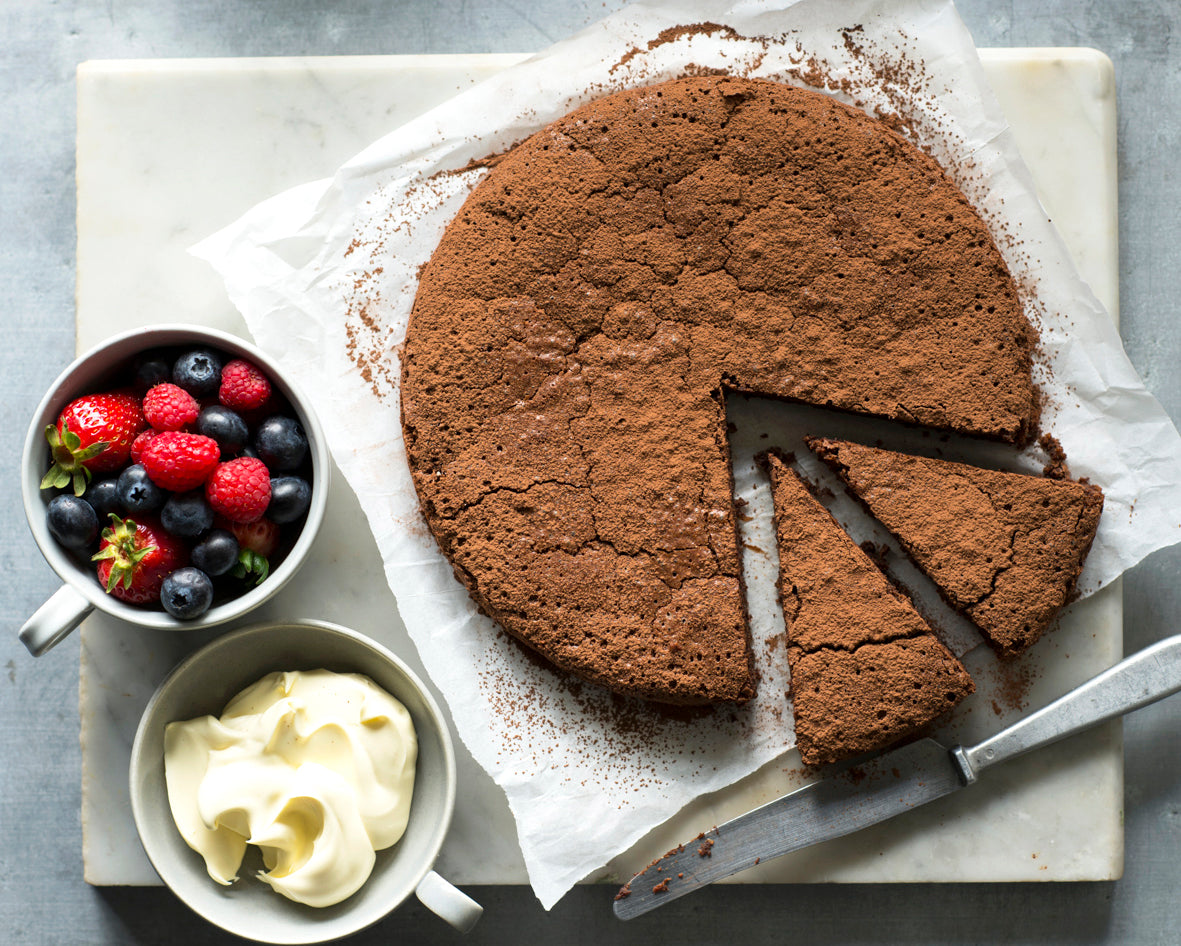
Prep 20minBake 55minMakes 8-10 serves
This cake is a favourite of mine – it is rich but light all at the same time. The chocolate, egg yolks and hazelnut meal provide the richness while the egg whites account for the light texture. It is indulgent without being overwhelmingly rich – my sort of chocolate cake. It makes a perfect dessert when served with thick cream or ice cream but don’t underestimate how blissfully suitable a slice with afternoon coffee can be.
Ingredients
Melted butter, to grease150g good-quality dark chocolate, chopped
100g butter, cubed
4 eggs, at room temperature, separated
110g (½ cup) caster sugar
110g (1 cup) hazelnut meal
2 tablespoons sherry, brandy or Frangelico
Cocoa powder or icing sugar, to dust
Method
- Preheat the oven to 150°C (130°C fan-forced). Grease a 22cm (base measurement) springform tin with the melted butter, then line the base and side with baking paper.
- Combine the chocolate and butter in a medium heatproof bowl over a saucepan of simmering water (don’t allow the bowl to touch the water). Stir occasionally until the chocolate and butter melt and the mixture is smooth. Remove the bowl from the pan.
- Add the egg yolks, sugar, hazelnut meal and sherry to the chocolate mixture and use a balloon whisk to stir until well combined. Transfer the mixture to a large bowl.
- Place the egg whites in a clean, dry medium bowl and use electric beaters with a whisk attachment to whisk until firm peaks form. Add a spoonful of egg white to the chocolate mixture and use a large metal spoon or spatula to fold in – this will ‘loosen’ the mixture. Add the remaining egg white and fold in until just combined.
- Pour the mixture into the prepared tin and use the back of a spoon to smooth the surface. Bake in preheated oven for 55 minutes or until the top of the cake feels set and crumbs cling to a skewer inserted into the centre. Remove the cake from the oven, place on a wire rack and cool completely in the tin.
- Remove the cake from the ti and serve dusted with cocoa powder or icing sugar.
Baker's Tips
- This cake will keep in an airtight container in the fridge for up to 4 days. Bring it to room temperature before serving.
Variations
- Flourless Chocolate & Almond Cake: Replace the hazelnut meal with almond meal.
- Flourless Chocolate & Orange Cake: Replace the hazelnut meal with almond meal. Replace the sherry with 2 tablespoons orange liqueur (such as Grand Marnier or Cointreau). Add 1 tablespoon finely grated orange zest with the egg yolks.
- Flourless Chocolate Coffee Cake: Replace the sherry with 2 teaspoons instant coffee granules dissolved in 2 tablespoons water.
Prep 25min (+ 2hr chilling, cooling and standing time)Bake 12-15minMakes about 35
Based on a deliciously spiced gingerbread, these fun biscuits are given their personalities through simple decorations... Make them into cheeky gingerbread men or turn them upside down and decorate them as cute, Christmas-themed reindeer.
Ingredients
125g (4½oz) unsalted butter, softened
90g (½ cup, lightly packed/3oz) brown sugar
235g (⅔ cup/8¼oz) golden syrup
1 teaspoon natural vanilla extract or essence
375g (2½ cups/13¼oz) plain flour
2 teaspoons ground ginger
1 teaspoon ground cinnamon
1 teaspoon bicarbonate of soda
Icing
185g (1½ cups/6½oz) pure icing sugar
35ml (7 teaspoons) boiling water
Red food colouring
Method
- Use an electric mixer with a paddle attachment to beat the butter and sugar on medium speed for 2-3 minutes, or until pale and creamy. Add the golden syrup and vanilla and beat to combine. Sift together the flour, ginger, cinnamon and bicarbonate of soda. Add to the butter mixture and beat on low speed until just combined and a dough forms. Divide the dough into 2 portions. Shape each into a disc about 2cm/¾in thick, wrap in plastic wrap and place in the fridge for 2 hours to chill.
- Preheat the oven to 160ºC/315°F(140°C/285°F fan-forced). Line two large oven trays with baking paper.
- Use a lightly floured rolling pin to roll out one portion of dough (leave the remaining portion in the fridge) on a lightly floured bench top to 4mm/⅛in thick. Use an 8cm/3¼in tall gingerbread man cutter to cut out shapes and then carefully transfer the shapes to the prepared oven trays using a palette knife, leaving a little room between each for spreading. Reroll any scraps to make more shapes. Discard any off cuts from the second rolling.
- Bake in preheated oven for 12-15 minutes or until the biscuits are just starting to colour and are cooked through. Stand on the trays for a few minutes before transferring to a wire rack to cool. Repeat with the remaining gingerbread dough portion.
- To make the Icing, sift the icing sugar into a medium bowl. Gradually add 30ml (6 teaspoons) of the boiling water and mix until smooth. The icing should be a piping consistency (see Baker’s Tips). If it is too thick stir in the remaining 1 teaspoon of boiling water and then test the consistency again. Spoon ¾ of the icing into a piping bag fitted with a 3mm/⅛in nozzle (see Baker’s Tips) and set aside. Stir a couple of drops of red food colouring into the remaining icing to reach the desired colour. Spoon into a separate piping bag fitted with a 3mm/⅛in nozzle.
- Use the icing to decorate the cooled biscuits to make men and/or reindeer as desired (using the photograph as a guide). Set aside for about 20 minutes or until the icing sets completely.
Baker's Tips
- To test if the icing is the correct consistency for piping, drizzle a little off the end of a teaspoon onto a plate and set aside for a few minutes. If it keeps its shape it is ready to use.
- If you don’t have piping bags and nozzles you can spoon the icing into a snap-lock bag, seal and then cut a small hole in one of the corners to pipe through.
- Store in an airtight container at room temperature for up to 1 week.
Photography by Georgie Esdaile.
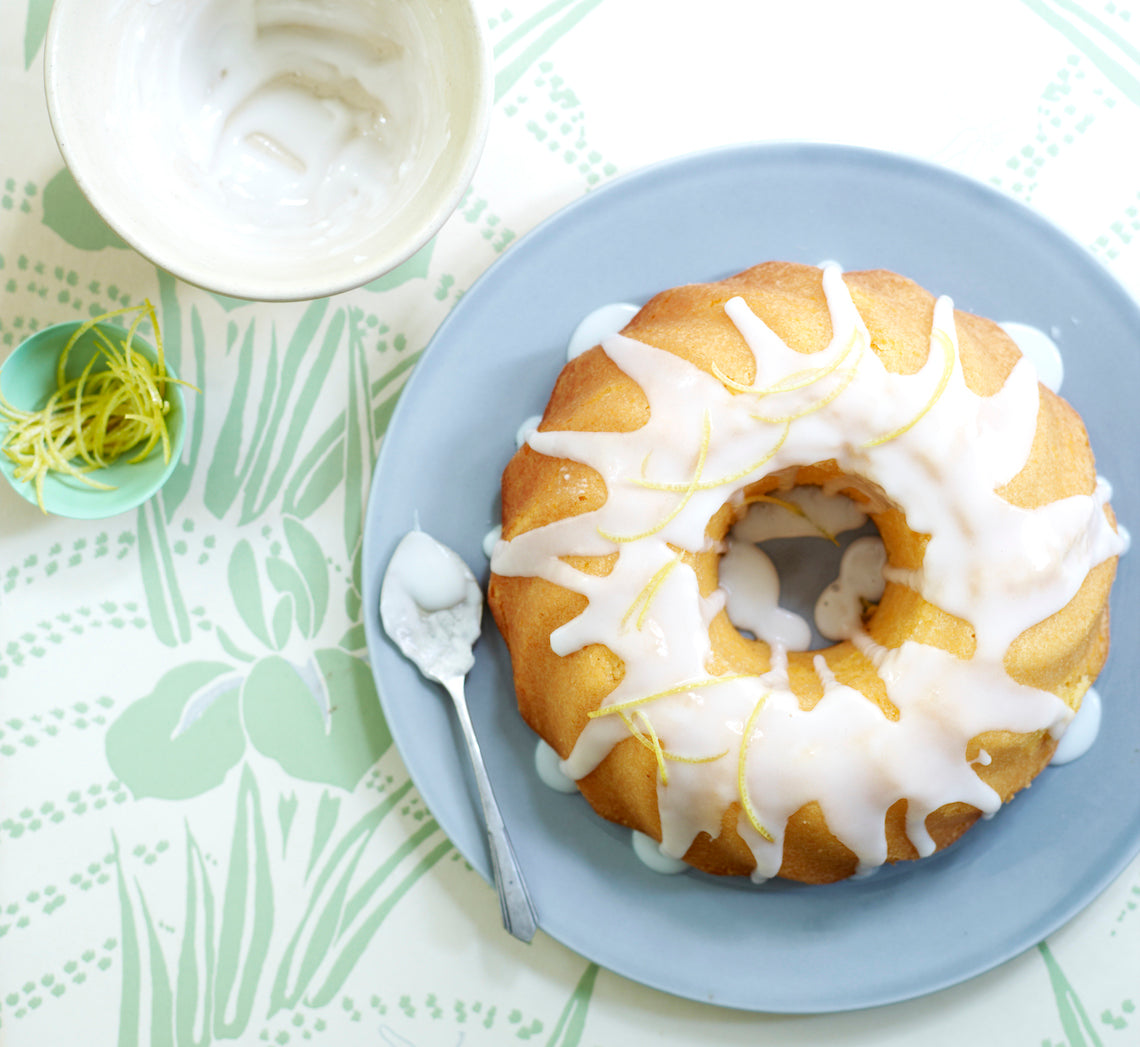
Prep 30minBake 40-45minMakes 10-12 serves
Lemon buttercake is something from heaven – rich, tart and mor-ish all at the same time… And when teamed with coconut it becomes sublime! This cake is particularly good for afternoon tea or dessert when teamed with vanilla ice-cream.
Ingredients
150g salted butter, softened
220g (1 cup) caster sugar
Finely grated zest of 2 lemons
3 eggs
300g (2 cups) self-raising flour
45g (½ cup) desiccated coconut
125ml (½ cup) milk
Candied Lemon Strips
220g (1 cup) caster sugar
250ml (1 cup) water
Lemon Drizzle Icing
125g (1 cup) pure icing sugar4-5 teaspoons strained fresh lemon juice
Method
- Preheat the oven to 170°C (150°C fan-forced). Grease a 24cm (top measurement) or 2.5 litre (10 cup) capacity fluted ring tin with the melted butter and dust with flour to lightly coat, tapping out any excess.
- Use an electric mixer to beat the butter, sugar and lemon rind in a large mixing bowl, scraping down the sides when necessary, until very pale and creamy. Add the eggs one at a time, beating well after each addition until well combined.
- Combine the flour and coconut. Add half of the flour mix to the butter mixture and mix on lowest speed possible until just combined. Add the milk and mix on lowest possible speed until just combined. Add the remaining flour mix and beat on lowest possible speed until just combined.
- Spoon the mixture into the prepared tin and use the back of a spoon to smooth the surface. Bake for 40-45 minutes or until a skewer inserted into the centre comes out clean. Stand the cake in the tin for 5 minutes to cool slightly before turning onto a wire rack sitting over a tray or plate.
- While the cake is cooling make the Candied Lemon Strips. Use a vegetable peeler to remove the rind in wide strips from the lemon. Use a small sharp knife to remove any white pith from the rind and then cut the rind into thin strips. Combine the sugar, water and lemon rind strips in small saucepan. Stir over medium heat until the sugar dissolves. Bring to a simmer and simmer for 10 minutes or until translucent. Use a fork to transfer the rind from the syrup to a plate, separating the strands. Set aside.
- When the cake is cool, make the Lemon Drizzle Icing. Sift the icing sugar into a medium bowl. Add 4 teaspoons of the lemon juice and stir until smooth and is a heavy coating consistency, adding a little more lemon juice, ¼ teaspoon at a time, until the desired consistency is reached. Use a spoon to drizzle the icing over the cake allowing it to run down the sides. Set aside for 10 minutes or until the icing sets.
- Transfer the cake to a serving plate, decorate with the Candied Lemon Strips and serve in wedges.
Baker's Tip
- This cake will keep in an airtight container for up to 2 days.

Prep 20min (+2hr cooling time)Bake 1hr15minMakes 8-10 serves
I remember my mum making pavlova for my dad’s surprise 40th birthday party – lots of them. They were hidden all over the house, even under my bed. Pavlova is definitely a crowd pleaser and Mum chose the right dessert for a party. This pavlova is finished with a slightly tart topping of poached apricots infused with lemon – the perfect partner for the sweet meringue base.
Ingredients
Melted butter, to grease4 egg whites, at room temperature
Pinch of salt
2 teaspoons cornflour
1 teaspoon white vinegar
220g (1 cup) caster sugar
1½ teaspoons natural vanilla extract
300ml thickened cream
Poached Apricot & Lemon Topping
2 lemons, washed220g (1 cup) caster sugar
185ml (¾ cup) water
250g dried apricot halves
Method
- Place the oven rack in the lower third of the oven and then preheat it to 110°C. Draw a circle on a piece of baking paper using a 20cm cake tin as a guide. Place the baking paper, marked side down, on a baking tray.
- Place the egg whites in a large mixing bowl and use an electric mixer with a whisk attachment to whisk on medium speed until foamy. Add the salt, vinegar and cornflour and whisk on medium speed until soft peaks form (this will take about 1 minute).
- With the motor running, add the sugar a spoonful at a time, whisking well after each addition, until all the sugar has dissolved and the mixture is very thick and glossy (this will take 4-5 minutes). Add the vanilla and whisk to combine. Use a spatula to stir the meringue mixture to ‘loosen’ it slightly (this will get rid of any excess air in the mixture and give it a smoother, less ‘foamy’ texture).
- Spoon the meringue mixture onto the lined tray and use the back of the spoon to spread it to fill the marked circle. Make a well in the centre and build up the sides, creating swirls or smoothing the surface as desired.
- Bake in preheated oven for 1 hour 15 minutes, until the meringue is crisp and hard to touch, but not coloured. When the pavlova is cooked, turn off the oven, leave the door slightly ajar (see Baker’s Tips) and cool it completely in the oven (this will take about 2 hours).
- To make the Poached Apricot & Lemon Topping, use a vegetable peeler to remove the rind from the lemons in wide strips. Remove any white pith on the rind with a small sharp knife. Juice the lemons and measure out 80ml (⅓ cup) lemon juice. Put the lemon rind strips and juice, sugar and water in a small saucepan. Stir with a wooden spoon over medium heat until the sugar dissolves. Add the apricots and bring to the boil. Reduce the heat to medium and simmer for 8–10 minutes or until the apricots are plump and tender and the syrup has reduced slightly. Remove from the heat and set aside to cool.
- To serve, use an electric mixer with a whisk attachment or a balloon whisk to whisk the cream until soft peaks form. Spoon the whipped cream into the centre of the pavlova and spread evenly. Spoon the apricots and lemon rind over the cream and then spoon a little of the poaching syrup over the top. Serve immediately with any remaining syrup served separately.
Baker's Tips
- Use a wooden spoon to keep the oven door ajar if it won’t stay slightly open on its own when cooling the pavlova.
- The unfilled pavlova shell will keep in an airtight container in a cool place (not the fridge), for up to 1 day.
Photography by Julie Renouf.
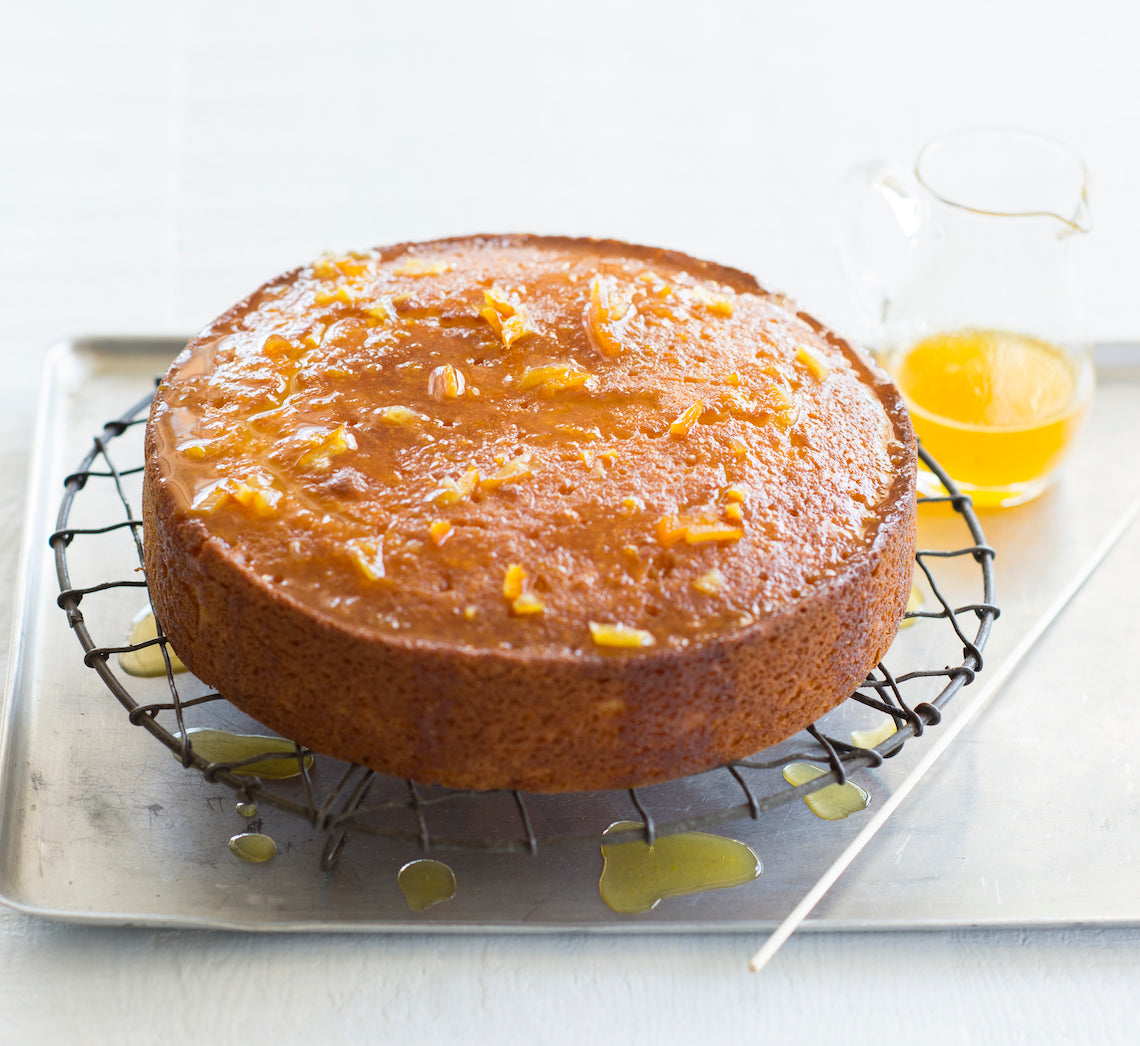
Prep 15minBake 50-60minMakes 8-10 serves
This is a wonderful cake that was originally inspired by a recipe my Aunt Joey used to make. No, it isn’t a mistake, a whole orange, rind and all goes into this cake. It is best to use a thin-skinned navel orange that is around in winter and spring, as it has no seeds and very little bitter pith.
It makes a wonderful dessert when served warm with vanilla ice-cream or a perfect picnic cake as it travels really well. The syrup keeps this cake deliciously moist and saves you from icing it – another great shortcut. If however you would prefer to ice it, a buttercream or glace icing flavoured with finely grated orange zest would be perfect.
Ingredients
Melted butter, to grease
1 orange (about 240g/8½oz), quartered, core and seeds removed
220g (1 cup/7¾oz) caster sugar
125g (4½oz) salted butter, melted and cooled
2 eggs, at room temperature
225g (1½ cups/8oz) self-raising flour
Orange syrup
250ml (1 cup/9fl oz) strained freshly squeezed orange juice
160g (½ cup/5¾oz) orange marmalade
75g (⅓ cup/2¾oz) caster sugar
Method
- Preheat oven to 170°C/340°F (150°C/300°F fan-forced). Grease a 20cm/8in round cake tin with melted butter and line the base with non-stick baking paper
- Place the quartered orange, sugar, butter and eggs in the bowl of a food processor. Process until the orange is finely chopped. Add the flour and process using the pulse button until just combined.
- Pour the mixture into the prepared tin and use the back of a spoon to smooth the surface. Bake in preheated oven for 50-60 or until a skewer inserted into the centre comes out clean. Remove from the oven and set aside for 5 minutes before turning onto a wire rack. Stand the rack over a baking tray.
- Meanwhile, to make the Orange Syrup, place the orange juice, marmalade and sugar in a small saucepan. Stir over medium heat until the sugar dissolves. Increase the heat to high and bring to the boil. Boil gently, uncovered and without stirring, for 5 minutes or until reduced slightly.
- Use a skewer to prick cake all over. Gradually pour the hot syrup over the hot cake, allowing it to soak in. Pour any syrup that has collected on the tray into a dish or jug, Serve warm or at room temperature with any syrup caught on the tray in a jug on the side.
Baker's Tips
- This cake will keep in an airtight container at room temperature for up to 4 days.
Image: Alan Benson
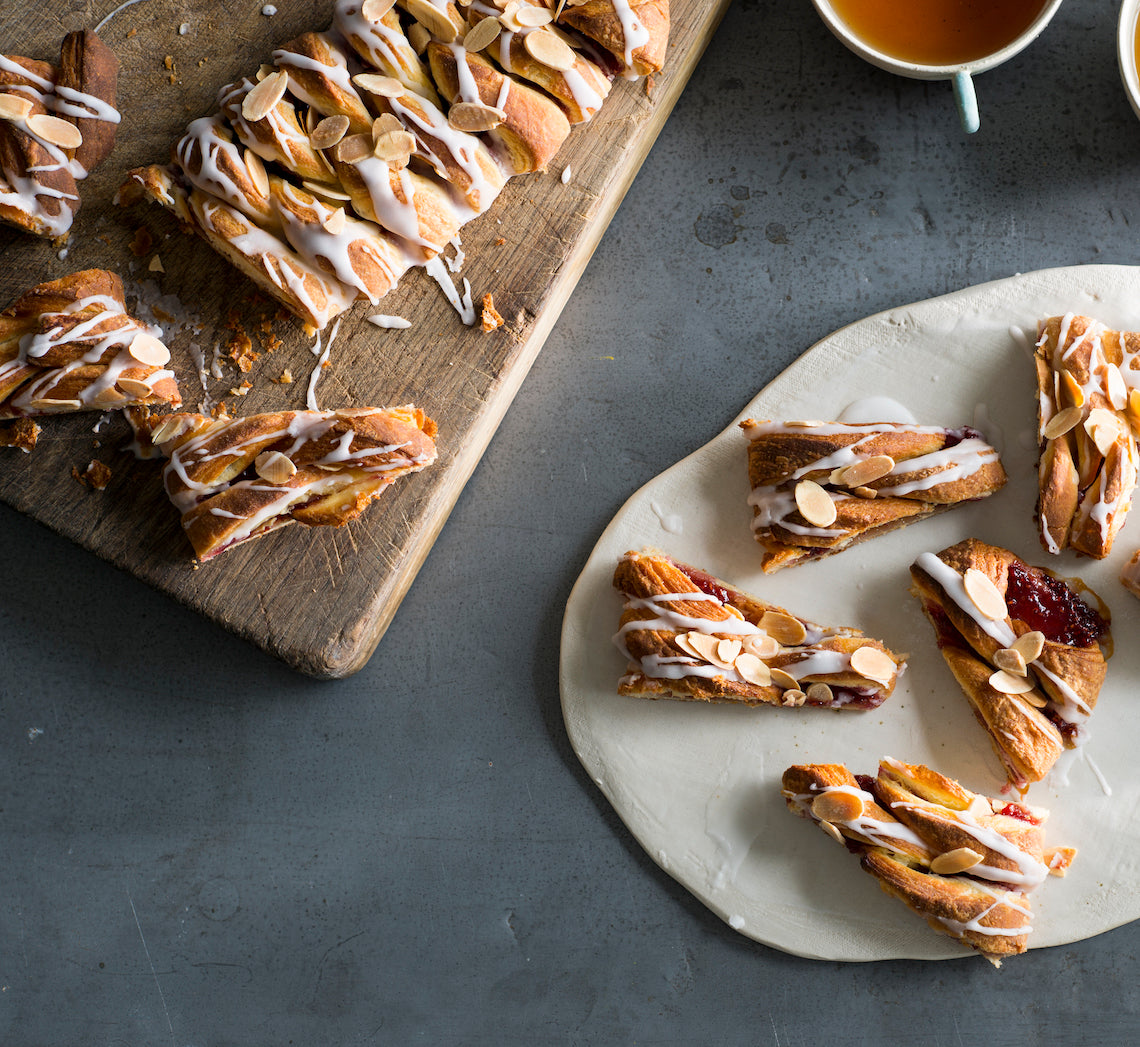
Prep 30min (+overnight +45min resting timeBake 20-25minMakes 12
Danish pastries are possibly Denmark’s most well-recognized food specialty, even though it is Austria that should actually be credited for originally creating them! Traditionally based on a leavened puff pastry (basically a puff pastry made with a yeast dough) the making of them is quite an involved process. Luckily, the pastry used here is a short-cut one with chunks of butter already incorporated into the pastry when initially mixed which cuts out the process of interleaving it with the pastry dough as you fold it – if you haven’t made puff pastry before, this is a great recipe to start with.
Ingredients
- 125ml (½ cup) lukewarm milk
- 7g (1 sachet) dried yeast
- 250g (1⅔ cups) plain flour
- 185g butter, chilled and cut into 2 cm cubes
- 1 egg, at room temperature, lightly whisked
- 2 tablespoons caster sugar
- ¼ teaspoon ground cardamom
- 5 tablespoons good-quality raspberry jam
- 2 tablespoons flaked almonds, toasted, to decorate
Icing
- 125g (1 cup) pure icing sugar
- 1 tablespoon boiling water
- ¼ teaspoon natural almond extract
Method
- Put the milk in a large bowl and sprinkle the yeast over the top. Set aside for 5 minutes.
- Put the flour and butter into the bowl of a food processor and use the pulse button to process until the butter is cut into 1 cm pieces (make sure your don’t process any further). Transfer to a large bowl.
- Add the egg, sugar and cardamom to the milk mixture and stir to combine. Add the flour and butter mixture and use a wooden spoon and then your hands to mix until it is just combined. Cover the bowl with plastic wrap and place in the fridge overnight.
- Turn the dough onto a lightly floured surface and bring together with your hands. Knead for 30 seconds or until smooth. Shape into a rectangle and then use a lightly floured rolling pin to roll the out until about 40 x 25cm, keeping the edges as straight as possible. With a long side nearest to you, fold the right third of the dough in to cover the centre third and then fold the left side in also. Turn the dough clockwise a quarter turn. Fold the dough into thirds as before to make a small rectangle. Flip the dough over on the bench and repeat the rolling and folding process again. You will finish with a small rectangle. Wrap well in plastic wrap and chill for 30 minutes.
- Preheat the oven to 200°C. Line a baking tray with non-stick baking paper.
- Roll out the pastry with a lightly floured rolling pin on a lightly floured surface to a rectangle about (30 x 35cm) and about 5mm thick. Cut in half to make two 15 x 35cm rectangles. Spread the raspberry jam down the centre to cover the centre third of both rectangles. Cut the pastry diagonally into 2cm-wide strips down both sides of the jam and then fold the strips, alternating form each side, into the centre over the jam. Transfer the pastries on the lined tray. Cover loosely with a slightly damp tea towel and set aside in a warm, draught-free place for 15 minutes or until the pastry is ‘puffy’.
- Bake in preheated oven for 20-25 minutes or until the pastry is golden, crisp and cooked through. Remove from oven and cool on the tray.
- To make the Icing, put the icing sugar in a medium bowl and stir in the water and almond extract to make a smooth pouring consistency. Drizzle over the cooled pastry and sprinkle with the almonds and set aside to set. Serve at room temperature cut into slices.
Baker's Tips
- This Danish Pastry is best eaten the day it is baked but will keep in an airtight container for up to 2 days.
This recipe is from Anneka's SBS Food online column, Bakeproof: Danish Baking.
CLICK HERE for more Bakeproof recipes.
Photography by Alan Benson.
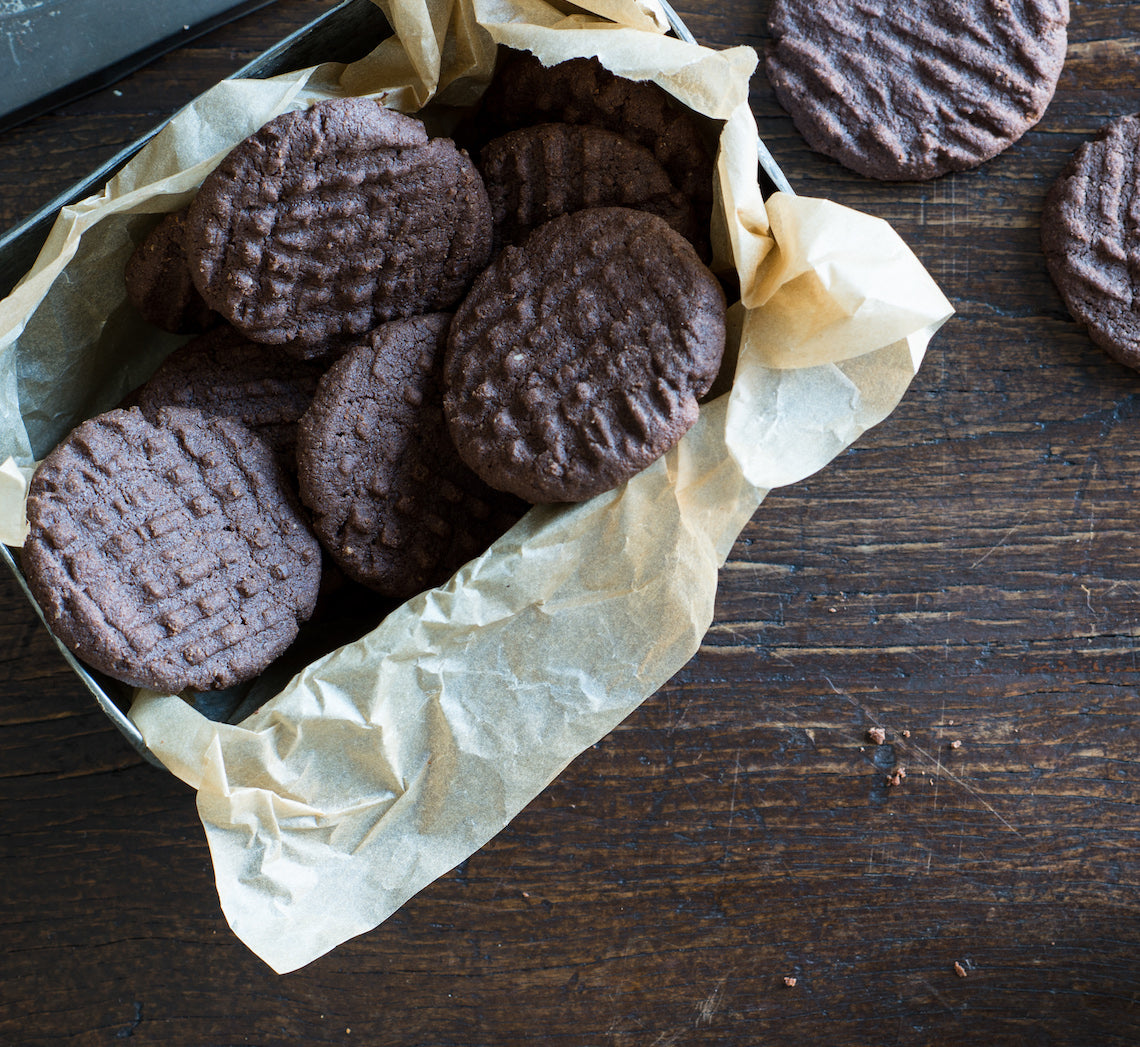
Prep 15minBake 25-30minMakes about 20
Simple and super quick to make, these shortbread will satisfy even the most hard-core chocoholic! For extra crunch, try adding some chopped roasted hazelnuts to the mixture with the chopped chocolate.
Ingredients
150g (5¼oz) chilled unsalted butter, diced
110g (½ cup, firmly packed/4oz) brown sugar
110g (¾ cup/4oz) plain flour
30g (⅓ cup/1oz) cornflour
30g (¼ cup/1oz) cocoa powder, sifted
75g (⅔ cup/2¾oz) hazelnut meal
1 teaspoon natural vanilla extract or essence
100g (3½oz) good-quality dark chocolate, chopped
Method
- Preheat the oven to 160°C/315°F (140°C/285°F fan-forced). Line two large oven trays with non-stick baking paper.
- Place the butter, sugar, flour, cornflour, cocoa powder, hazelnut meal and vanilla in the bowl of a food processor (see Baker's Tips) and process for 1 minute or until the mixture just starts to form a dough (be careful not to over-mix).
- Transfer the mixture to a medium bowl, add the chopped chocolate and bring together with your hands to combine evenly.
- Roll tablespoonfuls of the mixture into balls and place on the lined trays about 5cm/2in apart. Flatten each with a fork, creating a criss-cross pattern, so that they are about 1cm/½in thick.
- Bake for 25-30 minutes, swapping the trays halfway through baking, or until cooked through. Remove from the oven and cool on the trays.
Baker's Tips
- If you don’t have a food processor, you can make these shortbread by hand. Leave the butter at room temperature for a little while for it to soften slightly. Put the sugar, flour, cornflour, cocoa powder and hazelnut meal in a medium bowl. Sprinkle with the vanilla and then use your fingertips to rub the butter through the dry ingredients until it starts to come together and forms a dough. Continue the recipe from Step 3.
- These shortbread will keep in an airtight container at room temperature for up to 1 week.
This recipe is from Anneka's SBS Food online column, Bakeproof: Cookies in a hurry. CLICK HERE for more Bakeproof recipes.
Photography by Alan Benson.


