- home
- BAKERECIPES
BakeRecipes
Bringing real baking into your home with deliciously simple recipes.
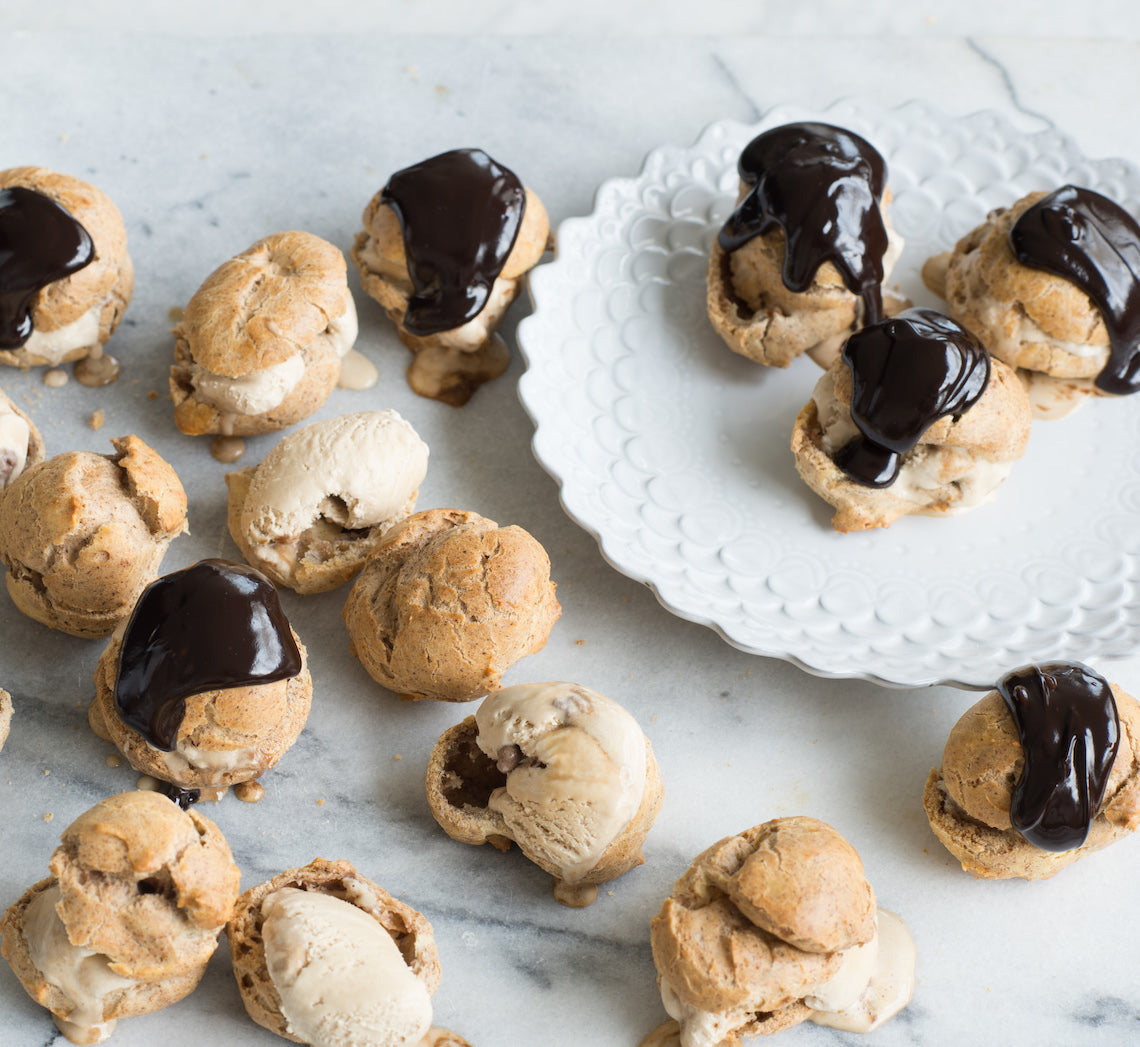
Prep 20min (+pastry making and 30min cooling time)Bake 40minMakes 10
Also called choux a la crème or cream puffs, profiteroles are basically choux pastry balls filled with crème patissiere, whipped cream or, as in these, ice-cream. These profiteroles, a heavenly combination of cinnamon, coffee and chocolate, are just a little bit addictive!
Ingredients
- 1 quantity basic choux pastry
- 2 teaspoons caster sugar
- 2 teaspoons ground cinnamon
- 1 egg, lightly whisked, to glaze
- 1 litre homemade or bought espresso or coffee ice-cream, to serve
Fudge sauce
- 200ggood quality dark chocolate (70% cocoa works well), chopped
- 125ml (½ cup) pouring cream
- 2 tablespoons golden syrup
- 1 teaspoon natural vanilla essence or extract
- ¼ teaspoon salt
Method
- Preheat oven to 200°C. Line 2 large oven trays with non-stick baking paper.
- Use a wooden spoon to beat the sugar and cinnamon into the warm prepared choux pastry until well combined.
- Spoon 30 heaped teaspoonfuls of the choux pastry onto the lined trays about 2cm apart to allow for spreading. Use a damp fingertip to smooth any peaks. Sprinkle the trays with a little water.
- Bake in preheated oven for 20 minutes or until well puffed and golden. Reduce the oven to 180°C and bake for a further 20 minutes. Turn off the oven and leave the puffs to cool in the oven for at least 30 minutes to dry. Remove from the oven and set aside to cool completely.
- Meanwhile, to make the fudge sauce, combine all the ingredients in a small saucepan and stir over low heat until the chocolate melts and the sauce is smooth. Set aside and keep warm.
- To serve, cut each of the cinnamon choux puffs in half and fill each with small scoop of ice-cream. Place three on each serving plate and spoon over the warm chocolate fudge sauce. Serve immediately.
Baker's Tips
- The cinnamon choux puffs can be made up to 3 days ahead of serving. Store in an airtight container at room temperature. Refresh by placing on an oven tray and reheating in an oven preheated to 180°C for 10 minutes. Cool, assemble and serve.
- The chocolate fudge sauce can be made up to 1 week ahead of serving. Keep in an airtight jar or container in the fridge. Reheat in a small saucepan over a low heat, stirring occasionally, until smooth and heated through.
This recipe is from Anneka's SBS Food online column, Bakeproof: Choux Pastry.
CLICK HERE for more Bakeproof recipes.
Photography by Alan Benson.
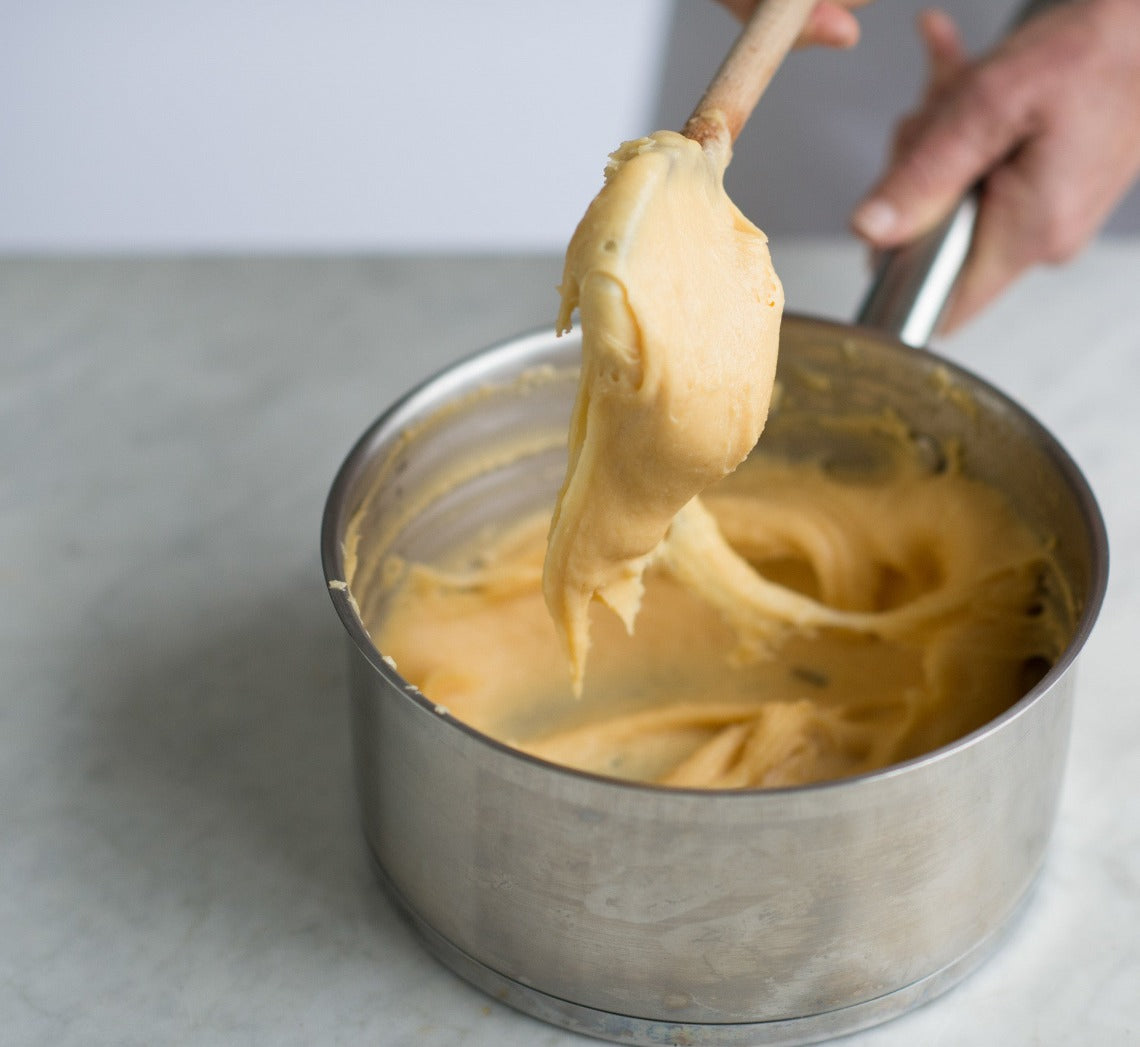
Prep 20-30minMakes 30 profiteroles or 12 average-sized éclairs
Completely unique in the pastry world, choux pastry goes against every rule in the book – eggs are more important than butter, the mixture is heated, and beating, as opposed to 'rubbing', is the method of mixing.
Ingredients
- 150g (1 cup) plain flour
- 185ml (¾ cup) water
- ½ teaspoons salt
- 75g salted butter, diced
- 4 eggs (59g each)
Method
- Sift the flour onto a sheet of baking paper.
- Combine the water, salt and butter in a medium saucepan and heat over medium heat until just boiling. Remove immediately from the heat, add all the flour at once and stir vigorously with a wooden spoon to combine.
- Return the saucepan to the heat and beat vigorously over a low heat for 30 seconds or until the mixture is smooth and starts to pull away from the sides of the pan and a flour film forms on the bottom of the pan (image 1). Remove the saucepan from the heat and set aside for 3-5 minutes or until cooled slightly.
- Use a fork to whisk together the 3 eggs. Add about one-quarter of the whisked eggs to the flour mixture at a time (image 2), beating well with the wooden spoon after each addition until well combined and the mixture thickens and becomes smooth before adding more (image 3 and 4). Use a fork to lightly whisk the extra egg and gradually add to the flour mixture a teaspoon at a time (image 5) and beating well after each addition until the mixture is thick, shiny and falls heavily from the spoon (image 6). You may not need to use all of the last egg.
- Pipe (as below) and bake immediately, or cover well and keep in the fridge for up to 24 hours before baking as directed. Bring to room temperature before using.
Baker's Tips
Making choux pastry
There are three main things to keep in mind when making choux pastry to ensure success:
- Measure your ingredients accurately, as the key to good choux pastry is a balance between the major ingredients of flour, water and eggs. If there is an imbalance between these, there is a great chance your choux won’t puff, become crisp or turn a golden brown colour.
- Add the egg gradually. The amount of egg needed will vary and is determined by how much can be absorbed by the flour (which can vary slightly from batch to batch). If too much egg is added or if it is added too quickly, the consistency of the choux pastry will be affected, and in turn its ability to rise. Similarly, if not enough egg is incorporated, the choux pastry won’t puff and it will be dense inside. This is because it is the moisture in the egg that is converted to steam in the heat of the oven and that, in turn, creates the air pocket inside. So the more egg, the more the mixture will puff.
- Oven temperature is important. If the oven temperature is too low or if the oven door is opened for too long and valuable heat is lost during baking, your choux pastry won’t rise as well. The same applies if you don’t bake it for long enough.
Piping choux pastry
- Choux pastry can either be spooned or piped onto a baking paper-lined oven tray for baking, depending on the desired result.
- Sprinkle the lined baking tray with a little water before piping or shaping your choux pastry – this creates extra steam in your oven and will help the choux pastry rise and puff.
- Spoon the choux pastry into a large pastry bag filled with a large piping nozzle. Twist the end of the pastry bag to contain the mixture and push it towards the nozzle end and expel any air pockets. Place the twisted end between your index finger and thumb of your writing hand and place the bag in the palm of your hand. Use your other hand to hold the nozzle end and guide it as you pipe.
- Firmly hold the bag about 1 cm above the lined tray and at a slight angle. Press gently with the hand holding the bag, pushing the pastry through the nozzle and moving the bag to create the desired shape. (For profiteroles and small rounds, hold the bag and nozzle directly over the tray, perpendicular to the tray and pipe the desired size.)
- When you reach the desired length, pipe the mixture back onto the shape when finished to avoid a peaked end. Use a damp fingertip to press and neaten any peaks.
- To help create uniformed lengths for éclairs, you can mark lines on the underside of the baking paper with a pencil. For evenly-sized choux puffs, you can mark the lined tray with a flour-dipped cutter of the desired size.
- Bake the choux pastry as directed in the recipe.
Cooling choux pastry
- Perfect choux pastry is puffy and crisp, hollow inside and is a deep golden colour. To help the éclairs and puffs dry out inside you can either split them in half or piece a hole in the base or side before they cool to allow any excess steam to escape.
To make choux pastry with an electric mixer
- Follow the recipe until the point of removing the flour mixture from the heat. Transfer the mixture to the bowl of an electric mixer with a paddle attachment and beat in the 3 eggs, one at a time, beating until well combined and smooth after each addition. Use a fork to lightly whisk the last egg and gradually add to the flour mixture, a teaspoon at a time, beating well after each addition until the mixture is thick, glossy and falls heavily from the spoon. You may not need to use all of the last egg.
This recipe is from Anneka's SBS Food online column, Bakeproof: Choux Pastry.
CLICK HERE for more Bakeproof recipes.
Photography by Alan Benson.
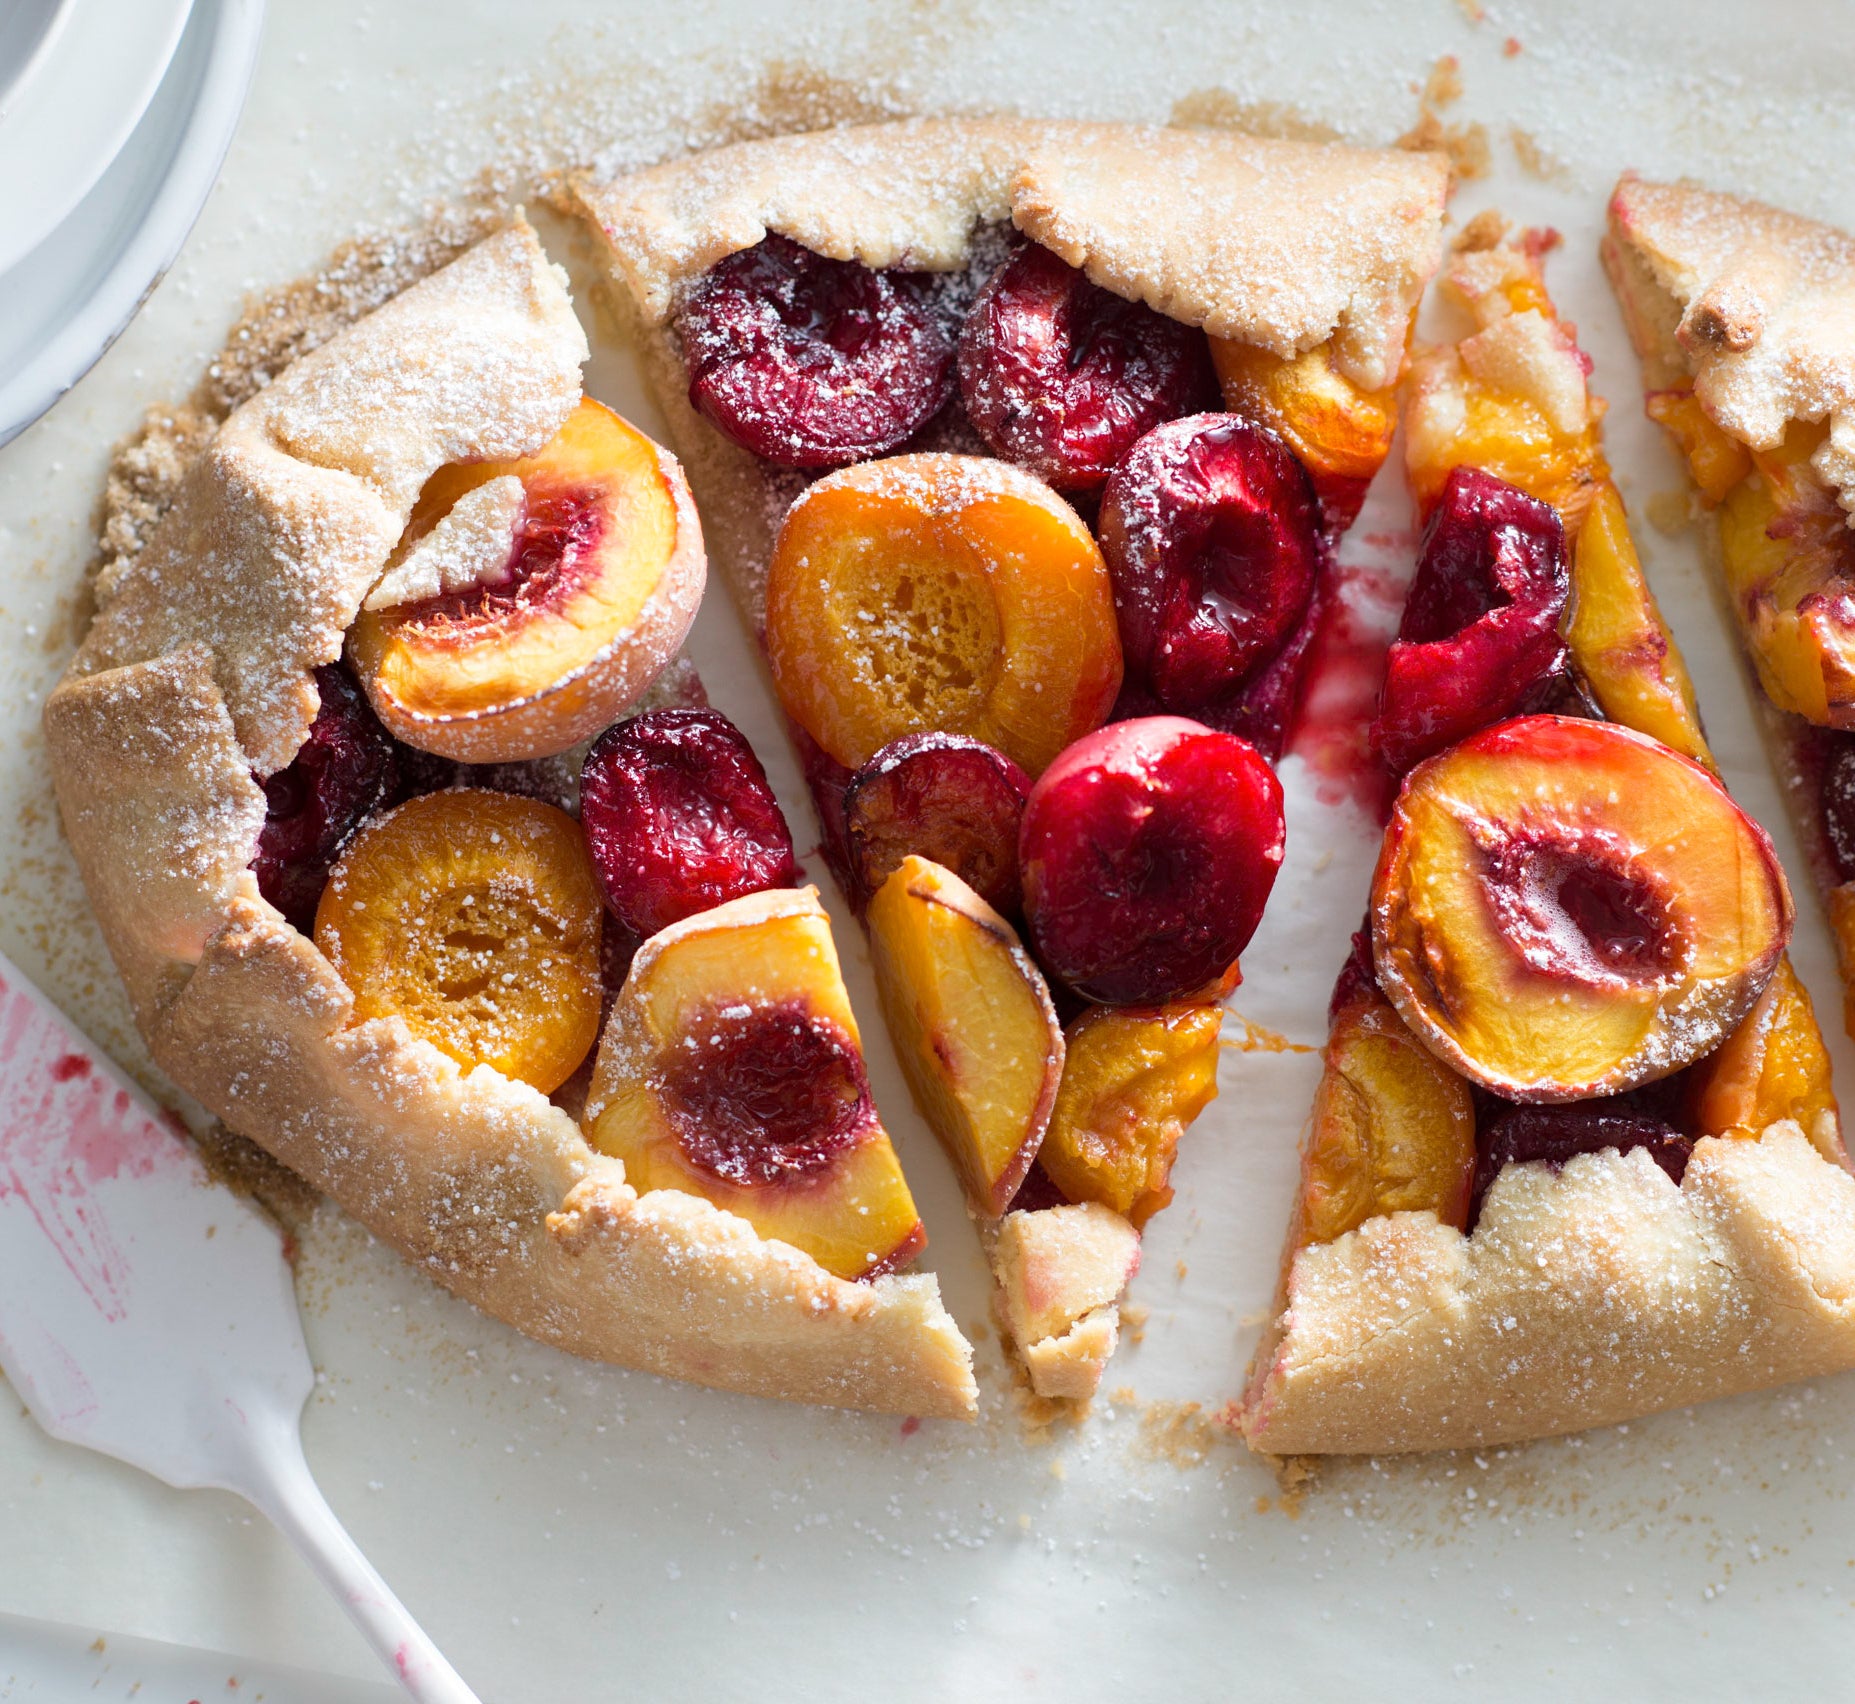
Prep 25min(+ pastry making and chilling time)Bake 50-55minMakes 8-10 serves
This tart is simplicity at its best – a selection of gorgeous summer stone fruit encased in a sweet, easy-peasy pastry. There's no real structure, it's slightly rustic and lets seasonal stone fruits shine. Serve with toffee ice-cream if you can – the combination is sublime.
Ingredients
1 quantity of Sweet Shortcrust Pastry (see Variations)
25g (¼ cup/¾oz) almond meal
700g (1lb 8oz) firm but ripe stone fruit of your choice (such as peaches, nectarines, plums and apricots), halved and pitted
2 tablespoons raw sugar
Icing sugar, to dust (optional)
Good-quality toffee or vanilla ice-cream, to serve
Method
- Preheat oven to 200°C/400°F (180°C/350°F fan-forced).
- Use a lightly floured rolling pin to roll out the pastry on a piece of non-stick baking paper to a rough rectangle about 3mm/⅛in thick. Use the paper to transfer the pastry to a large baking tray. Sprinkle the pastry with the almond meal, leaving a 5cm/2in-wide border around the edge. Arrange the fruit over the almond meal and then fold the pastry border up over the fruit. Sprinkle the upturned border and fruit with the sugar. Bake in preheated oven for 50-55 minutes or until the pastry is golden and crisp.
- Serve warm or at room temperature, dusted with icing sugar, if desired, cut into wedges and accompanied by ice-cream.
Baker's Tip
- This tart is best served warm, but is also great served at room temperature. It will keep covered in the fridge for up to 2 days. Stand at room temperature for about 30 minutes before serving.
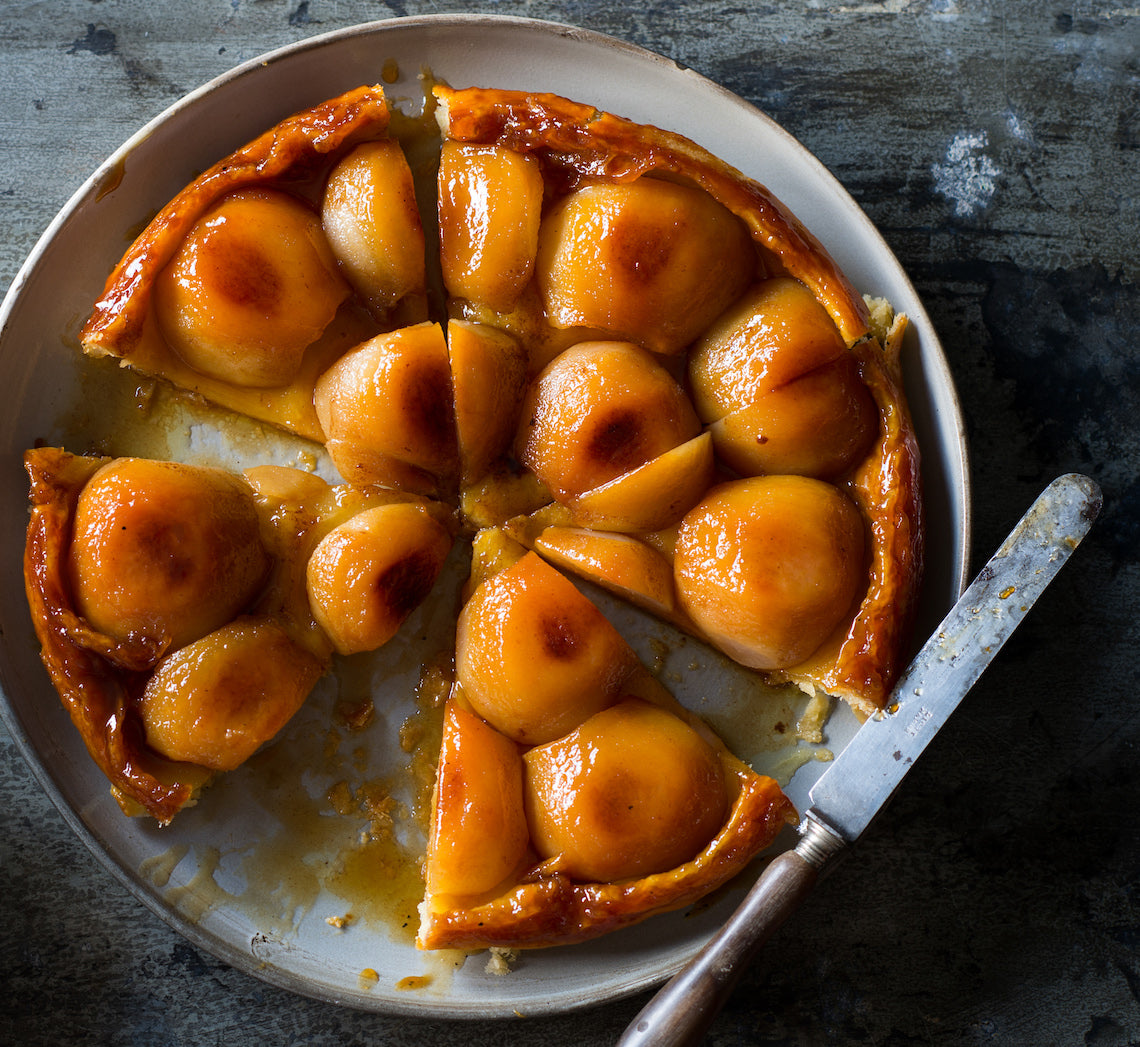
Prep 40min (+20min chilling and 1hr 25min cooling time)Bake 45minMakes 8 serves
Traditionally made with apples, this classic upside-down French tart was created by the Tatin sisters who ran a hotel in France in the early 1900s. If you don't have an ovenproof frying pan, transfer the cooled caramel and pears to a base-lined 22cm round cake tin before covering them with the pastry and baking.
Ingredients
Ground cinnamon, to sprinkle
Vanilla ice-cream, cream or crème fraiche, to serve
1 quantity Shortcrust Pastry
80g (2¾oz) salted butter, cubed
110g (½ cup/4oz) caster sugar
1.1kg (2lb 7oz) small (about 7) pears (such as Josephine), peeled, halved and cored
Method
- Prepare the Shortcrust Pastry.
- Meanwhile, melt the butter in a 20–22cm/8-8¼in(base measurement) heavy-based frypan over medium-high heat. Sprinkle with the sugar and then arrange the pears, cut-side up, in the pan, cutting some of the halves into quarters to fill the gaps. Reduce the heat to medium and cook, uncovered, for 15 minutes or until the liquid becomes a dark caramel and the pears are almost tender and golden underneath. Remove the pan from the heat and set aside for 1 hour 15 minutes or until cooled completely.
- Preheat oven to 190°C/375°F (170°C/340°F fan-forced).
- Use a lightly floured rolling pin to roll the pastry out on a lightly floured bench top to about 5mm/¼in thick and then cut into a circle about 26cm/10½in in diameter. Place the pastry over the cooled pears in the pan and carefully tuck the pastry edge around the fruit and down the side of the pan. Bake in preheated oven for 45 minutes or until the pastry is deep golden and cooked through and the pear juices are bubbling. Remove from the oven and set aside for 10 minutes to cool slightly.
- Place a serving plate with a lip over the top of the tart and invert. Serve immediately cut into wedges and accompanied by ice-cream, cream or crème fraiche.
This recipe is from Anneka's SBS Food online column, The real secrets of French baking.
CLICK HERE for more Bakeproof recipes.
Photography by Alan Benson.
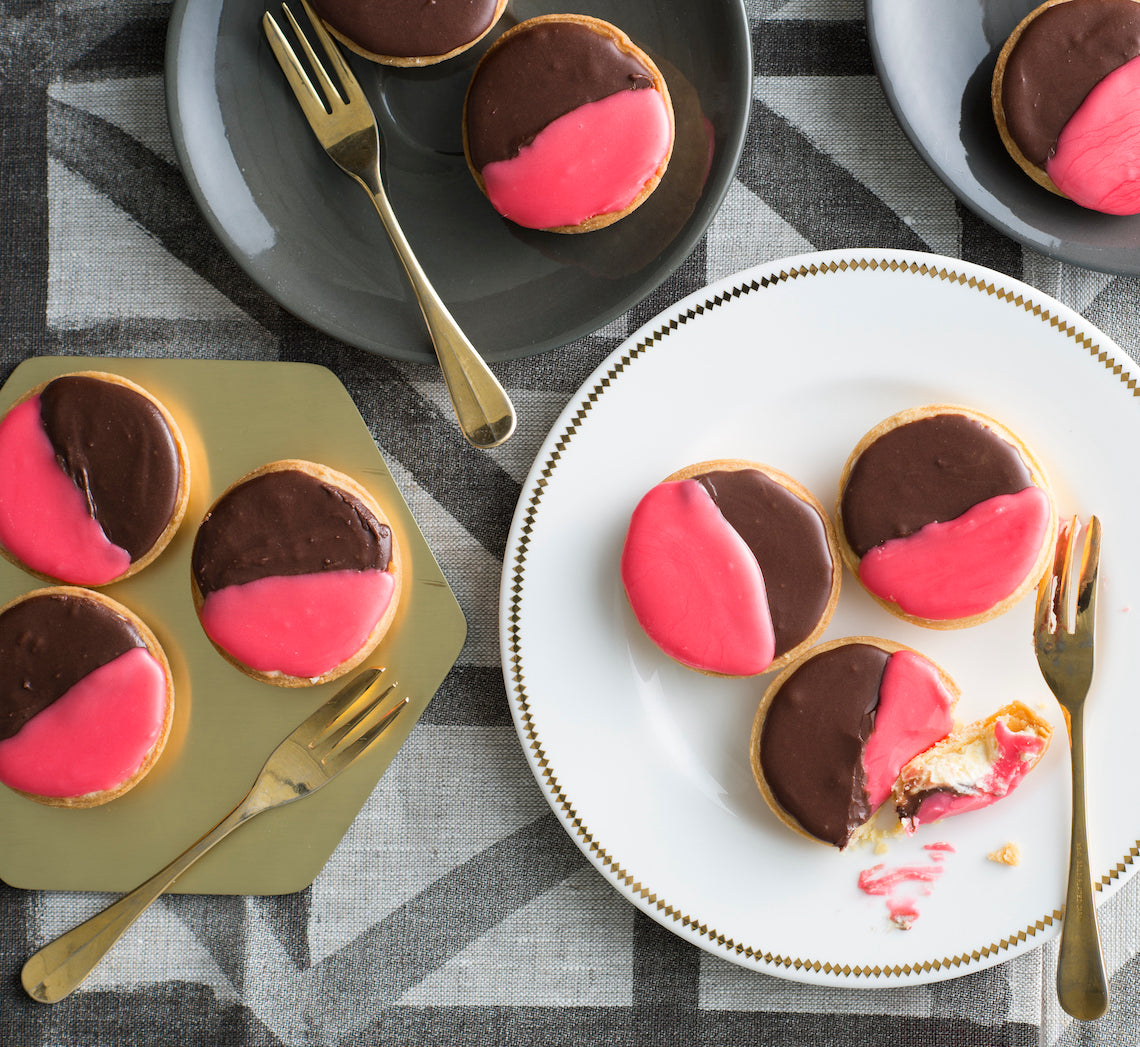
Prep 40min (+30min chilling and 30min cooling time)Bake 20minMakes 12
Dating back almost a century, this Australian creation of a pastry case filled with mock cream (and sometimes a raspberry jam layer) and topped with sickly sweet icing seems to hit a nostalgic chord – we all remember eating them as a child! For a more contemporary twist, we've added an extra colour punch to the pink icing. Remember that chocolate and white, or pink and white are also popular colour combinations.
Ingredients
1 quantity Sweet shortcrust pastry, divided in half before wrapping and chilling as directed
Mock Cream Filling
1 tablespoon boiling water
½ teaspoon gelatine powder
65g (⅓ cup) caster sugar
2 tablespoons milk
125g unsalted butter, softened
1 teaspoon natural vanilla essence or extract
Icing
185g (1½ cups) pure icing sugar
1 tablespoon water, plus 1 teaspoon extra (optional)
2 teaspoons sifted cocoa powder
Pink food colouring
Method
- Unwrap one pastry portion and place on a lightly floured, cool work surface. Gently pat the pastry with the palm of your hand to flatten slightly. Use a lightly floured rolling pin to roll out on a lightly floured surface until 3mm thick. Use an 8cm diameter plain round cutter to cut out 6 circles, re-rolling the pastry if necessary. Line six holes of a 12-hole 80ml ( ⅓ cup) muffin tin (the pastry circles won’t fill the muffin holes completely. Repeat with the remaining pastry portion to line the six remaining muffin holes.
- Prick each pastry case base 3 times with a fork and place in the fridge for 30 minutes. Preheat the oven to 200°C (180°C fan-forced).
- Line each tartlet case with a piece of foil and then fill with dried rice. Blind bake the tart cases for 15 minutes or until the pastry is sealed. Use the foil to lift the rice out of the tartlet cases and bake for a further 5 minutes or until lightly golden and cooked through. Cool the cases in the tin.
- To make the Mock cream filling, put the boiling water in a small ramekin and sprinkle the gelatine over the top. Use a fork to whisk the gelatine into the water and then set aside for about 3 minutes or until the mixture is clear (see Bakers Tips). Meanwhile, combine the sugar and milk in a small saucepan and stir over medium heat until the sugar dissolves. Stir in the gelatine mixture until well combined. Remove from heat and set aside, stirring occasionally so the gelatine doesn't set, for 30 minutes or until cooled to room temperature.
- Use an electric beater to beat the butter and vanilla in a medium bowl until pale and creamy. With the motor running, gradually add the cooled gelatin mixture in a slow steady stream until well combined and fluffy. Divide the Mock cream filling evenly among the pastry cases and smooth the surfaces. Set aside in a cool spot but not in the fridge.
- To make the Icing, sift the icing sugar into a bowl and then stir in the water until smooth (the icing should be a spreadable consistency). Put half the icing into a separate bowl and stir in the cocoa powder and extra teaspoon of water. Colour the remaining portion with 2-4 drops of pink food colouring. Use a palette knife or the back of a teaspoon to spread about a teaspoon of the pink icing over the top of half of each tart. Set aside for 5-10 minutes for the icing to set. Spread about a teaspoon of the chocolate icing over the remaining half of each tart to cover the tops and then set aside for 5-10 minutes for the icing to set. Serve at room temperature.
Baker's Tips
- If the gelatine doesn't dissolve in the boiling water and become clear, add boiling water to a larger heatproof bowl, jug or dish and then sit the ramekin with the gelatine mixture in the water. Stir occasionally until the mixture is clear.
- These tarts will keep in an airtight container in the fridge for up to 4 days. Serve at room temperature.
This recipe is from Anneka's SBS Food online column, Bakeproof: Childhood Favourites. CLICK HERE for more Bakeproof recipes.
Photography by Alan Benson.
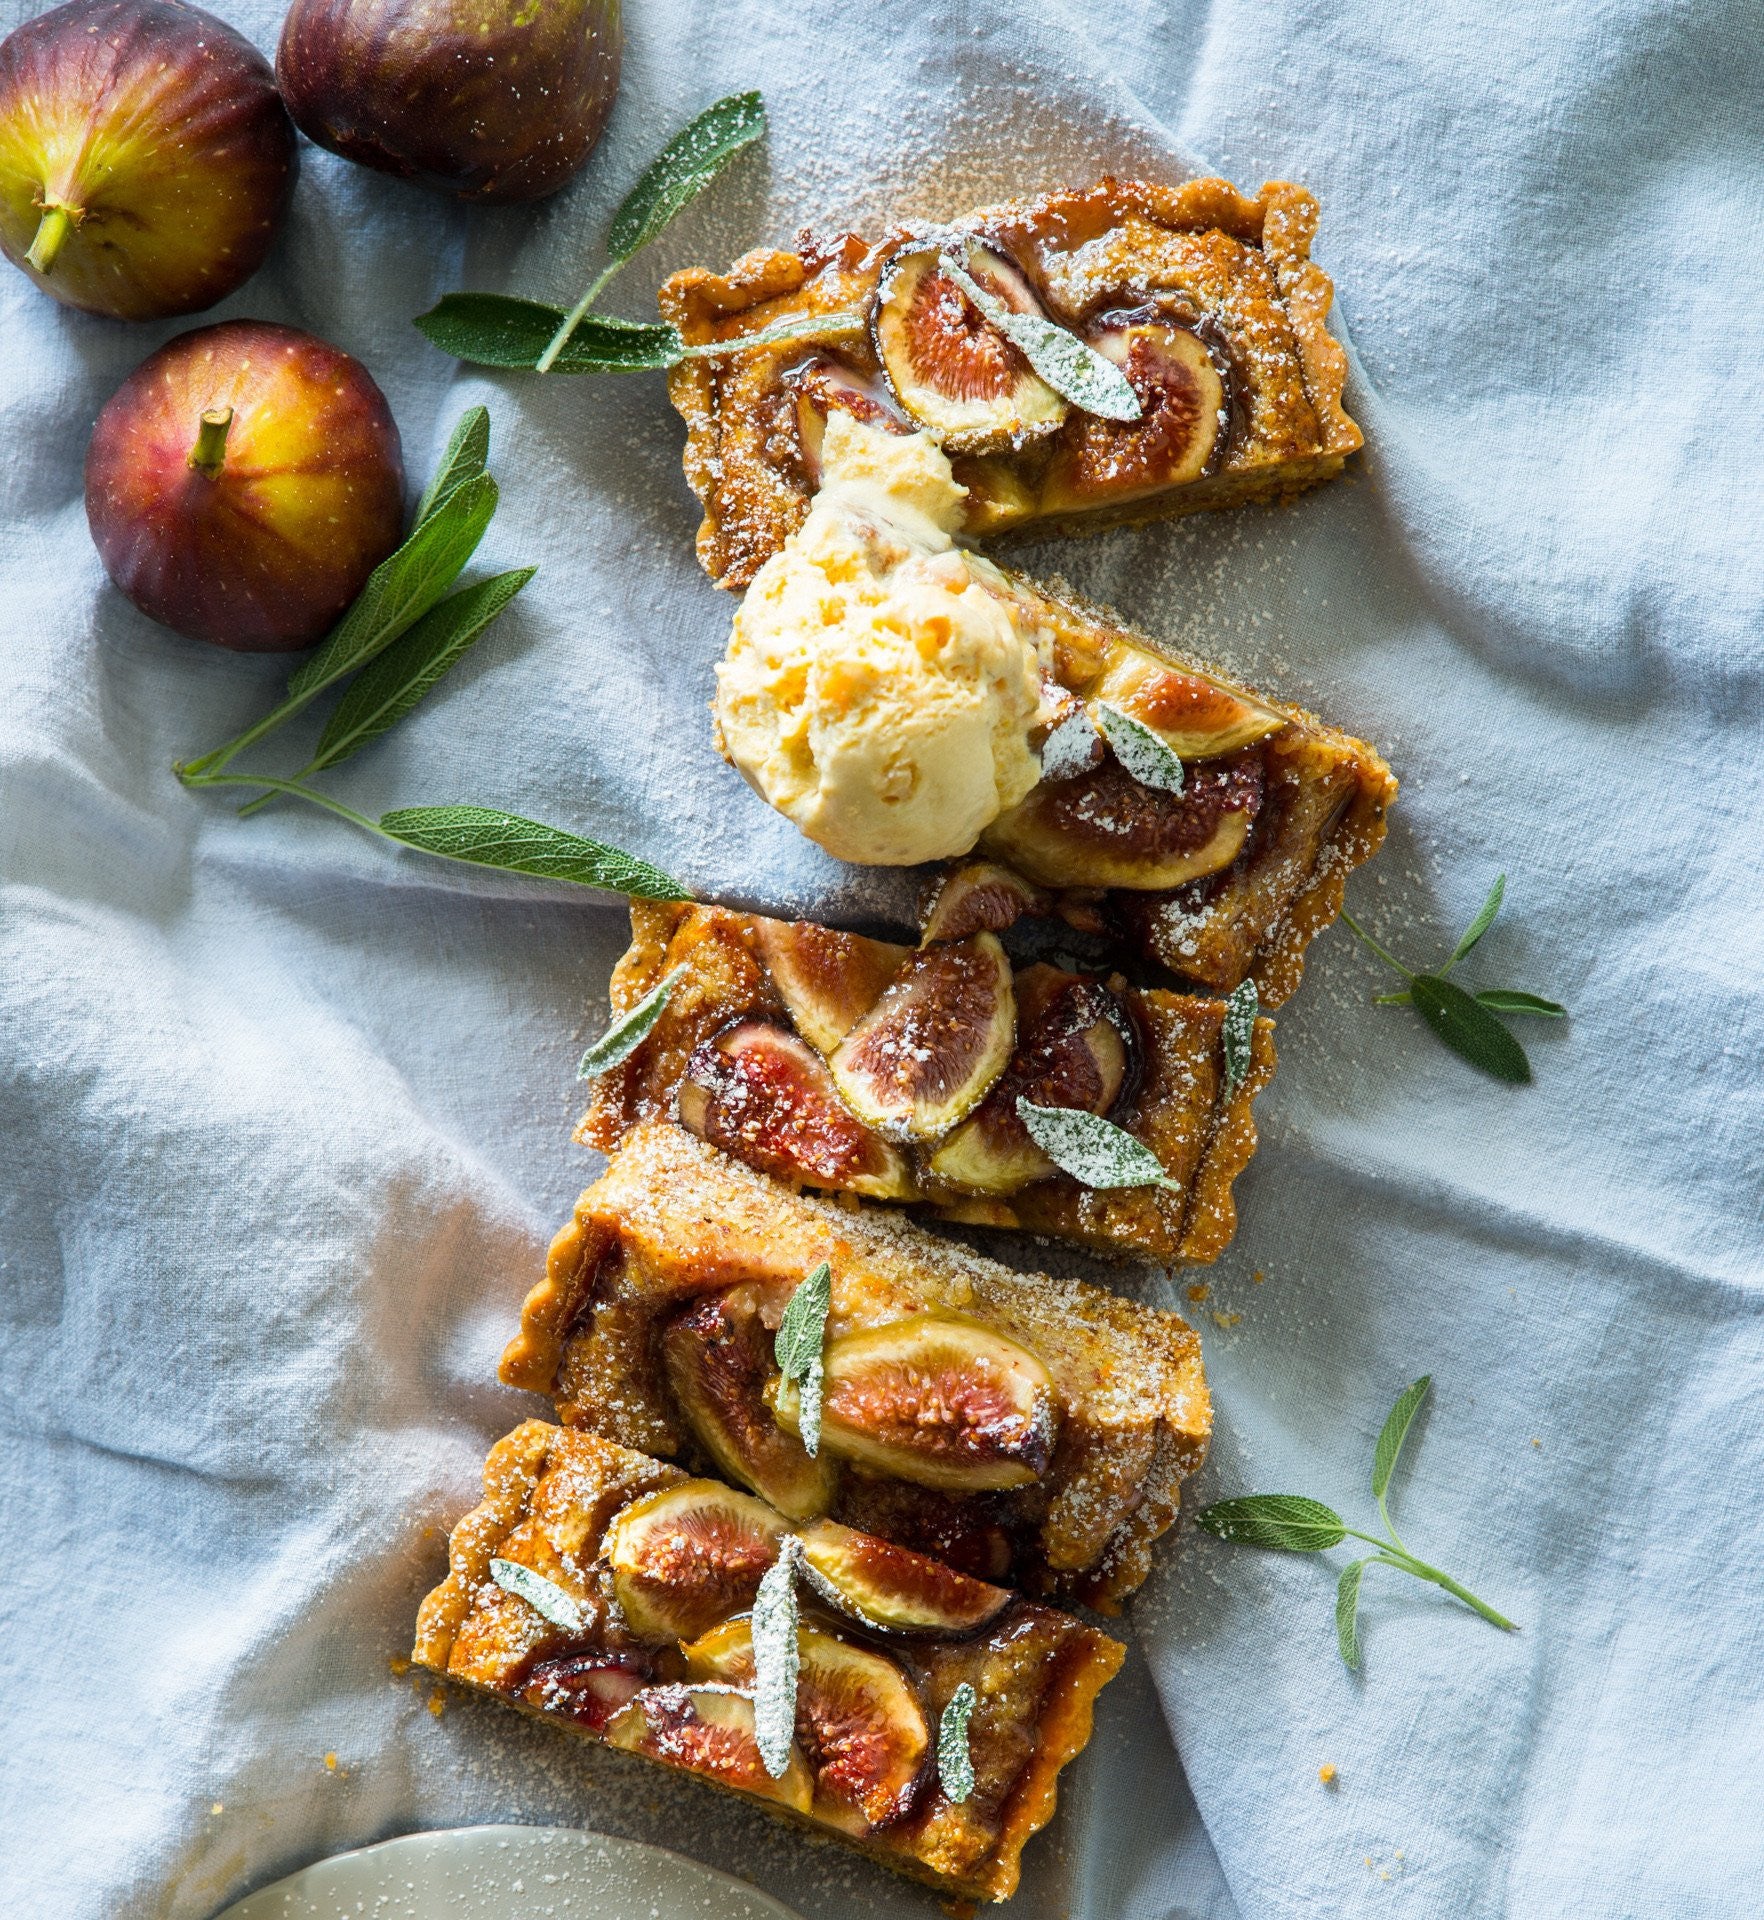
Prep 45min (+ 20min chilling + 1.5hr cooling time)Bake 55minMakes 8-10 serves
The combination of fig, honey and almonds is a well-loved one. I’ve added the gentle pungency of fresh sage to this and the result is sublime. This tart is something special to reserve for autumn lunches when figs are at their best.
Ingredients
1 x quantity sweet sage shortcrust pastry, shaped into a rectangle before wrapping and chilling as directed
8 medium firm ripe figs (about 50g each), quartered
2 tablespoons honey, warmed, to brush
20 small sage leaves (optional), to serve
Icing sugar (optional), to dust
Honey ice cream or whipped cream, to serve
Frangipane
80g unsalted butter, at room temperature
75g (⅓ cup) caster sugar
2 tablespoons honey
1 orange, rind finely grated
2 eggs, at room temperature
50g (⅓ cup) plain flour
120g ground almonds (meal)
Method
- Preheat oven to 200°C (180°C fan-forced).
- Unwrap the pastry and place on a lightly floured, cool work surface. Gently pat the pastry with the palm of your hand to flatten slightly. Use a lightly floured rolling pin to roll the pastry into a rectangle about 4mm thick. Line a 11.5cm x 35cm (base measurement) tart tin, with a removable base, with the pastry. Roll the rolling pin over the top of the tart tin to trim any overhanging pastry.
- Place tart case on a baking tray. Prick the pastry base with a fork (about 12 times). Line the pastry case with greaseproof paper or foil and fill with pastry weights, dried beans or raw rice, making sure to press into the corners. Bake for 15 minutes.
- Remove from oven and use the paper to lift the weights out of the case. Return the pastry case to the oven and cook for a further 5-10 minutes or until the pastry case is lightly golden and just cooked through. Remove the tart case from the oven and set aside to cool.
- Reduce the oven temperature to 170°C (150°C fan-forced).
- To make the Frangipane, use an electric mixer to beat the butter, sugar, honey and orange rind until pale and creamy. Add the eggs one at a time, beating well after each addition, until well combined. Combine the flour with the ground almonds and mix evenly. Add to the butter mixture and mix on low speed until just combined. Spoon the frangipane into the cooled tart case and spread evenly. Press the fig quarters, cut side up, randomly into the frangipane.
- Bake for 50-55 minutes or until the frangipane is just set and the pastry is golden and crisp. Remove the tart from the oven and place, still in the tin, on a wire rack.
- Brush the warm tart with the honey and set aside to cool (this will take about 1 hour). Sprinkle with the small sage leaves and icing sugar, and serve slices accompanied with ice cream or cream.
Baker's Tips
- This tart is best eaten on the day it is baked; however, it will keep in the fridge in an airtight container for up to 2 days. Serve at room temperature.
This recipe is from Anneka's SBS Food online column, Bakeproof: Autumn Fruits. CLICK HERE for more Bakeproof recipes.
Photography by Alan Benson.
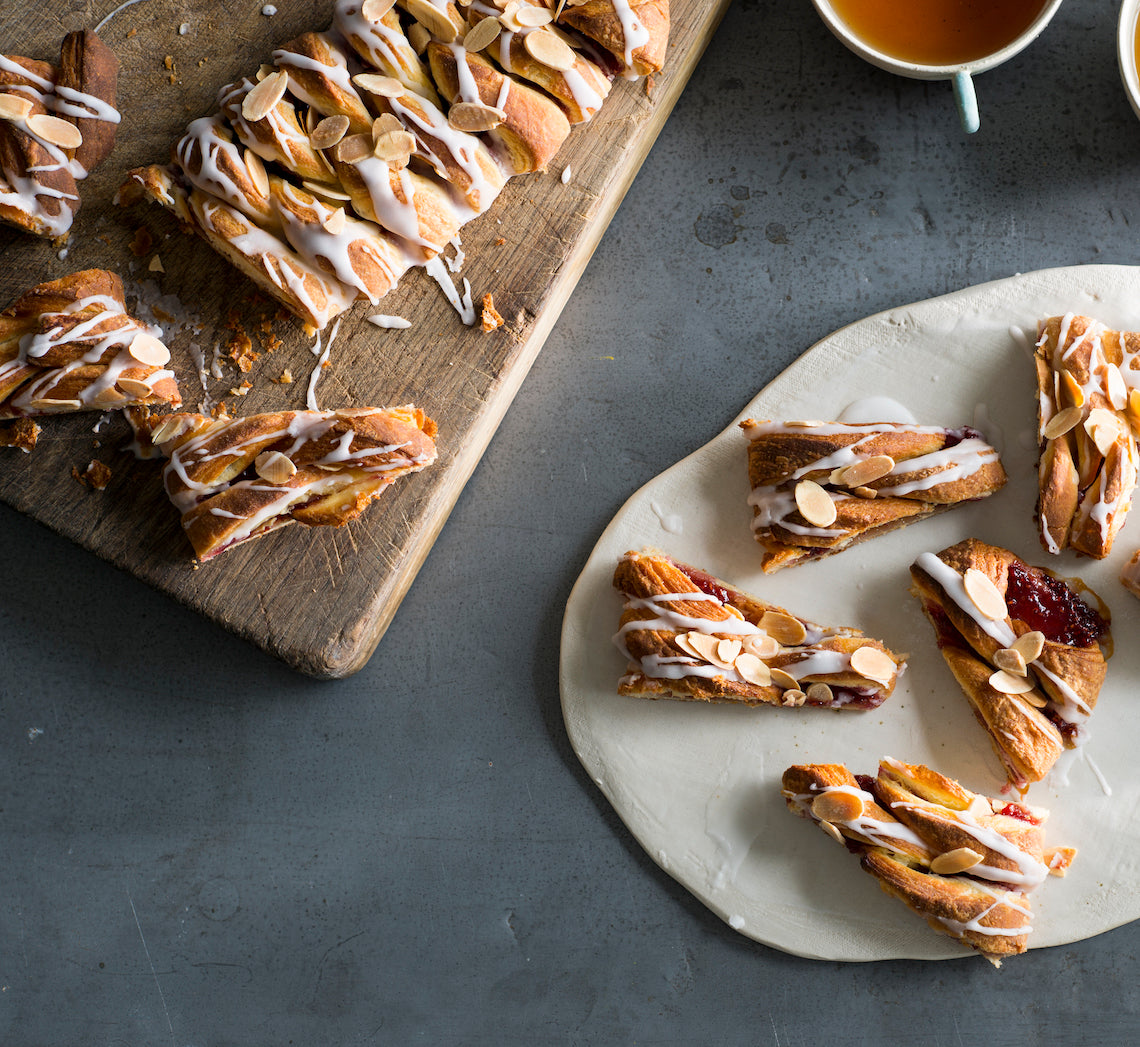
Prep 30min (+overnight +45min resting timeBake 20-25minMakes 12
Danish pastries are possibly Denmark’s most well-recognized food specialty, even though it is Austria that should actually be credited for originally creating them! Traditionally based on a leavened puff pastry (basically a puff pastry made with a yeast dough) the making of them is quite an involved process. Luckily, the pastry used here is a short-cut one with chunks of butter already incorporated into the pastry when initially mixed which cuts out the process of interleaving it with the pastry dough as you fold it – if you haven’t made puff pastry before, this is a great recipe to start with.
Ingredients
- 125ml (½ cup) lukewarm milk
- 7g (1 sachet) dried yeast
- 250g (1⅔ cups) plain flour
- 185g butter, chilled and cut into 2 cm cubes
- 1 egg, at room temperature, lightly whisked
- 2 tablespoons caster sugar
- ¼ teaspoon ground cardamom
- 5 tablespoons good-quality raspberry jam
- 2 tablespoons flaked almonds, toasted, to decorate
Icing
- 125g (1 cup) pure icing sugar
- 1 tablespoon boiling water
- ¼ teaspoon natural almond extract
Method
- Put the milk in a large bowl and sprinkle the yeast over the top. Set aside for 5 minutes.
- Put the flour and butter into the bowl of a food processor and use the pulse button to process until the butter is cut into 1 cm pieces (make sure your don’t process any further). Transfer to a large bowl.
- Add the egg, sugar and cardamom to the milk mixture and stir to combine. Add the flour and butter mixture and use a wooden spoon and then your hands to mix until it is just combined. Cover the bowl with plastic wrap and place in the fridge overnight.
- Turn the dough onto a lightly floured surface and bring together with your hands. Knead for 30 seconds or until smooth. Shape into a rectangle and then use a lightly floured rolling pin to roll the out until about 40 x 25cm, keeping the edges as straight as possible. With a long side nearest to you, fold the right third of the dough in to cover the centre third and then fold the left side in also. Turn the dough clockwise a quarter turn. Fold the dough into thirds as before to make a small rectangle. Flip the dough over on the bench and repeat the rolling and folding process again. You will finish with a small rectangle. Wrap well in plastic wrap and chill for 30 minutes.
- Preheat the oven to 200°C. Line a baking tray with non-stick baking paper.
- Roll out the pastry with a lightly floured rolling pin on a lightly floured surface to a rectangle about (30 x 35cm) and about 5mm thick. Cut in half to make two 15 x 35cm rectangles. Spread the raspberry jam down the centre to cover the centre third of both rectangles. Cut the pastry diagonally into 2cm-wide strips down both sides of the jam and then fold the strips, alternating form each side, into the centre over the jam. Transfer the pastries on the lined tray. Cover loosely with a slightly damp tea towel and set aside in a warm, draught-free place for 15 minutes or until the pastry is ‘puffy’.
- Bake in preheated oven for 20-25 minutes or until the pastry is golden, crisp and cooked through. Remove from oven and cool on the tray.
- To make the Icing, put the icing sugar in a medium bowl and stir in the water and almond extract to make a smooth pouring consistency. Drizzle over the cooled pastry and sprinkle with the almonds and set aside to set. Serve at room temperature cut into slices.
Baker's Tips
- This Danish Pastry is best eaten the day it is baked but will keep in an airtight container for up to 2 days.
This recipe is from Anneka's SBS Food online column, Bakeproof: Danish Baking.
CLICK HERE for more Bakeproof recipes.
Photography by Alan Benson.
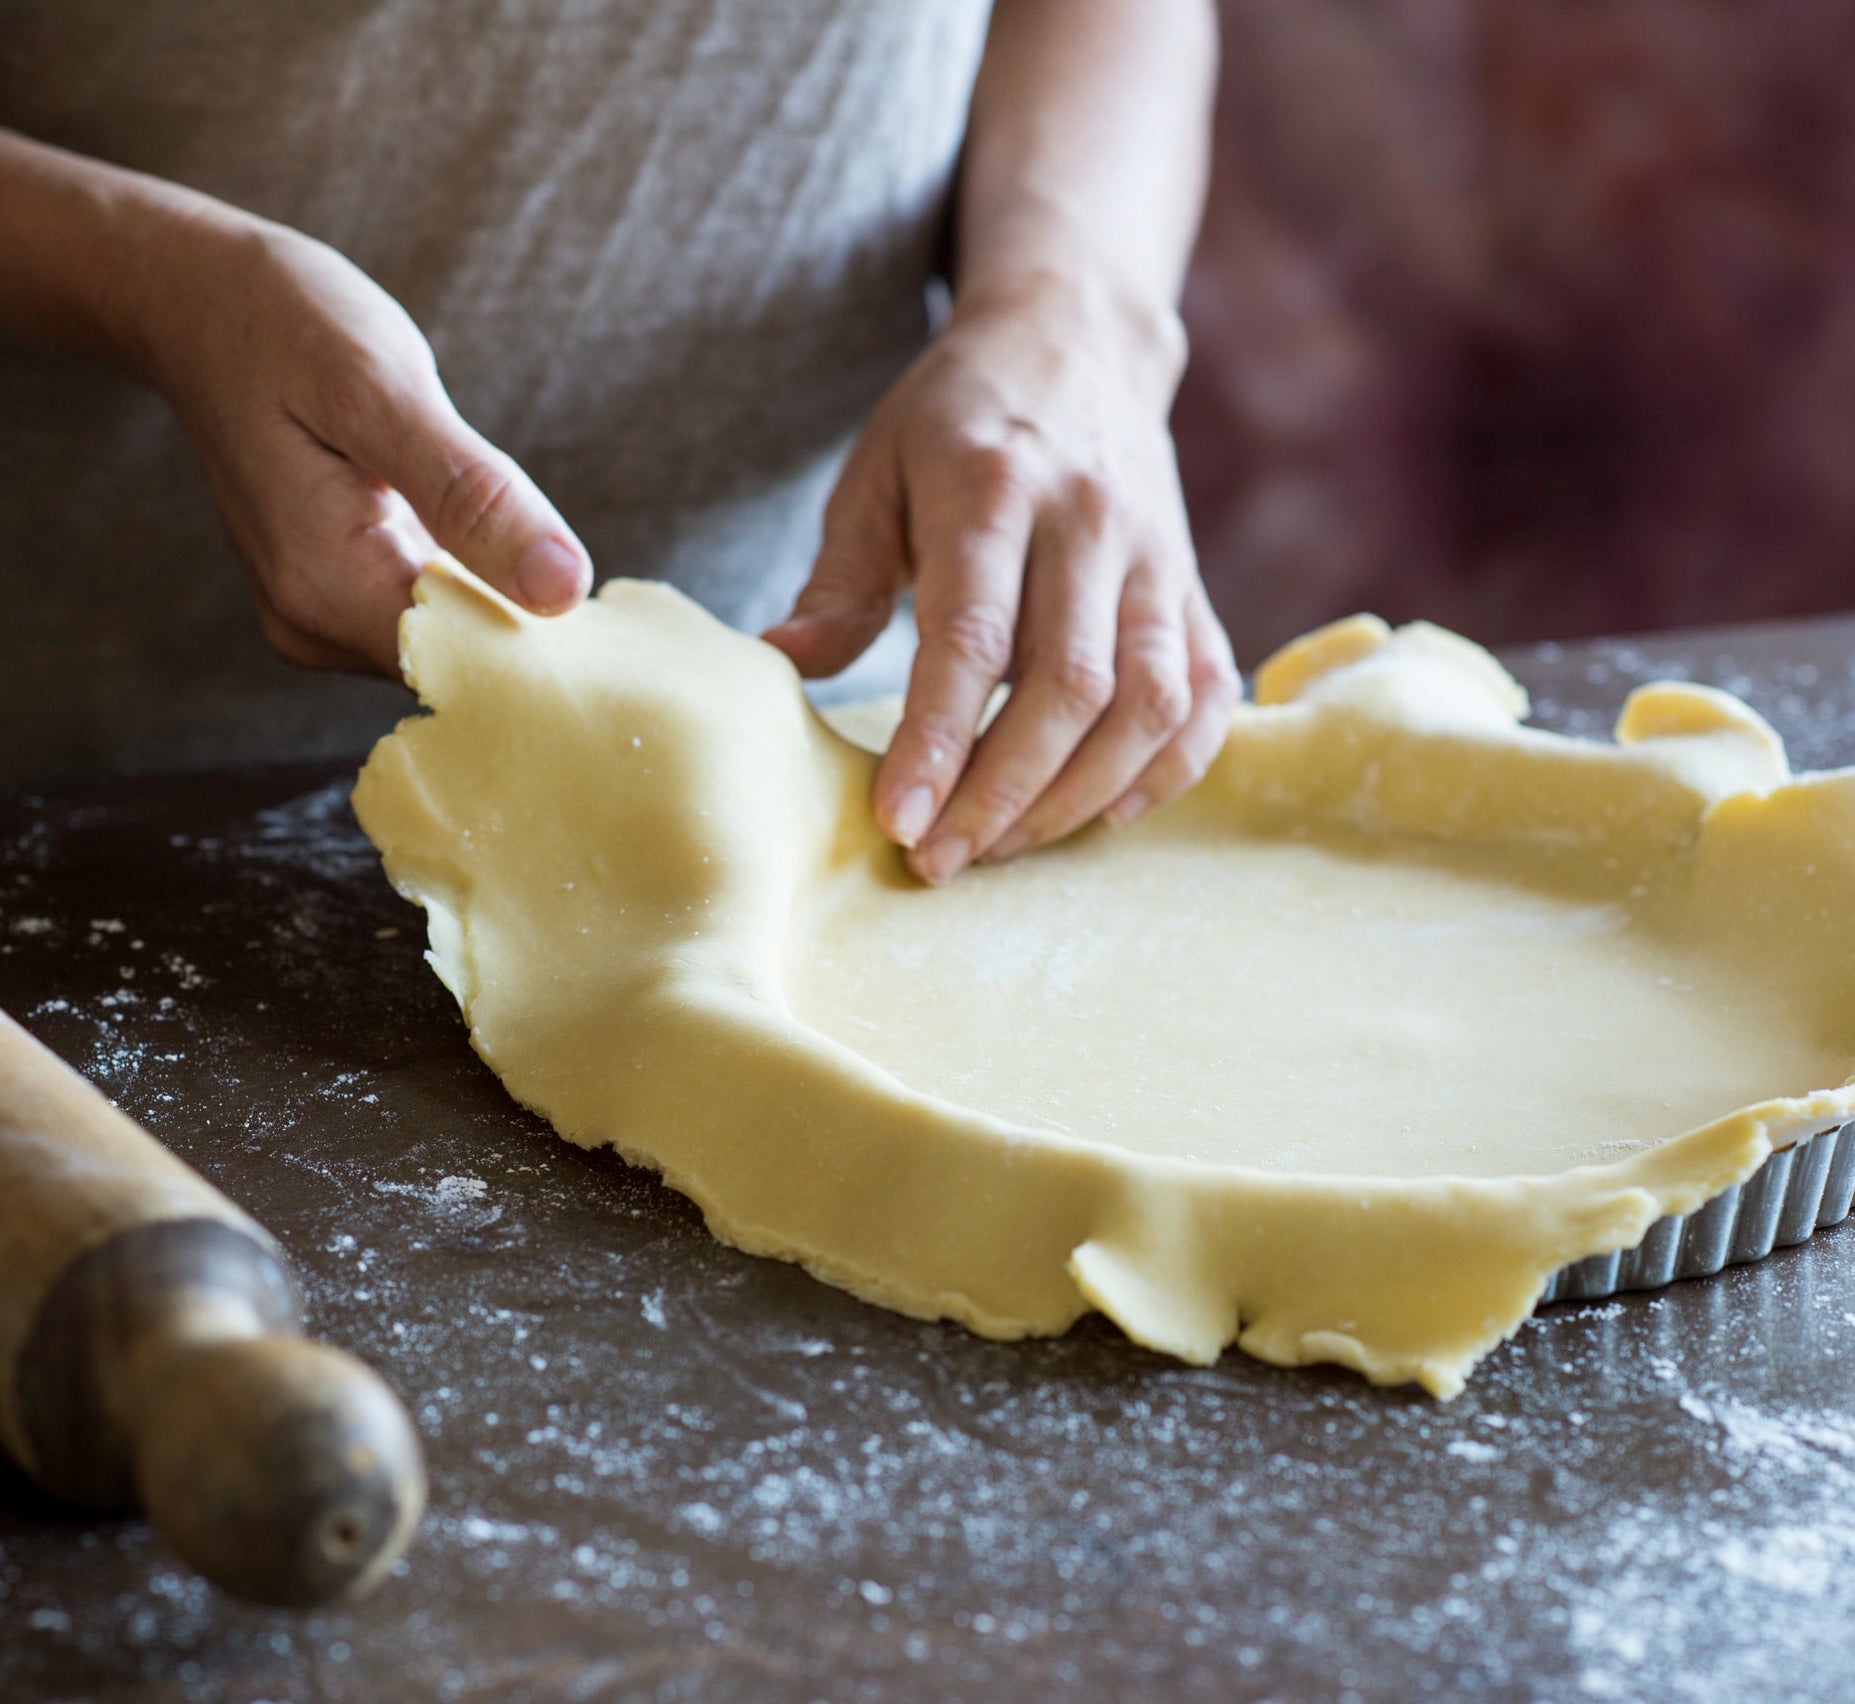
Prep 15min (+20-30min chilling time)Makes: Enough for a 23cm/9in round tart case
A really good, well-made, homemade pastry is always the secret to a fabulous pie or tart and shortcrust pastry, when you have a good recipe, is one of the simplest and quickest pastries to make. Here I have given lots of making ahead and freezing tips as well as some great variations to use in a selection of both sweet and savoury tarts and pies.
Ingredients
225g (1½ cups/8oz) plain flourGood pinch salt
150g (5¼oz) chilled unsalted butter, diced
3-3½ tablespoons (60-70ml/2½fl oz) iced water
Method
- Combine the flour and salt in a large, wide mixing bowl. Add the chilled butter. With your palms facing upwards, use your fingertips to rub in the butter until the mixture resembles breadcrumbs with some larger pieces of butter still visible.
- Sprinkle 3 tablespoons (60ml/2fl oz) of the iced water over the flour and butter mixture. Use a butter or round-ended knife in a cutting motion to mix, turning the bowl frequently, until evenly combined and the mixture starts holding together. Press a little of the mixture between your fingers – if it holds together easily, there is no need to add more water; if it doesn’t add the remaining 1⁄2 tablespoon (10ml/⅓fl oz), a teaspoon at a time, combining with the knife until it reaches the right consistency. The pastry should be soft but not sticky.
- Bring the pastry together with your hands in the bowl or turn out onto a cool bench top and then bring together. Lightly knead the pastry with your fingertips for about 5-10 seconds or until it comes together but isn’t completely smooth. Shape the pastry into a disc about 2cm/¾in thick, wrap well in plastic wrap, baking paper or beeswax wrap and place in the fridge for 20-30 minutes to rest. Use as directed.
Baker's Tips
This pastry is also enough for a 24cm/9½in square tart case; ten 6cm/2¼in or eight 8cm/3¼in) individual round tart cases; a 12cmx34.5cm/4¾inx13½in) rectangular tart case; or 24 tartlet cases (1 Tbsp/20ml/¾fl oz capacity)
Making Ahead
Keeping in the fridgeShape uncooked pastry into a disc. Wrap well in plastic wrap and keep in the fridge for up to 3 days. Stand at room temperature for about 1 hour (depending on the temperature in your kitchen) until softened slightly and pliable enough to roll easily.
Freezing uncooked pastry
Shape uncooked pastry into a disc. Wrap well in plastic wrap, then seal in a freezer bag or airtight container and freeze for up to 6 months. Transfer to the fridge to thaw completely (this will take about 1 day). Stand at room temperature for about 1 hour (depending on the weather) until softened slightly and pliable enough to roll easily.
Freezing uncooked pastry case/s
Place the pastry case, still in the tin or dish, in the freezer until frozen. Once frozen, leave the pastry in the tin or dish or remove and seal in freezer bag or an airtight container. Freeze for up to 6 months. Bake in the tin or dish directly from the freezer or transfer to the fridge to thaw completely in the tin or dish (this will take about 1 day) and then bake as directed.
Variations
- Rich Shortcrust Pastry: Increase the butter to 170g (6oz). Replace the water with 1 lightly whisked egg yolk.
- Parmesan Shortcrust Pastry: Combine 40g (½ cup/1½oz) finely grated parmesan to the flour and butter mixture just before adding the water.
- Mustard Shortcrust Pastry: Add 1½ teaspoons dry mustard powder to the flour and salt before rubbing in the butter.
- Sweet Shortcrust Pastry: Stir 2 tablespoons sifted icing sugar or caster sugar to the flour and butter mixture just before adding the water.
- Chocolate Shortcrust Pastry: Reduce the flour to 200g (1⅓cups/7oz). Sift the flour with 2 tablespoons cocoa powder and 2 tablespoons icing sugar and the salt before rubbing in the butter.
- Sweet Orange & Vanilla Shortcrust Pastry: Reduce the flour to 200g (1⅓cups/7oz). Add 2 tablespoons almond meal, 2 tablespoons caster or icing sugar and 1 teaspoon finely grated orange zest to the flour and salt before rubbing in the butter. Add 1 teaspoon natural vanilla essence or extract with the water.
This recipe is from Anneka's SBS Food online column, Bakeproof: Never-fail Shortcrust Pastry. CLICK HERE for more Bakeproof recipes.
Photography by Alan Benson.


