- home
- BAKERECIPES
BakeRecipes
Bringing real baking into your home with deliciously simple recipes.

Prep 40min (+1.5hr chilling and 20min standing time)Bake 18-22min (per batch)Makes about 40
These delicious biscuits get their name from the pepper that, along with the ginger, gives them their "warming" flavour. I’ve made these as reindeer, but you can make them any shape you wish. Also, have fun experimenting with the icing decoration, giving them your own creative touch.
Ingredients
150g (5¼oz) unsalted butter, softened
150g (5¼oz/¾ cup, lightly packed) brown sugar
2 tablespoons golden syrup
2 tablespoons treacle
1 egg yolk, chilled
450g (3 cups/15¾oz) plain flour
2 teaspoons ground ginger
1 teaspoon ground cinnamon
½ teaspoon ground cardamom
½ teaspoon ground cloves
¼ teaspoon finely ground black pepper
½ teaspoon baking powder
½ teaspoon bicarbonate of soda
60ml (¼ cup/2fl oz) milk
Icing
375g (3 cups/13¼oz) pure icing sugar
2-3 tablespoons (40-60ml/1⅓fl oz-2fl oz) water
Method
- Use an electric mixer to beat the butter and sugar until just pale and creamy. Add the golden syrup, treacle and egg yolk and beat to combine.
- Sift together the flour, ginger, cinnamon, cardamom, cloves, pepper, baking powder and bicarbonate of soda. Add half the flour to the butter mixture and beat on lowest possible speed until just combined. Mix in the milk and then the remaining flour until just combined and a soft dough forms.
- Divide the dough into 4 portions. Shape each into a disc, wrap in plastic wrap and place in the fridge for 1 hour or until firm enough to roll.
- Preheat the oven to 170°C/340°F (150°C/300°F fan-forced). Line 3 large oven trays with non-stick baking paper.
- Use a lightly floured rolling pin to roll out one portion of dough on a lightly floured surface until 3mm/⅛in thick.
- Use a cutter/s of your choice to cut out shapes from the rolled dough and use a palette knife to carefully transfer to a lined tray, leaving a little room between each. Repeat with the remaining dough portions, rerolling any leftover dough. Place the trays of biscuits in the fridge for 30 minutes to chill.
- Bake two trays of biscuits in preheated oven for 18-22 minutes, swapping the trays halfway through baking, or until they start to colour around the edges and are cooked through. Cool on the trays. Bake the remaining tray of biscuits as before.
- To make the icing, sift the icing sugar into a medium bowl. Gradually add 2 tablespoons (40ml/1⅓fl oz) of the water and mix until smooth. The icing should be a piping consistency (see Baker’s Tips). If it's too thick, stir in the remaining water ½ tsp at a time until the icing reaches the correct consistency. Divide the icing between two resealable plastic bags, seal and then cut a small hole in one of the corners of each to pipe through.
- Use the icing to decorate the cooled biscuits as desired. Set aside for about 20 minutes or until the icing sets before serving or storing.
Baker's Tips
- To test if the icing is the correct consistency for piping, drizzle a little on a plate and set aside for a few minutes. If it keeps its shape, it's ready.
- These biscuits are lovely iced with a lemon icing. Replace the water in the icing with strained fresh lemon juice.
- These biscuits will keep in an airtight container or jar at room temperature for up to 1 week.
Prep 30min (+2hr chilling and decorating time)Bake 20-25minMakes about 25 cookies
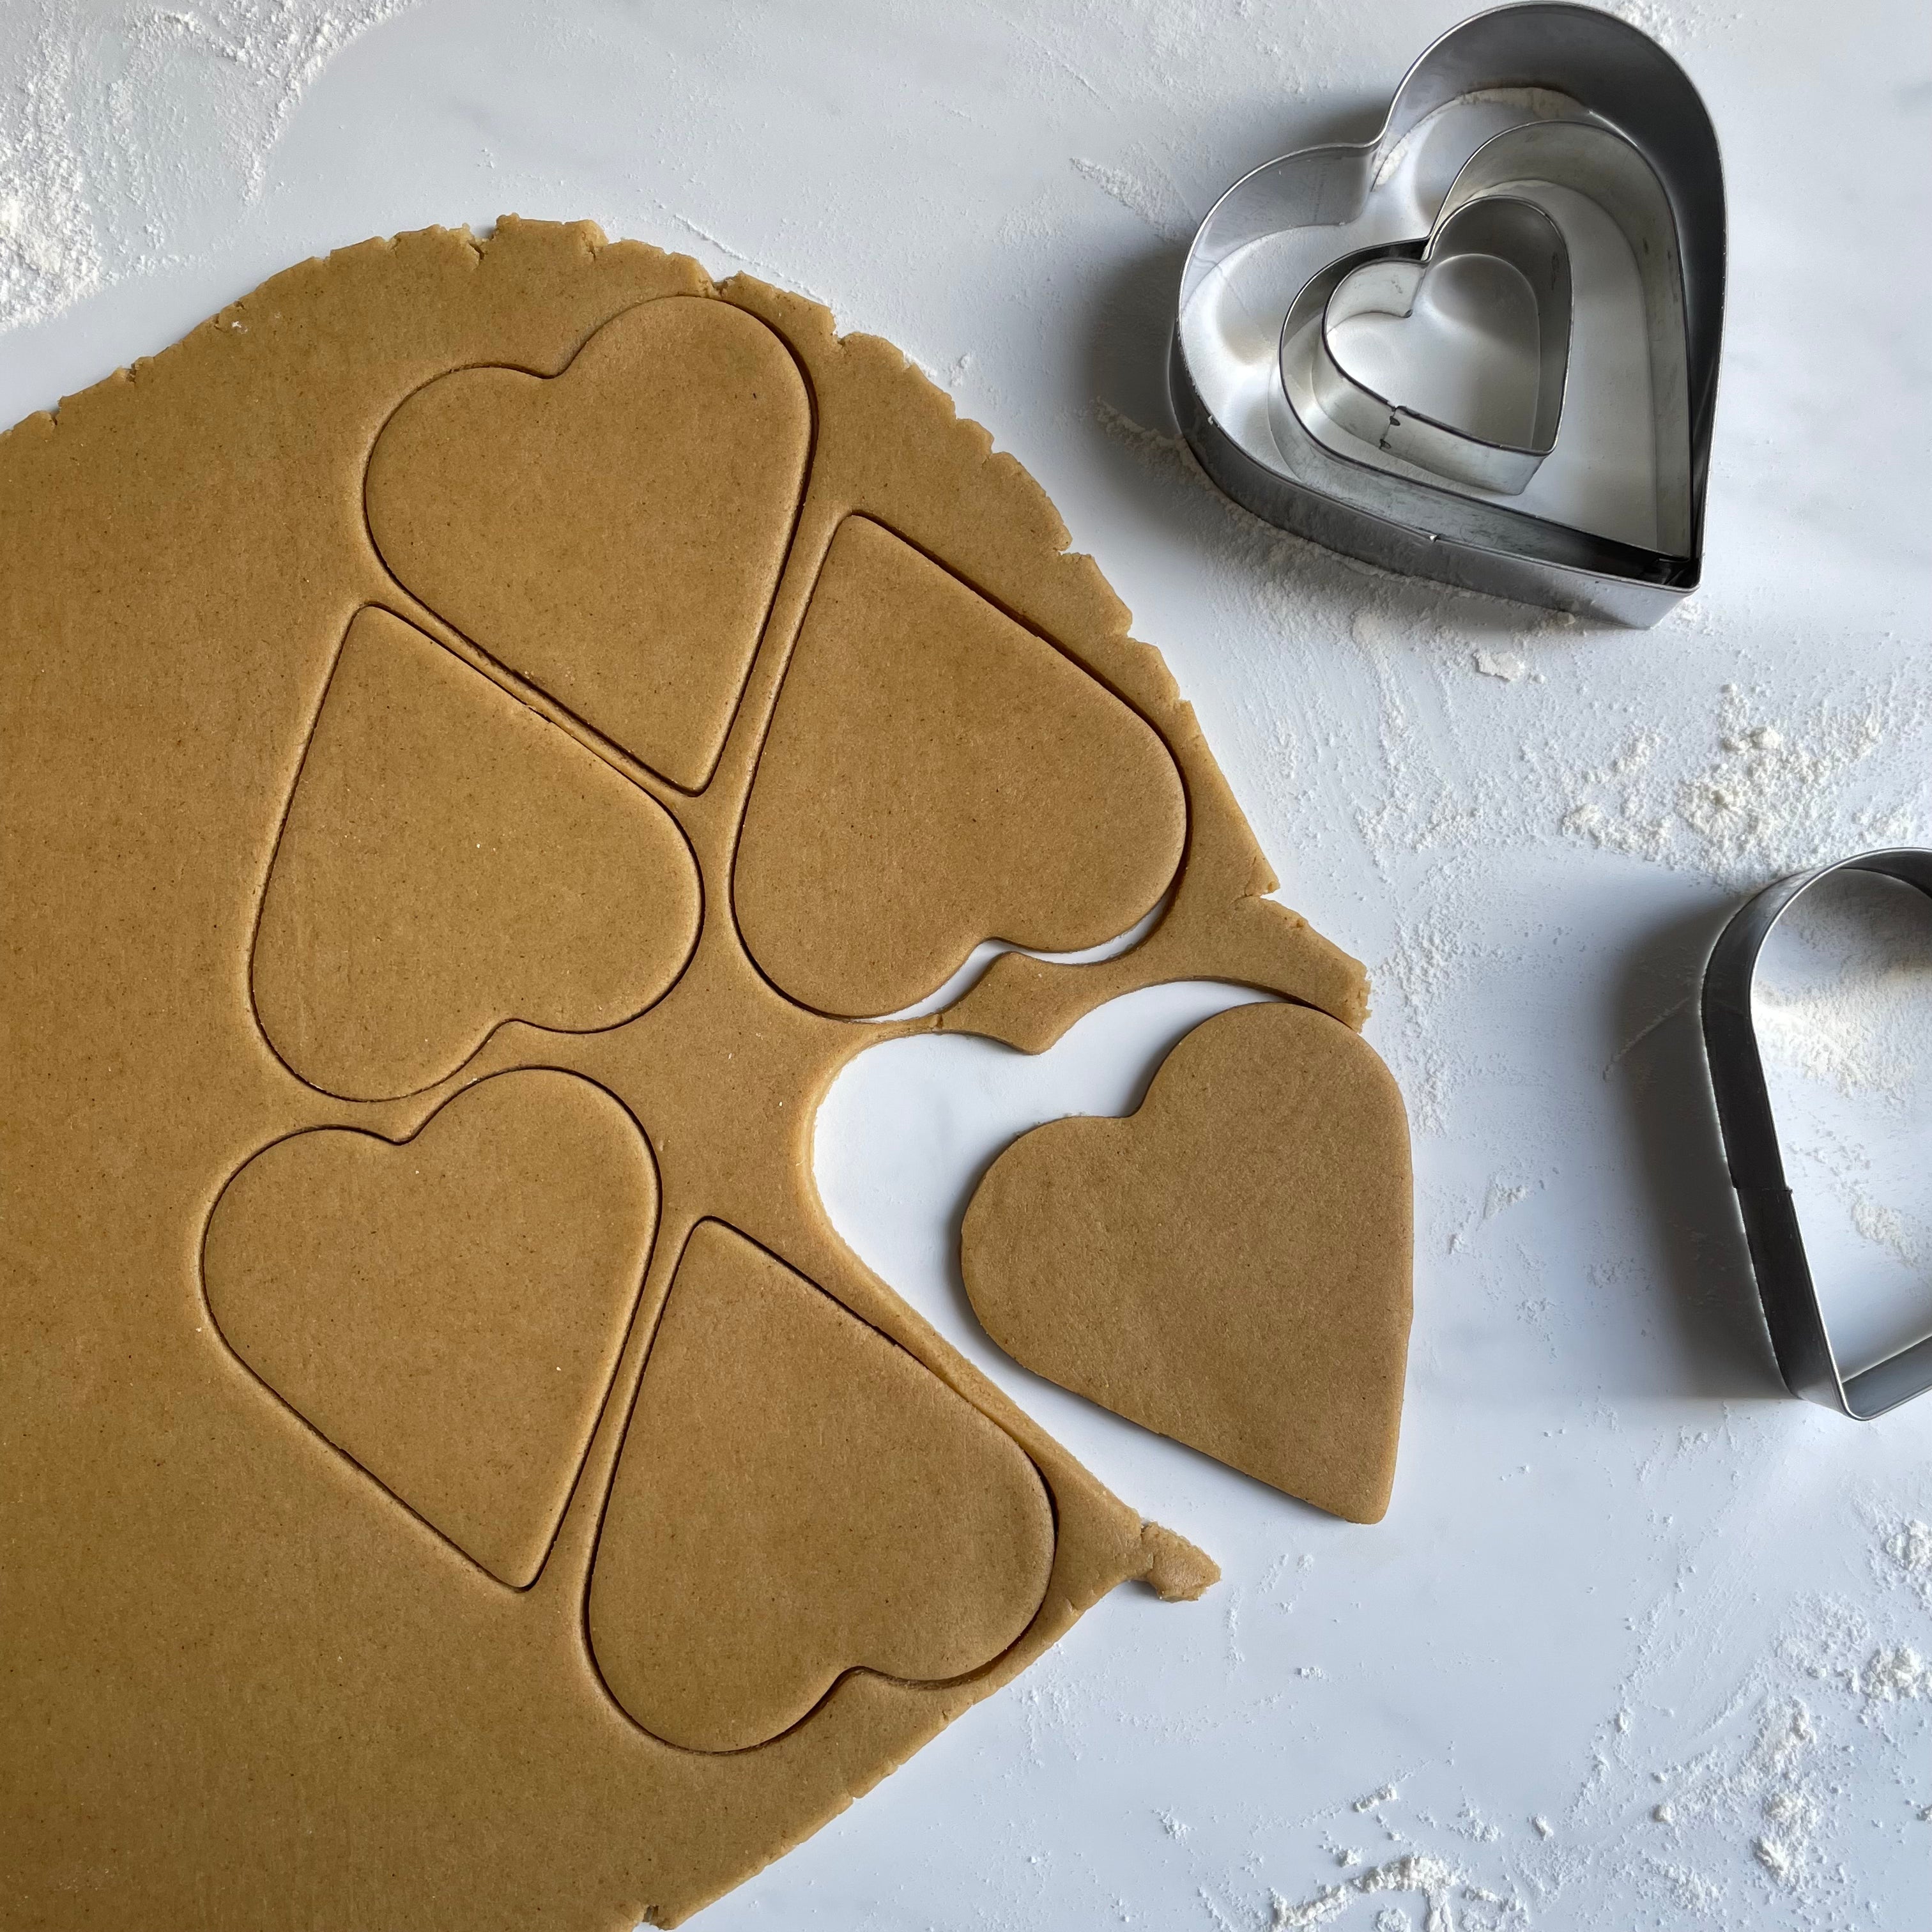
Use this recipe as the base for cookies decorated with either royal icing (like these gorgeous Iced Heart Cookies) or fondant. The sweetness of the icing complements the spicy gingerbread base perfectly and lays down a canvas for you to create something extra special for customers, friends and family.
Ingredients
125g salted butter, softened
90g (½ cup, lightly packed) brown sugar
235g (160ml/⅔ cup) golden syrup
1 teaspoon natural vanilla extract or essence
375g (2½ cups) plain flour
2 teaspoons ground ginger
1 teaspoon ground cinnamon
1 teaspoon bicarbonate of soda
Method
- Use an electric mixer with a paddle beater attachment to beat the butter and sugar on medium speed for 2-3 minutes, or until pale and creamy. Add the golden syrup and vanilla and beat to combine evenly. Sift together the flour, ginger, cinnamon and bicarbonate of soda. Add to the butter mixture and beat on low speed until just combined evenly and a soft dough forms. Turn the dough onto a lightly floured surface and divide into 2 equal portions. Shape each portion into a disc about 2cm thick, wrap in plastic wrap and place in the fridge for 2 hours or until firm enough to roll easily.
- Preheat the oven to 160°C (140°C fan-forced). Line two large oven trays with baking paper.
- Use a lightly floured rolling pin to roll out one portion of the dough (leave the remaining portion in the fridge) on a lightly floured benchtop to 6mm thick. Use cutter/s of your choice, approximately 7.5cm across at the widest part, to cut out shapes and then use a palette knife to carefully transfer the shapes to the prepared oven trays, leaving a little room between each for
spreading. Reroll any dough scraps to make more shapes. Discard any offcuts from the second rolling. Repeat with the remaining gingerbread dough portion. - Bake in preheated oven for 20-25 minutes, swapping the trays halfway through baking, or until the cookies are just starting to colour and are cooked through. Stand the cookies on the trays for a few minutes before transferring to a wire rack to cool completely. Decorate as desired.
Baker's Tips
- Undecorated biscuits will keep in an airtight container at room temperature for up to 5 days.

Prep 1-2hr (+drying time)Makes about 25 biscuits
If you're keen to show your loved one/s just how much they mean to you by baking them something irresistibly sweet, then you really can't go past a batch of these gorgeous cookies! The style of decorating used to create them is called 'flood on flood' icing and is a really effective way to decorate gingerbread or sugar biscuits. The key is to be patient, try not to rush and remember your designs will improve with practice. You will need at least three small piping bags and three Wilton or Loyal #4 round piping nozzles for this style. This Royal Icing recipe makes about 3 cups of icing and is enough to decorate about 25 average-sized cookies.
Ingredients
Gel food colours of your choice (we have used shades of 'rose pink' and 'raspberry'), to tint
About 25 gingerbread cookies
Edible sprinkles, to decorate
Royal Icing
3 egg whites (from 59g eggs) or 90g pasteurized egg whites (see Baker’s Tips)
675g (1½ cups) pure icing sugar, sifted through a fine sifter
½-3 teaspoons strained fresh lemon juice
Room temperature water, to thin icing
Method
- To make the Royal Icing, place the egg whites then the icing sugar in the bowl of an electric mixer. Use the paddle beater to beat on low speed until combined. Increase speed to medium and beat for 5 minutes. The icing will be smooth and thick at this stage. Add the lemon juice, ¼ teaspoon at a time, beating well between each addition, until the icing reaches a good piping consistency. The icing should be the consistency of toothpaste - soft but will hold its shape and form a soft peak when the beater is lifted.
- Immediately cover the bowl with plastic wrap and then a damp tea towel or cloth to prevent it from drying out (see Baker’s Tips).
- Divide the icing evenly between 3-5 small bowls (depending on how many different coloured icings you would like to use - we used 4 for these cookies including the white) and cover each bowl well. Transfer one white icing portion to a small piping bag fitted with a Wilton or Loyal #4 round piping tip (this will be used to pipe the outlines). Working with one portion of the remaining icing at a time, tint to desired colours, then add a little water, a drop at a time, and use a small palette knife or metal spoon to stir until it reaches the right consistency for ‘flooding’ (see Baker’s Tips). As soon as each portion reaches the right consistency, spoon into a small piping bag fitted with a Wilton or Loyal #4 round piping tip. Twist the end of the piping bag and seal with a clip or elastic band (this will help prevent it from drying out). Cover the tip with plastic wrap and then a damp cloth or tea towel and set aside while tinting and thinning the remaining icing portions.
- Use the white icing to pipe an outline around the inside edge of a cookie to create a border so that the icing in the centre won’t flow over the edge. Set aside for 3-5 minutes or until firm but not set.
- Pipe a tinted icing into the centre of a cookie to 'flood' it (making sure there will be enough to cover it comfortably but not too much so that the icing flows over the piped border). Use a toothpick to carefully spread the icing to cover fully, if needed, and then let the icing settle and become smooth. To achieve a ‘flood on flood’ effect (so that the pattern sinks into the base icing), while the icing is still wet, use contrasting tinted icing/s to pipe the stripes, dots or patterns onto the flooded icing (see Baker’s Tips). We created the heart pattern by piping dots and then dragging a toothpick through the dot from top to bottom and a little beyond. Sprinkle with edible sprinkles to decorate, if desired.
- Set iced cookies aside to dry completely overnight before storing (see Baker’s Tips).
Baker's Tips
- If you are concerned that these cookies will be served to pregnant women or people with compromised immune systems, use pasteurised egg whites. They are available in a carton from the refrigerated section of the supermarket.
- Royal Icing will dry out and start to set very quickly if not covered well. Cover bowls and the tips of filled icing bags with plastic wrap and then a damp tea towel while you are not using them to prevent the icing from drying out.
- To test if the icing is at the right consistency for ‘flooding’, drop a teaspoonful of the icing back into the bowl. If it melts back into the icing and the surface becomes flat in 5-6 seconds it is ready. If not, add a little more water to thin or a little more icing sugar to thicken it.
- If using the ‘flood on flood’ technique, to prevent the icing from spilling over the piped border, it is important not to over-flood the centre of the cookie with icing.
- It is best to have all the tinted icing consistencies the same for the best results for the 'flood on flood' technique. However, if two icing portions are slightly different consistencies, use the thinner one first to cover the cookie first and then use the slightly thicker one on top to create the decoration.
- If your royal icing becomes too thick during decorating, remove it from the piping bag and stir in a drop or two of water or enough to reach the desired consistency. A dropper is ideal for adding this small amount of water.
- The time it will take for the icing to dry/set will depend greatly on the weather (temperature and humidity). If humid, to assist in the drying, place the cookies on a lined tray in an oven preheated to 50°C for 30-60 minutes. Also if it is really humid, it is best to put the cookies straight into an airtight container lined with absorbent paper as soon as they cool from drying in the oven.
- These decorated cookies will keep in a single layer in a sealed airtight container lined with paper towel for up to 5 days.
- The Royal Icing will keep in a well-sealed container in the fridge for up to 3 days. Bring to room temperature to use. You may need to add a little more water to bring it to the correct consistency.
Prep 11/2hr (+ standing time) Bake 15min (per batch) Makes about 28
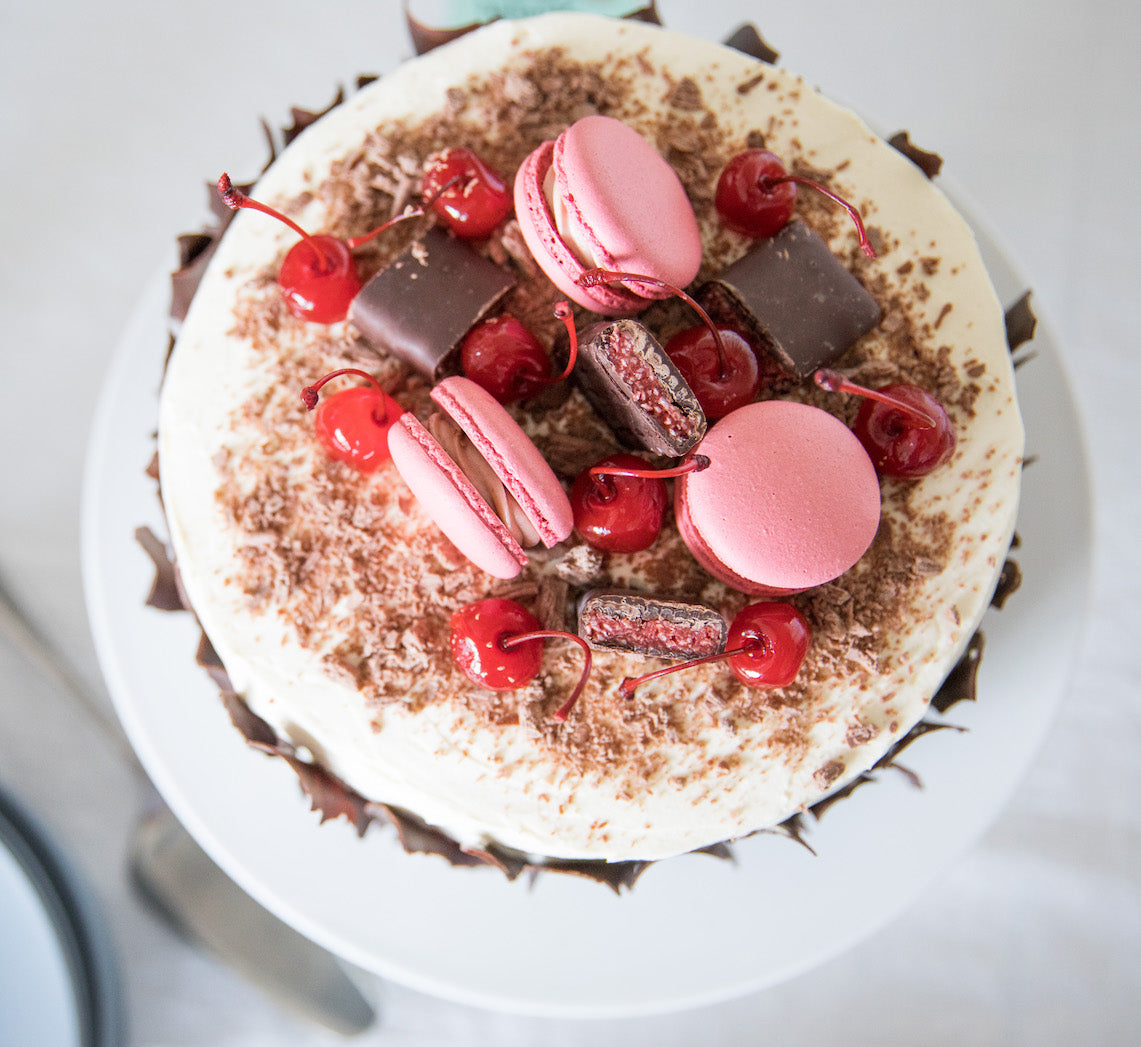
Pretty to look at, divine to eat, these macarons were created by Allen Au, one of our Make Me a Baker graduates, to use as part of his Graduation cake recipe.
Ingredients
125g almond meal
125g pure icing sugar
96g egg whites
125g caster sugar
30ml water
Gel colouring (see Baker's tip)
Filling
125g unsalted butter
125g pure icing sugar, sifted
1 tablespoon sieved cherry jam
Method
- Preheat oven to 165°C (145°C fan-forced). Line two large oven trays with non-stick baking paper or silicone baking mats.
- Sift together the almond meal and icing sugar into a large bowl. Add half the egg white and mix until a thick paste forms.
- Combine the caster sugar and water in a small saucepan and stir over medium heat until the sugar dissolves. Bring to a boil and simmer over medium heat, brushing down the sides of the saucepan with a wet pastry brush occasionally to prevent any sugar crystals forming. Do not stir. Once the sugar mixture has reached 115°C on a sugar thermometer, use an electric mixer with a whisk attachment to whisk the remaining egg white on medium-high speed until soft peaks form. Once the sugar mixture has reached 118°C, remove the saucepan from the heat and slowly whisk the hot sugar mixture into the egg whites. Continue to whisk on medium-high speed until the temperature cools to 30°C. The meringue should be thick and glossy. Add enough gel colour to the meringue to tint to the desired colour, whisking until evenly combined.
- Fold 2 large tablespoons of the meringue into the almond paste mixture until well incorporated. Fold in the remaining meringue until evenly combined. The consistency of the batter should look like molten lava. If you can draw a figure eight and the trail stays on the surface, then the mixture is ready to be piped.
- Spoon the mixture into a piping bag fitted with a 10mm round nozzle. Pipe the macarons onto the lined trays into 3.5cm rounds. Tap the tray to remove any air bubbles from the macarons. Leave the macarons out in the open until a skin forms on the surface of the macaron. (This can take from 20 minutes to an hour depending on the humidity). The skin should be dry enough that it does not stick to your finger when touched lightly.
- Bake one tray of macarons in the centre of the preheated oven for 15 minutes or until shells don't feel soft at the 'feet' when touched. Set aside to cool on the tray and repeat with the remaining tray of macarons.
- To make the Filling, use an electric mixer to beat the butter until it is pale and creamy. Beat in the icing sugar until well combined. Add the cherry jam and beat until well combined. Spoon the filling into a piping bag fitted with a 7mm star nozzle and pipe a small rosette onto the base of half the macarons. Sandwich with the remaining macarons.
- Store the macarons in the fridge overnight so the flavours from the filling are absorbed by the shells. Bring the macarons to room temperature before serving.
Baker's Tips
- Allen used Chefmaster Liqua-Gel colours to colour his macarons – he used 8 drops of Super Red with 0.5 drop of Black Diamond
- This recipe is based on a recipe from a course Allen did with Australian Patisserie Academy
Prep 30min (+ 15min cooling and 30min chilling time)Bake 25-30minMakes about 15
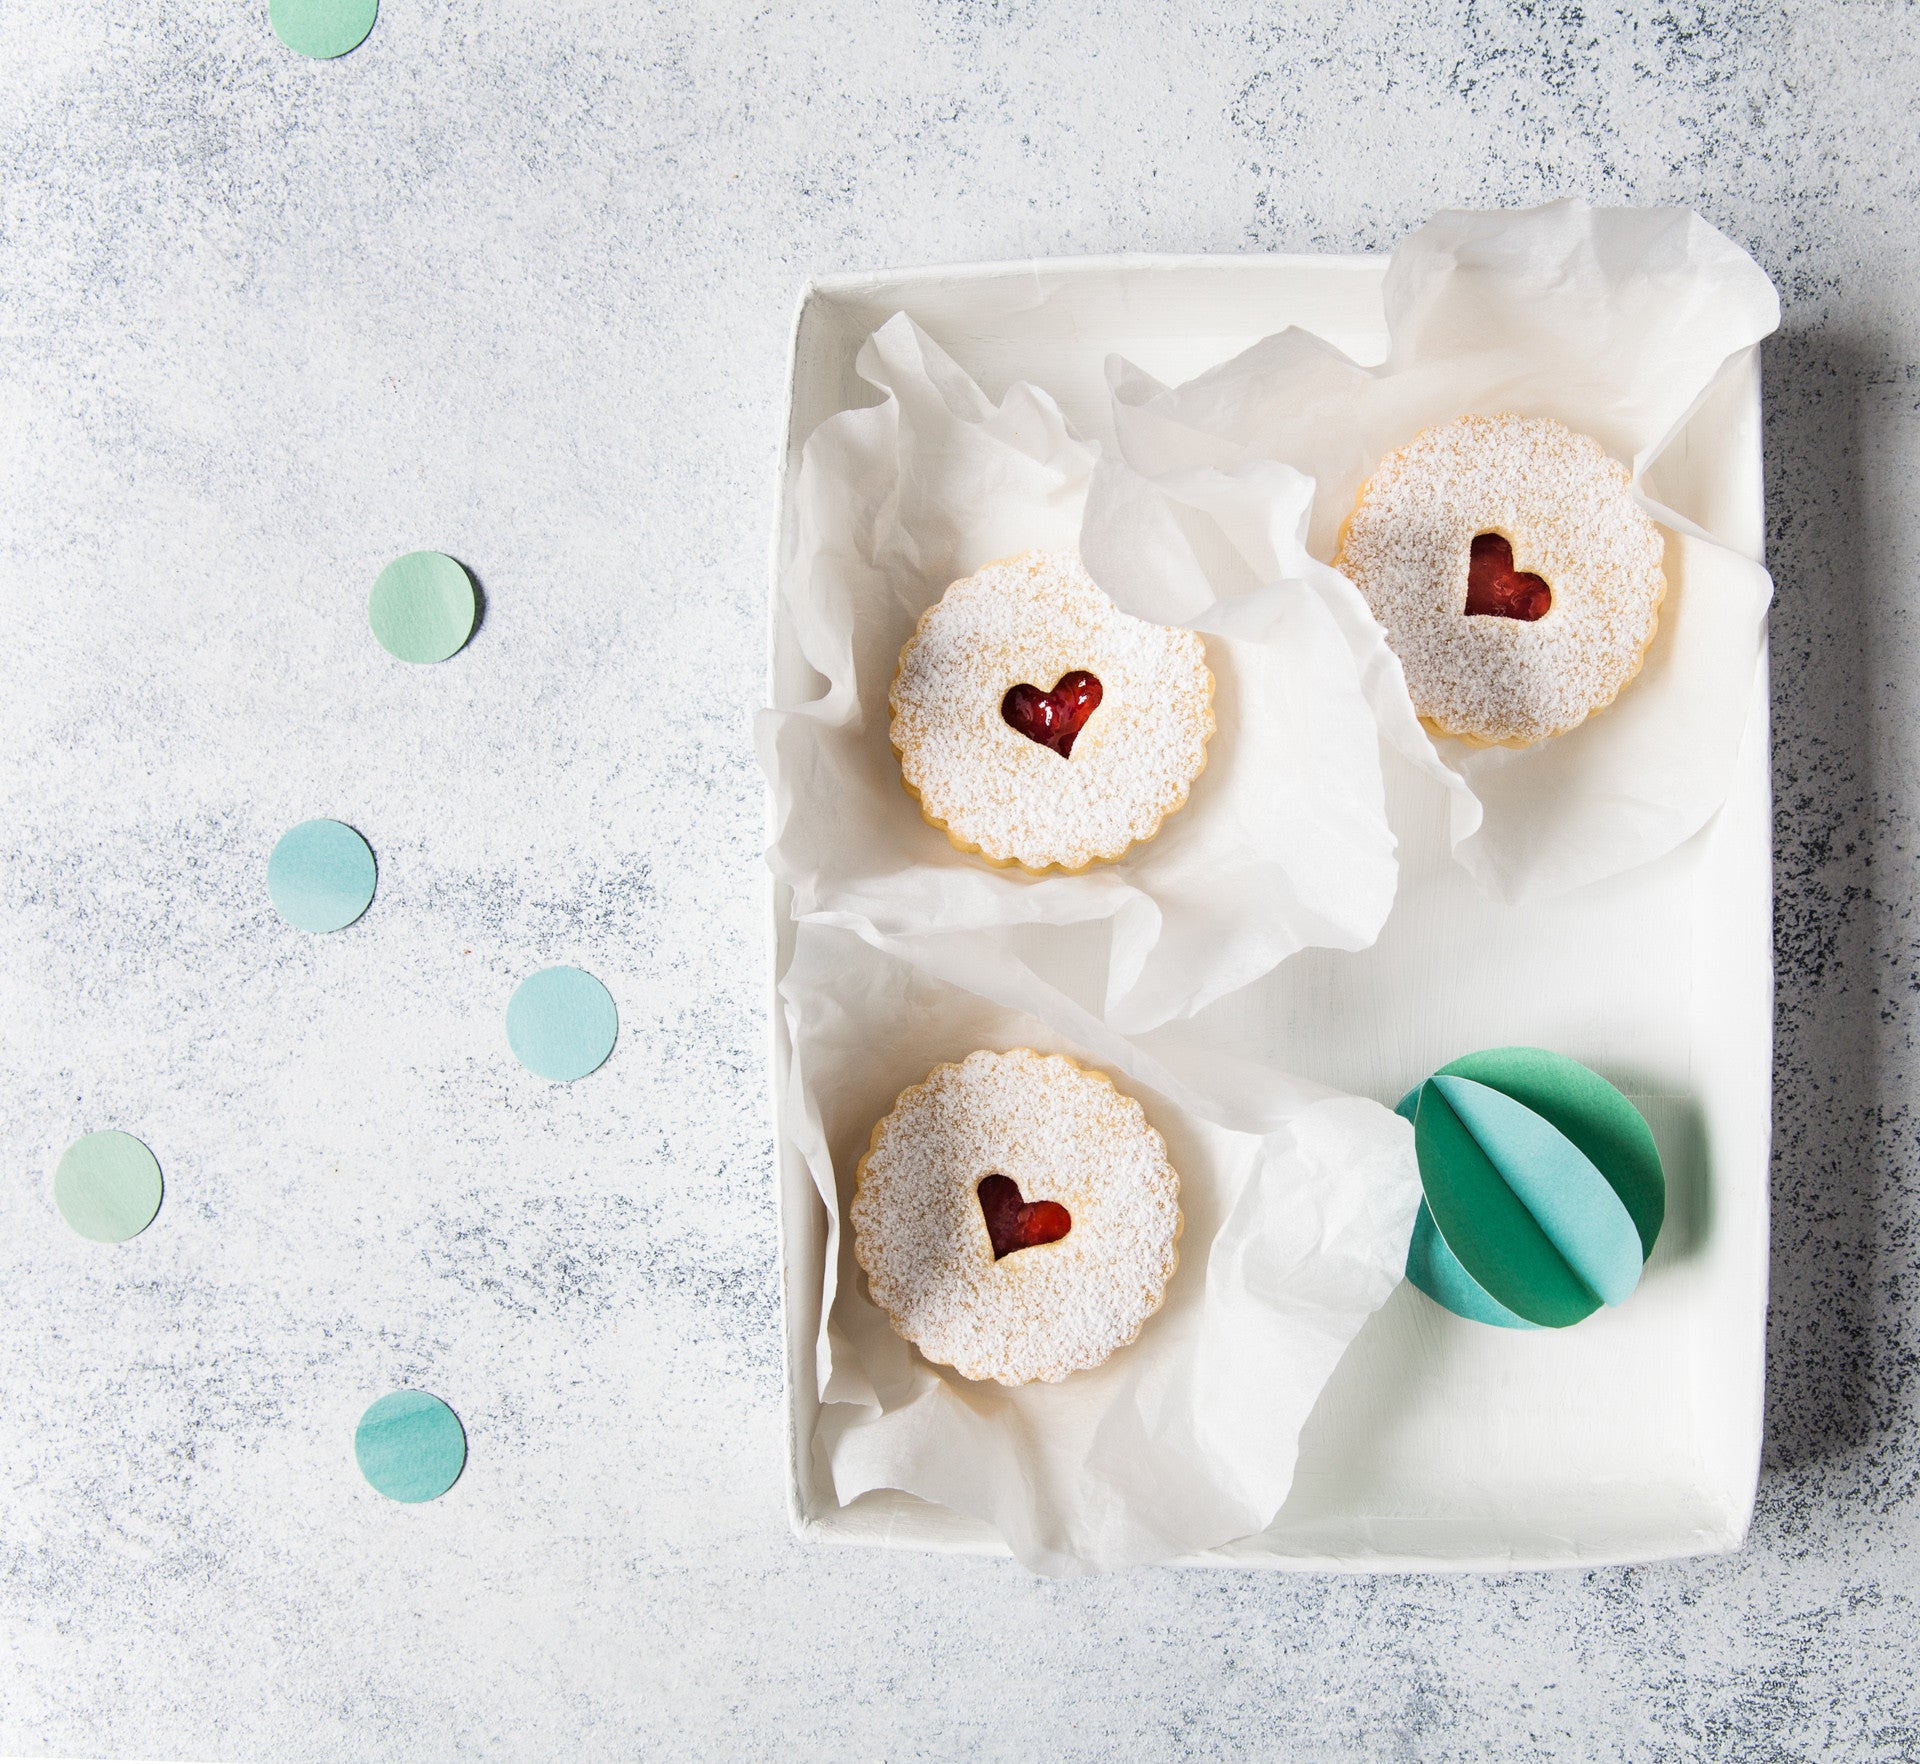
These jammy, Linzer-like, buttery mouthfuls are a popular inclusion in the German Weihnachtsplätzchen (collection of traditional festive cookies) but are often claimed by the Swiss. Feel free to switch up the type of jam you use – red currant is also very traditional.
Ingredients
185g (6½oz) salted butter, at room temperature
110g (½ cup/4oz) caster sugar
1 teaspoon natural vanilla essence or extract
1 egg yolk
300g (2 cups/11¾oz) plain flour
¼ teaspoon fine salt
110g (⅓ cup/4oz) raspberry jam, warmed slightly
Icing sugar, to dust
Method
- Preheat oven to 160°C/315°F (140°C/285°F fan-forced). Line two large oven trays with non-stick baking paper.
- Use an electric mixer with a paddle attachment to beat the butter, sugar and vanilla until pale and creamy. Add the egg yolk and beat well. Sift together the flour and salt. Add to the butter mixture and beat on lowest possible speed until just combined and a soft dough forms.
- Divide the dough in half. Use a rolling pin to roll out one portion of dough between two sheets of non-stick baking paper to 5mm/¼in thick. Use a 6cm/2¼in fluted round cutter to cut out rounds of dough. Use a palette knife to transfer the rounds to the lined trays, leaving about 2cm/¾i between each to allow for spreading. Repeat with the remaining dough portion, re-rolling off-cuts, to make about 30 rounds in total. Place the trays in the fridge for 30 minutes to chill.
- Use a 2cm/¾in heart, fluted round or star-shaped cutter to cut the centre from half of the chilled cookie rounds.
- Bake for 25-30 minutes, swapping the trays halfway through baking, or until pale golden and cooked through. Cool on the trays.
- Spoon 1 teaspoon of the warm jam onto each of the cookie bases and spread to about 1cm/½in from the edge. Dust the cookie tops (with the cut-outs) generously with icing sugar. Carefully sandwich the cookies together, pressing gently to join.
Baker's Tip
- These cookies will keep in an airtight container, layered with baking paper, at room temperature for up to 1 week. Dust with icing sugar again if desired before serving.
This recipe is part of Anneka's SBS Food Bakeproof: Festive Cookies online column. For more Bakeproof columns and recipes, click here.
Photography by China Squirrel.
Prep 20minBake 35minMakes 8-10 serves
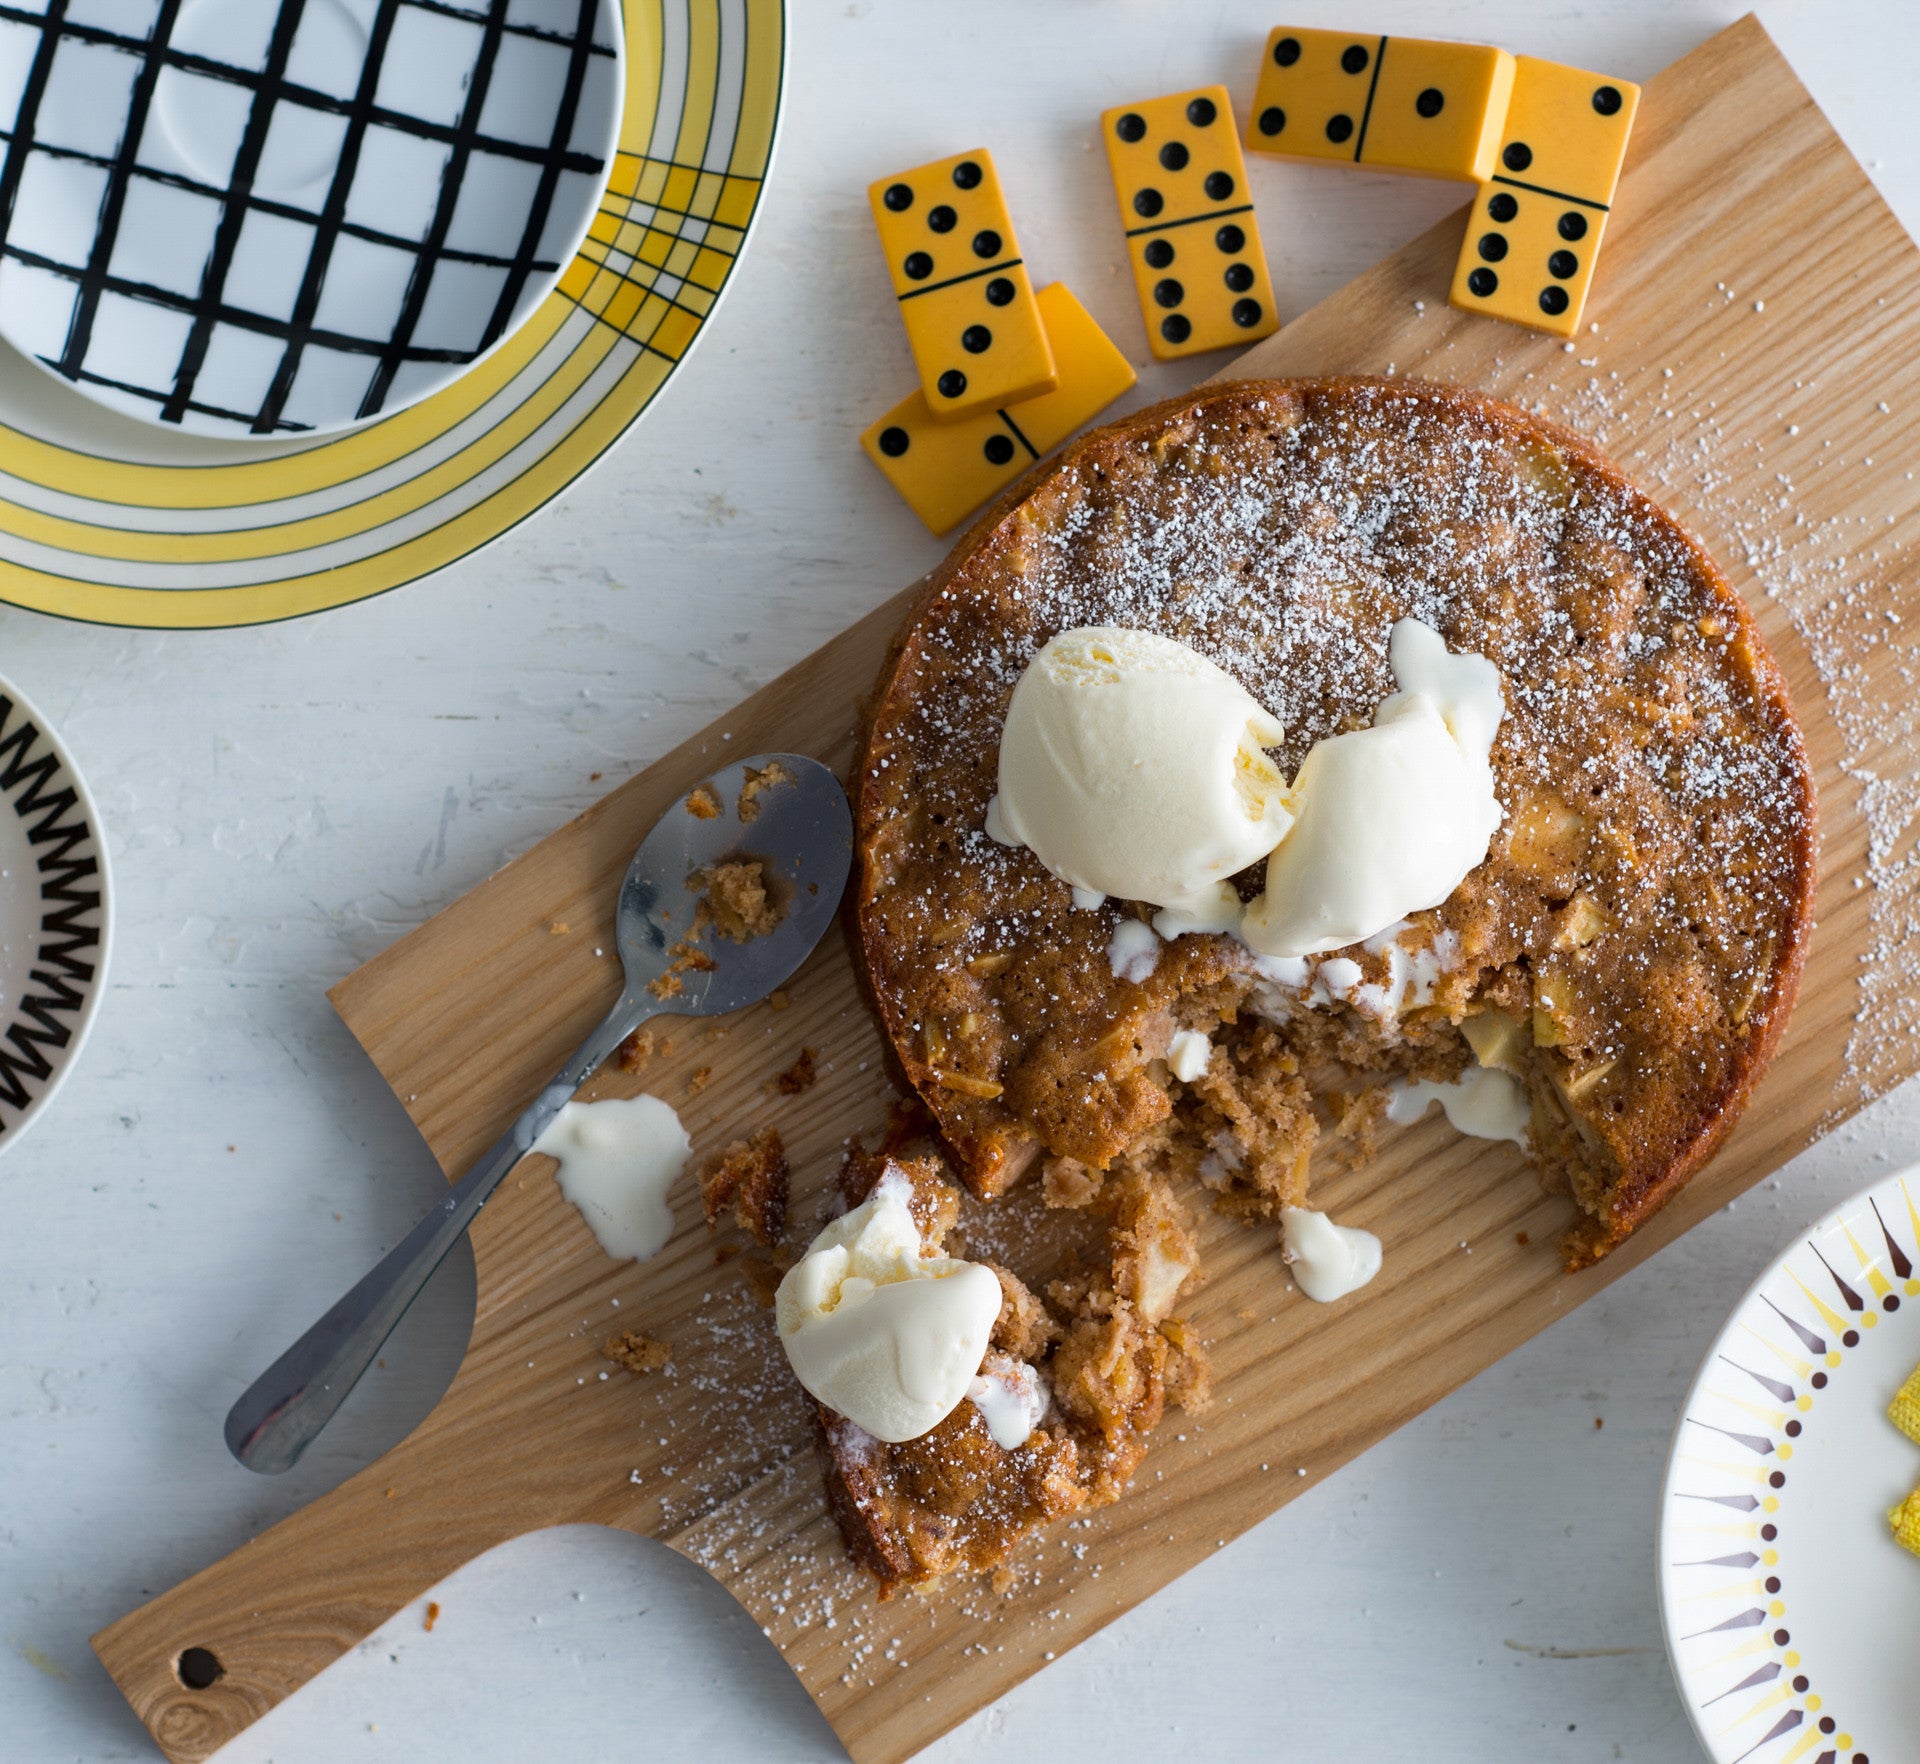
Much more like a cake than a pie, this apple-dense traditional Norwegian dessert is comforting, homely and can warm the soul with just one mouthful – especially when served straight from the oven in generous scoops and topped with ice-cream or a large dollop of thick cream. Don’t overlook the fact that it is also pretty good served like any other cake, cooled and in wedges. The trick to this recipe is not to over-mix – only mix until the wet and dry ingredients are evenly combined.
Ingredients
- Melted butter, to grease
- 110g (¾ cup) plain flour
- 1 teaspoon baking powder
- 1 teaspoon ground cinnamon
- ½ teaspoon ground cardamom
- 110g (½ cup) caster sugar
- 3 medium (about 150g each) apples (such as golden delicious, royal gala or pink lady), peeled, cored and cut into 2 cm pieces
- 80g slivered almonds, toasted
- 100g butter, melted and cooled
- 1 egg
- 2 tablespoons milk
- 1½ teaspoons natural vanilla essence or extract
- Vanilla ice-cream or thick cream, to serve
Method
- Preheat the oven to 180°C (160°C fan-forced). Grease a 20cm springform tin with melted butter and line the base with baking paper.
- Sift together the flour, baking powder, cinnamon and cardamom into a large bowl. Stir in the sugar, apple and almonds. Use a fork to whisk together the butter, egg, milk and vanilla. Add to the flour mixture and use a spatula to mix until just combined.
- Spoon the mixture into the prepared tin and spread evenly with the back of a spoon. Bake in the preheated oven for 35 minutes or until golden and a skewer inserted into the centre comes out clean.
- Stand the pie in the tin for 5–10 minutes before removing the sides of the tin. Serve warm in scoops or at room temperature in wedges with ice-cream or cream.
Baker's Tips
- This pudding/cake will keep in an airtight container at room temperaturein a cool spot for up to 3 days.
This recipe is from Anneka's SBS Food online column, Bakeproof: Scandi Baking. CLICK HERE for more Bakeproof recipes.
Photography by Alan Benson.
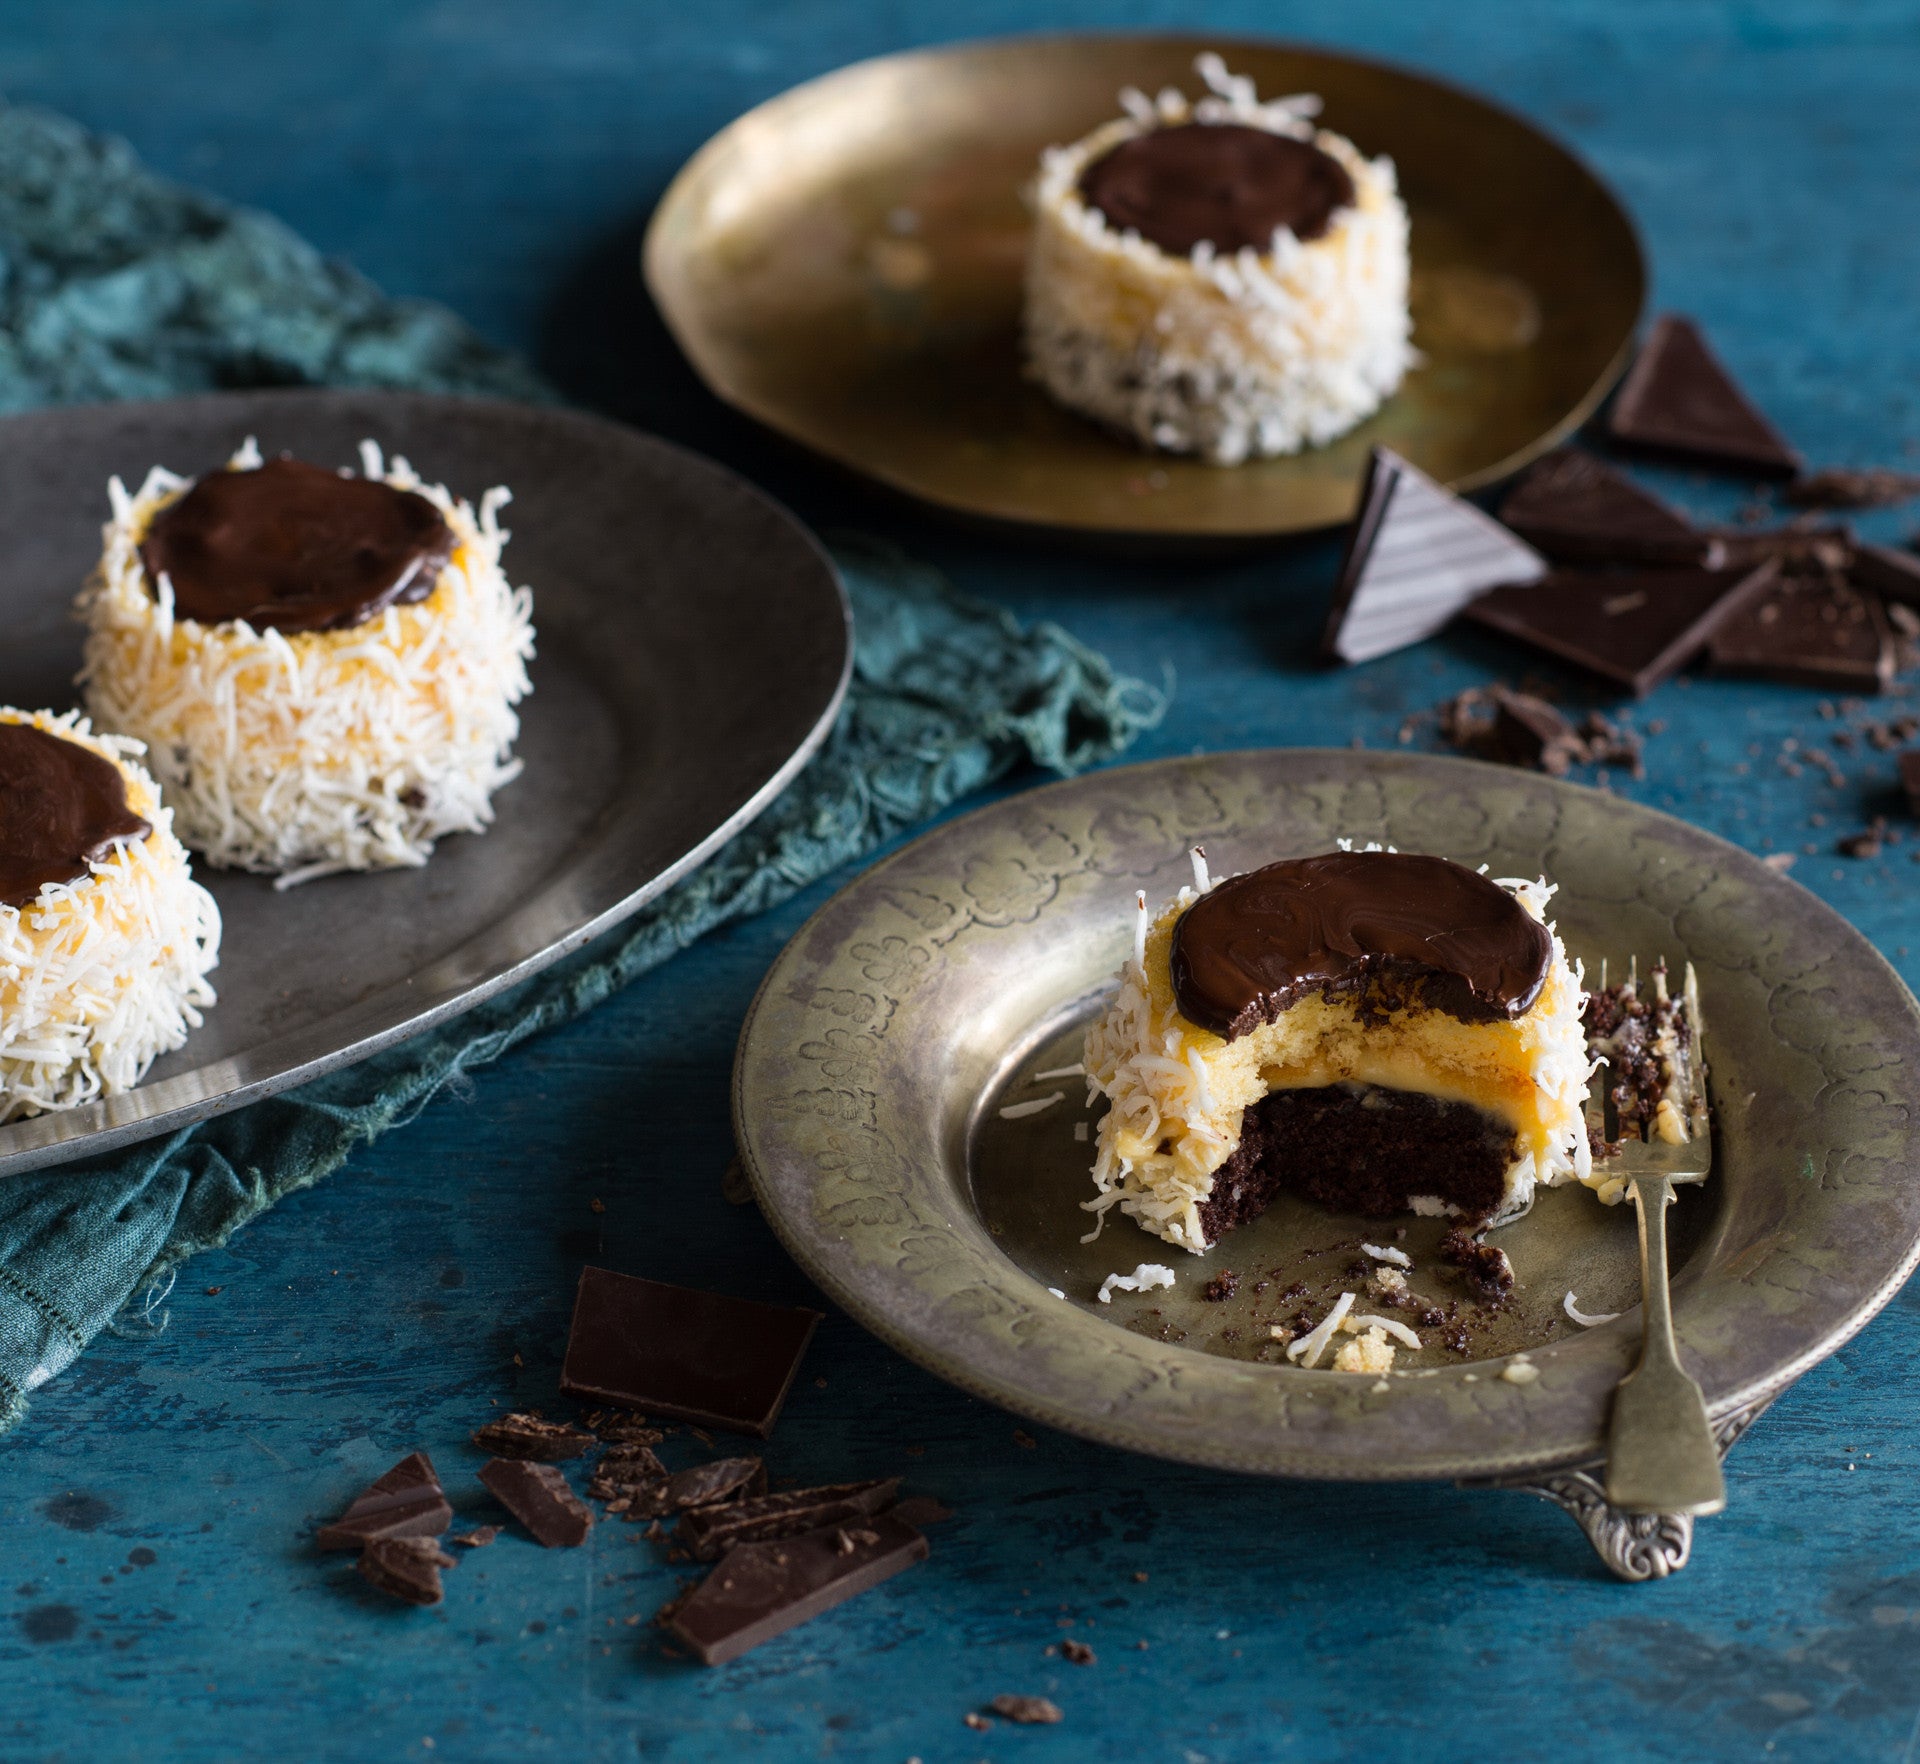
Prep 40min (+20min cooling and 2.5hr chilling)Bake 15minMakes 6 serves
These little layered cakes are the sweetest hats you'll find. Made up of custard cream and a chocolate topping they are covered in shredded coconut for a little texture but you can also use nuts as well, if you have them handy. They are best served chilled and if you aren't much for a dessert fork, then eating these with your hands like a cupcake is absolutely acceptable!
Ingredients
- 100g (1½ cups) shredded coconut, to coat
Sponge Layers
- melted butter, to grease
- 4 eggs, at room temperature
- 165g (¾ cup) caster sugar
- 2 tablespoons boiling water
- 2 tablespoons vegetable oil
- 100g (⅔ cup) self-raising flour, sifted
- 2 tablespoons cocoa powder mixed to a paste with 60 ml (¼ cup) boiling water and cooled
Custard cream
- 1 tablespoon cornflour
- 1 tablespoon custard powder
- 2 tablespoons caster sugar
- 200ml milk
- 20g butter, cubed
- 1 egg yolk
- 1½ teaspoons natural vanilla essence or extract
Chocolate glaze
- 50g dark chocolate, chopped
- 2 teaspoons vegetable oil
Method
- To make the custard cream, sift together the cornflour and custard powder into a small saucepan. Add the sugar and then use a balloon whisk to gradually stir in the milk. Place the saucepan over a medium heat and cook, stirring frequently, until the mixture boils and thickens. Remove from the heat and stir in the butter, egg yolk and vanilla until well combined. Pour into a medium bowl, cover the surface of the custard directly with a piece of plastic wrap and set aside to cool (this will take about 2 hours).
- To make the sponge layers, preheat oven to 180°C (160°C fan-forced). Brush two 16 x 26 cm shallow cake tins with a little melted butter to lightly grease and then line the base and two long sides of each with one piece of non-stick baking paper.
- Use an electric mixer with a whisk attachment on high speed to whisk the eggs and sugar in a large bowl until the mixture is very thick and pale (this will take 5-8 minutes). Lift the whisk out of the mixture and draw a figure eight, if the trail stays on the surface long enough for you to finish drawing then the mixture is ready. If not, continue to whisk for a further minutes and then test again.
- Combine the boiling water and oil. Sift the flour over the egg mixture. Immediately pour the warm water and oil mixture down the side of the bowl and use a spatula to fold until just evenly combined (be careful not to overmix).
- Pour half of the mixture into one of the prepared cake tins. Add the cocoa paste to the mixture still in the bowl and fold together until just combined. Pour into the second cake tin. Gently tap the tins on the bench top three times to settle the mixture. Bake in preheated oven for 12-15 minutes or until the cakes spring back when lightly touched in the centre and start pulling away from the sides of the tins. Stand the cakes in the tins for 2 minutes before turning onto a wire racks to cool completely.
- To assemble, use a 6 cm round cutter to cut each of the Sponge cakes into 6 rounds. Place the round cutter over a chocolate sponge. Top the chocolate sponge round with about 1 tbsp of the Custard cream and then cover with around of plain sponge. Remove the pastry cutter. Repeat with the remaining chocolate and plain sponge rounds and 1 tbsp of Custard cream for each cake to make 6 layered cakes in total. Spread the sides of the cakes with the remaining Custard cream. Roll the sides of the cakes in the coconut to coat and place on a serving plate. Place in the fridge while making the Chocolate glaze.
- Place the chocolate and oil in a heatproof bowl. Place over a saucepan of simmering water, stirring occasionally, until melted and smooth. Carefully spread about 1 tsp of the Chocolate glaze over the tops of each of the cakes to cover. Return the cakes to the fridge for 30 minutes or until the Chocolate glaze is set. Serve chilled.
Baker's Tips
These cakes will keep in an airtight container in the fridge for up to 2 days.This recipe is from Anneka's SBS Food online column, Bakeproof: Bosnian Baking.
CLICK HERE for more Bakeproof recipes.
Photography by Alan Benson.
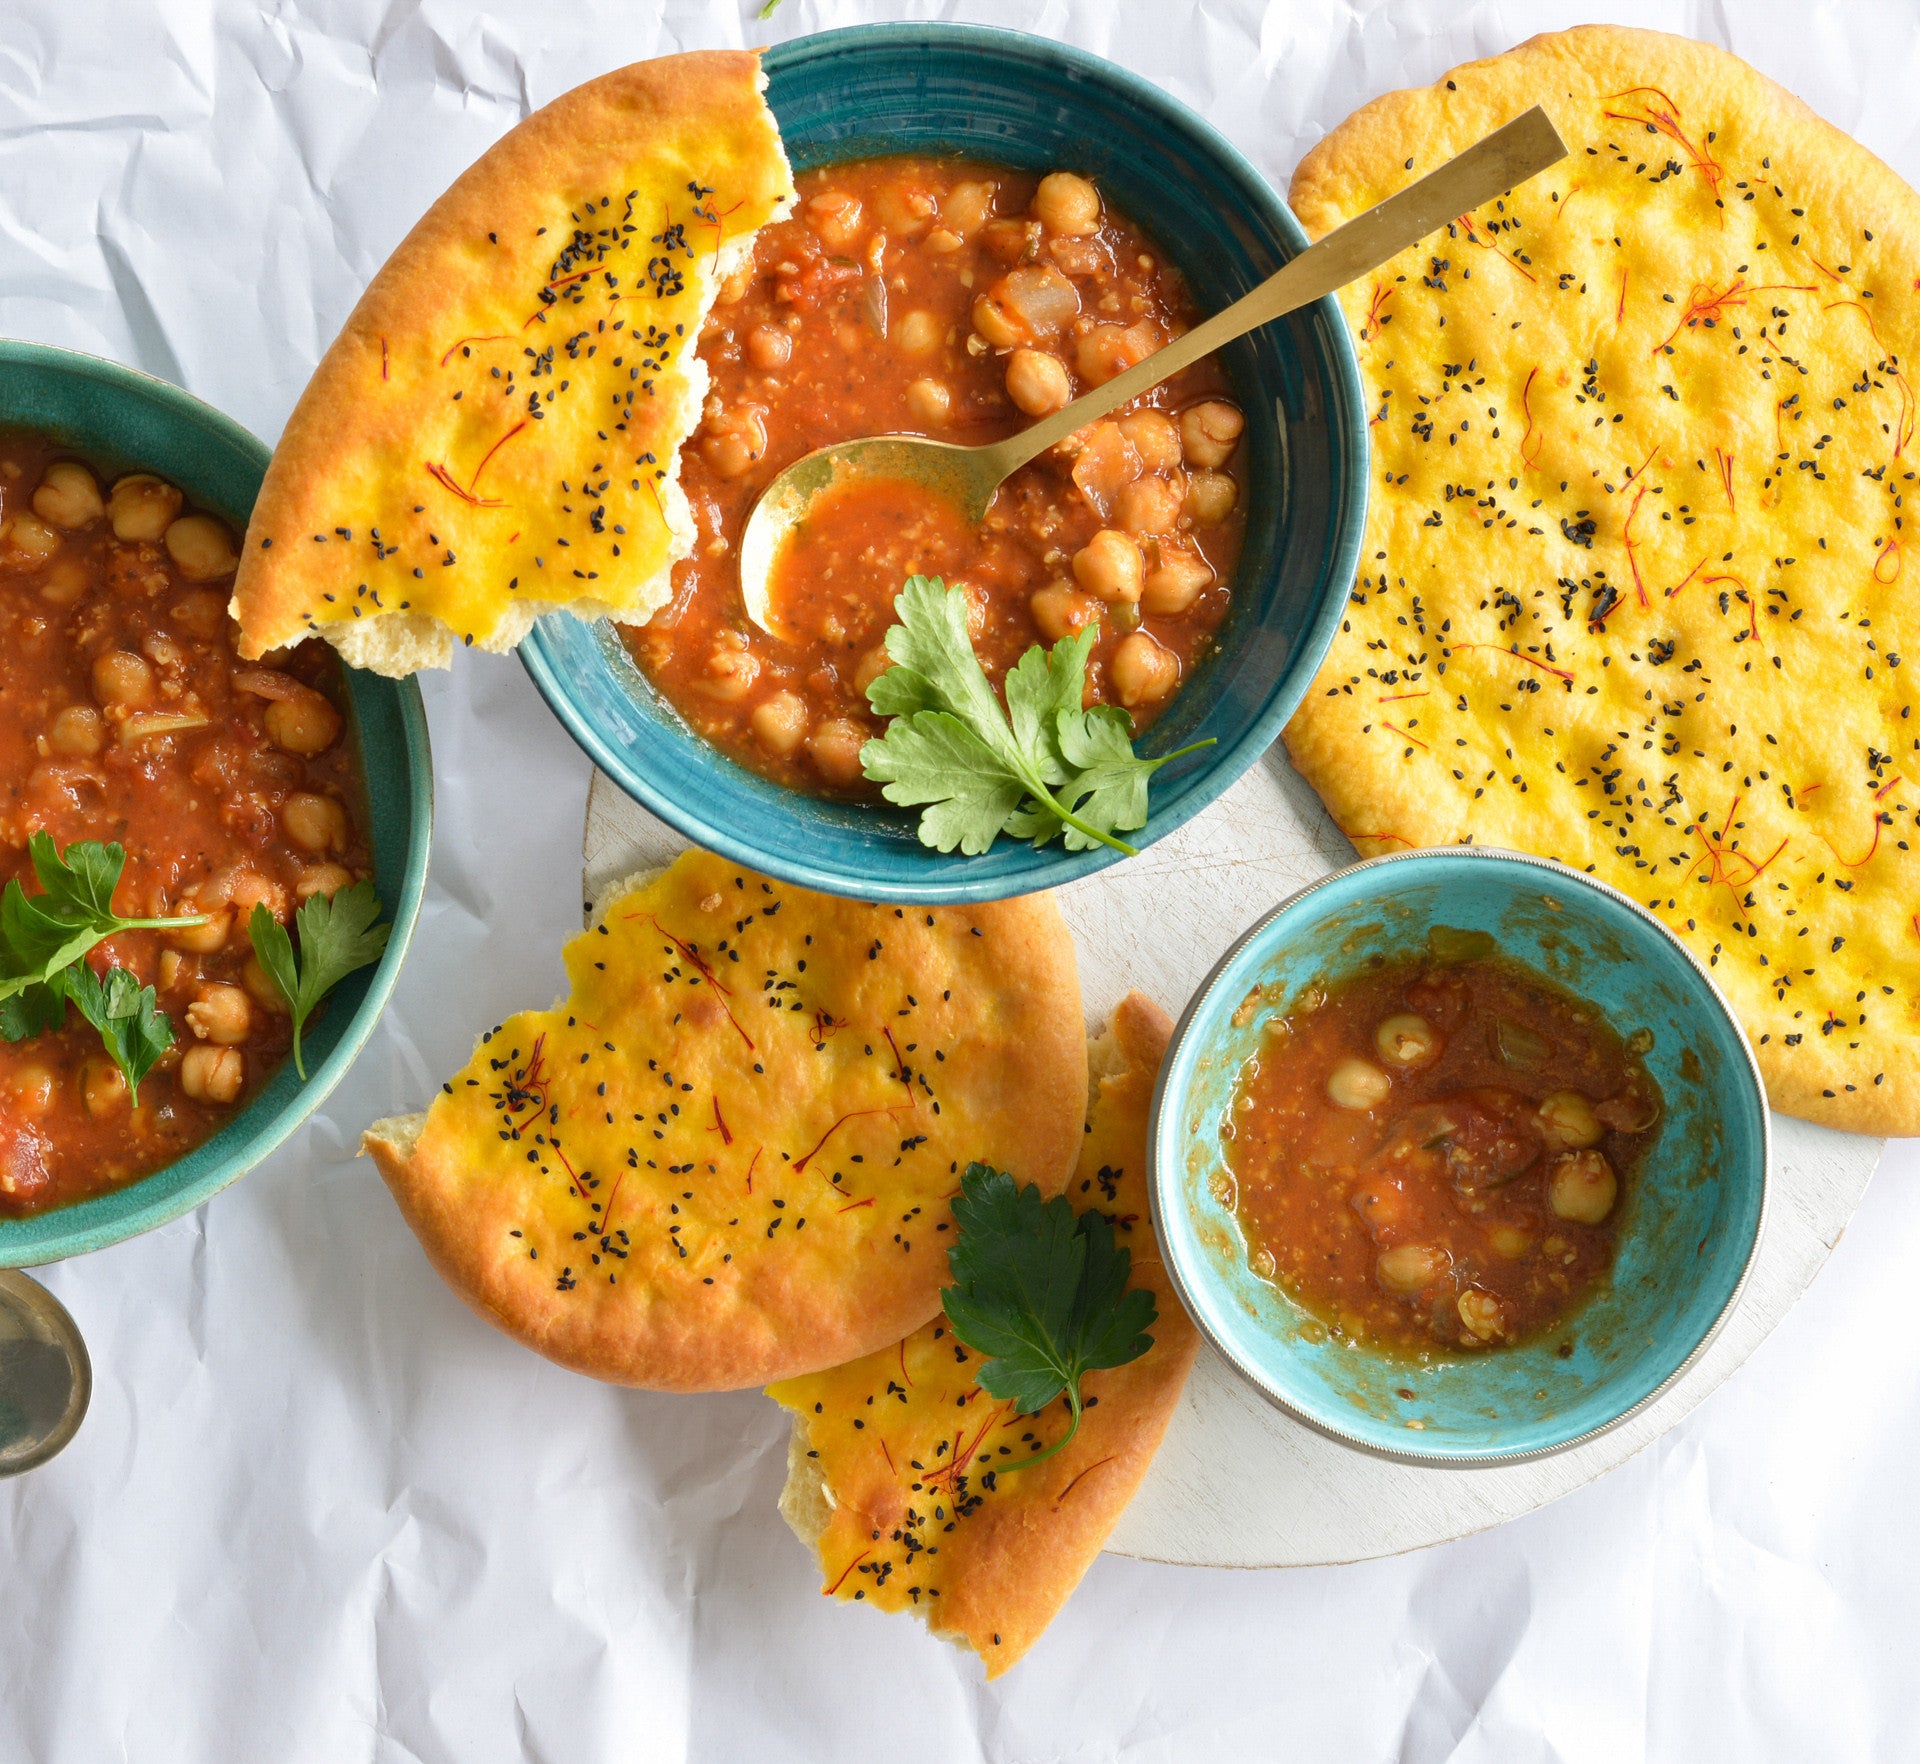
Prep 30min (+40min proving)
Bake 15minMakes 4serves
Similar to Indian Naan, just lighter and flakier (and in my opinion yummier), taftan is a hearth-baked flatbread from Persia and Pakistan. It is often flavoured with saffron – as this one is – which gives it a striking golden hue and alluring flavour perfect to serve alongside curries and soups (although don’t discount just nibbling it on its own).
Ingredients
- 260g (1¾ cups) bread or pizza flour
- 2 teaspoons sugar
- 1 teaspoon salt
- ½ teaspoon instant dried yeast
- 70g (3½ tbsp) ghee, melted
- 2 tablespoon Greek-style natural yoghurt
- 80ml (⅓ cup) milk
- 1 tablespoon vegetable oil, plus extra to grease
- 2 teaspoons nigella seeds
- 1 good pinch saffron, soaked in 1 tbsp hot water
Method
- Combine the flour, sugar, salt and yeast in a large bowl and make a well in the centre. Combine the milk, yoghurt and 40g (2 tablespoons) of the melted ghee, add to the dry ingredients and use a wooden spoon and then your hands to mix to a soft dough. Turn onto a lightly floured bench top and knead for 8-10 minutes or until smooth and elastic and springs back when you push your finger into it.
- Brush a medium bowl with extra oil to grease, add the dough and turn to coat. Cover with plastic wrap and set aside in a warm, draught-free place for 40 minutes or until risen slightly.
- Preheat the oven to 200°C (180°C fan-forced). Line two large heavy baking trays with baking paper.
- Knock back the dough by punching it in the centre with your fist. Turn onto a lightly floured bench top and knead for 2-3 minutes or until smooth and elastic and the dough has returned to its original size. Divide the dough evenly into 2 portions and brush each with the oil to coat.
- Use a rolling pin to roll out a portion into a rough circle about 22cm in diameter and 5mm thick. Then use your hands to pull one end to shape into a teardrop, about 17cm x 24cm, pressing the centre to create a thicker edge. Transfer to a baking tray and then use your fingertips to make indents all over the surface of the flatbread. Repeat with the remaining dough portion. Brush the flatbreads with the saffron liquid and then sprinkle with the nigella.
- Bake for 10 minutes. Brush the surface of the flatbreads with the remaining melted ghee. Swap the trays around and then bake for a further 5-10 minutes or until the flatbreads are golden and cooked through.
- Serve warm or at room temperature along side a soup or curry.
Baker's Tips
This flatbread will keep in an airtight container at room temperature for up to 2 days but it is best eaten the day it is baked.This recipe is from Anneka's SBS Food online column, Bakeproof: Yeast-leavened Flatbreads.
CLICK HERE for more Bakeproof recipes.
Photography by Alan Benson.
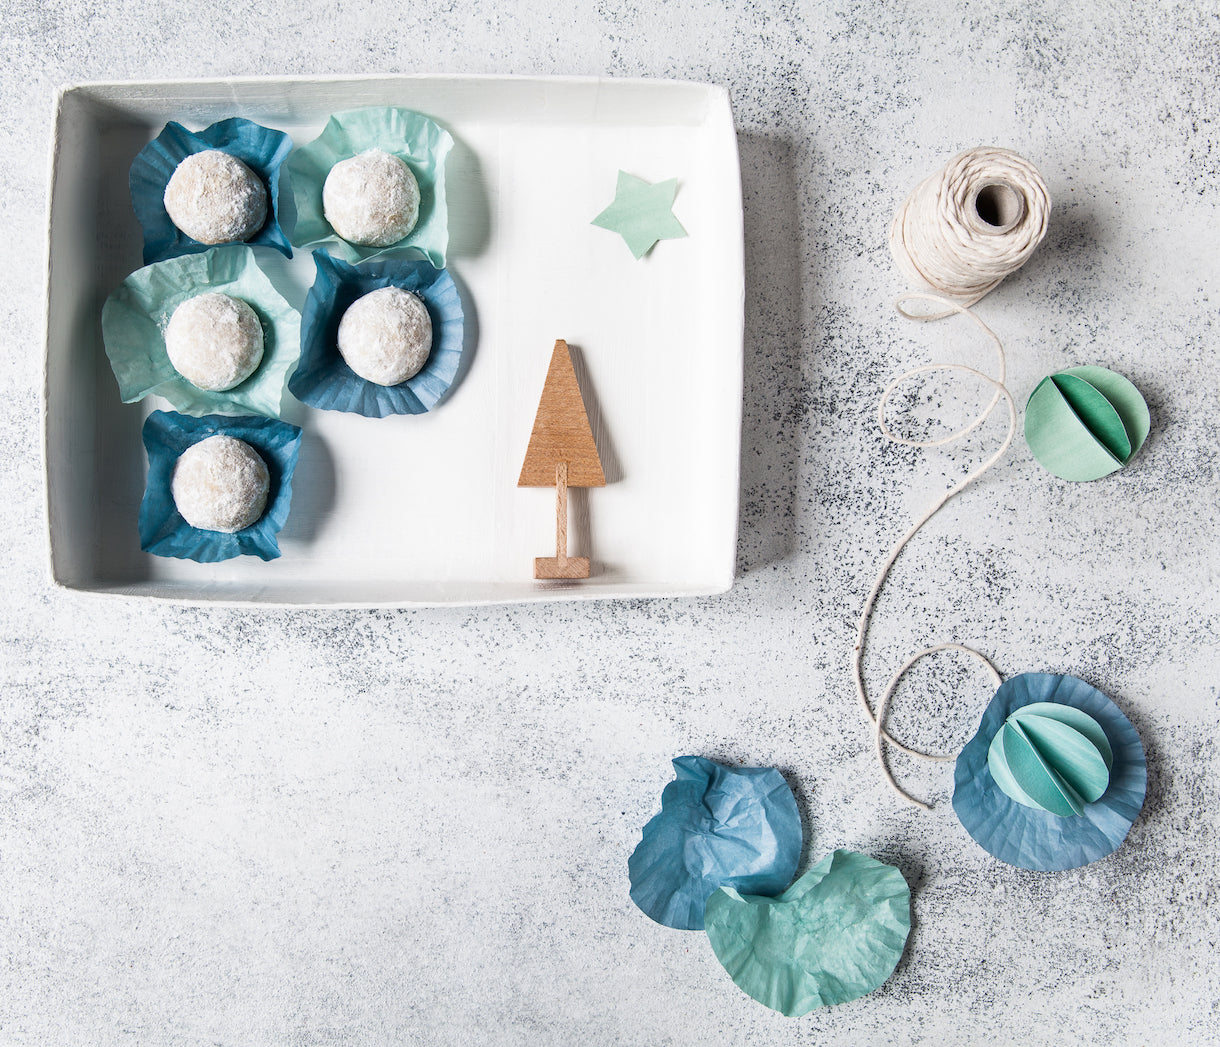
Prep 30min (+20min cooling time)Bake 15minMakes about 50
Often associated with Christmas in Germany, these bite-sized mouthfuls of gingerbread deliciousness actually originated in Scandinavia. The combination of a soft, highly spiced centre hidden beneath a crisp, sugar-powdered outer coat is pure, festive heaven.
Ingredients
125g (4½oz) unsalted butter, softened slightly
110g (½ cup, firmly packed/4oz) dark brown sugar
1 lemon, zest finely grated
1 orange, zest finely grated
90g (¼ cup/3oz) honey
1 egg, at room temperature
40g (¼ cup/1½oz) finely chopped candied citrus rind / mixed peel
350g (2⅓ cups/12¼oz) plain flour
½ teaspoon baking powder
½ teaspoon bicarbonate of soda
2 teaspoon ground cinnamon
½ teaspoon ground black pepper
½ teaspoon ground ginger
¼ teaspoon crushed aniseed
½ teaspoon ground nutmeg
¼ teaspoon ground cloves
¼ teaspoon ground allspice
125g (1 cup/4½oz) pure icing sugar, to dust
Method
- Preheat oven to 160°C/315°F (140°C/285°F fan-forced). Line two large oven trays with non-stick baking paper.
- Use an electric mixer with a paddle beater to beat the butter, sugar and citrus zest until just creamy. Add the honey and beat until just combined. Add the egg and beat until evenly combine. Mix in the candied citrus rind / mixed peel.
- Sift together the flour, baking powder, bicarbonate of soda and spices. Add the flour mixture to the butter mixture and beat on lowest possible speed until just combined and a soft dough forms.
- Roll heaped teaspoonfuls of the mixture into balls and place 5cm/2in apart on the lined trays. Bake in preheated oven for 10-12 minutes, swapping the trays halfway through baking, or until they start to crack and are just cooked through.
- Sift the icing sugar into a medium bowl. Add about 6 warm biscuits to the icing sugar and toss to coat generously. Place on a wire rack to cool and repeat with the remaining biscuits.
Baker's Tips
- The uncooked dough will keep covered in the fridge for up to 2 days. Roll and bake straight from the fridge.
- These biscuits will keep in an airtight container at room temperature for up to 1 month.
- Dust with icing sugar again just before serving if desired.

Prep 40minBake 20-25minMakes about 18
These melt-in-the-mouth buttery biscuits, sandwiched with a creamy, sweet buttercream, are an all-time favourite. This version has the addition of orange zest in the filling, which adds a subtle citrus tang. They're the perfect accompaniment to a cuppa.
Ingredients
250g (9oz) salted butter, cubed, softened
110g (⅔ cup/4oz) icing sugar
1½ teaspoons natural vanilla essence or extract
250g (1⅔ cups/9oz) plain flour
60g (½ cup/2oz) cornflour (see Baker's Tips)
Orange buttercream filling
60g (2oz) salted butter, softened
1 orange, zest finely grated
125g (1 cup/4½oz) icing sugar, sifted
Method
- Preheat the oven to 160°C/315°C (140C/285°F fan-forced). Line 2 large baking trays with baking paper.
- Use an electric mixer on medium to beat the butter, icing sugar and vanilla until pale and creamy, scraping down the side of the bowl when necessary.
- Sift the flour and cornflour together over the butter mixture. Mix on low speed (or use your hands to mix) until just combined and a soft dough forms.
- Use lightly floured hands to roll heaped teaspoonfuls of the mixture into balls and place on the lined trays, about 5cm/2in apart (you should have about 36 balls). Dip a fork in flour and use it to flatten the balls to about 1cm/½in thick and 4cm/1½in in diameter.
- Bake in preheated oven for 20-25 minutes, swapping the trays after 8 minutes, or until the biscuits are a pale golden colour. Remove from the oven and cool on the trays.
- While the biscuits are cooling, make the orange buttercream filling. Put the butter and orange zest in a small mixing bowl and use an electric mixer to beat on medium speed until pale and creamy. Add the icing sugar and beat on low speed, scraping down the side of the bowl when necessary, until well combined and smooth.
- To join the biscuits, spread a little buttercream on the base of a cooled biscuit and sandwich with another biscuit. Repeat with the remaining biscuits and filling.
Baker's Tips
- The cornflour can be replaced with custard powder for a more intense vanilla/custardy flavour.
- These biscuits will keep in an airtight jar or container in a cool place (not the fridge) for up to 4 days.
Variations
Coffee Melting Moments – Replace the orange zest in the filling with 1 teaspoon instant coffee granules dissolved in 1 teaspoon boiling water, cooled before using.
Lemon Melting Moments – Replace the orange zest in the filling with the finely grated zest of 1 large lemon.
Passionfruit Melting Moments – Replace the orange zest in the filling with 1 tablespoon passionfruit pulp.
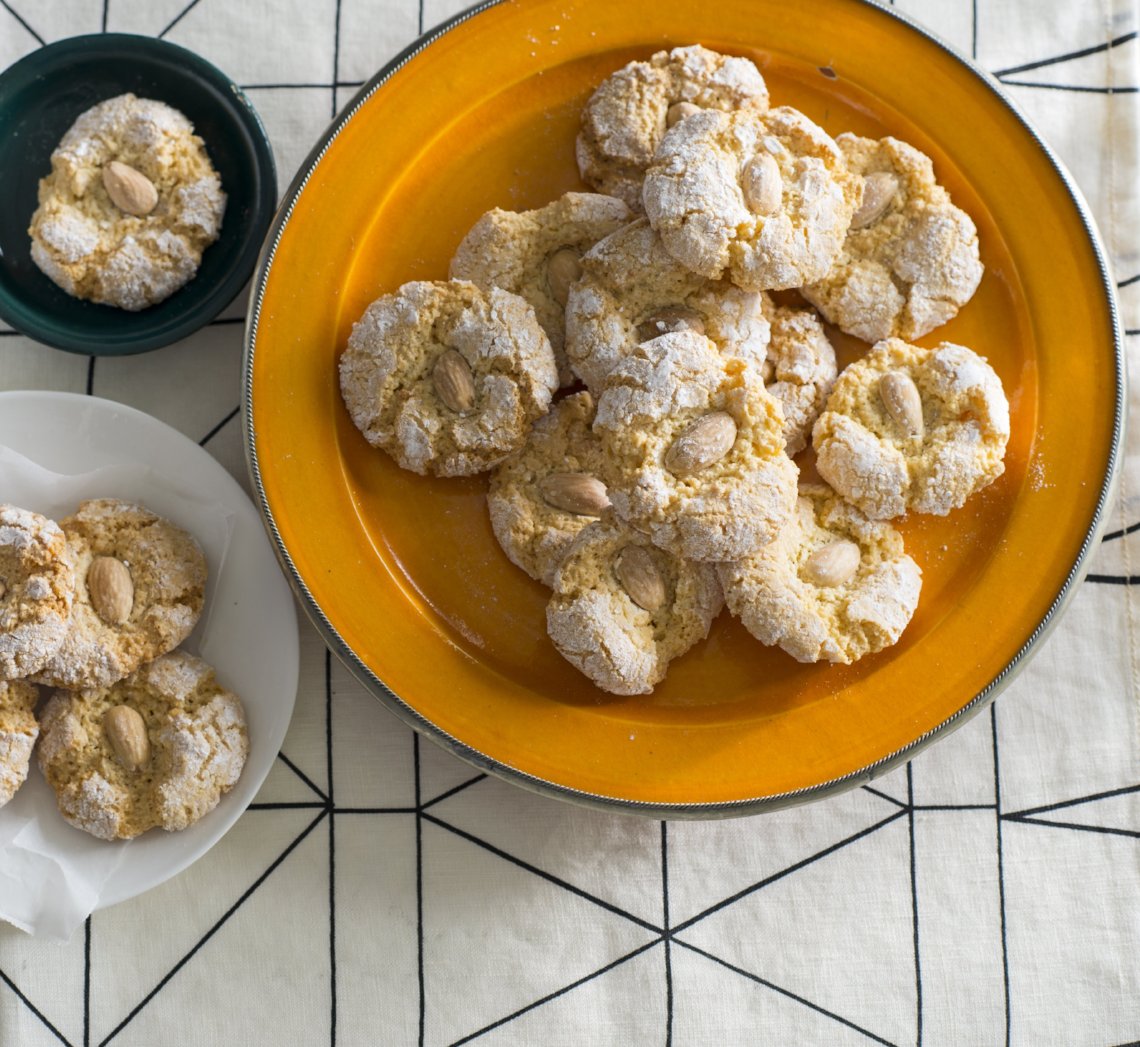
Prep 20minBake 30minMakes about 30
These "very Moroccan" cookies are dead-easy to make, but still special with the addition of orange flower water. They have a crisp macaroon-like character that softens and becomes chewy the longer they're kept.
Ingredients
240g (1½ cups) blanched almonds, plus 30 extra to decorate (optional)125g (1 cup) pure icing sugar, plus 2 tablespoons extra to coat
1 teaspoon baking powder
3 egg yolks
2 teaspoons orange flower water
Method
- Preheat oven to 180°C (160°C fan-forced). Line two large oven trays with non-stick baking paper.
- Spread the almonds on one of the baking trays and toast in preheated oven, shaking the tray occasionally, for 8-10 minutes or until lightly golden and aromatic. Set aside for 5 minutes to cool slightly.
- Use a food processor to process the almonds until finely ground. Transfer to a medium mixing bowl.
- Sift together the icing sugar and baking powder over the almond meal. Add the egg yolks and orange flower water and use an electric mixer to beat until well combined and a soft dough forms. Roll heaped teaspoonfuls of the mixture into balls. Roll in the extra icing sugar to coat lightly and then place on the lined oven trays about 5cm apart. Flatten the balls until about 1cm thick and then press a whole extra almond into the center of each, if desired.
- Bake in preheated oven for 20 minutes, swapping the trays around halfway through baking, or until lightly golden around the edges and cracked on top. Remove from the oven and cool on the trays.
Baker's Tips
- These ghoribas will keep in an airtight container at room temperature for up to 2 weeks.
- For a slightly soft centre bake these biscuits for only 16 minutes.
This recipe is from Anneka's SBS Food online column, Bakeproof: Moroccan Spice.
CLICK HERE for more Bakeproof recipes.
Photography by Alan Benson.
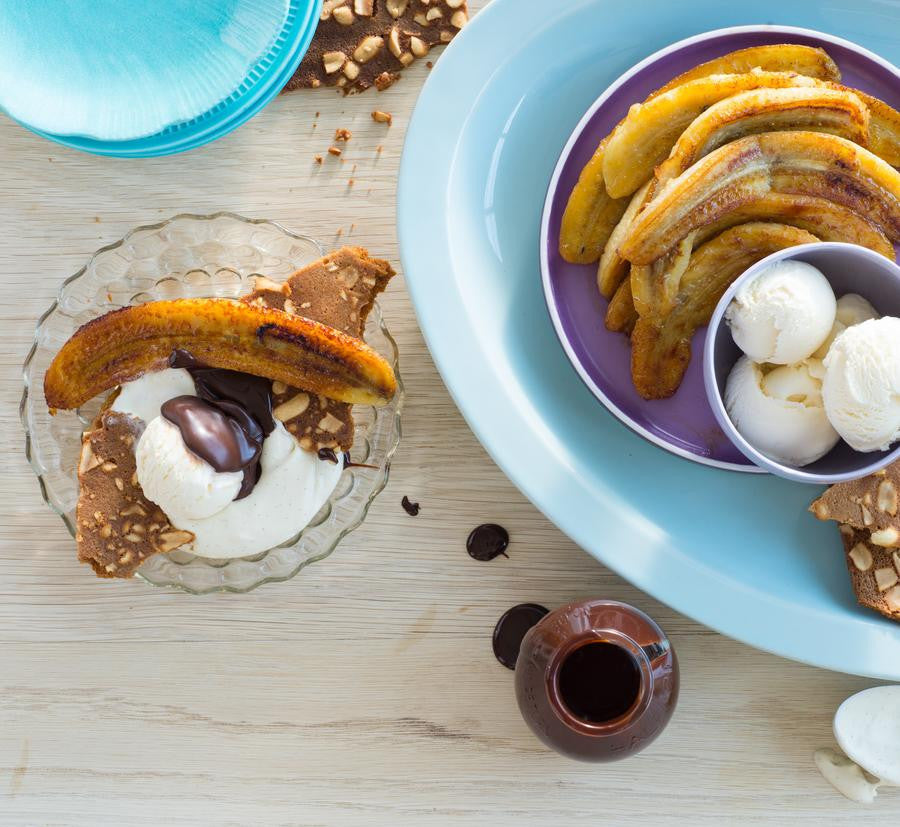
Prep 40min (+ 30min cooling time)
Bake 25minMakes 6 serves
A childhood classic given a modern twist, this fruity split is the perfect dessert to share with a crowd. Place all the separate elements in the centre of the table and arm your guests with their own bowl and spoon. Ready, set, go!
Ingredients
1 x 500ml (17fl oz) tub good–quality vanilla ice-cream, to serve
Salted peanut honey wafers
35g (¼ cup/1¼oz) plain flour
55g (¼ cup/2oz) caster sugar
85g (¼ cup/3oz) honey, warmed slightly
50g (1¾oz) unsalted butter, melted and cooled
1 egg white
100g (3½oz) salted roasted peanuts, very coarsely chopped
Chocolate fudge sauce
185g (6½oz) good-quality dark chocolate (45-54% cocoa), chopped
185ml (¾ cup/6½fl oz) pouring cream
1 tablespoon (4 teaspoons) honey
Caramelised Honeyed Banana
6 firm, ripe bananas (about 170g/6oz each)
20g (¾oz) salted butter, diced
2 tablespoons (8 teaspoons) honey
Chantilly cream
150ml (5fl oz) thickened cream
1 teaspoon vanilla bean paste
1½ tablespoons (6 teaspoons) icing sugar
Method
- To make the Honey and peanut wafers, preheat the oven to 150°C/300°F (130°C/265°F fan-forced). Line a large oven tray with non-stick baking paper. Place the flour and sugar in a medium bowl. Combine the honey, butter and egg white, add to the dry ingredients and use a balloon whisk to stir until just combined and smooth. Pour the mixture onto the lined tray and use the back of a spoon to spread the mixture evenly as evenly as possibly into a thin 25cmx30cm/10inx12in rectangle. Sprinkle evenly with the peanuts. Bake in the centre of the preheated oven for 25 minutes, turning the tray around after 15 minutes to help bake evenly, or until dark golden and the centre is cooked through. Remove from the oven and cool on the tray (this will take about 30 minutes). Break into large pieces and set aside.
- To make the Chantilly cream, combine the cream, icing sugar and vanilla in a medium bowl and use a balloon whisk or an electric hand mixer with a whisk attachment to whisk the cream until soft peaks form. Transfer to a serving bowl, cover place in the fridge until ready to serve.
- To make the chocolate fudge sauce, combine the chocolate, cream and vanilla in a small saucepan and heat over a medium-low heat, stirring occasionally, until the chocolate melts and the sauce is smooth. Transfer to a heatproof jug, cover and keep warm.
- To make the caramelised honeyed bananas, peel the bananas and cut each in half lengthways. Melt half the butter in a large non-stick frying pan over medium-high heat. Drizzle in half the honey and then add half the banana slices in a single layer. Cook for 2-4 minutes each side or until the bananas are golden and caramelised. Transfer to a serving bowl, wipe out the pan with paper towel and repeat with the remaining butter, honey and banana.
- To serve, place the caramelised banana, wafers, fudge sauce, cream and ice-cream in the centre of the table for guests to assemble their own dessert.
Baker's Tips
- The wafers will keep in an airtight container at room temperature for up to 1 week.
- The chocolate fudge sauce will keep in an airtight jar or container in the fridge for up to 5 days. Reheat in a small saucepan or microwave until smooth and warmed through.
This recipe is part of Anneka's SBS Food Bakeproof: DIY dessert bar online column. For more Bakeproof columns and recipes, click here.
Photography by Alan Benson.


