- home
- BAKERECIPES
BakeRecipes
Bringing real baking into your home with deliciously simple recipes.

Prep 30min (+1hr cooling and 1hr chilling time)Bake 20minMakes 20 pieces
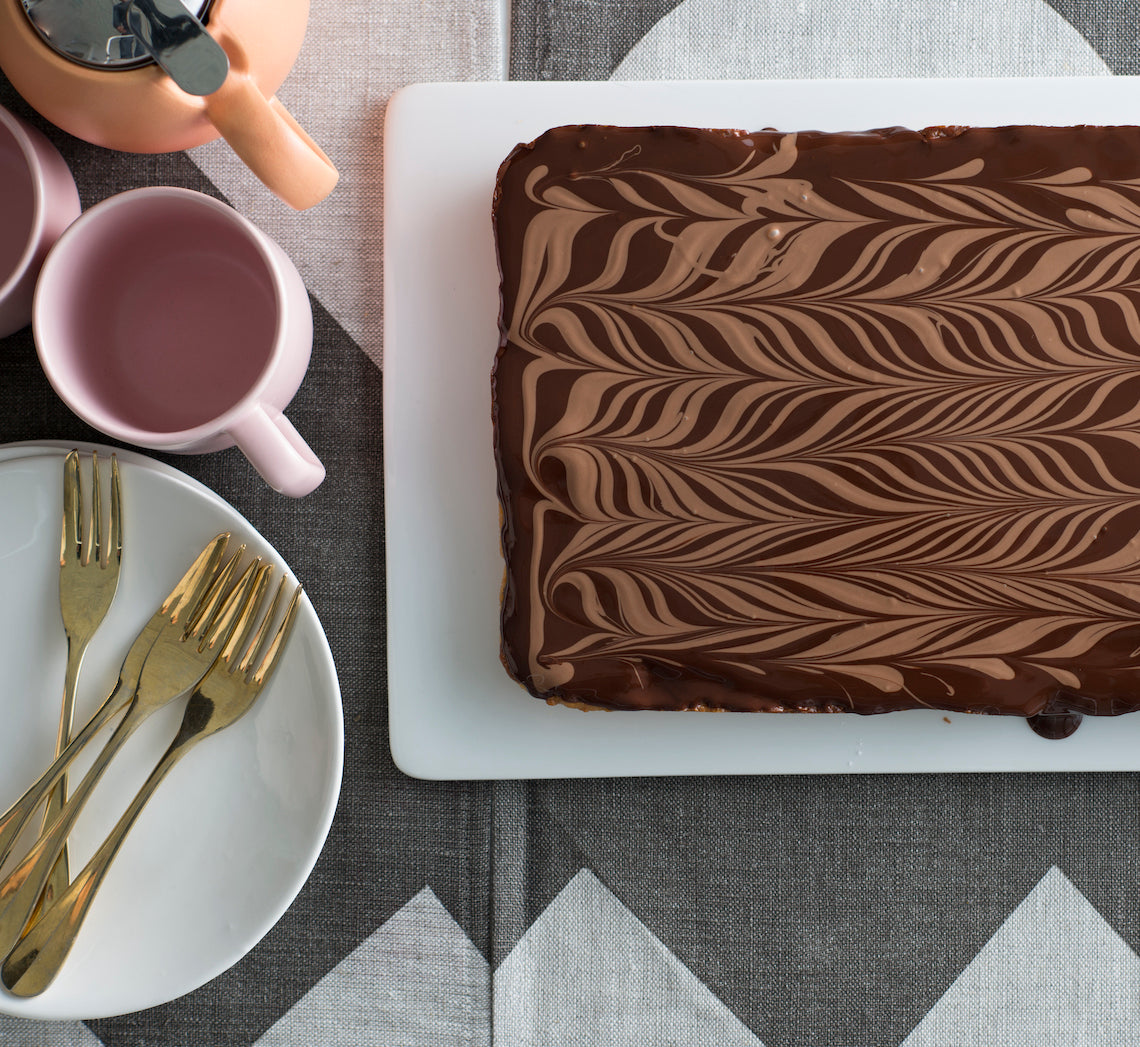
This has to be the perennial favourite... biscuit base, gooey caramel centre and chocolate topping is a combination made in heaven. This chocolate caramel slice has been given a little makeover with a feather-patterned topping.
Ingredients
110g (¾ cup/4oz) plain flour
½ teaspoon baking powder
30g (⅓ cup/1oz) desiccated coconut
75g (⅓ cup, firmly packed/2¾oz) brown sugar
80g (2¾oz) salted butter, melted
1 teaspoon natural vanilla essence or extract
Caramel filling
395g (13¼oz) tin sweetened condensed milk
110g (½ cup, firmly packed/4oz) brown sugar
1 tablespoon golden syrup
40g (1½oz) salted butter, cubed
Chocolate topping
200g (7oz) good-quality dark chocolate (70% cocoa), chopped
30g (1oz) salted butter, cubed
75g (2¾oz) good-quality milk chocolate
Method
- Preheat oven to 180°C/350°F (160°C/315°F fan-forced). Grease a 16cm x 26cm (6 ¼in x 10½in), base measurement, shallow slice tin and line the base and sides with one piece of non-stick baking paper, cutting into the corners to fit.
- To make the base, combine the flour, baking powder, desiccated coconut and brown sugar in a medium bowl. Add the butter and vanilla and mix well. Crumble evenly over the base of the lined tin and use your hands to press down firmly and cover evenly. Bake in preheated oven for 12-15 minutes or until cooked through and lightly golden. Remove from the oven.
- Meanwhile, to make the Caramel Filling, combine the sweetened condensed milk, brown sugar, golden syrup and butter in a small saucepan and cook over a low heat, stirring constantly, for 10 minutes, or until the sugar dissolves and the mixture thickens slightly (do not boil).
- Pour the hot caramel immediately over the base and use the back of a metal spoon to smooth the surface. Return the slice to the oven and bake for 10 minutes or until the caramel has darkened slightly and starts to bubble around the edges. Remove from the oven and set aside for 1 hour or until cooled completely.
- To make the Chocolate Topping, combine the dark chocolate and butter in a medium heatproof bowl over a saucepan of simmering water (don’t let the water touch the base of the bowl). Stir frequently until the chocolate melts and the mixture is smooth. Pour over the cooled slice and use the back of a metal spoon to cover evenly. Tap the tin on the bench to even the topping and to remove any air bubbles. Melt the milk chocolate in the same way as the dark chocolate and butter in a separate small heatproof bowl. Place the slice with a short side of the tin closest to you. Use a teaspoon to generously drizzle the milk chocolate widthways across the dark chocolate to form horizontal lines. Then use a skewer to run through both the dark and milk chocolate lengthways 5-6 times in alternate directions to form a feather pattern. Place in the fridge for 1 hour or until the chocolate sets.
- Use a warm large sharp knife to cut into pieces to serve.
Baker's Tip
- This slice will keep in an airtight container in the fridge for up to 1 week.
This recipe is from Anneka's SBS Food online column, Bakeproof: Childhood Favourites.
CLICK HERE for more Bakeproof recipes.
Photography by Alan Benson.

Prep 40min (+30min chilling and 30min cooling time)Bake 20minMakes 12
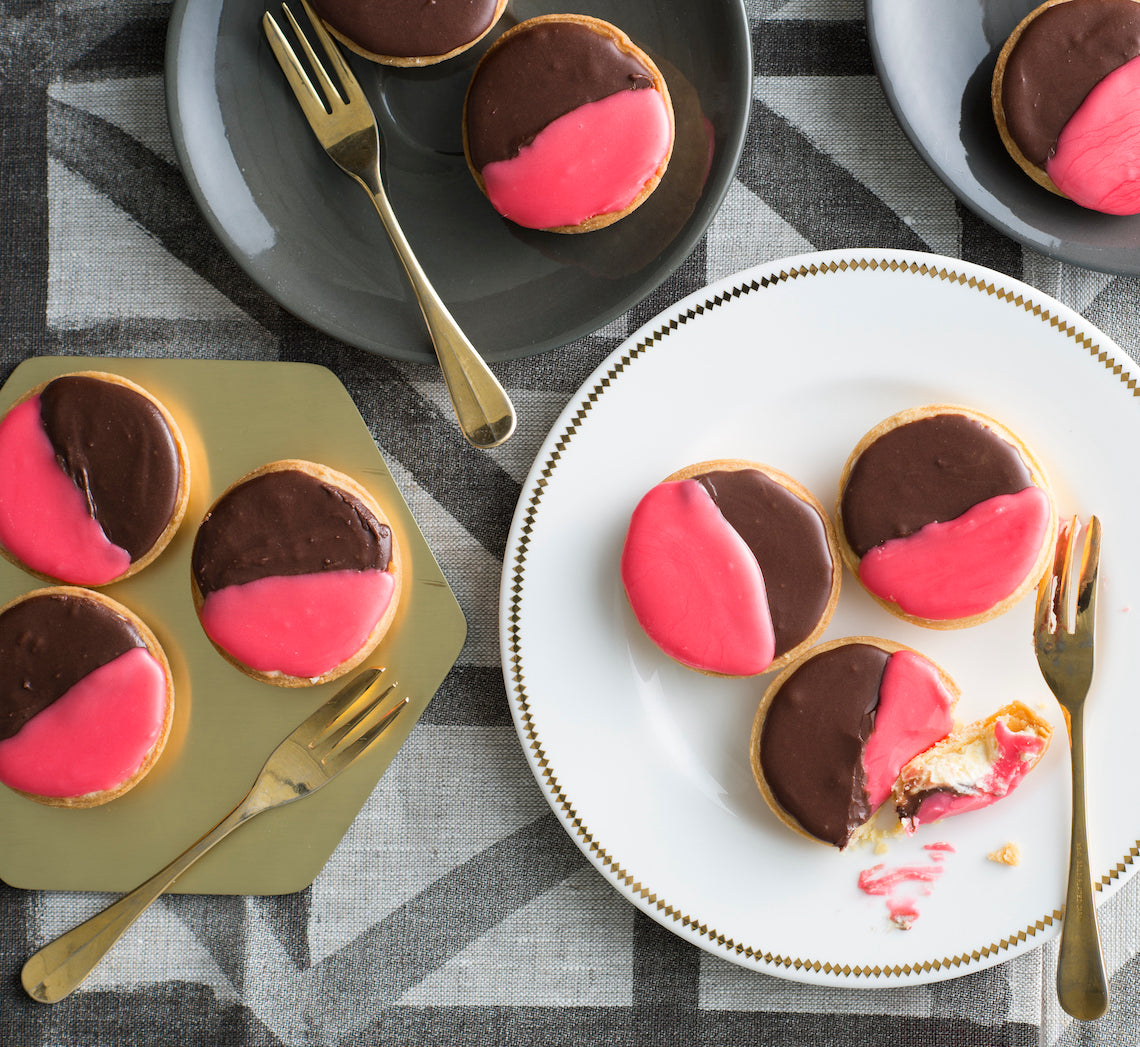
Dating back almost a century, this Australian creation of a pastry case filled with mock cream (and sometimes a raspberry jam layer) and topped with sickly sweet icing seems to hit a nostalgic chord – we all remember eating them as a child! For a more contemporary twist, we've added an extra colour punch to the pink icing. Remember that chocolate and white, or pink and white are also popular colour combinations.
Ingredients
1 quantity Sweet shortcrust pastry, divided in half before wrapping and chilling as directed
Mock Cream Filling
1 tablespoon boiling water
½ teaspoon gelatine powder
65g (⅓ cup) caster sugar
2 tablespoons milk
125g unsalted butter, softened
1 teaspoon natural vanilla essence or extract
Icing
185g (1½ cups) pure icing sugar
1 tablespoon water, plus 1 teaspoon extra (optional)
2 teaspoons sifted cocoa powder
Pink food colouring
Method
- Unwrap one pastry portion and place on a lightly floured, cool work surface. Gently pat the pastry with the palm of your hand to flatten slightly. Use a lightly floured rolling pin to roll out on a lightly floured surface until 3mm thick. Use an 8cm diameter plain round cutter to cut out 6 circles, re-rolling the pastry if necessary. Line six holes of a 12-hole 80ml ( ⅓ cup) muffin tin (the pastry circles won’t fill the muffin holes completely. Repeat with the remaining pastry portion to line the six remaining muffin holes.
- Prick each pastry case base 3 times with a fork and place in the fridge for 30 minutes. Preheat the oven to 200°C (180°C fan-forced).
- Line each tartlet case with a piece of foil and then fill with dried rice. Blind bake the tart cases for 15 minutes or until the pastry is sealed. Use the foil to lift the rice out of the tartlet cases and bake for a further 5 minutes or until lightly golden and cooked through. Cool the cases in the tin.
- To make the Mock cream filling, put the boiling water in a small ramekin and sprinkle the gelatine over the top. Use a fork to whisk the gelatine into the water and then set aside for about 3 minutes or until the mixture is clear (see Bakers Tips). Meanwhile, combine the sugar and milk in a small saucepan and stir over medium heat until the sugar dissolves. Stir in the gelatine mixture until well combined. Remove from heat and set aside, stirring occasionally so the gelatine doesn't set, for 30 minutes or until cooled to room temperature.
- Use an electric beater to beat the butter and vanilla in a medium bowl until pale and creamy. With the motor running, gradually add the cooled gelatin mixture in a slow steady stream until well combined and fluffy. Divide the Mock cream filling evenly among the pastry cases and smooth the surfaces. Set aside in a cool spot but not in the fridge.
- To make the Icing, sift the icing sugar into a bowl and then stir in the water until smooth (the icing should be a spreadable consistency). Put half the icing into a separate bowl and stir in the cocoa powder and extra teaspoon of water. Colour the remaining portion with 2-4 drops of pink food colouring. Use a palette knife or the back of a teaspoon to spread about a teaspoon of the pink icing over the top of half of each tart. Set aside for 5-10 minutes for the icing to set. Spread about a teaspoon of the chocolate icing over the remaining half of each tart to cover the tops and then set aside for 5-10 minutes for the icing to set. Serve at room temperature.
Baker's Tips
- If the gelatine doesn't dissolve in the boiling water and become clear, add boiling water to a larger heatproof bowl, jug or dish and then sit the ramekin with the gelatine mixture in the water. Stir occasionally until the mixture is clear.
- These tarts will keep in an airtight container in the fridge for up to 4 days. Serve at room temperature.
This recipe is from Anneka's SBS Food online column, Bakeproof: Childhood Favourites. CLICK HERE for more Bakeproof recipes.
Photography by Alan Benson.


