
- home
- BAKERECIPES
BakeRecipes
Bringing real baking into your home with deliciously simple recipes.
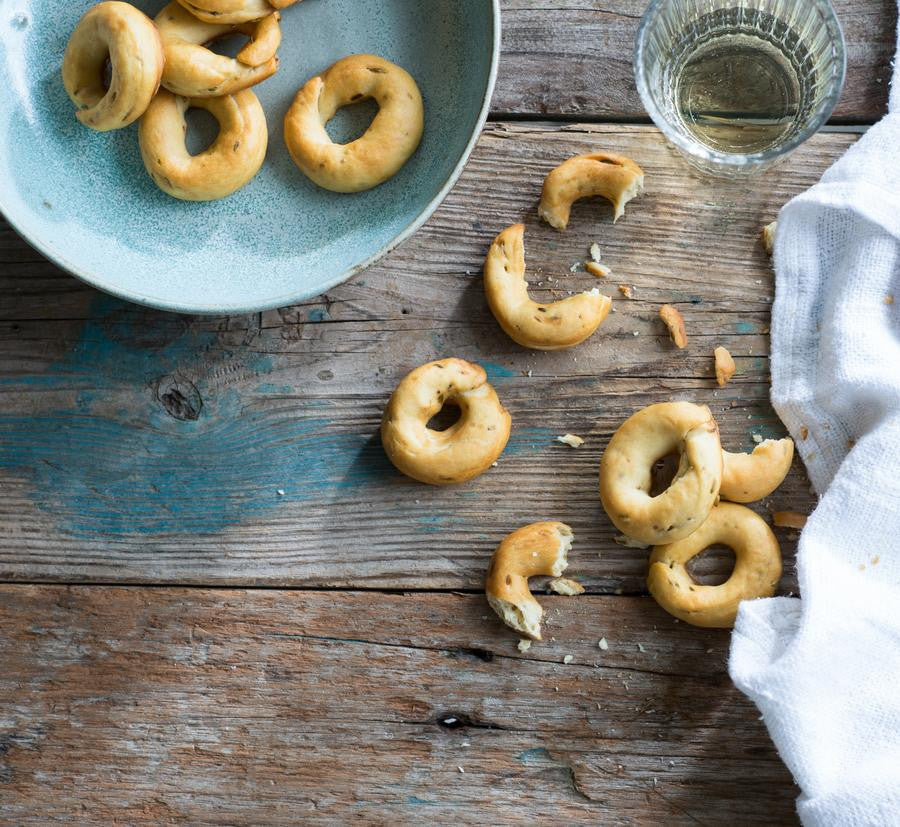
Prep 50min (+1hr 30min proving time)Bake 1hr 5minMakes about 36
Traditionally served as a stuzzichini (an appetiser snack), these cute, crisp, fennel-scented biscuits hail from the Puglia region in the heel of Italy’s boot. Traditionally associated with Easter you will also often find them served throughout the year alongside an aperitif for dunking.
Ingredients
80ml (⅓ cup) lukewarm water
1 teaspoon dried yeast
60ml (¼ cup) extra virgin olive oil
60ml (¼ cup) dry white wine
300g (2 cups) bread or pizza flour, plus extra to dust (see Baker's Tips)
1 tablespoon fennel seeds, coarsely crushed
1 teaspoon freshly ground black pepper
1 teaspoon salt
1 tablespoon bicarbonate of soda
Method
- Combine the water and yeast in a jug, stir to combine and set aside in a warm draught-free place for 5 minutes or until frothy.
- Add the olive oil and wine to the yeast mixture. Combine the flour, fennel seeds, pepper and salt in a large bowl, make a well in the centre and add the yeast mixture. Use a wooden spoon and then your hands to mix to a soft dough. Turn the dough onto a lightly floured surface and knead for 5-8 minutes or until it is smooth and elastic and springs back when you push your finger into it.
- Place the dough in an oiled bowl, turning it to coat lightly with the oil. Cover with plastic wrap and place in a warm, draught-free place for 1 hour or until almost doubled in size.
- Line two large oven trays with non-stick baking paper.
- Knock back the dough by punching it in the centre with your fist. Turn onto a lightly floured surface and knead for 1-2 minutes or until it returns to its original volume.
- Divide the dough into 12 even portions. Roll each portion into a rope about 30cm long and then cut each into three shorter lengths, each about 10 cm long. Roll each length until 15cm long. Join the ends of each length, pinching to seal, to form rings. Place on the lined oven trays, leaving a little room for rising between each, cover with plastic wrap or a slightly damp tea towel and set aside in a warm, draught-free place for about 30 minutes or until well puffed.
- Preheat oven to 180°C (160°C fan-forced). Fill a large saucepan or large deep frying pan with water until about 8cm deep. Add the bicarbonate of soda and bring to the boil.
- Reduce the heat so that the water is simmering. Working quickly, carefully add 6 of the rings to the boiling water. Once they rise to the surface (this will only take a few seconds) use a slotted spoon to transfer the rings, one at a time, back to the lined oven trays, allowing any excess water to drain away. Repeat with the remaining rings in 5 more batches.
- Bake in preheated oven for 25 minutes or until dark golden, swapping the trays after 12 minutes. Reduce the oven temperature to 110°C (90°C fan-forced) and continue to bake for a further 40 minutes, swapping the trays after 20 minutes, or until crisp all the way through. Cool on the trays.
Baker's Tips
- Bread and pizza flour (also known as ‘strong’ flour) has a higher gluten-content than regular plain flour. This type of flour is more suited to use in yeast-based bread recipes like these biscuits and will give you a better texture that will have more ‘bite’ rather than a fine cake-like crumbly texture.
- These biscuits will keep in an airtight container at room temperature for up to 2 weeks.
- The butter for this recipe needs to be soft enough to spread but not so soft that is starts melting when you spread it.
- This bread is best eaten on the day it is made but will keep in an airtight container for up to 2 days.
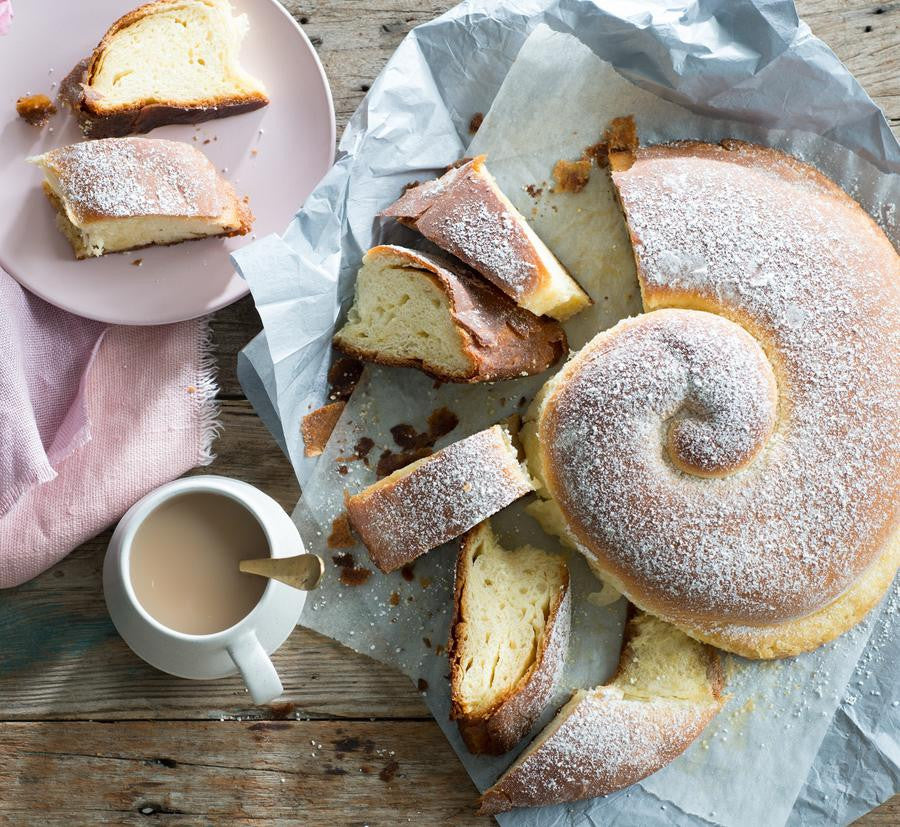
Prep 50min (+10min cooling, 15min chilling and 2hrs proving time)Bake 30minMakes 12 serves
This amazing Spanish bread is reminiscent of the croissant from neighbouring France – traditionally layered with lard (although I make mine with butter) this brioche-like bread has a wonderful flakiness and rich buttery flavour that is simply too hard to resist. Originally from the Isle of Mallorca it is traditionally served at festivals and celebrations such as Easter however, these days, it is often found on the breakfast table – trust me, it really is too good to keep for special occasions!
Ingredients
200ml (7fl oz) lukewarm milk
1 x 7g sachet (2 teaspoons) instant dried yeast
110g (½ cup/4oz) caster sugar
2 eggs, at room temperature
450g (3 cups/15¾oz) strong bread or pizza (high-protein) flour, plus extra to dust (see Baker's Tips)
¼ teaspoon fine salt
Melted butter, to grease
200g (7oz) salted butter, cubed, softened (see Baker’s Tips)
Icing sugar, to dust
Method
- Combine the milk, yeast and 1 teaspoon of the sugar in a jug. Stir to combine and set aside in a warm draught-free place for 5 minutes or until frothy. Add the eggs and use a fork to whisk to combine.
- Combine the flour, remaining sugar and salt in the bowl of a stand mixer. On low speed gradually add the milk mixture and knead with a dough hook. Continue to knead on low speed for 6-8 minutes or until the dough is smooth and elastic.
- Brush a medium bowl with melted butter to grease. Place the dough in the bowl, turning it to coat lightly with the butter. Cover with plastic wrap and place in a warm, draught-free place for 1 hour or until doubled in volume.
- Line a large oven tray with non-stick baking paper.
- When the dough has doubled in size knock it back by punching it in the centre with your fist. Turn onto a lightly floured surface and knead for 1-2 minutes or until it returns to its original volume.
- Use a lightly floured rolling pin to roll out the dough on a lightly floured surface to a 45cm/18in square. Working quickly, use a palette knife to carefully spread the butter all over the dough to cover evenly, leaving a 2cm/¾in border. Roll up the dough into a roll to enclose the butter and then press the ends to seal. With an end closest to you, gently roll out the dough again to a rectangle about 60cm/24in long and 15cm/6in wide, dusting the dough with a little flour if the butter breaks through. Starting from a long end, roll up the dough again to form a long roll.
- Loosely coil the roll onto the lined baking tray. Cover with a slightly damp tea towel and chill for 15 minutes. Remove form the fridge and set aside in a warm draught-free place for 1 hour or until well risen.
- Preheat oven to 180°C/350°F (160°C/315°F fan-forced).
- Bake the Ensaïmada in preheated oven for 30 minutes or until cooked through and golden. Place the baking tray on a wire rack and set aside on the tray for at least 10 minutes to cool slightly before serving warm or cool completely. Serve dusted liberally with icing sugar.
Baker's Tips
- The butter for this recipe needs to be soft enough to spread but not so soft that is starts melting when you spread it.
- This bread is best eaten on the day it is made but will keep in an airtight container for up to 2 days.
This recipe is from Anneka's SBS Food online column Bakeproof: Easter Treats. Click here for more Bakeproof columns and recipes.
Photography by Alan Benson.
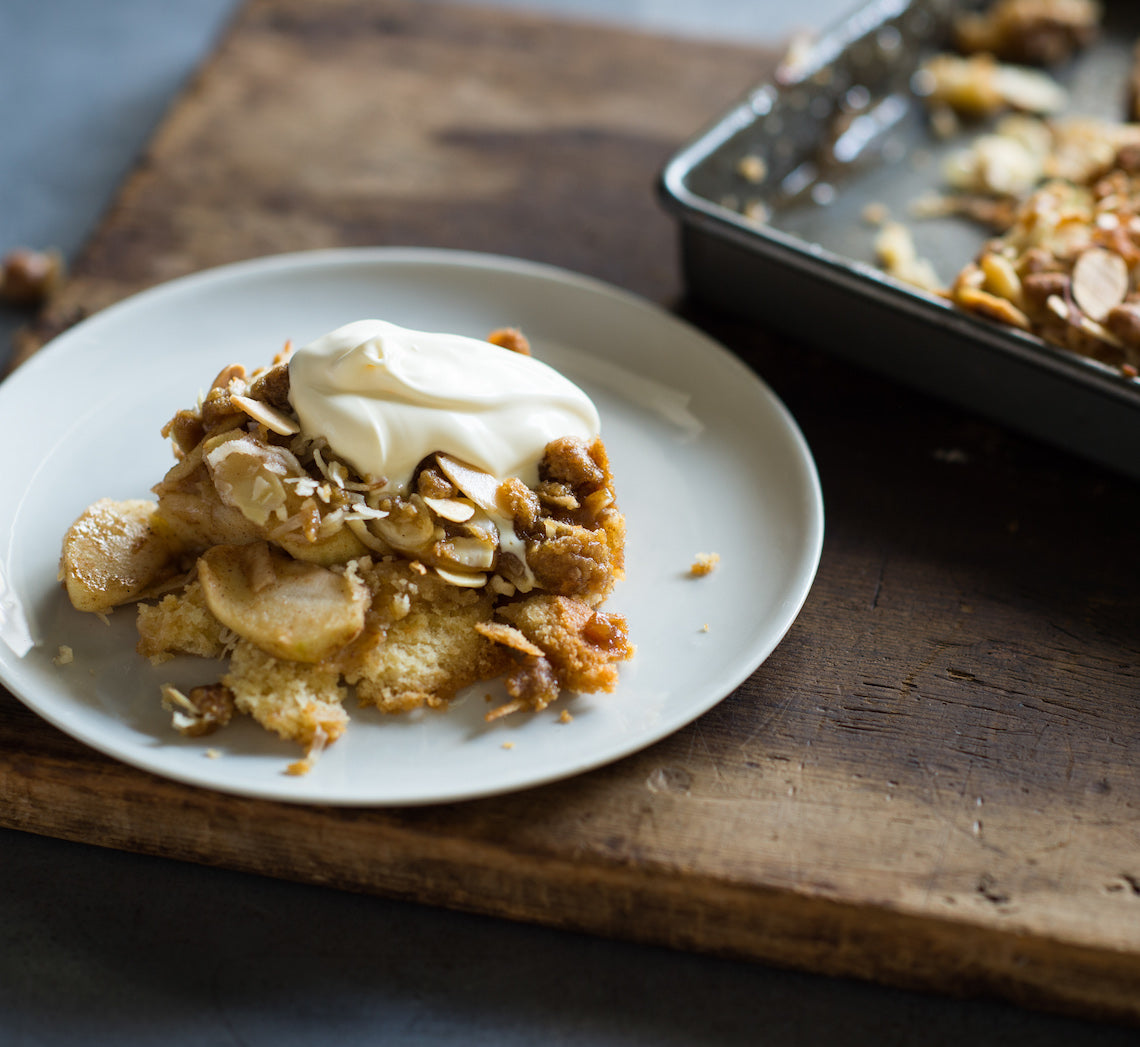
Prep 25minBake 35minMakes 8-10 serves
With its shortbread-like base, tart apple filling and crunchy crumble topping, this is a slice that you eat with a fork or spoon, not your fingers. It's more suited to dessert than afternoon tea... although, by all means, feel free to indulge mid-afternoon!
Ingredients
melted butter, to grease
800g apples (such as Granny Smith or Golden Delicious)
75g (⅓ cup) caster sugar
1½ teaspoons ground cinnamon
thick cream or vanilla ice cream, to serve
Base
190g (1¼ cup) plain flour
1 teaspoon baking powder
110g (½ cup) caster sugar
125g unsalted butter, cubed, softened
1½ teaspoons natural vanilla essence or extract
1 egg
50g (⅓ cup) plain flour
100g (½ cup, firmly packed) brown sugar
80g chilled unsalted butter, cubed
40g (½ cup) shredded coconut
75g (¾ cup) flaked almonds
Method
- Preheat the oven to 180°C. Brush a 20 x 30cm shallow slice tin with melted butter to grease.
- To make the Base, put the flour, baking powder, sugar and butter in the bowl of a food processor and process until the mixture resembles breadcrumbs. Whisk the egg with the vanilla, add to the flour mixture and use the pulse button to process until the mixture forms a soft dough. Bring together with your hands and then press the dough evenly over the base of the greased tin to evenly cover. Place in the fridge.
- Meanwhile, to make the Crumble Topping, put the flour and brown sugar in a medium bowl and use your fingertips to rub in the butter until roughly combined. Stir in the coconut and almonds.
- Peel, core and thinly slice the apples and put in a large bowl. Combine the sugar and cinnamon, sprinkle over the apples and toss to coat evenly. Arrange the apple slices over the Base in the tin and then sprinkle evenly with the Crumble Topping. Set aside.
- Bake in preheated oven for 30-35 minutes or until the base is cooked, the Crumble Topping is golden, the apples are tender when tested with a skewer, and the base is cooked through.
- Serve warm or at room temperature cut into portions and accompanied by cream or ice cream.
Baker's Tips
- This slice is delicious served either warm or at room temperature. It will keep, covered, in the fridge for up to 3 days. Bring to room temperature or warm gently in the microwave to serve.
This recipe is from Anneka's SBS Food online column, Bakeproof: Apples. CLICK HERE for more Bakeproof recipes.
Photography by Alan Benson.
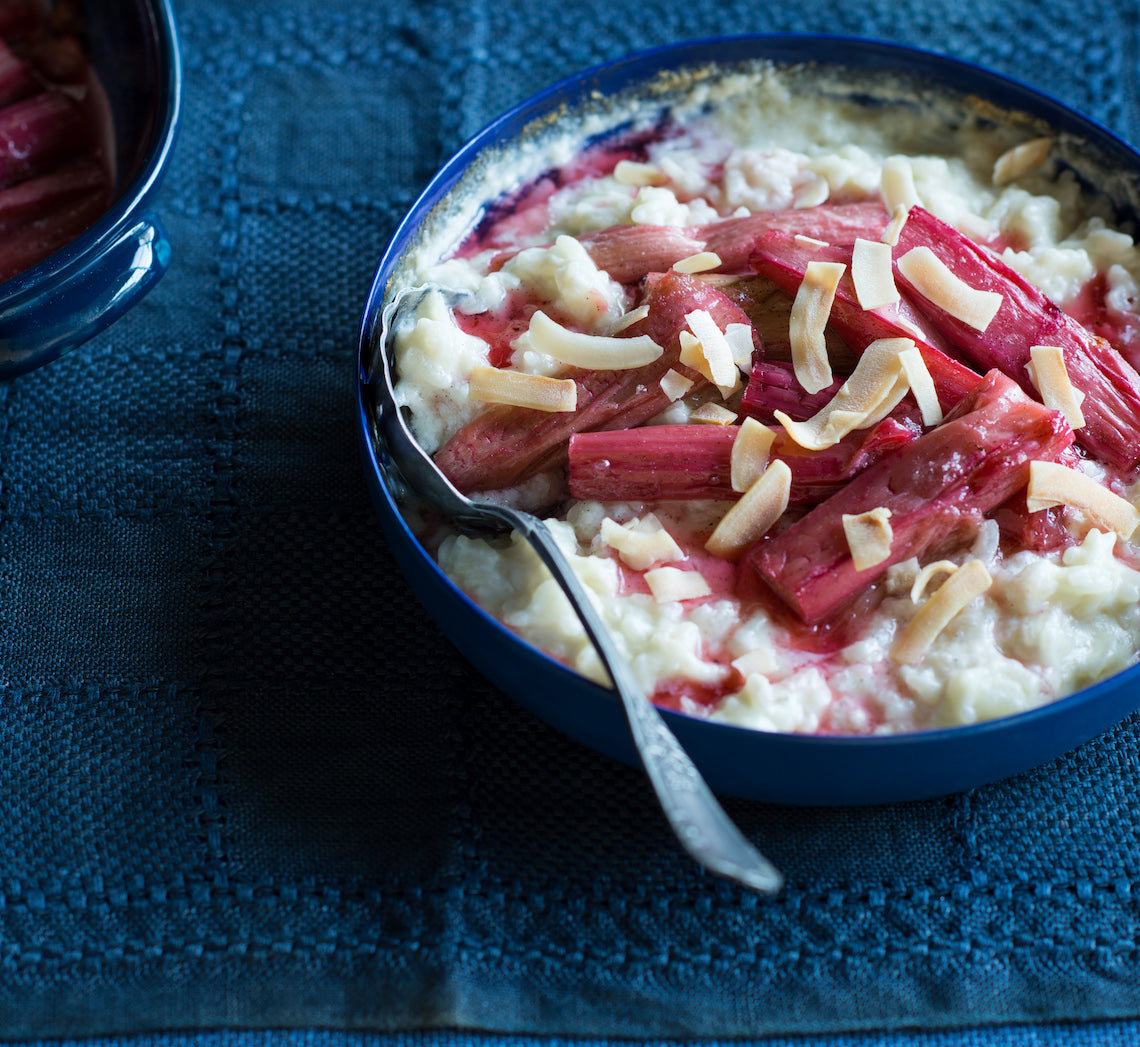
Prep 15minBake 1hr 40minMakes 6-8 serves
Rice pudding is the ultimate in comfort food. Coconut milk gives this version a contemporary twist and when topped with vanilla-baked rhubarb, it is a winter pudding you will want to make time and time again.
Ingredients
melted butter, to grease
110g (½ cup) Arborio rice
375ml (1½ cup) milk
270ml can coconut milk
2 tablespoons caster sugar
10g (2 teaspoons) butter
toasted flaked coconut or roasted coconut chips (see Baker’s Tips), to serve (optional)
Baked rhubarb
1 vanilla bean, split lengthways
75g (⅓ cup) caster sugar
1 bunch rhubarb, trimmed, washed and cut into 7cm lengths (you will have about 550g trimmed weight)
Method
- To make the Baked rhubarb, preheat oven to 200°C. Scrape the seeds from the vanilla bean, place into a medium bowl with the sugar, and toss to evenly combine. Add the rhubarb and toss to coat in the vanilla sugar. Transfer the rhubarb and vanilla bean to an ovenproof dish just large enough to arrange the rhubarb in a single layer. Sprinkle with any remaining vanilla sugar left in the bowl. Cover with foil and bake in preheated oven for 20 minutes. Remove the foil, give the dish a shake and bake for a further 5-10 minutes or until the rhubarb is tender when tested with a skewer. Remove from the oven and set aside while baking the rice pudding.
- Reduce the oven temperature to 160°C. Combine the rice, milk, coconut milk and caster sugar in a bowl. Stir with a fork until well combined. Transfer to a 1-litre (4-cup) ovenproof dish and dot with the butter. Bake, uncovered, in preheated oven for 1 hour–1 hour 10 minutes, whisking occasionally with a fork so the rice cooks evenly, or until the rice is just tender and the pudding is the consistency of a wet risotto.
- Serve the warm rice pudding immediately, topped with the rhubarb. Drizzle with rhubarb syrup and sprinkle with the coconut, if desired.
Baker's Tips
- Roasted coconut chips are available from the dried fruit and nuts section of selected supermarkets.
Photography by Alan Benson.
This recipe is from Anneka's SBS Food online column, Bakeproof: Comfort puddings. CLICK HERE for more Bakeproof recipes.
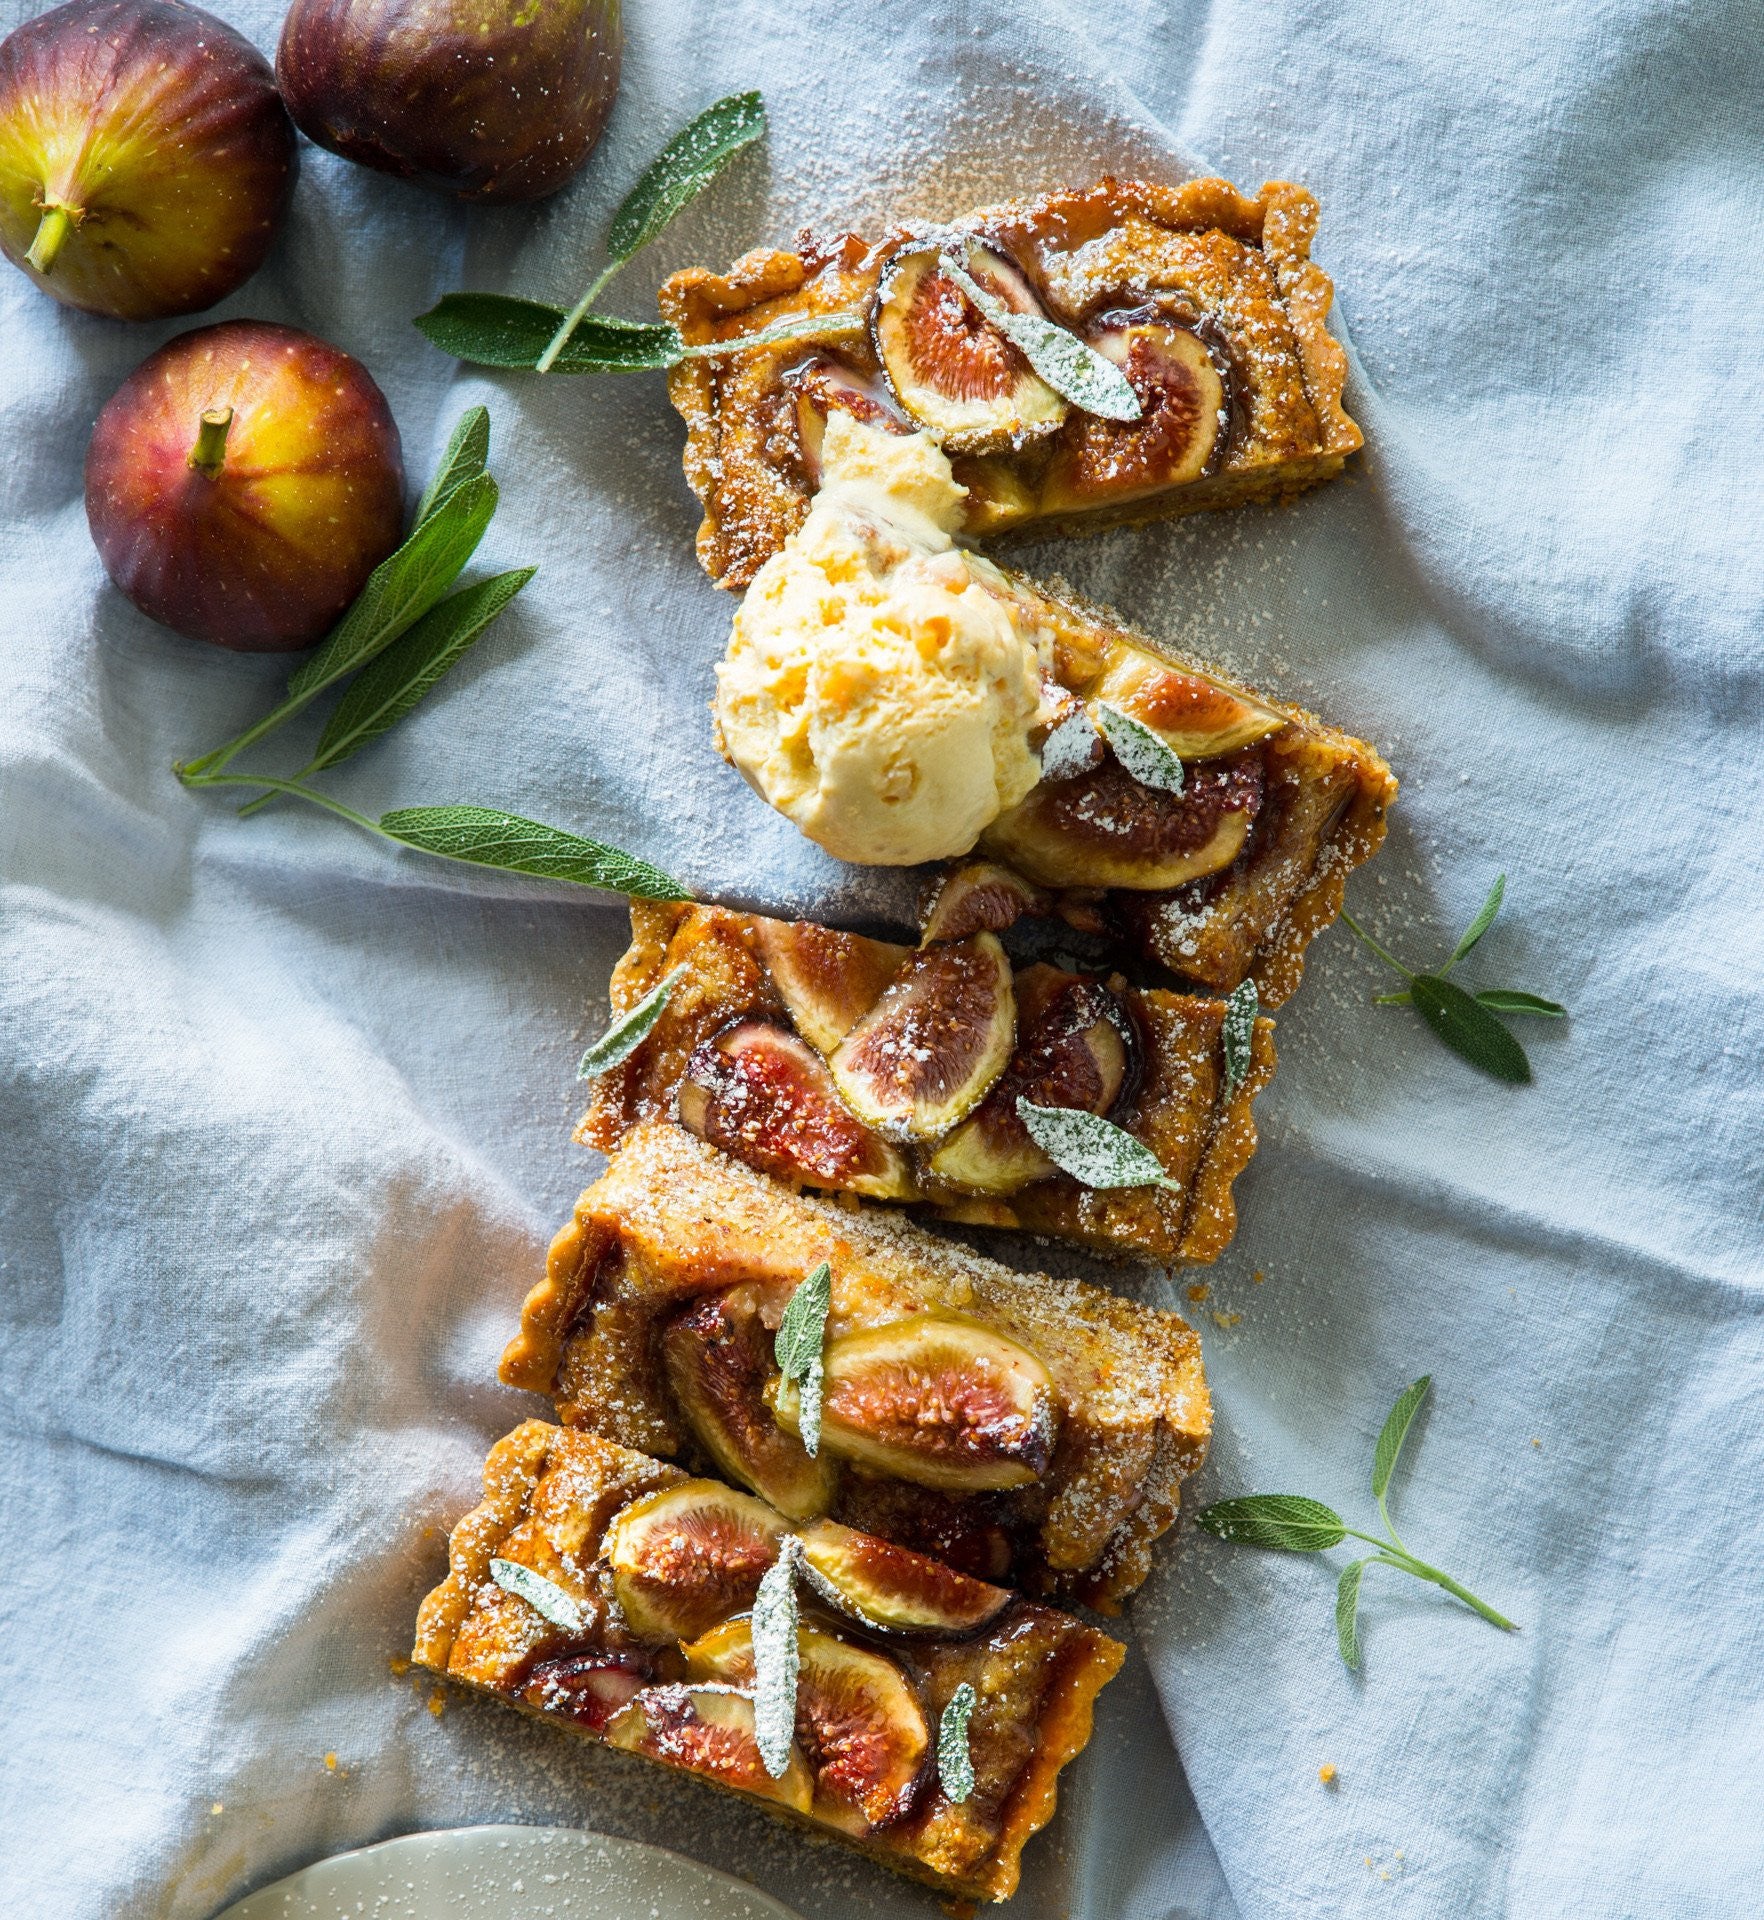
Prep 45min (+ 20min chilling + 1.5hr cooling time)Bake 55minMakes 8-10 serves
The combination of fig, honey and almonds is a well-loved one. I’ve added the gentle pungency of fresh sage to this and the result is sublime. This tart is something special to reserve for autumn lunches when figs are at their best.
Ingredients
1 x quantity sweet sage shortcrust pastry, shaped into a rectangle before wrapping and chilling as directed
8 medium firm ripe figs (about 50g each), quartered
2 tablespoons honey, warmed, to brush
20 small sage leaves (optional), to serve
Icing sugar (optional), to dust
Honey ice cream or whipped cream, to serve
Frangipane
80g unsalted butter, at room temperature
75g (⅓ cup) caster sugar
2 tablespoons honey
1 orange, rind finely grated
2 eggs, at room temperature
50g (⅓ cup) plain flour
120g ground almonds (meal)
Method
- Preheat oven to 200°C (180°C fan-forced).
- Unwrap the pastry and place on a lightly floured, cool work surface. Gently pat the pastry with the palm of your hand to flatten slightly. Use a lightly floured rolling pin to roll the pastry into a rectangle about 4mm thick. Line a 11.5cm x 35cm (base measurement) tart tin, with a removable base, with the pastry. Roll the rolling pin over the top of the tart tin to trim any overhanging pastry.
- Place tart case on a baking tray. Prick the pastry base with a fork (about 12 times). Line the pastry case with greaseproof paper or foil and fill with pastry weights, dried beans or raw rice, making sure to press into the corners. Bake for 15 minutes.
- Remove from oven and use the paper to lift the weights out of the case. Return the pastry case to the oven and cook for a further 5-10 minutes or until the pastry case is lightly golden and just cooked through. Remove the tart case from the oven and set aside to cool.
- Reduce the oven temperature to 170°C (150°C fan-forced).
- To make the Frangipane, use an electric mixer to beat the butter, sugar, honey and orange rind until pale and creamy. Add the eggs one at a time, beating well after each addition, until well combined. Combine the flour with the ground almonds and mix evenly. Add to the butter mixture and mix on low speed until just combined. Spoon the frangipane into the cooled tart case and spread evenly. Press the fig quarters, cut side up, randomly into the frangipane.
- Bake for 50-55 minutes or until the frangipane is just set and the pastry is golden and crisp. Remove the tart from the oven and place, still in the tin, on a wire rack.
- Brush the warm tart with the honey and set aside to cool (this will take about 1 hour). Sprinkle with the small sage leaves and icing sugar, and serve slices accompanied with ice cream or cream.
Baker's Tips
- This tart is best eaten on the day it is baked; however, it will keep in the fridge in an airtight container for up to 2 days. Serve at room temperature.
This recipe is from Anneka's SBS Food online column, Bakeproof: Autumn Fruits. CLICK HERE for more Bakeproof recipes.
Photography by Alan Benson.

Prep 1hr15min (+2hr chilling and 1hr cooling time)Bake 1hr20minMakes 10 serves
This blissful combination of sponge cake, cream, meringue, dulce de leche and peaches takes its name from a native Uruguayan bird – apparently the meringues resemble the features of a chaja bird. I must admit I find it hard to see the resemblance and feel this wonderful cake has been dealt a slight disservice in its naming!
Ingredients
400g (14oz) tin sliced peaches in juice
55g (¼ cup/2oz) caster sugar
2 tablespoons peach-flavoured liqueur or schnapps
300ml (10¼fl oz) thickened cream
1 teaspoon natural vanilla essence or extract
2 x 20cm/8in sponge cakes
225g (¾ cup/8oz) dulce de leche, warmed gently to a spreadable consistency
Meringues
2 egg whites (from 60g/2oz eggs)
110g (½ cup/4oz) caster sugar
1 teaspoon vanilla essence
Method
- To make the Meringues, combine the egg whites and sugar in a medium heatproof bowl (preferably metal) and place over a saucepan of simmering water, ensuring the bowl doesn’t touch the water. Stir with a spatula or small whisk until the sugar dissolves and the mixture is hot to touch (about 55-60°C on a sugar thermometer). Be careful not to allow the egg whites to cook.
- Transfer the egg white mixture to the bowl of an electric mixer (see Baker’s Tips). Whisk the egg white mixture with a whisk attachment on medium-high speed until very thick and glossy and the mixture has cooled to room temperature. Whisk in the vanilla and cornflour.
- Fill a large piping bag fitted with a 4B star (or #11/11mm/½in round) piping nozzle with the meringue mixture. Holding the piping nozzle about 1cm/½in above the tray, pipe small rosettes (or 'kisses') about 2.5cm/1in in diameter and 2cm apart on the lined tray.
- Bake in a preheated oven for 60-70 minutes or until the meringues are crisp, hard to touch and peel away from the tray easily, but are not coloured. Remove the meringues from the oven and place immediately in an airtight container lined with absorbent paper.
- Drain the peach slices, reserving 100ml (3½fl oz) of the juice. Set the peach slices aside. Combine the reserved juice in a small saucepan with the sugar and stir over low heat until the sugar dissolves. Bring to a simmer and simmer gently for 2 minutes to reduce slightly. Remove from the heat and stir in the peach-flavoured liqueur or schnapps.
- Use an electric mixer with a whisk attachment on medium-low speed or a balloon whisk to whisk the cream and vanilla until soft peaks form.
- To assemble the cake, turn the sponge layers upside down and brush with half the peach syrup. Turn the sponges right side up and brush with the remaining syrup. Place one layer on a serving plate and spread with half the dulce de leche. Spread with half of the whipped cream. Crumble over about 12 of the meringues and then top with the reserved peach slices. Cover with the remaining sponge layer. Spread the top with the remaining dulce de leche and then the remaining cream. Decorate the top with the remaining meringues. Serve immediately.
Baker's Tips
- The assembled cake, without the meringues on top, will keep in the fridge for up to 3 hours before serving. Stand at room temperature for 30 minutes before serving.
- The fan-forced setting is often too intense for baking meringues and will cause them to crack. If this is the case with your oven, opt for the conventional setting. However, if the meringues do crack when using the convention setting, your oven may be running a little hot and next time reduce the temperature by 5-10°C (41-50°F) as this will often help prevent them from cracking.
- If you don't have a small bowl for your mixer, first whisk the egg white mixture with a balloon whisk until it is foamy and doubled in volume before whisking with the stand mixer. This will make the whisking of the egg white mixture more efficient in a standard size bowl.
- Allowing the egg white mixture to come to room temperature before whisking will reduce the time it will take to whisk it to a meringue.
- The meringues will keep in an airtight container at room temperature for up to 1 week.
This recipe is from Anneka's SBS Food online column, Bakeproof: Latin American Cakes.
CLICK HERE for more Bakeproof recipes.
Photography by Alan Benson.
Prep 40min (+ 20min cooling time)
Bake 20minMakes about 15
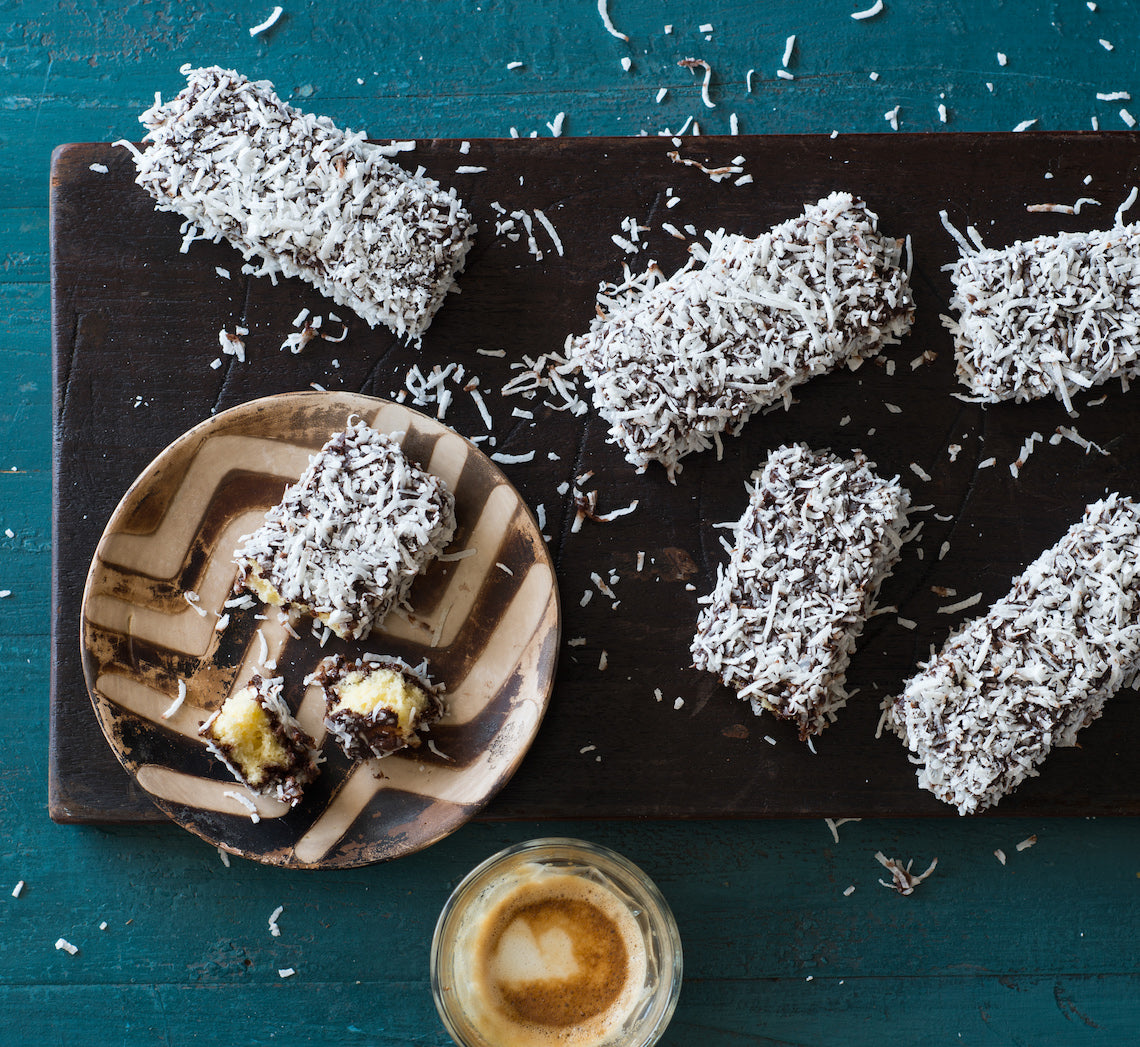
Who doesn't love a lamington? Believe it or not, this iconic Australian cake dates back over 100 years. These lamingtons of mine are based on a super simple, super quick, one-bowl recipe that requires no fussing at all. It is baked in a thin layer and then cut into fingers – the resulting lamingtons don't have the height of the traditionally sized ones, but it does mean you get more chocolate icing and coconut with each piece of butter cake – a little cheeky, but definitely a good thing! Feel free to use desiccated or flaked coconut instead of the shredded, depending on what 'look' you want for your lamingtons.
Ingredients
195g (3 cups) shredded coconut, to coatButtercake
110g (¾ cup) self-raising flour75g (½ cup) plain flour
165g (¾ cup) caster sugar
125g salted butter, at room temperature
80ml (⅓ cup) milk
2 eggs, at room temperature
1 teaspoon natural vanilla extract or essence
Chocolate icing
465g (3¾ cups) pure icing sugar55g (¼ cup) cocoa powder
150ml boiling water
1½ teaspoons vanilla essence
Method
- To make the buttercake, preheat the oven to 180°C (160°C fan-forced). Grease a 20 x 30cm (base measurement) shallow cake tin and line the base and two longs sides with one piece of baking paper.
- Place both the flours, sugar, butter, milk, eggs and vanilla in a large mixing bowl. Use an electric mixer to beat on low speed until combined. Increase the speed to medium and beat for 3 minutes or until the mixture is well combined and very pale in colour. Spoon the mixture into the lined tin and spread evenly using the back of a spoon.
- Bake for 20 minutes or until cooked when tested with a skewer. Cool for 5 minutes in the tin, then turn onto a wire rack to cool.
- Cut the cooled cake into 15 equal ‘fingers’ (each will be about 4 x 10cm).
- To make the chocolate icing, sift the icing sugar and cocoa powder into a medium bowl. Add the boiling water and vanilla and stir until smooth (it should be the consistency of pouring cream).
- Spread the coconut on a tray or plate. Rest a cake ‘finger’ on a fork and dip it into the icing to coat (see Baker’s tips). Lift it out and allow any extra icing to drip off. Roll the cake ‘finger’ in the coconut to coat evenly. Place on a wire rack to set. Repeat with the remaining cake ‘fingers’, icing and coconut.
Baker's Tips
- You can also spoon the icing over the cake to help coat it.
- If the icing becomes too thick while you are coating the cake pieces, stir in enough extra boiling water, adding it a teaspoon at a time, to thin to the right consistency.
- These lamingtons will keep in an airtight container in a cool spot, but not in the fridge, for up to 2 days.
This recipe is from Anneka's SBS Food online column Bakeproof: Lamingtons. CLICK HERE for more Bakeproof recipes.
Photography by Alan Benson.
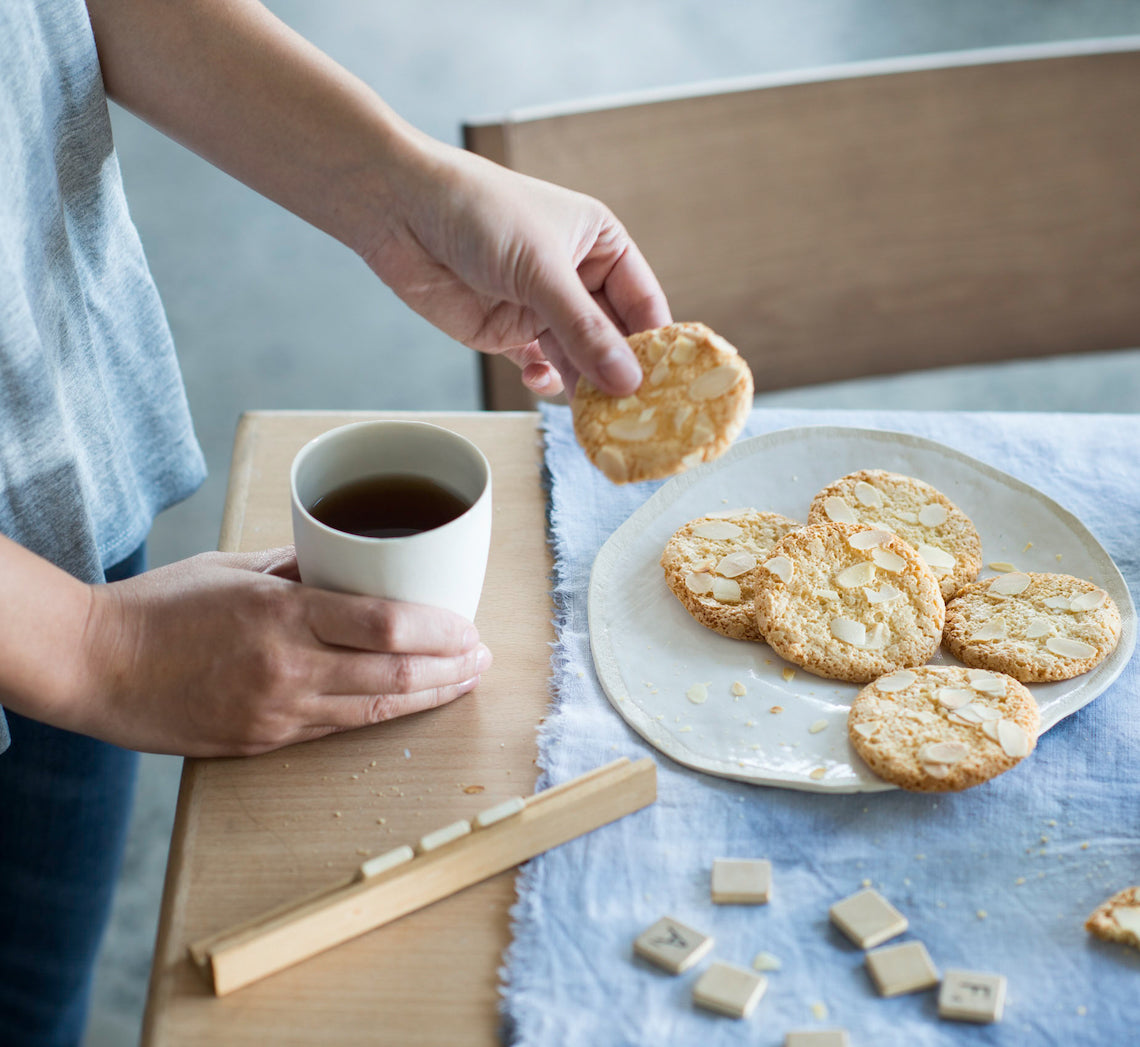
Prep 15minBake 12-15min (per batch)Makes about 20
These macaroons are commonly crumbled and used in the traditional Danish Lagkage (layer cake), a traditional Danish birthday cake. They are wonderfully crisp on the outside while being mor-ishly soft on the inside and are truly addictive as a ‘sweet’ treat. While not traditional, I’ve taken the liberty of adding a sprinkling of flaked almonds for extra texture.
Ingredients
100g almond meal100g pure icing sugar, sifted
Good pinch of bicarbonate of soda
2 egg whites, at room temperature
Pinch of salt
25g (¼ cup) flaked almonds, to sprinkle
Method
- Preheat the oven to 180°C. Line a large baking tray with non-stick baking paper.
- Put the almond meal, icing sugar and bicarbonate of soda in a medium bowl and mix until evenly combined.
- Use an electric mixer with a whisk attachment to whisk the egg whites and salt in a medium clean, dry bowl until stiff peaks form. Add the almond meal and icing sugar mixture and use a spatula or large metal spoon to fold together until evenly combined.
- Use two metal teaspoons to spoon slightly heaped spoonfuls of the mixture onto the lined tray about 4 cm apart to allow for spreading. Sprinkle with the flaked almonds and then bake in the third top of the preheated oven for 12-15 minutes or until golden and aromatic.
- Cool the macaroons on the tray. Repeat with the remaining mixture to make about 20 macaroons in total.
Baker's Tips
- These macaroons will keep in an airtight container at room temperature for up to 1 week.
This recipe is from Anneka's SBS Food online column, Bakeproof: Danish Baking. CLICK HERE for more Bakeproof recipes.
Photography by Alan Benson.
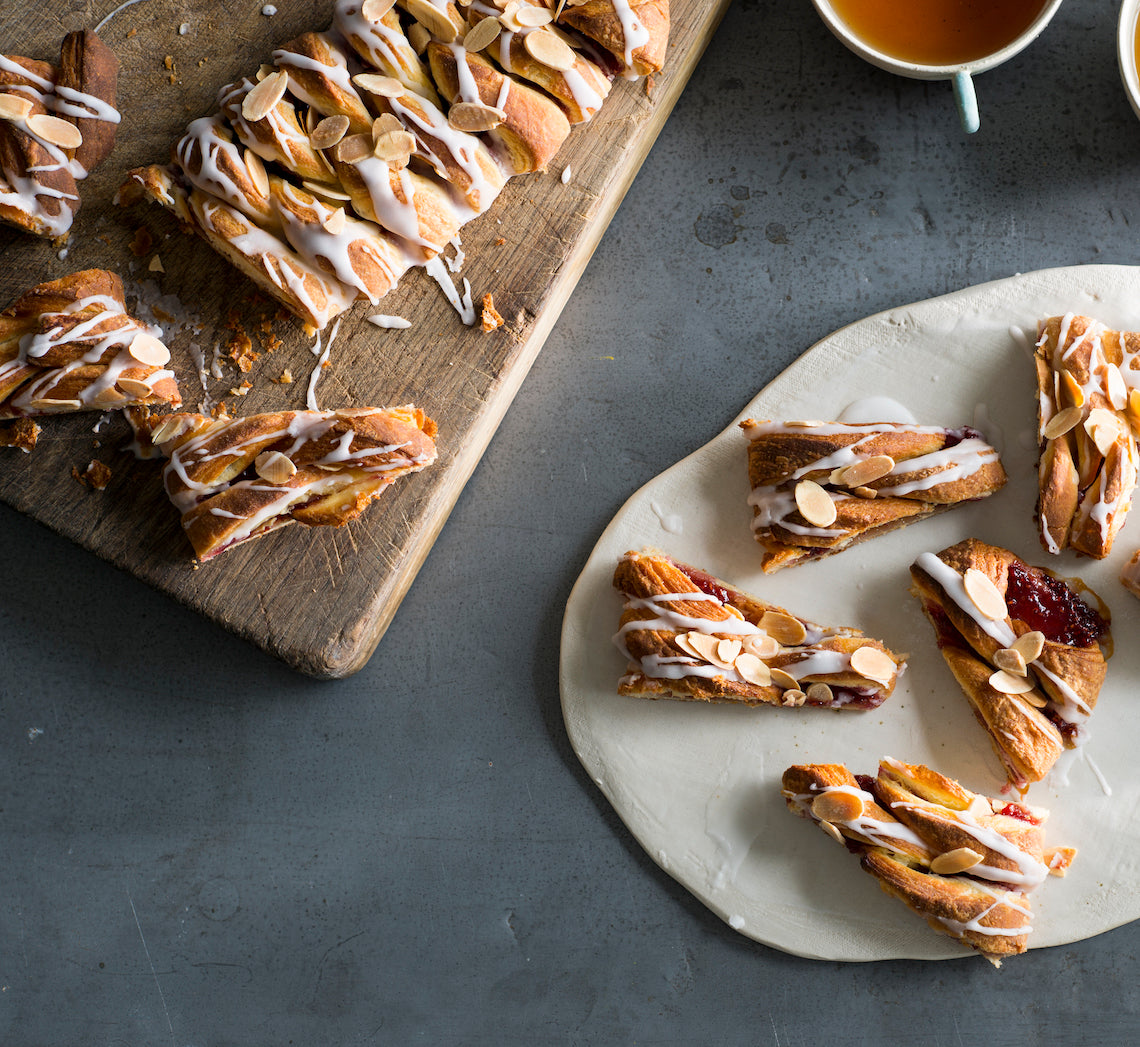
Prep 30min (+overnight +45min resting timeBake 20-25minMakes 12
Danish pastries are possibly Denmark’s most well-recognized food specialty, even though it is Austria that should actually be credited for originally creating them! Traditionally based on a leavened puff pastry (basically a puff pastry made with a yeast dough) the making of them is quite an involved process. Luckily, the pastry used here is a short-cut one with chunks of butter already incorporated into the pastry when initially mixed which cuts out the process of interleaving it with the pastry dough as you fold it – if you haven’t made puff pastry before, this is a great recipe to start with.
Ingredients
- 125ml (½ cup) lukewarm milk
- 7g (1 sachet) dried yeast
- 250g (1⅔ cups) plain flour
- 185g butter, chilled and cut into 2 cm cubes
- 1 egg, at room temperature, lightly whisked
- 2 tablespoons caster sugar
- ¼ teaspoon ground cardamom
- 5 tablespoons good-quality raspberry jam
- 2 tablespoons flaked almonds, toasted, to decorate
Icing
- 125g (1 cup) pure icing sugar
- 1 tablespoon boiling water
- ¼ teaspoon natural almond extract
Method
- Put the milk in a large bowl and sprinkle the yeast over the top. Set aside for 5 minutes.
- Put the flour and butter into the bowl of a food processor and use the pulse button to process until the butter is cut into 1 cm pieces (make sure your don’t process any further). Transfer to a large bowl.
- Add the egg, sugar and cardamom to the milk mixture and stir to combine. Add the flour and butter mixture and use a wooden spoon and then your hands to mix until it is just combined. Cover the bowl with plastic wrap and place in the fridge overnight.
- Turn the dough onto a lightly floured surface and bring together with your hands. Knead for 30 seconds or until smooth. Shape into a rectangle and then use a lightly floured rolling pin to roll the out until about 40 x 25cm, keeping the edges as straight as possible. With a long side nearest to you, fold the right third of the dough in to cover the centre third and then fold the left side in also. Turn the dough clockwise a quarter turn. Fold the dough into thirds as before to make a small rectangle. Flip the dough over on the bench and repeat the rolling and folding process again. You will finish with a small rectangle. Wrap well in plastic wrap and chill for 30 minutes.
- Preheat the oven to 200°C. Line a baking tray with non-stick baking paper.
- Roll out the pastry with a lightly floured rolling pin on a lightly floured surface to a rectangle about (30 x 35cm) and about 5mm thick. Cut in half to make two 15 x 35cm rectangles. Spread the raspberry jam down the centre to cover the centre third of both rectangles. Cut the pastry diagonally into 2cm-wide strips down both sides of the jam and then fold the strips, alternating form each side, into the centre over the jam. Transfer the pastries on the lined tray. Cover loosely with a slightly damp tea towel and set aside in a warm, draught-free place for 15 minutes or until the pastry is ‘puffy’.
- Bake in preheated oven for 20-25 minutes or until the pastry is golden, crisp and cooked through. Remove from oven and cool on the tray.
- To make the Icing, put the icing sugar in a medium bowl and stir in the water and almond extract to make a smooth pouring consistency. Drizzle over the cooled pastry and sprinkle with the almonds and set aside to set. Serve at room temperature cut into slices.
Baker's Tips
- This Danish Pastry is best eaten the day it is baked but will keep in an airtight container for up to 2 days.
This recipe is from Anneka's SBS Food online column, Bakeproof: Danish Baking.
CLICK HERE for more Bakeproof recipes.
Photography by Alan Benson.

Prep 15minBake 18-20minMakes about 18
Reminiscent of the good old Digestives, these biscuits easily swing between savoury and sweet. Serve them with blue cheese or dip them in dark chocolate to give them the flavour preference you prefer.
Ingredients
150g (5¼oz) wholemeal plain flour
130g (1 cup/4½oz) oat bran
75g (⅓ cup, firmly packed/2¾oz) brown sugar
1 teaspoon baking powder
½ teaspoon salt
125g (4½oz) chilled salted butter, cubed
60ml (¼ cup/2fl oz) milk
Method
- Preheat oven to 180°C/350°F (160°C/315°F). Line two oven trays with non-stick baking paper.
- Put the flour, oat bran, brown sugar, baking powder, salt and butter in the bowl of a food processor and process until the mixture resembles breadcrumbs. Sprinkle the mixture with the milk and use the pulse button to process until the mixture starts to come together as a dough. Transfer the mixture to a bowl and bring it together with your hands.
- Turn the dough onto a lightly floured surface and use a lightly floured rolling pin to roll out until about 5mm/¼in thick. Use a 6cm/2¼in round cutter to cut the dough into discs and place them on the lined trays about 3cm/1¼in apart. Prick the tops of each biscuit twice with a fork. Re-roll any off cuts and cut out more biscuits.
- Bake in preheated oven for 18-20 minutes or until golden around the edges, aromatic and cooked through. Cool on the trays.
Baker's Tip
- These biscuits will keep in an airtight container at room temperature for up to 1 week.
Prep 15minBake 25-30minMakes about 20
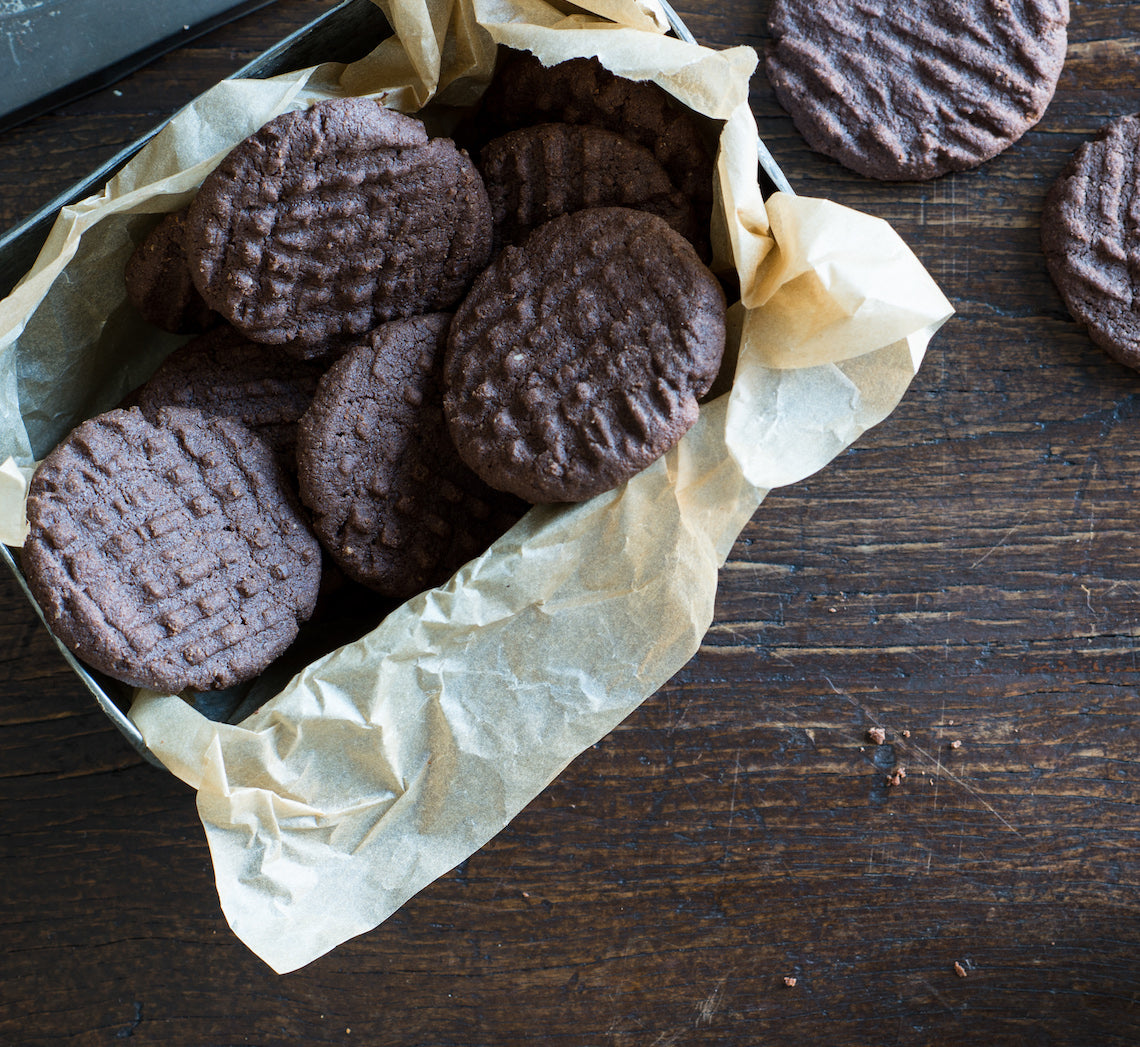
Simple and super quick to make, these shortbread will satisfy even the most hard-core chocoholic! For extra crunch, try adding some chopped roasted hazelnuts to the mixture with the chopped chocolate.
Ingredients
150g (5¼oz) chilled unsalted butter, diced
110g (½ cup, firmly packed/4oz) brown sugar
110g (¾ cup/4oz) plain flour
30g (⅓ cup/1oz) cornflour
30g (¼ cup/1oz) cocoa powder, sifted
75g (⅔ cup/2¾oz) hazelnut meal
1 teaspoon natural vanilla extract or essence
100g (3½oz) good-quality dark chocolate, chopped
Method
- Preheat the oven to 160°C/315°F (140°C/285°F fan-forced). Line two large oven trays with non-stick baking paper.
- Place the butter, sugar, flour, cornflour, cocoa powder, hazelnut meal and vanilla in the bowl of a food processor (see Baker's Tips) and process for 1 minute or until the mixture just starts to form a dough (be careful not to over-mix).
- Transfer the mixture to a medium bowl, add the chopped chocolate and bring together with your hands to combine evenly.
- Roll tablespoonfuls of the mixture into balls and place on the lined trays about 5cm/2in apart. Flatten each with a fork, creating a criss-cross pattern, so that they are about 1cm/½in thick.
- Bake for 25-30 minutes, swapping the trays halfway through baking, or until cooked through. Remove from the oven and cool on the trays.
Baker's Tips
- If you don’t have a food processor, you can make these shortbread by hand. Leave the butter at room temperature for a little while for it to soften slightly. Put the sugar, flour, cornflour, cocoa powder and hazelnut meal in a medium bowl. Sprinkle with the vanilla and then use your fingertips to rub the butter through the dry ingredients until it starts to come together and forms a dough. Continue the recipe from Step 3.
- These shortbread will keep in an airtight container at room temperature for up to 1 week.
This recipe is from Anneka's SBS Food online column, Bakeproof: Cookies in a hurry. CLICK HERE for more Bakeproof recipes.
Photography by Alan Benson.
Prep 20min (+25min cooling time)Bake 30minMakes 8 serves
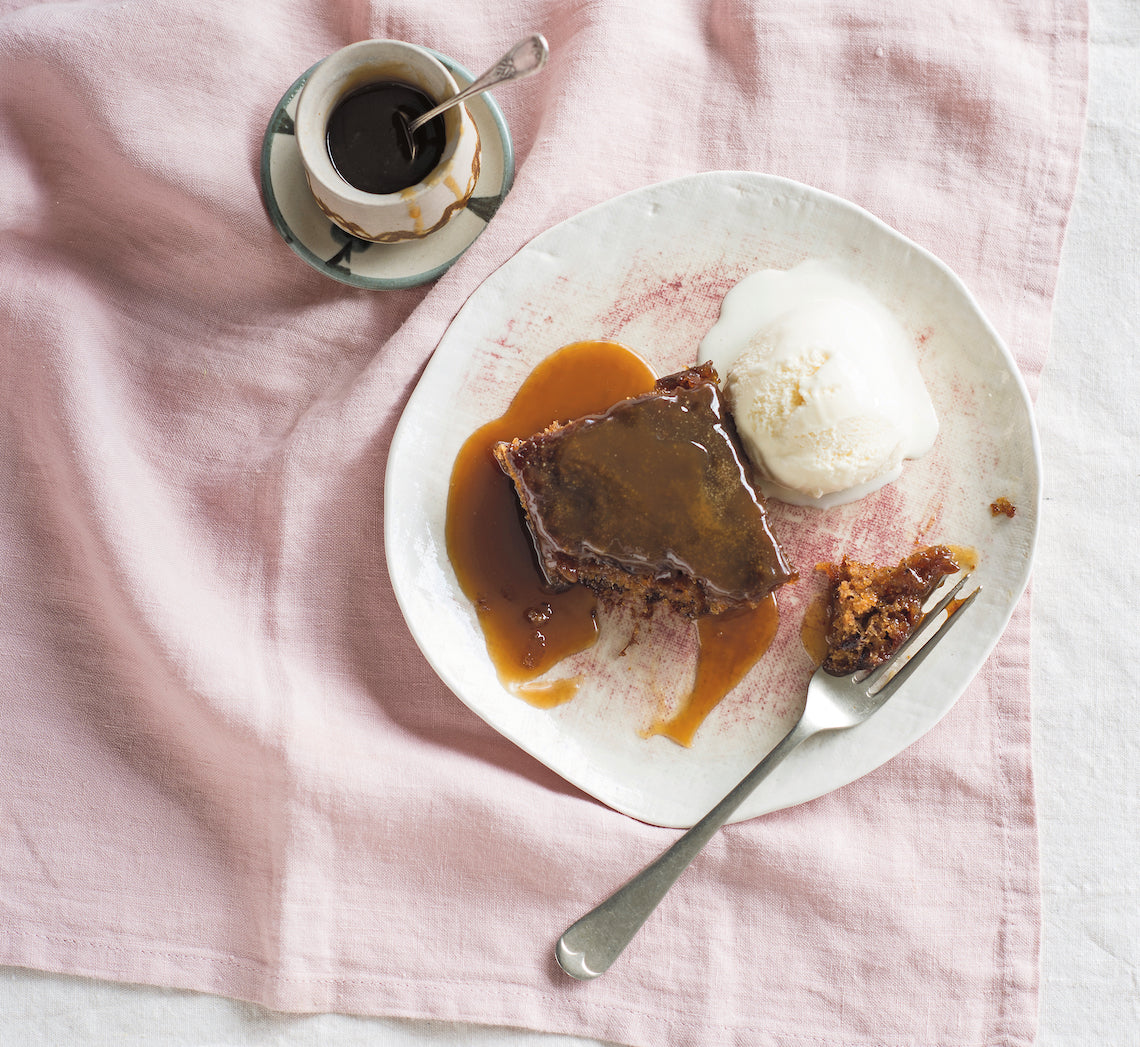
Hailing from the 70s and reaching peak popularity in the 90s, sticky toffee pudding now sits alongside the likes of lemon delicious, rice pudding and chocolate fondants as a classic. Sweet, sticky and completely addictive, it is always a crowd pleaser.
Ingredients
200g fresh dates, pitted and chopped250ml (1 cup) water
1 teaspoon bicarbonate of soda
100g unsalted butter, at room temperature
150g (¾ cup, firmly packed) brown sugar
2 eggs
150g (1 cup) self-raising flour
Cream or vanilla ice cream, to serve
100g unsalted butter, cubed
200g (1 cup, firmly packed) brown sugar
250ml (1 cup) pouring cream
Method
- Preheat oven to 180°C. Grease a 18 x 28cm shallow cake tin with melted butter and line the base and two long sides with one piece of baking paper, allowing the paper to overhang the sides.
- Place the dates and water in a small saucepan, bring to the boil over medium heat and simmer for 3-5 minutes or until pulpy. Stir in the bicarbonate of soda and then set aside for 20 minutes or until cooled to room temperature.
- Use an electric mixer to beat the butter and sugar in a medium bowl until pale and creamy. Add the eggs, one at a time, beating well after each addition. Use a large metal spoon or spatula to fold in the cooled date mixture and then the flour until just combined.
- Spoon the mixture into the prepared tin and smooth the surface with the back of a spoon. Bake in preheated oven for 30 minutes or until cooked when tested with a skewer.
- Meanwhile, to make the toffee sauce, put the butter, sugar and cream in a medium saucepan and stir over medium heat until the butter melts and the sugar dissolves. Bring to a simmer for 3 minutes.
- Remove the pudding from the oven and pour a quarter of the hot toffee sauce over. Set aside for 5 minutes. Remove the warm pudding from the tin, cut into portions and serve drizzled with the remaining warm toffee sauce and accompanied by cream or ice-cream.
Baker's Tips
- Any leftover pudding and sauce will keep in an airtight container in the fridge for up to 4 days. Reheat both separately in the microwave on medium in 1-minute bursts until warmed through.
This recipe is from Anneka's SBS Food online column, Bakeproof: Comfort Puddings. CLICK HERE for more Bakeproof recipes.
Photography by Alan Benson.


